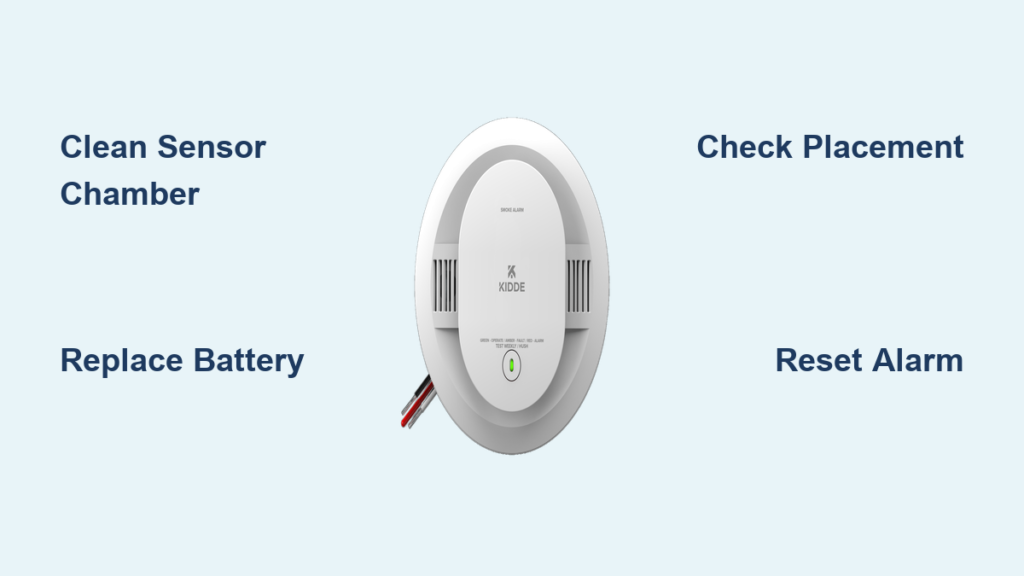
Nothing disrupts a home like a blaring smoke alarm, especially when there’s no fire. If your Kidde smoke detector is sounding off for no reason, you’re not alone. False alarms are a common frustration, but they’re rarely random. Most stem from preventable issues like dust buildup, low batteries, humidity, or aging units. The good news? With the right steps, you can diagnose and fix the problem quickly, often in under 10 minutes.
This guide cuts through the confusion with actionable solutions based on official Kidde procedures and real user experiences. You’ll learn how to identify the root cause of false alarms, reset your unit properly, clean it safely, and prevent future disruptions. Whether your alarm chirps at night, goes off while cooking, or activates out of nowhere, this step-by-step breakdown will get your system working reliably again.
Identify the Alarm Type First
Before troubleshooting, know what kind of Kidde alarm you have. The model affects sensitivity, maintenance needs, and reset methods.
Check for Ionization vs Photoelectric
- Ionization alarms (e.g., Kidde i12060): More sensitive to fast-flaming fires but prone to false triggers from cooking fumes and dust.
- Photoelectric alarms (e.g., Kidde P3010): Better at detecting smoldering fires and less likely to false alarm near kitchens.
- Dual-sensor models: Combine both technologies and offer broader protection but require more careful placement.
Look at the label on the back of the unit. It will specify the sensor type. If yours is ionization and installed near the kitchen, that alone could explain frequent nuisance alarms.
Confirm Power Source
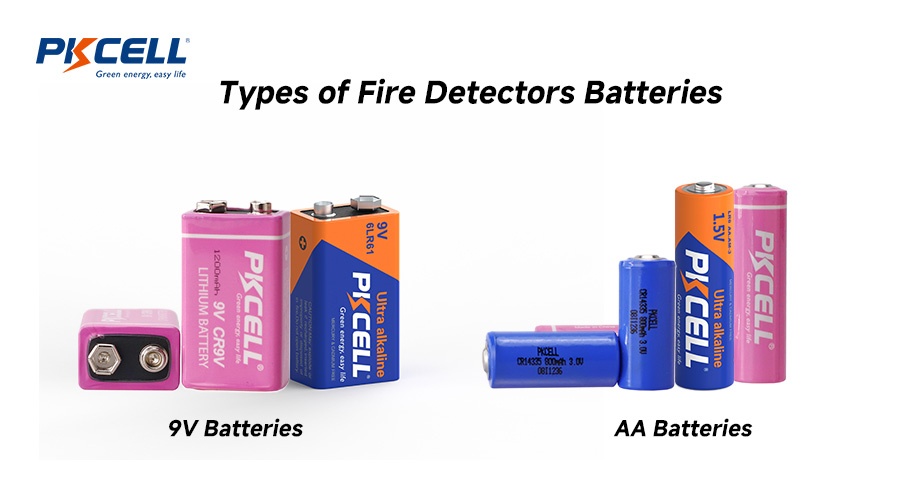
- Battery-only models: Use 9V or AA batteries, common in older homes.
- Hardwired with battery backup: Connected to your home electrical system; chirping may persist even after battery replacement if wiring issues exist.
- Sealed 10-year battery models: No battery replacement needed; the entire unit is replaced after a decade.
Knowing your model helps avoid missteps like holding the test button too long on a sealed unit or using compressed air incorrectly.
Clean the Sensor Chamber Safely
Dust, insects, or cooking residue inside the sensor chamber are top causes of false alarms, especially in ionization models.
Use Compressed Air Correctly
Kidde officially recommends compressed air (like keyboard cleaner) to clean alarms. To do it right:
- Turn off power at the breaker if hardwired.
- Remove the alarm from its mounting bracket.
- Hold the unit sideways and spray compressed air through the vents around the outer edge.
- Focus on areas marked with arrows, visible on models like the i12060 and P3010.
- Keep the can upright to avoid moisture damage.
Pro Tip: Do this outdoors or over a trash can. You might dislodge visible dust or even a dead insect.
Avoid Vacuum and Water
- Vacuum cleaners may generate static electricity that damages sensors.
- Water or damp cloths can short-circuit electronics.
Stick to dry compressed air for safe cleaning every 6 months.
Reset Your Kidde Alarm Properly

After cleaning, reset the unit to clear any stored error signals.
For Hardwired Units with Battery Backup
- Disconnect power at the circuit breaker.
- Remove the alarm from the mount.
- Take out the backup battery.
- Press and hold the Test/Hush button for 5 seconds.
- Reconnect power and reinstall the battery.
The alarm will chirp once when power returns. This is normal, and the unit should stabilize within a minute.
For Battery-Only Models
- Remove the battery.
- Press and hold the Test/Hush button for 15 seconds.
- Reinsert a fresh battery.
Holding the button drains residual charge, ensuring a full reset.
⚠️ Warning: If chirping continues after resetting, the issue isn’t resolved. Check battery, placement, or age next.
Fix Low Battery and Night Chirping
A common myth is that chirping only means “replace battery.” But timing matters. Nighttime chirping often points to temperature-related battery stress.
Why Alarms Chirp at 3 AM
- Indoor temperatures often dip between 2 and 4 AM.
- Cold reduces battery output, triggering low-power alerts.
- As the room warms up, chirping stops, creating confusion.
Replace the Battery the Right Way
- Use fresh, name-brand 9V or AA batteries and avoid generics.
- Never mix old and new batteries.
- Replace all batteries in interconnected systems at once.
Even if the battery seems fine, replace it as part of troubleshooting. A weak battery can cause erratic behavior, including full alarms, not just chirps.
Check Placement and Environmental Triggers
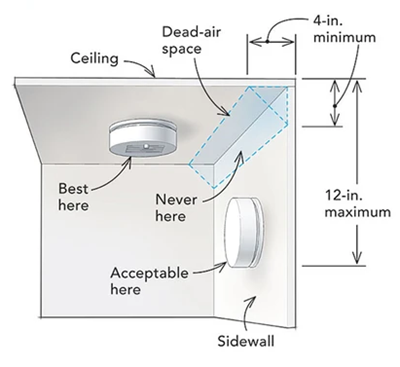
Where your alarm is installed matters as much as how you maintain it.
Avoid These Locations
- Within 10 feet of cooking appliances like ovens, stoves, and microwaves
- Near bathroom showers or humidifiers
- Close to HVAC vents, ceiling fans, or drafty windows
Steam, grease particles, and airflow can all mimic smoke. Kidde alarms perform best between 40°F and 100°F, so temperature extremes can also play a role.
Ideal Placement Guidelines
- Install alarms on the ceiling, at least 4 inches from walls
- Or high on walls, 4 to 12 inches from the ceiling
- One on each floor, including basement and outside sleeping areas
If your alarm is near the kitchen, consider relocating it or switching to a photoelectric model, which is far less sensitive to cooking fumes.
Use the Hush® Feature Wisely
Kidde’s Hush® feature is designed for temporary silencing during known nuisance conditions like burnt toast or shower steam.
How to Activate Hush Mode
- Confirm there’s no actual fire or smoke.
- Press the Test/Hush button once.
- The alarm will silence for up to 10 minutes.
- It resets automatically after about 8 minutes if air clears.
Only the initiating unit needs to be hushed in interconnected systems. Find it by looking for the one flashing red or green once per second during an alarm.
❌ Never use Hush® if you suspect fire. Always investigate first.
Replace Aging Alarms Immediately
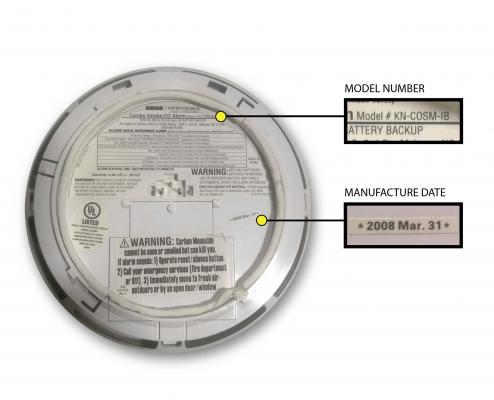
Smoke detectors don’t last forever. All Kidde units expire after 10 years with no exceptions.
Find the Manufacture Date
Check the back or side of the unit. Look for a label like “MAN DATE: 04/2014.” If the alarm is older than 10 years, replace it now, even if it seems to work.
Why? Sensors degrade over time. An old alarm may:
– False alarm more frequently
– Fail to detect real smoke
– Chirp intermittently without cause
Sealed 10-year models automatically alert you near end-of-life with a chirp pattern of one chirp every 30 seconds.
Prevent Future False Alarms
Stop recurring issues before they start with smart habits and upgrades.
Upgrade to Photoelectric Alarms
Replace ionization alarms near kitchens and bathrooms with photoelectric models. They are:
– Less prone to cooking and steam false alarms
– Better at detecting slow, smoldering fires common in homes
Recommended options include the Kidde P3010, First Alert SCO7CN, or X-Sense SD01.
Install Interconnected Alarms
When one alarm detects smoke, all units sound. This improves safety and helps you identify the initiating unit faster during false alarms. Modern options include:
– Hardwired interconnects
– Wireless interconnects (Kidde RF series)
– Smart alarms (Nest Protect) that send phone alerts
Schedule Maintenance
Make it automatic:
– Monthly: Test each alarm by pressing the test button
– Every 6 months: Clean with compressed air
– Annually: Check battery and placement
– At 10 years: Replace the entire unit
Set calendar reminders or tie checks to daylight saving time changes.
When to Switch Brands
Despite proper care, some users report persistent false alarms with certain Kidde models. While most issues stem from environment or maintenance, chronic problems may justify switching.
Consider Alternatives If:
- You’ve cleaned, reset, repositioned, and replaced batteries
- The unit is under 10 years old
- False alarms continue without explanation
Top Alternatives to Kidde
| Brand | Benefits |
|---|---|
| First Alert | Reliable sensors, clear chirp codes, smart interconnect |
| Nest Protect | Voice alerts, app notifications, self-testing |
| X-Sense | High-quality photoelectric models, long battery life |
These brands often receive higher user ratings for fewer nuisance alarms, especially in challenging environments.
✅ Expert Note: Kidde meets UL safety standards and is a solid choice for most homes. But if reliability is a recurring issue, don’t hesitate to explore alternatives.
Troubleshoot Step-by-Step Flow
Follow this sequence to resolve false alarms efficiently:
- Confirm no fire and always check first.
- Find the initiating unit by looking for a flashing red or green light.
- Press Hush® to temporarily silence if safe.
- Clean with compressed air focusing on sensor vents.
- Reset the unit using the correct method for your power type.
- Replace the battery even if it seems strong.
- Check placement to ensure 10+ feet from kitchen or bathroom.
- Verify age and replace if over 10 years old.
- Upgrade sensor type by switching to photoelectric if needed.
- Replace or switch brand if all else fails.
This process resolves over 90% of false alarm cases.
Frequently Asked Questions About Kidde Smoke Detector False Alarms
Why does my Kidde smoke alarm go off for no reason?
False alarms are usually caused by dust or debris in the sensor chamber, low or weak batteries, high humidity or steam, improper placement near kitchens or bathrooms, or an aging unit over 10 years old. Cleaning the sensor, replacing the battery, or relocating the alarm typically fixes the issue.
How do I stop my Kidde alarm from chirping at night?
Nighttime chirping usually happens when temperatures drop between 2 and 4 AM, reducing battery output. Replace the battery with a fresh, name-brand one. If chirping continues, check the manufacture date and replace the entire unit if it’s over 10 years old.
Can I use compressed air to clean a Kidde smoke detector?
Yes. Kidde officially recommends using compressed air, like keyboard cleaner, to clean alarms. Spray through the vents on the side of the unit while holding it sideways. Avoid vacuums and water, which can damage the sensor or electronics.
How do I find the initiating alarm in an interconnected system?
During an alarm, look for the unit flashing red or green once per second. That’s the initiating alarm, and only that unit needs to be reset or hushed. If the alarm stopped on its own, the initiating unit will flash for 1.5 seconds every 10 seconds afterward.
When should I replace my Kidde smoke detector?
Replace any Kidde smoke alarm after 10 years of service, regardless of whether it seems to work. Check the manufacture date on the back or side of the unit. Sealed 10-year models will chirp once every 30 seconds to signal end-of-life.
Should I switch to a different brand if false alarms continue?
If you’ve cleaned the sensor, replaced the battery, verified placement, and confirmed the unit is under 10 years old, persistent false alarms may warrant a switch. First Alert, Nest Protect, and X-Sense are popular alternatives with strong reputations for reliability.
Key Takeaways for Fixing Kidde Smoke Detector False Alarms
Most false alarms come down to a handful of fixable causes: dust in the sensor, weak batteries, poor placement, or an expired unit. Start by identifying your alarm type and power source, then clean with compressed air and perform the correct reset. Replace the battery even if it tests fine, and make sure the alarm is at least 10 feet from kitchens and bathrooms.
If your unit is over 10 years old or problems persist after thorough troubleshooting, replace it without delay. Consider switching to a photoelectric model or a different brand if nuisance alarms keep disrupting your home. Your safety is worth the investment.