
Your Levoit humidifier sits silent on the nightstand, refusing to power up just when you need it most. Whether it’s the middle of winter when dry air cracks your skin or allergy season when every breath feels scratchy, a non-responsive humidifier quickly becomes more than an inconvenience—it affects your health and comfort. That familiar hum you rely on for better sleep and easier breathing has vanished, leaving you frustrated and wondering what went wrong.
Before you rush to replace it or call customer service, most power issues stem from simple, fixable causes. This guide walks you through systematic troubleshooting steps that restore 90% of non-functioning Levoit humidifiers without professional help. You’ll discover exactly where to look, what to check, and how to get your humidifier running again—often in less than 15 minutes with tools you already have at home.
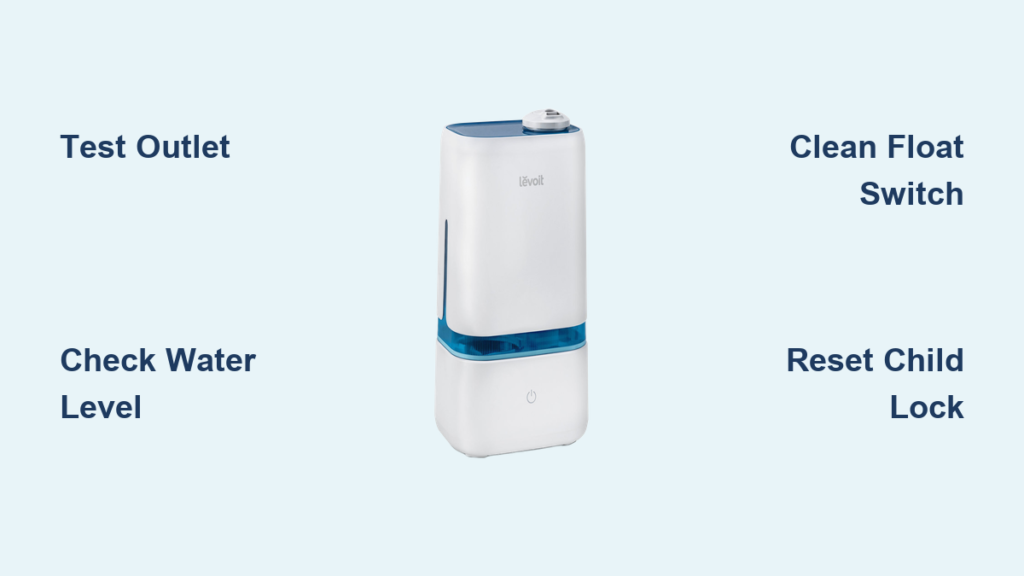
Verify Your Electrical Connection Isn’t the Culprit
Test Wall Outlet Functionality with Another Device
Plug a phone charger or lamp into the same outlet your Levoit humidifier uses. If the test device doesn’t work, the outlet itself has failed. Check your circuit breaker panel for tripped breakers—look for switches positioned between ON and OFF. Reset any tripped breakers by pushing firmly to OFF, then back to ON. Some homes have GFCI outlets in bedrooms or bathrooms that trip during power fluctuations—press the “RESET” button on these outlets if present. If multiple outlets in the same room are dead, you may have a more serious wiring issue that requires an electrician.
Inspect Power Cord for Hidden Damage

Unplug the cord and run your fingers along its entire length. Feel for cuts, exposed wires, or areas where the cord feels unusually warm. Pay special attention to the connection points at both ends where wires flex most. Any damage requires immediate replacement—using a damaged cord risks electrical fire. If the cord appears intact but stiff or cracked, these are early warning signs of internal wire damage. Levoit humidifiers often sit where pets or furniture can pinch cords—check under nightstands and behind dressers for concealed damage.
Confirm Secure Connection at Both Ends
Disconnect and reconnect both ends of the power cord. Push firmly into the humidifier’s port until you hear or feel a click. Many users don’t realize how much pressure these connections require—give it a firm push rather than a gentle placement. Wiggle the cord gently while connected—if it feels loose or powers on intermittently, the internal connection may need professional repair. Check if your model uses a magnetic connector; these can lose strength over time and require more precise alignment.
Diagnose Control Panel Problems Before Assuming Major Failure
Release Stuck Buttons with Proper Cleaning Technique
Power off the unit completely, then press every button firmly multiple times. Stuck buttons prevent startup signals from reaching the internal circuits. Clean around button edges with a cotton swab dipped in rubbing alcohol to remove sticky residue or mineral buildup from water mist. Let the area dry completely for 10 minutes before attempting to power on again. For touch-sensitive panels, wipe with a microfiber cloth dampened with distilled water—never spray liquid directly on the control surface.
Interpret LED Display Behavior Accurately
A blank display often indicates total power loss rather than control failure. However, if the unit makes sounds but shows no lights, the display board may need replacement. This requires manufacturer service—contact Levoit support for warranty options. Some models display error codes through specific light patterns: three flashes might indicate low water, while rapid blinking could mean filter replacement is needed. Consult your manual for model-specific codes before assuming the worst.
Disable Accidental Child Lock Activation
Press and hold the power button for 3-5 seconds. Many Levoit models use this combination to toggle child lock mode. Look for a small lock icon on the display—when lit, all buttons remain disabled until unlocked. This feature often activates accidentally when cleaning or moving the unit. If you don’t see the lock icon, check your model’s specific child lock procedure as some require pressing two buttons simultaneously.
Ensure Water Tank Is Properly Positioned and Functional
Confirm Minimum Water Level Requirements
Levoit humidifiers won’t start without adequate water as a safety feature. Fill the tank to at least the minimum line—usually marked near the bottom. Listen for a soft click when replacing the tank—this indicates the float switch has engaged properly. Some users make the mistake of filling the tank but not seating it correctly, tricking the unit into thinking it’s empty. Always fill the tank completely before placing it on the base for optimal performance.
Clean Float Switch Mechanism Thoroughly

Remove the water tank and locate the small plastic float inside the base. Gently lift it with your finger—it should move freely up and down. If stuck in the down position, the unit thinks it’s empty and won’t start. Clean any debris around the float mechanism with warm water and a soft toothbrush, being careful not to force the float up too hard. Mineral deposits from hard water commonly cause this issue—soaking the area with white vinegar for 15 minutes dissolves buildup effectively.
Achieve Perfect Tank Alignment Every Time
Unseat and reseat the water tank, ensuring it sits flush against the base. Some models have alignment grooves—check that these match perfectly. A tank sitting slightly crooked prevents electrical contacts from connecting. Place the tank on a flat surface first to ensure it’s not warped, which happens over time with repeated filling and emptying. For top-fill models, verify the cap is fully tightened—many users overlook this simple step that breaks the circuit.
Identify Internal Failures That Require Professional Attention
Recognize Blown Fuse Symptoms
While not user-replaceable, recognizing fuse failure saves diagnostic time. If the unit shows no signs of life after checking all external factors, a fuse likely blew during a power surge. This requires professional repair—note any recent storms or electrical issues. Unlike power cord problems, fuse issues typically occur suddenly with no warning signs. If your humidifier died during a lightning storm or when other appliances cycled on, fuse damage is probable.
Detect Early Circuit Board Corrosion
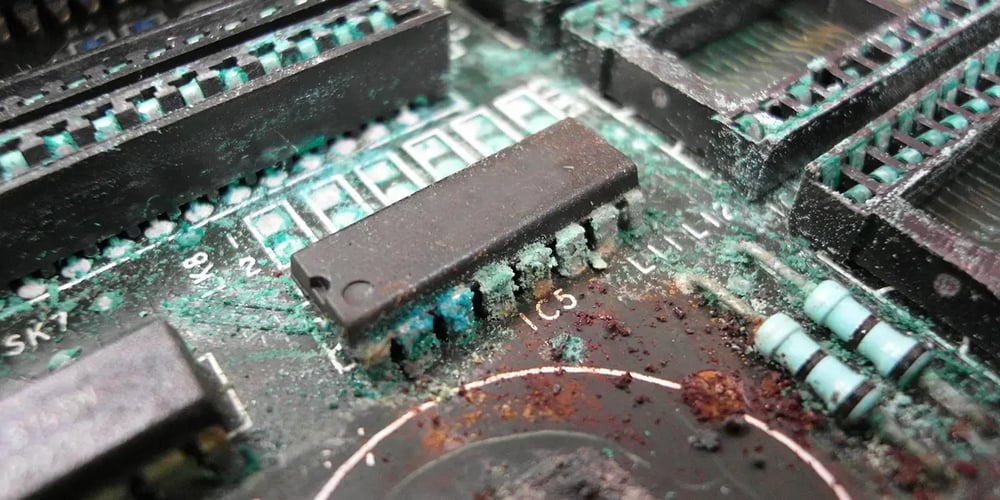
Remove the water tank and sniff near the base—a musty or metallic odor suggests moisture damage. Look for white, green, or brown deposits on metal contacts. Corrosion from spills or high humidity often causes permanent failure requiring board replacement. This typically develops gradually—you might notice intermittent operation before complete failure. Units kept in bathrooms or basements are particularly vulnerable to this issue.
Confirm Fan Motor Burnout Before Replacement
Listen closely when pressing power—any humming or clicking sounds indicate the motor tries to start. Complete silence with power present suggests motor failure. This expensive repair often warrants replacement, especially for units over 2 years old. If you hear grinding or squealing noises, the motor bearings may be failing—a sign replacement is imminent. Levoit’s newer models have improved motor designs that address this common failure point.
Perform These Diagnostic Tests Before Calling for Help
Decode Power Indicator Light Patterns
Plug in the humidifier and observe the power button LED. No light indicates power supply issues, while flashing lights often signal specific error codes. Refer to your manual for LED pattern meanings—common codes indicate water shortage, filter replacement needs, or overheating. Some models flash rapidly when the water level is critically low, while others display steady lights for operational status. Learning these patterns helps you diagnose problems faster.
Listen for Critical Audible Cues
Stand within 6 inches of the unit when pressing power. You should hear a soft click from the relay switch, followed within 2-3 seconds by a gentle hum from the ultrasonic transducer. Absence of these sounds points to electrical failure rather than mechanical issues. The relay click confirms power is reaching internal components, while the hum verifies the transducer is working. If you hear only one but not the other, you’ve narrowed your problem significantly.
Prevent Future Levoit Humidifier Power Failures
Implement a Consistent Cleaning Routine
Clean your humidifier weekly using white vinegar solution to prevent mineral buildup that can interfere with electrical contacts. Pay special attention to the base where water meets electronics. Never immerse the base in water—wipe carefully with damp cloth only. For hard water areas, consider using distilled water to minimize mineral deposits that cause electrical issues over time. Always unplug and let the unit dry completely before storage to prevent corrosion.
Use Proper Storage Methods During Off-Seasons
During off-seasons, completely dry all components before storage. Leave the tank cap off to prevent mold growth. Store in original packaging or a sealed plastic bag to keep dust from settling on sensitive electronic components. Periodically check stored units for signs of moisture accumulation, especially in humid climates. Consider running the unit briefly every month during storage to verify functionality.
Invest in Essential Surge Protection
Plug your humidifier into a quality surge protector rated for small appliances. Power fluctuations commonly damage humidifier circuits, especially during summer storms. This $15 investment often prevents $100+ repairs. Avoid using extension cords, which can cause voltage drops that stress the internal components. If you live in an area with frequent power surges, consider a UPS (uninterruptible power supply) for critical appliances.
Know When to Contact Levoit Support for Professional Help
Verify Warranty Coverage Before Paying for Repairs
Locate your serial number (usually on the bottom sticker) and check Levoit’s website for warranty status. Most models include 1-year coverage for manufacturing defects. Have your purchase receipt ready—digital copies from email confirmations work perfectly. Even if your warranty has expired, Levoit often provides discounted replacement parts for older models. Their support team can guide you through determining whether repair or replacement makes financial sense.
Order Genuine Replacement Parts for Reliable Fixes
Levoit stocks power adapters, water tanks, and filter assemblies for current models. Discontinued models may have limited parts—support can confirm compatibility before ordering. Expect 3-5 business days for standard shipping on in-stock items. Using third-party parts often voids remaining warranty and can cause compatibility issues—stick with genuine Levoit components for best results. Their customer service can walk you through installation if you’re comfortable with basic repairs.
Final Takeaway: Nine out of ten Levoit humidifiers that won’t turn on suffer from power supply issues, water level problems, or stuck buttons—all fixable within 15 minutes using this guide. Start with the simplest solutions first: test your outlet, check water levels, and ensure proper tank placement. Keep your humidifier clean and use surge protection to prevent most future issues. If these steps don’t restore power, Levoit’s customer support offers free diagnosis and affordable replacement parts to extend your unit’s life. Don’t replace your humidifier prematurely—most “dead” units just need the right troubleshooting steps to spring back to life.


