
Water spreading across your basement floor from your Aprilaire humidifier creates urgent problems that demand immediate attention. That persistent puddle isn’t just an inconvenience—it threatens your home’s structural integrity, risking costly damage to flooring, ceilings, and even your HVAC system components. Most homeowners face this issue during peak heating season when dry air demands maximum humidifier operation.
While Aprilaire units generally deliver reliable performance, water leakage remains one of the most common failures across their product line. The good news? Over 80% of these leaks stem from predictable failure points that you can diagnose and often repair yourself with basic tools. This guide provides a systematic approach to identifying your specific leak source and implementing effective solutions before water damage escalates.
Pinpointing Your Aprilaire Leak Location by Model
Different Aprilaire models develop leaks in characteristic locations based on their design and component placement. Recognizing your model’s weak spots saves hours of unnecessary troubleshooting.
700 Series Whole-House Humidifier Leak Hotspots
Your 700 Series unit most likely leaks from the water distribution tray or bypass damper seals. These horizontal-flow models route water across a metal tray that can develop hairline cracks from thermal stress. Check for moisture around the unit’s bottom edges where the tray connects to the housing—this indicates tray failure rather than supply line issues.
600 Series Failure Patterns
The 600 Series vertical units commonly develop problems at the water panel housing or drain line connections. Inspect the plastic housing surrounding the water panel for visible stress cracks, especially near the mounting tabs. Many owners report leaks originating from the drain line elbow fitting where vibration gradually loosens the connection over time.
500/400 Series Leak Sources
Compact 500 and 400 Series models typically leak around the solenoid valve assembly or reservoir tank seams. These units’ smaller size creates higher water pressure at connection points, accelerating seal degradation. Look for mineral deposits forming around the valve connections—this white crust signals slow seepage that will worsen without intervention.
Quick Identification Test: Trace the Leak Path
Grab paper towels and food coloring to pinpoint your exact leak origin:
- Completely dry all surfaces around the humidifier
- Add 5-6 drops of food coloring to the water panel compartment
- Run the unit for 10-15 minutes
- Examine where colored water appears
This simple test reveals whether your leak originates from the supply line, distribution system, or drain path—critical information before attempting repairs.
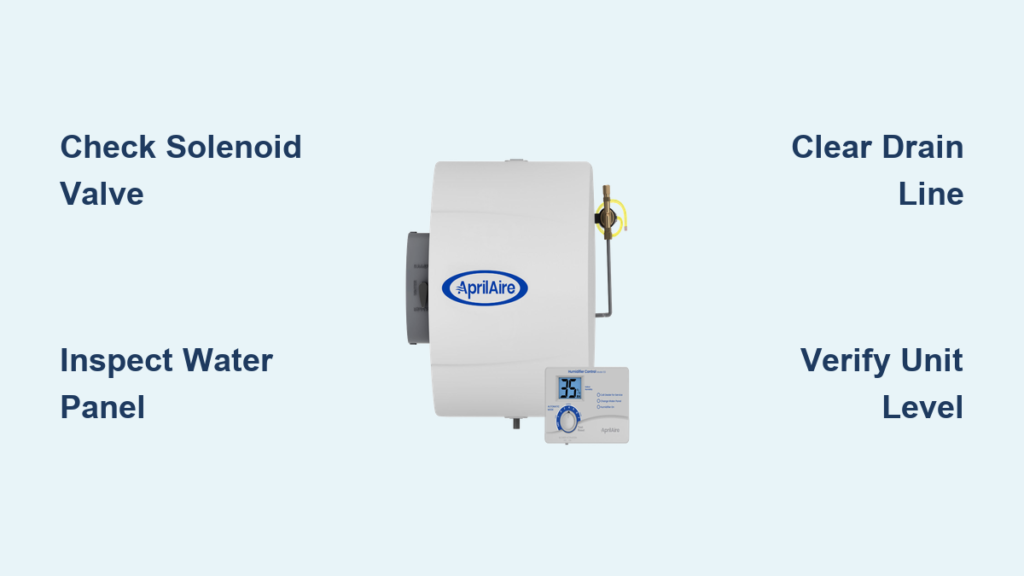
Solenoid Valve Failures: The Silent Overflow Culprit
Your Aprilaire’s solenoid valve controls water entry into the system. When this component fails, water flows continuously regardless of humidity settings, creating dangerous overflow conditions that often appear as mysterious leaks.
Critical Solenoid Failure Signs
Watch for these unmistakable indicators of solenoid problems:
– Constant water flow even when the humidistat reads below your set point
– Water hammer noises (loud banging) in supply lines during operation
– Overflow from the top of the humidifier cabinet during normal cycles
– Persistent leaks despite checking all visible connections
Testing Your Solenoid Valve in 5 Minutes

Grab a multimeter and follow these steps:
- Power down your furnace at the breaker
- Disconnect electrical wires from the valve (note positions)
- Remove the valve from water lines using wrenches
- Test coil resistance: 20-50 ohms indicates proper function
- Inspect the rubber diaphragm for tears or mineral buildup
Pro Tip: Soak a malfunctioning valve in white vinegar for 30 minutes to dissolve mineral deposits before replacing—this fixes 30% of “failed” solenoids.
Complete Solenoid Replacement Procedure
- Shut off main water supply to your HVAC system
- Disconnect electrical connections
- Remove compression fittings from valve ends
- Install new valve with fresh Teflon tape on threads
- Reconnect wiring and test for leaks at 1/4 turn intervals
Tighten connections gradually—over-tightening cracks plastic fittings and creates new leaks.
Water Distribution System Failures

The water panel and distribution tray work together to spread water evenly across the evaporative surface. When either component fails, water channels instead of dispersing, creating concentrated leaks that damage surrounding areas.
Water Panel Inspection Checklist
Examine your panel for these failure signs:
– White mineral crust blocking water flow channels
– Visible cracks or warping allowing water bypass
– Improper sizing creating gaps between panel and housing
– Loose seating in mounting tracks causing uneven distribution
Replace panels annually or when you notice reduced humidity output despite proper settings.
Distribution Tray Troubleshooting
Check your tray for:
– Hairline cracks from winter freeze damage
– Clogged distribution holes redirecting water flow
– Loose mounting screws creating uneven surfaces
– Warped plastic from prolonged heat exposure
Clean clogged holes with a straightened paper clip—never use wire that could enlarge holes and worsen distribution.
Drain Line Blockages Causing Backflow Leaks
Clogged drain lines force water to back up and overflow from unexpected locations, creating secondary leaks that appear unrelated to the actual problem source.
Effective Drain Line Clearing Methods
Gravity Flush Technique:
– Disconnect line from humidifier outlet
– Pour 1 gallon of hot water through the line
– Verify free flow at the drain point
– Repeat until water flows within 10 seconds
Compressed Air Method:
– Use low pressure (under 30 PSI)
– Wear eye protection during operation
– Start near the humidifier and work toward the drain
– Test flow after each air burst
Critical Warning: Never use coat hangers or stiff wires—they puncture plastic tubing and create permanent leaks that require full line replacement.
Installation Errors Causing Persistent Leaks
Improper installation accounts for nearly half of all Aprilaire humidifier leaks. These issues often surface months after installation as components settle and connections loosen.
Essential Installation Corrections
Water Supply Connection:
– Replace saddle valves with proper shutoff valves
– Use plastic tubing instead of copper for vibration resistance
– Tighten compression fittings finger-tight plus 1/4 turn only
Unit Leveling Verification:
– Place torpedo level across the top surface
– Adjust mounting brackets until level in both directions
– Recheck level after seasonal temperature changes
Critical Drain Line Requirements
- Maintain minimum 1/4 inch per foot slope toward drain
- Install P-trap to prevent siphoning effects
- Avoid sharp bends that collect debris
- Secure line with proper hangers every 18 inches
Preventive Maintenance That Stops Leaks Before They Start
Regular maintenance prevents most Aprilaire leaks before they cause damage. Implement this simple schedule:
Monthly Quick Checks (3 minutes)
- Visual inspection: Look for new water spots or mineral deposits
- Listen for changes: Note unusual sounds during operation
- Test manual cycle: Verify proper startup and shutdown
Seasonal Deep Maintenance (20 minutes)
- Replace water panel: Critical for proper water distribution
- Clean distribution tray: Remove and scrub with vinegar solution
- Flush drain line: Prevent buildup with monthly vinegar treatment
- Check all connections: Tighten fittings to proper torque
When to Call an HVAC Professional Immediately
Some leaks require specialized expertise to resolve safely:
Emergency Service Indicators
- Electrical components exposed to water
- Ceiling stains below second-floor installations
- Repeated solenoid failures indicating pressure issues
- Visible ductwork damage affecting system integrity
Professionals use pressure testing, borescope inspections, and electronic leak detection to diagnose complex issues beyond DIY capabilities.
Emergency Water Damage Mitigation Steps
When you discover a leak, take these actions within the first 30 minutes:
- Stop water flow at the main supply valve
- Contain spread with towels around the unit
- Document damage with photos for insurance
- Promote drying with fans and dehumidifiers
Check behind your furnace, under flooring, and ceiling areas below for hidden moisture pockets that cause long-term damage.
Bottom Line: Aprilaire humidifier leaking water requires immediate action but often involves simple fixes you can complete in under an hour. Start with model-specific leak locations, test the solenoid valve first, and never ignore minor seepage that will worsen over time. Implement seasonal maintenance to prevent 90% of leaks before they start—replace water panels annually, clean distribution trays quarterly, and verify proper drain line slope twice yearly. When in doubt between DIY repair and professional service, remember: water damage costs escalate exponentially with time. Shut off the water supply immediately and consult an HVAC specialist if you see ceiling stains or electrical components exposed to moisture. Your prompt action today prevents thousands in restoration costs tomorrow.


