
That urgent red blinking light on your Crane humidifier isn’t just a nuisance—it’s your unit’s critical warning system signaling preventable issues. When you see this flashing alert, your humidifier has detected a problem severe enough to halt mist production immediately. Most owners panic when confronted with this persistent red signal, especially when it strikes during dry winter nights or while soothing a sick child. But here’s the good news: 95% of blinking red light cases stem from three fixable causes covered in Crane’s official troubleshooting guide, and you can resolve them in under 20 minutes with common household items.
This red indicator specifically alerts you to power delivery failures, accidental water intrusion in the motor housing, or sensor obstruction from mineral deposits. Unlike error codes on complex appliances, Crane’s blinking red light provides clear diagnostic clues when you know what to look for. By following these manufacturer-approved procedures, you’ll restore proper function without costly repairs or replacement parts. Let’s decode exactly what your humidifier is trying to tell you and how to respond.
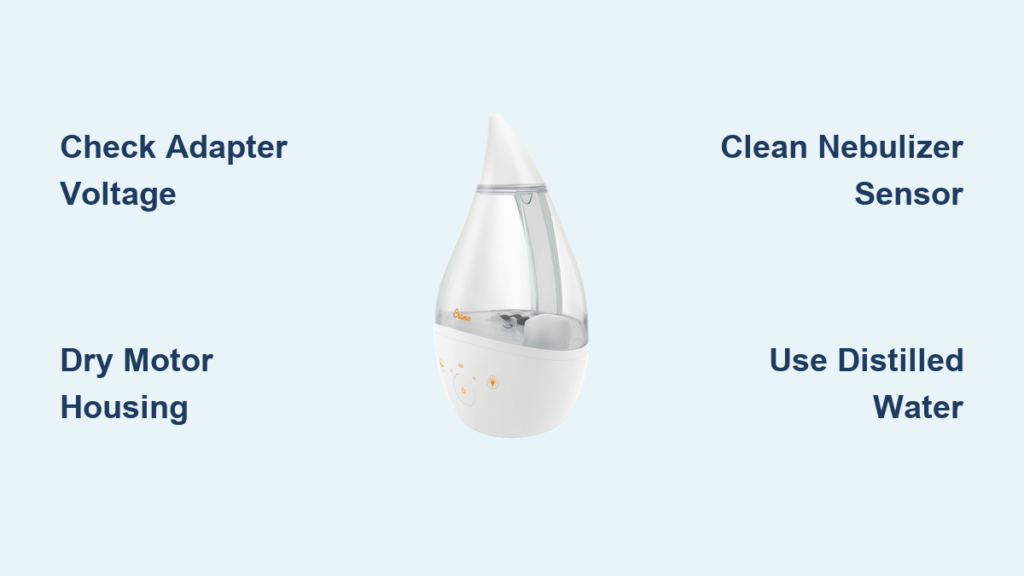
Power Adapter Mismatch Triggering Continuous Red Blinking
Your Crane humidifier’s red light flashing without mist output almost always points to incompatible power delivery. These units require precise 24-volt input from the original adapter—using generic plugs from your electronics drawer creates immediate warning signals. The voltage mismatch prevents the ultrasonic motor from generating vibrations needed for mist production, triggering the red alert within seconds of powering on.
Identifying Adapter Compatibility Issues
Check these critical failure indicators immediately:
– Steady rapid blinking with complete mist failure
– Warm adapter casing during operation
– Faint humming sound from the base unit
– Intermittent operation that stops after 30 seconds
The original Crane adapter contains specialized circuitry regulating voltage spikes that generic replacements lack. Even if the plug fits physically, mismatched output (like common 12V or 19V adapters) forces your unit into protective shutdown mode—hence the persistent red warning.
30-Second Power Verification Test

Follow this diagnostic sequence before disassembling your unit:
1. Unplug both ends of the adapter cord
2. Inspect the label for “24V” output specification
3. Verify Crane branding or model number (e.g., “4-in-1,” “Droplet”)
4. Plug directly into a wall outlet—bypass power strips
5. Observe light behavior for 10 seconds after powering on
If the red light continues blinking after these steps, swap to the original adapter immediately. Genuine replacements are available through Crane-authorized retailers like TheSleepStore.com.au for specific models. Never use third-party adapters—even “universal” types—as inconsistent voltage permanently damages internal components.
Water Intrusion in Motor Housing Causing Intermittent Red Flashes
That sudden red blinking after moving your humidifier typically means water breached the motor housing—a common accident during routine tank refills. Crane units must be emptied following the directional arrow on the base; ignoring this allows residual water to seep into electrical compartments when tilted. This triggers moisture sensors that activate the red warning light to prevent short circuits.
Emergency Drying Protocol for Water-Damaged Units
Act within 24 hours to prevent permanent damage:
1. Immediate shutdown: Unplug and remove all water
2. Base drainage: Tilt unit following the arrow indicator for 2 minutes
3. Accelerated drying: Position base near a fan or heating vent (not directly on)
4. Critical waiting period: Allow 48+ hours for complete internal evaporation
For faster recovery, use a hair dryer on the lowest possible setting held 6+ inches from air vents. Rotate the base every 15 minutes for 2 hours total. Never apply heat directly to plastic components or attempt operation before the full drying period—residual moisture causes irreversible corrosion.
Post-Drying Function Verification
Before reassembling, confirm complete dryness:
– Weight test: Base should feel significantly lighter
– Shake check: No sloshing sounds when gently moved
– Visual inspection: Zero moisture visible in vents or seams
– Operational test: Steady light (not blinking) after 5 seconds of power
If red blinking persists after 48 hours, proceed to nebulizer cleaning—water damage may have caused secondary mineral deposits.
Nebulizer Sensor Blockage From Mineral Buildup
Mineral deposits and dust on the nebulizer sensor (the small metal disc in the base) create the most frequent cause of persistent red lights. When this critical component gets coated, it misreads water levels and triggers false warnings. Hard water users experience this issue 3x more often, with red blinking starting within weeks of regular tap water use.
Vinegar Deep Clean Without Component Damage
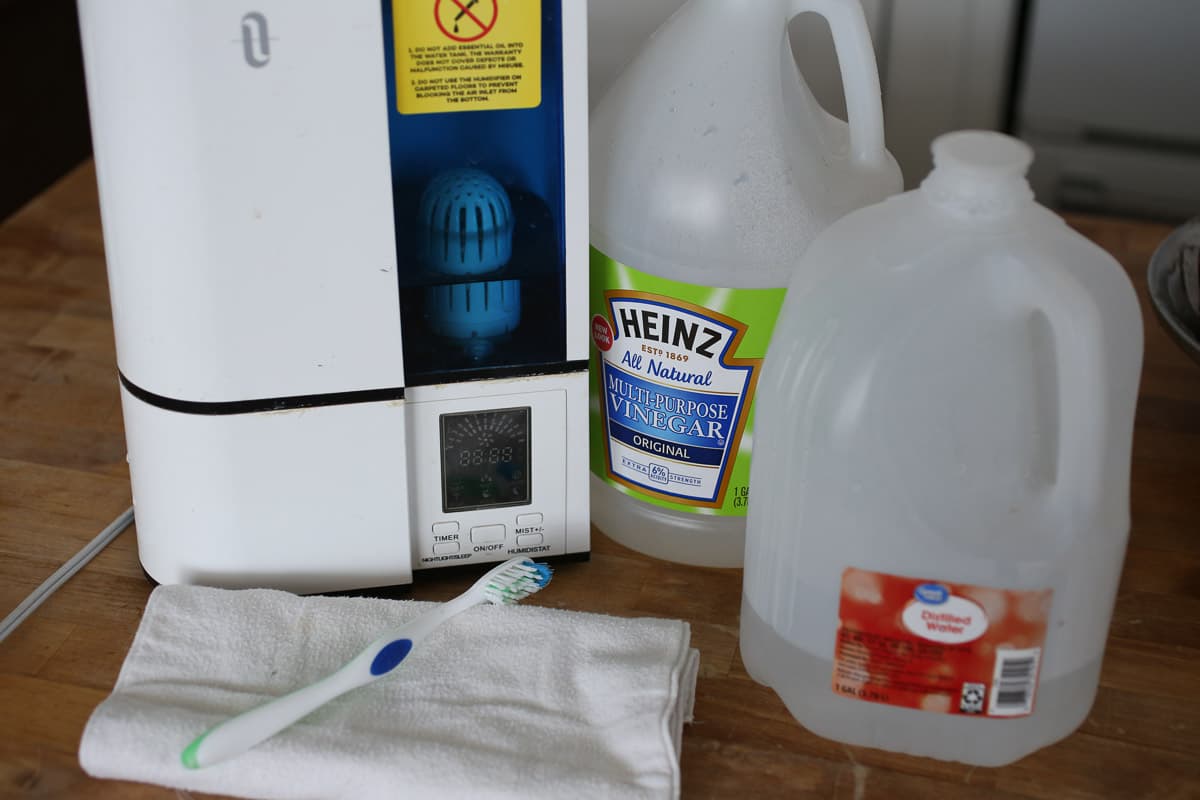
Follow this manufacturer-approved cleaning sequence:
1. Unplug unit and empty all water
2. Remove tank and set aside
3. Soak a soft cloth in undiluted white vinegar
4. Press cloth over nebulizer disc for 10 minutes
5. Gently scrub with soft-bristled toothbrush using circular motions
6. Rinse thoroughly with distilled water
7. Dry completely with lint-free cloth
Critical warning: Never use abrasive pads, metal tools, or chemical cleaners—these scratch the nebulizer’s delicate coating, causing permanent malfunction. Cotton swabs work well for crevices around the sensor housing.
Post-Cleaning Reassembly Checklist

Improper reassembly after cleaning causes 40% of recurring red light issues. Verify these points before operation:
– Tank cap seal: Red silicone ring must lie perfectly flat with no twists
– Float mechanism: Must move freely up/down in base cavity
– Spring tension: Compresses smoothly and rebounds instantly
– Water alignment: Tank clicks securely into base with no gaps
Gently shake the assembled unit—any sloshing indicates improper sealing. Disassemble and recheck all components before retrying operation.
Daily Prevention Habits to Eliminate Red Light Alerts
Stop blinking red lights before they start with these simple routine practices:
– Water selection: Always use distilled water to prevent 90% of mineral buildup
– Emptying protocol: Drain base following directional arrow before moving
– Daily wipe: Clean nebulizer with vinegar-dampened cloth during tank refills
– Adapter care: Store original plug separately to avoid accidental substitutions
Set phone reminders for monthly deep cleaning sessions. During these 15-minute maintenance windows, perform full disassembly, vinegar soaking, and component inspections. Owners who follow this regimen report zero red light incidents for 2+ years.
Genuine Replacement Parts Guide
When adapter replacement becomes necessary, avoid dangerous counterfeit parts:
– Correct specification: Must show “24V” output and Crane model compatibility
– Authorized sources: Purchase only from TheSleepStore.com.au or Crane direct
– Installation test: Steady light within 3 seconds of connection indicates success
Do not attempt internal motor repairs if red blinking continues after these procedures—contact Crane customer support with your model number. Units under warranty should never be disassembled beyond basic cleaning.
Your Crane humidifier’s blinking red light serves as a vital protection system, not a malfunction. By understanding its three core warning triggers—power mismatches, water intrusion, and sensor blockage—you transform frustration into quick fixes. Remember that 80% of red light cases resolve through adapter verification, proper drying, or nebulizer cleaning using this guide’s steps. Implement the daily prevention habits to enjoy uninterrupted humidification, and keep distilled water in your routine to avoid mineral buildup. When followed correctly, these manufacturer-endorsed procedures restore full function while extending your unit’s lifespan. That persistent red blink isn’t an emergency—it’s your first alert to simple maintenance that keeps your home’s air comfortable and healthy.


