

Your Dyson air purifier’s WiFi connection has suddenly stopped working, and you’re not sure why. You’re not alone—connectivity problems rank among the most common issues Dyson air purifier owners face. Whether your device won’t connect during initial setup or drops its connection after working fine for months, this guide walks through every solution from basic checks to advanced troubleshooting. By following these steps, you can restore your purifier’s smart features and regain control through the Dyson Link app.
Before diving into complex solutions, understand that most WiFi connectivity problems stem from a handful of recurring causes. Your router’s frequency band, password compatibility, firmware updates, and device placement all play critical roles in establishing and maintaining a stable connection. This article covers every major troubleshooting scenario, so you can identify and fix the specific issue affecting your setup.
Confirm Your Dyson Only Works on 2.4 GHz Networks
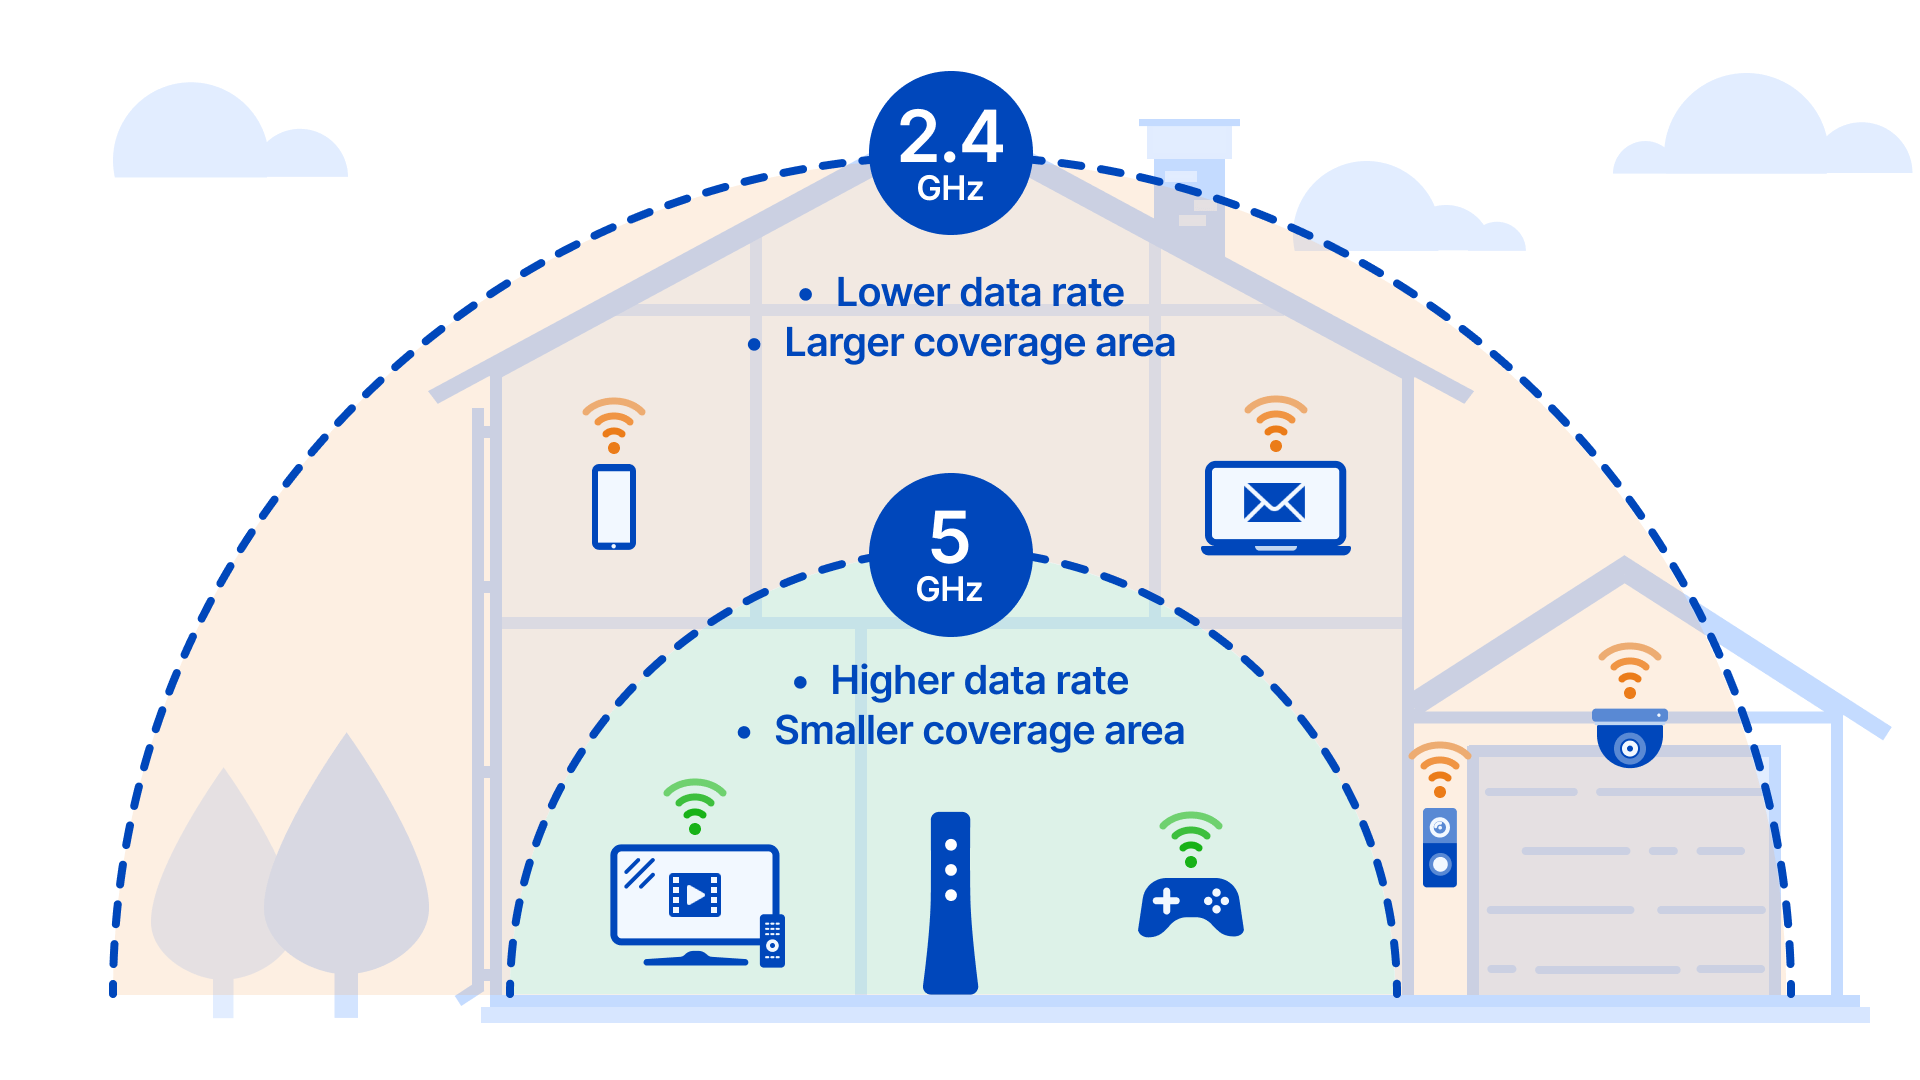
Dyson air purifiers operate exclusively on 2.4 GHz WiFi bands and cannot connect to 5 GHz networks. This limitation catches many users off guard, especially those with dual-band routers that broadcast both frequencies under a single network name. When your router combines both bands using the same SSID, your phone might connect to 5 GHz while your Dyson searches in vain for a 2.4 GHz signal it cannot detect.
Check your router settings to confirm you have a separate 2.4 GHz network available. Access your router’s administration panel through its IP address (typically 192.168.1.1 or 192.168.0.1) and look for wireless settings. If your router uses a single combined network name, create a distinct 2.4 GHz network with a separate SSID specifically for your Dyson device. This separation ensures your purifier connects to the correct frequency without interference from faster 5 GHz traffic.
Signal strength matters as much as frequency compatibility. Measure WiFi strength at your air purifier’s location using smartphone apps like Airport Utility for iOS or any WiFi analyzer tool for Android. Readings below -70 dBm often cause connection timeouts and intermittent disconnections. If your purifier sits at the edge of your router’s range, consider relocating either the device or your router, or install a WiFi extender on the 2.4 GHz band to boost coverage.
How to Test Your WiFi Signal Strength for Dyson Compatibility
- Download a WiFi analyzer app on your smartphone
- Walk to your Dyson air purifier’s location with the phone
- Note the signal strength reading for your 2.4 GHz network
- If below -70 dBm, try moving your router closer or adding a range extender
- For best results, maintain signal strength above -60 dBm
Fix Password Recognition Problems in Dyson Link App
When your Dyson air purifier rejects a WiFi password that works perfectly for every other device, special characters are likely to blame. Certain Dyson models cannot properly interpret symbols like !@#$%^&*()_+-=[]{}|;’:”,./<>? during the authentication process. This creates a frustrating situation where you know your password is correct, but your purifier refuses to accept it.
The quickest solution involves temporarily simplifying your WiFi password. Access your router settings and change your wireless password to a basic alphanumeric combination without special characters. Connect your Dyson using this simplified password, then change your router back to the original password if desired. Alternatively, create a dedicated guest network with a simple password specifically for IoT devices like your air purifier.
Why Your Dyson Account Won’t Accept Your Login Credentials
Account-related login problems also cause connectivity failures. If you recently changed your Dyson account password, the system requires approximately 30 minutes before you can successfully log in with new credentials. Additionally, four or more consecutive failed login attempts lock your account for 30 minutes as a security measure. Wait out this lockout period or use the password reset function to regain access.
Pro Tip: Create a separate Dyson account specifically for your smart home devices to avoid frequent account lockouts.
Resolve Router Compatibility Issues After Firmware Updates

Router firmware updates frequently break previously stable WiFi connections with Dyson air purifiers. Users across multiple router brands, particularly Asus models, report immediate connectivity loss after firmware updates. Affected models include the Rog GT-BE98 Pro, Rapture GT-AX6000, RT-BE96U, and AX-88U, though other brands experience similar issues.
When your connection breaks after a router update, your security protocol settings are the prime suspect. Modern routers often default to combined WPA2/WPA3 security or WPA3-only configurations that older Dyson models cannot handle. Access your router settings and locate the wireless security section. Change the security protocol to “WPA2 only” to force compatibility with devices designed before WPA3 became standard.
How to Configure Asus Router Settings for Dyson Compatibility
Channel selection causes problems when set to “AUTO.” The router may switch to channels or protocols that certain Dyson models cannot communicate with effectively. Manually set your 2.4 GHz channel to 6 or 11, the most universally compatible channels. For Asus routers specifically, navigate to Wireless settings and disable AUTO channel selection, then explicitly choose channel 6 or 11 for your 2.4 GHz network.
Some users find that deleting and recreating their IoT network resolves persistent issues. Router-generated IoT networks created during initial setup may develop configuration problems after firmware updates. Creating a fresh IoT network with new settings eliminates these hidden conflicts. Ensure this IoT network operates on a separate subnet from your primary network to prevent routing conflicts.
Reset Network Settings Correctly Without Losing Preferences
Resetting your Dyson air purifier’s network settings clears all stored WiFi information and allows you to start fresh. Locate the standby On/Off button on your device—typically on the top or side of the unit. Press and hold this button for approximately 20 seconds while watching the WiFi indicator light.
During the reset, the WiFi indicator light should flash both white and green colors. This color combination confirms that your network settings have been successfully cleared and the device has returned to factory network defaults. If you do not see this flashing pattern, the button press may not have registered properly, or there could be a fault with the control interface.
After the reset completes, put your device back into pairing mode through the Dyson Link app. The app guides you through selecting your 2.4 GHz network and entering your password. Ensure your password contains no special characters that might cause authentication problems during this fresh setup attempt.
When to Perform a Full Factory Reset vs. Network Reset
For units that refuse to connect despite multiple reset attempts, a full factory reset may be necessary. This involves holding the power button for 10-15 seconds while the device is plugged in, which resets all settings rather than just network configuration. After a complete factory reset, you must set up your device from scratch including all personalized settings, schedules, and room configurations.
Decode WiFi Indicator Light Signals for Instant Diagnosis

Your Dyson air purifier’s WiFi indicator light communicates its connection status through different colors and patterns. Learning to interpret these signals helps you diagnose problems without guesswork. A solid white light indicates normal operation with an active WiFi connection. A flashing white light means the device is in pairing mode and ready to connect to a new network.
A flashing amber or orange light signals a connection error or network problem requiring your attention. This pattern indicates that your purifier can detect networks but cannot establish a stable connection. Common causes include incorrect password entry, router compatibility issues, or weak signal strength.
If the WiFi indicator light remains completely dark, your device may not be receiving power, the WiFi feature may be disabled, or an internal hardware fault affects wireless connectivity. First verify that the main power switch on the unit itself is in the “On” position. Some Dyson models have a physical switch that must be activated to enable WiFi functionality even when the device is otherwise operational.
Update Firmware Using Mobile Hotspot When WiFi Fails
Outdated firmware on your Dyson air purifier can cause WiFi connectivity problems, as older software versions may contain bugs affecting network communication or lack compatibility with updated router security protocols. The Dyson Link app typically notifies you when firmware updates are available, but you cannot receive these updates without an active WiFi connection.
If your device cannot connect to WiFi to receive firmware updates, temporarily connect through a mobile hotspot with simplified settings. Create a hotspot using your smartphone with WPA2 security and no special characters in the password. Connect your Dyson to this hotspot, allow the firmware update to complete, then reconnect to your primary home network.
The Dyson Link app itself should remain updated through your smartphone’s app store. Outdated app versions may contain bugs affecting the device pairing process or may not properly communicate with current firmware versions. Uninstall and reinstall the app to resolve software conflicts that prevent successful device pairing or connection.
Get Direct Help from Dyson Support When Stuck
If standard troubleshooting procedures fail to resolve your WiFi connectivity issues, Dyson provides multiple support channels for assistance. The primary telephone support line is available at 844-705-4777, with operating hours from 8:00 AM to 8:00 PM CST on weekdays and 9:00 AM to 6:00 PM CST on Saturdays. This number connects you with technical support representatives who can guide you through advanced troubleshooting steps specific to your model.
Dyson’s website offers a live chat function accessible through a button in the bottom right corner of support pages. A Dyson Expert becomes available during business hours to provide real-time troubleshooting assistance. The chat function also provides access to written guides and documentation that you can reference during your support interaction.
When contacting support, have your device’s serial number readily available. The serial number begins with a three-digit code (such as “123-AU-A12345” or “AB1-AU-A123456”) that identifies the manufacturing location and date. Support representatives use this information to access model-specific documentation and troubleshooting procedures tailored to your exact device.
Prevent Future Connectivity Problems with Smart Setup
Once your Dyson air purifier reconnects successfully, take steps to maintain a stable connection going forward. Avoid changing router settings that affect IoT device compatibility, such as security protocols or channel selections. If your router prompts you to update firmware, research whether other Dyson users have reported connectivity issues with that specific version before proceeding.
Consider creating a dedicated 2.4 GHz network for your smart home devices. This network should use WPA2 security and a simple password without special characters. Isolating IoT devices on their own network prevents conflicts with faster primary network traffic and makes troubleshooting easier if problems recur.
Regularly check that your Dyson Link app remains updated and that your purifier’s firmware current. Enable automatic app updates on your smartphone to ensure you always have the latest version. Periodically verify that your WiFi indicator light shows a solid white connection, especially after router changes or power outages.
Final Tip: Place your Dyson air purifier within 10-15 feet of your router with minimal obstructions for optimal WiFi signal strength. Avoid positioning it behind large metal objects or in enclosed spaces that can block the wireless signal.


