
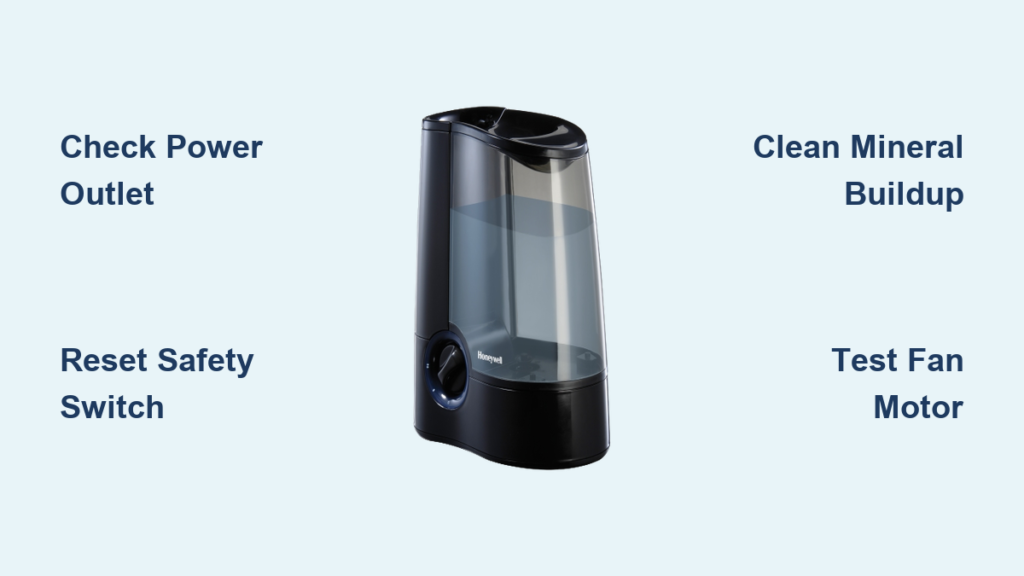
Your Honeywell humidifier powers on but stays silent while dry air leaves your skin flaking and throat raw—especially maddening during winter’s dry spells or summer’s air-conditioned chill. When the fan won’t spin, your humidifier becomes useless plastic filling space. This happens to thousands of Honeywell owners yearly, turning what should be a comfort device into a frustrating paperweight. Don’t panic yet. Most Honeywell humidifier fan not working issues stem from solvable problems like mineral buildup, safety switch glitches, or simple electrical faults. We’ll diagnose every model—from portable Quiet Care units to whole-house HE365 systems—with actionable fixes you can complete in under an hour.
Quick Power Checks First
Before grabbing tools, eliminate basic failures. Many “dead” fans revive with these 30-second verifications that prevent unnecessary disassembly.
Test Wall Outlet Power
Plug a phone charger or lamp into the same outlet. If it doesn’t power on, the issue isn’t your humidifier—it’s your electrical supply. Critical step: Check your home’s circuit breaker panel for tripped switches. Reset any that aren’t fully in the “ON” position. If breakers trip repeatedly, consult an electrician before proceeding.
Inspect Power Cord Damage
Run your fingers along the entire cord length, feeling for soft spots, kinks, or exposed copper wires. Pay special attention to where the cord enters the unit—this area often frays from constant bending. Never ignore damage: A single exposed wire risks electrical shock or fire. Replace cords immediately using Honeywell’s official replacement parts (model-specific for safety).
Reset Safety Switches
Portable models like the HCM-6009 have hidden safety mechanisms. Remove the water tank completely, then firmly reseat it until you hear a distinct click. This engages the float switch that prevents operation without water. For whole-house units, ensure the bypass damper is fully open—many systems disable fans if airflow is restricted.
Decode Model-Specific Failures

Quiet Care HCM-6009/6011 Series
These decade-old portables face inevitable motor failure. Units over 10 years old commonly suffer burnt windings from continuous operation, especially in hard water areas. Hard truth: Honeywell discontinued fan replacement parts—only evaporative wicks remain available. If your unit clicks on but the fan stays silent, replacement is your only option. Check eBay for used parts, but expect inconsistent quality.
HE365 Whole-House Systems
These units follow a precise electrical sequence: 120VAC enters the control board → powers a 24VAC transformer → activates the fan motor. Key insight: The fan won’t run if the solenoid valve circuit fails. This safety design prevents flooding during fan malfunctions. If your furnace runs but no humid air circulates, test the transformer output before assuming motor failure.
Diagnostic Steps With Multimeter
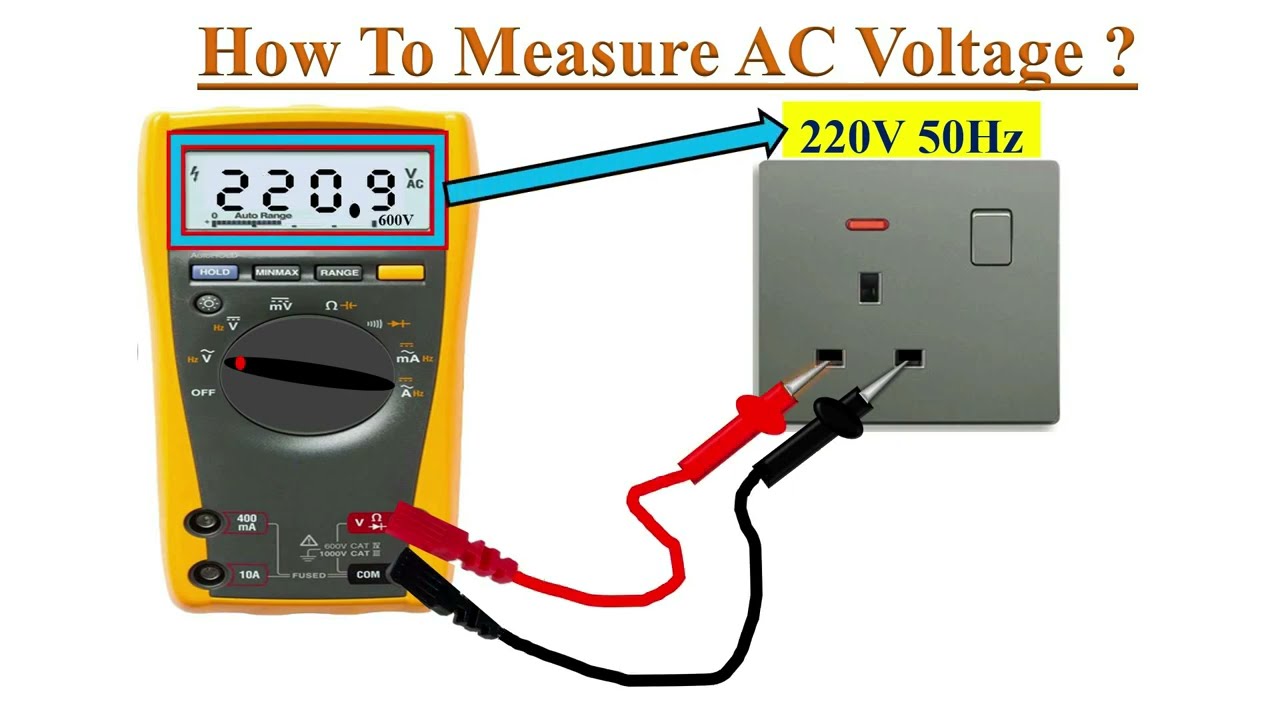
Measure Voltage Path
Grab a multimeter set to AC voltage. Start at the power source and work inward with this sequence:
- Wall outlet: Should read 110-120VAC
- Control board input: Must show 120VAC (test terminals where cord connects)
- Transformer output: Should deliver 24-28VAC to fan circuit
- Fan motor leads: Verify 24VAC when humidistat calls for humidity
Pro tip: Place humidistat at maximum setting during tests. If voltage drops at any stage, that component needs replacement.
Quick Relay Test
Locate the yellow humidistat control wires at the control board. Temporarily short them together with insulated pliers. You should hear a distinct click from the relay, and the fan should activate. No response? The control board is faulty—a $90 part requiring professional installation due to high-voltage risks.
Control Board Inspection Guide
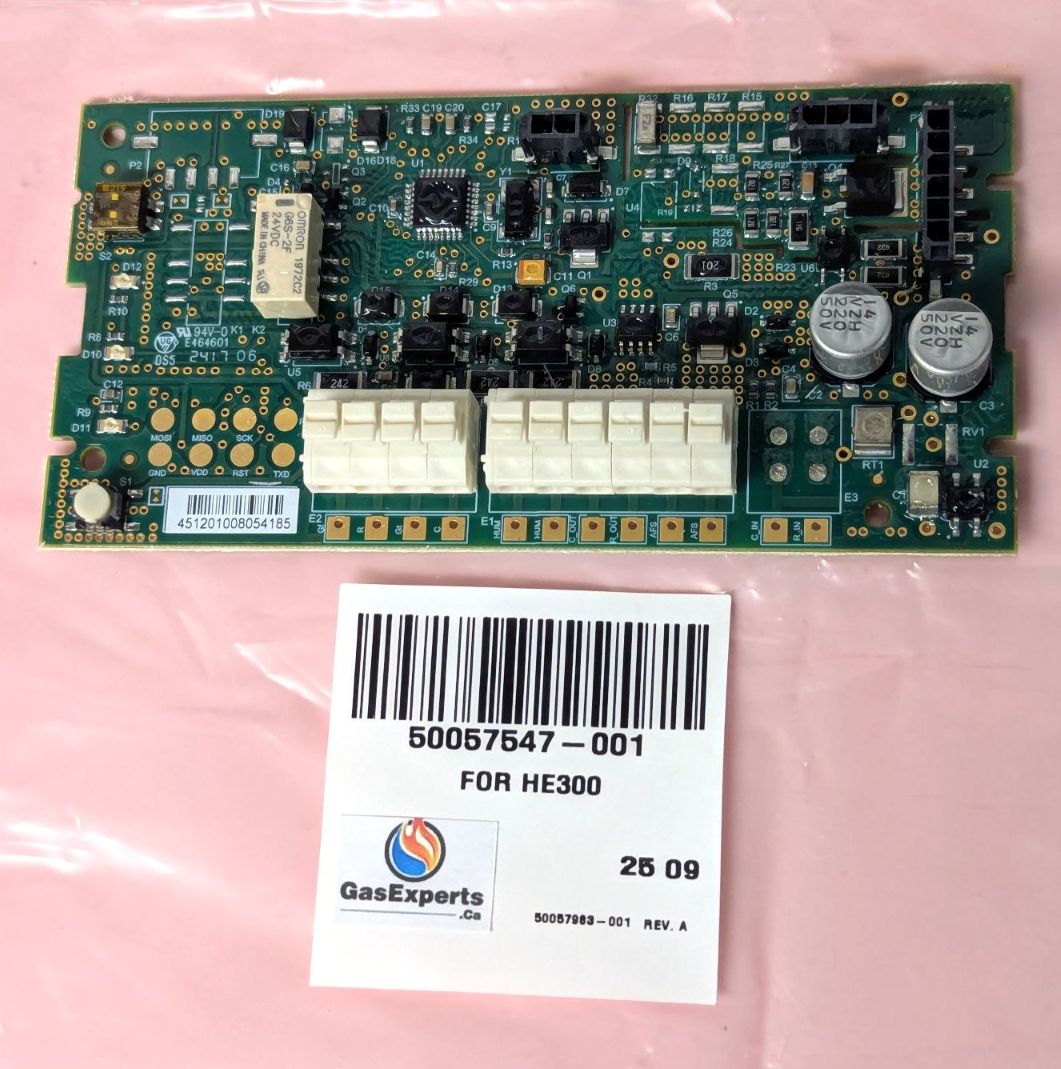
Visual Damage Signs
After disconnecting power, remove the control board and examine under bright light:
- Blackened solder joints: Indicates overheating at connection points
- Brown circuit board patches: Evidence of component burnout
- Cracked copper traces: Breaks the electrical pathway (use magnifying glass)
- Bulging capacitors: Swollen tops signal imminent failure
Never reinstall damaged boards—they cause erratic operation or fire hazards.
Transformer Testing
Transformers convert dangerous 120VAC to safe 24VAC for fans. Test both sides:
– Primary side: Verify 120VAC input at terminals
– Secondary side: Expect 24-28VAC output under load
Critical note: A “dead” transformer often shows no visible damage. If output is zero, replace it immediately—universal 24VAC transformers cost $35 vs. Honeywell’s $90 OEM price.
Motor Testing Techniques
Direct Power Test
Bypass all circuitry by connecting a 24VAC power source (like a working transformer) directly to the motor leads. If the fan spins, your control system failed. If silent, the motor is dead. Warning: Never apply 120VAC directly—this destroys 24V motors instantly.
Continuity Check
Disconnect motor wires and set multimeter to ohms (Ω). Touch probes to motor terminals:
– Normal reading: 50-200Ω (varies by model)
– Open circuit: Infinite resistance (OL reading) = burned windings
– Short circuit: Near-zero resistance = internal short
No middle ground: Motors either work or need replacement—repairing windings isn’t feasible.
Fix vs. Replace Decision Matrix

Portable Units (HCM Series)
Replace immediately if:
– Unit is over 10 years old (common with HCM-6009/6011)
– Repair costs exceed $40 (50% of new unit price)
– You smell burning plastic during operation
Worth attempting repair only for:
– Safety switch misalignment
– Mineral-clogged fan blades
– Power cord damage (easily replaceable)
Whole-House Systems
Cost comparison:
– Control board: $90
– Transformer: $90
– Fan motor: $60-120
– Total DIY repair: $180-300 vs. $400 for new system
Professional help is essential for control board swaps—miswiring risks furnace damage or electrical fires.
Clean Mineral Buildup Fast
Hard water minerals silently strangle fans. Monthly cleaning prevents 80% of failures—especially in portable units using tap water.
Cleaning Process
- Unplug unit and empty water tank
- Remove fan housing (typically 4 Phillips screws)
- Soak blades in white vinegar for 30 minutes
- Gently scrub deposits with soft toothbrush
- Rinse with distilled water and air-dry 24 hours
Never use abrasive pads—they damage blade balance causing vibration.
Common Fan Symptom Fixes
“Fan Not Running Despite Power”
Follow this sequence:
1. Confirm tank is fully seated (listen for click)
2. Turn humidistat to MAX setting
3. Verify 24VAC at transformer output
4. Inspect control board for burn marks
5. Test motor with direct 24VAC power
Skip steps and you’ll miss 70% of solvable issues.
“Fan Runs Briefly Then Stops”
This indicates thermal overload protection kicking in. Immediate actions:
– Clean mineral buildup from blades (primary cause)
– Ensure water tank is 50%+ full (low water = overheating)
– Tighten loose motor mounting screws causing vibration
– Replace failing bearings if you hear grinding
Pro tip: Run unit on “Low” setting after cleaning—high speed stresses worn components.
Safety First: Electrical Precautions
Before Any Testing
- Always cut power at the breaker, not just unplugging
- Use CAT III rated multimeter for household voltage
- Wear rubber-soled shoes on dry flooring
- Remove jewelry that could cause shorts
Water plus electricity equals electrocution risk—never test damp components.
Maintenance Schedule for Longevity
Monthly Tasks
- Clean fan blades with vinegar solution
- Check water level before each use
- Listen for unusual humming or grinding
Annual Tasks
- Replace evaporative wicks/filters (clogged filters strain fans)
- Inspect electrical connections for corrosion
- Lubricate motor bearings with silicone grease (if accessible)
Units with distilled water last 3x longer—tap water destroys fans in hard water areas.
Final Troubleshooting Checklist
When your Honeywell humidifier fan not working, methodically work through:
- Power verification (outlet, cord, breakers)
- Safety switch engagement (tank seating, float valve)
- Voltage testing (120V in → 24V out)
- Component inspection (board, transformer, motor)
- Physical obstructions (mineral buildup, debris)
Bottom line: Portable units over 10 years need replacement—repair costs exceed value. Whole-house systems justify DIY repairs under $150, but hire pros for control board work. Always start with safety switch resets and vinegar cleaning—these solve 60% of “dead fan” cases instantly. Make monthly blade maintenance non-negotiable, and your Honeywell will deliver silent, reliable humidity control for years. Don’t let dry air win—your fix is likely simpler than you think.


