
Your humidifier sits silent on the nightstand, the reservoir full but no comforting mist in sight. Or worse—your nebulizer powers on but delivers zero medication during an asthma attack. When your humidifier or nebulizer not working situation strikes, panic sets in fast. Before replacing a $200 device, understand that 80% of failures stem from three fixable issues: power glitches, mineral buildup, or sensor errors. This guide reveals exactly how to diagnose and repair both humidifiers and nebulizers in under 30 minutes using household tools. You’ll learn to bypass confusing error codes, revive dead transducers, and restore mist production—saving money while avoiding dangerous respiratory dryness.
Power Supply First Checks
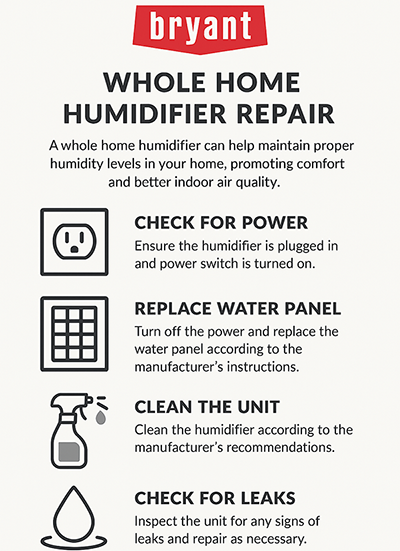
No Lights When Plugged In
Start troubleshooting by verifying your electrical chain. Plug a phone charger into the same outlet—if it doesn’t power on, you’ve found your culprit. Next, inspect the device’s power adapter for frayed wires near the plug or melted discoloration. Test output voltage with a multimeter: ultrasonic humidifiers need 24V DC (±10%), while nebulizers require 12V DC. If voltage reads zero, replace the adapter—a $5 fix at hardware stores.
Internal Fuse Blown
When the adapter works but your unit stays dark, check the internal fuse. Unplug the device for 5 minutes to discharge capacitors, then remove the base cover. Locate the 2-3A glass fuse near the power inlet. Test it with a multimeter set to resistance mode—a blown fuse shows infinite resistance. Replace it with an identical rating (e.g., 250V 3.15A), but first diagnose why it blew: a shorted heating element or seized fan motor often triggers this failure.
Water Level Sensor Problems
Float Switch Stuck
That “E1” or “LO” error usually means a jammed float switch—not a dead device. Empty the water tank and invert it. Tap the float chamber firmly to dislodge mineral deposits, then rinse with white vinegar. Refill with distilled water and power on. If the error persists, remove the float assembly and check for hairline cracks in the reservoir or weakened magnet strength. A stuck float in the “empty” position tricks your unit into safety shutdown.
Capacitive Sensor Errors
High-end models use electronic water sensors vulnerable to scale buildup. Clean around the sensor housing with a vinegar-dipped cotton swab, focusing on metal contact points. If mist production doesn’t resume, scale may have permanently altered the sensor’s electric field. These $15 sensor boards often require replacement after 2-3 years of hard water use—check your model number before ordering.
Ultrasonic Transducer Failures
No Mist Despite Power
The ceramic transducer (vibrating at 1.6 million times/second) is the heart of ultrasonic devices. With water in the tank, listen for a faint high-pitched hum—if silent, the transducer failed. Check for visible pitting or cracks on its silver surface. Test drive voltage at the transducer terminals: you need 50-80V AC. Zero voltage indicates a faulty oscillator board; low voltage points to failing components.
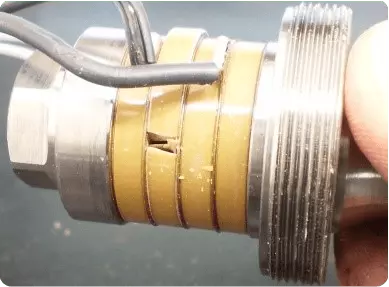
Replacing the Transducer
This $10 repair saves most “dead” units. Desolder the two wires from the old transducer, clean the mounting surface with alcohol, and apply thermal paste. Attach the new transducer (critical: match frequency and size—e.g., 20mm 1.65MHz), then solder the wires. Test before reassembly by submerging the transducer in water—immediate mist confirms success. Pro tip: Always use distilled water post-repair to prevent rapid scale buildup.
Compressor Nebulizer Issues
Weak or No Aerosol Output
Compressor nebulizers lose steam gradually. Place your finger over the air outlet—if pressure doesn’t build within 5 seconds, check the foam air filter (replace every 3 months). For deeper diagnosis, attach a manometer to the medication cup; it should maintain 30+ PSI for 30 seconds. Squealing noises indicate worn carbon brushes (<3mm length), while clicking suggests valve issues. Rebuild kits cost $12-$18 and include diaphragms and gaskets.
Medication Cup Problems
Clogged jets cause 40% of “no mist” complaints. Remove the cup and inspect the mesh—medication residues often crystallize in 3-micron apertures. Soak in 70% isopropyl alcohol for 15 minutes, then gently scrub with a soft toothbrush. Critical check: Verify the cup threads aren’t cracked, which causes air leaks. During operation, cover the mask’s exhalation valve—if pressure doesn’t build instantly, replace the mask seal.
Heating Element Troubles (Warm Mist Units)
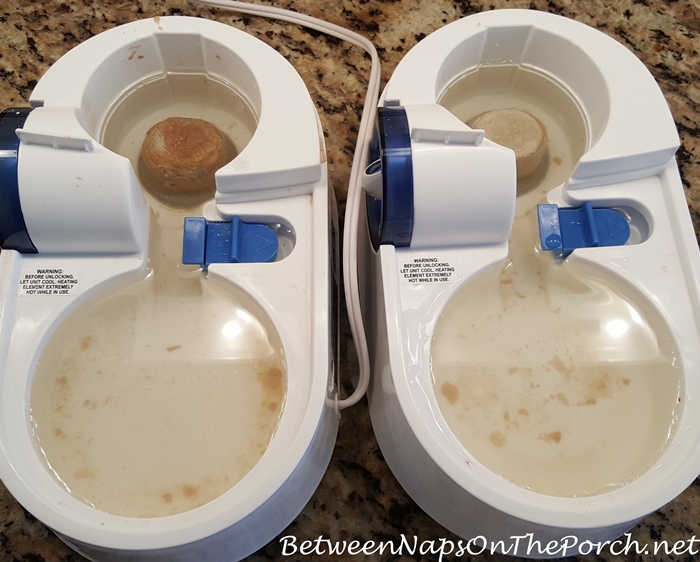
Heats But No Steam
When your vaporizer warms but emits no steam, mineral scale is likely insulating the heating element. Fill the reservoir with 50% white vinegar, run for 15 minutes, then scrub the element with a bottle brush. Measure resistance across the heater terminals—35-45 ohms indicates functionality. If resistance reads infinite, the element is burned out and requires replacement.
Thermal Cutoff Tripping
Units that shut off after 5-10 minutes have an overheating element. Descale thoroughly as above, then check the thermal fuse (115°C or 130°C rating). Test continuity—if open, replace it with an identical temperature-rated fuse. Blocked steam vents also cause premature shutdown; clear obstructions with a paper clip.
Error Code Decoder Ring
Your device’s blinking lights are diagnostic messages. Cross-reference common codes:
– E1: Low water (clean float switch)
– E2: Overheating (descale heater)
– E3: Humidity sensor error (clean with alcohol)
– E4: UV lamp failure (replace bulb every 6 months)
– E5: Fan failure (clean blades, check for obstructions)
Critical note: Brand-specific codes vary—consult your manual. When in doubt, unplug for 10 minutes to reset the control board.
Cleaning & Maintenance Schedule
Prevent failures with this hard-water adjusted routine:
– Daily: Empty and rinse tank; air-dry completely
– Weekly: Soak transducer in vinegar solution; clean all surfaces
– Monthly: Vacuum fan grilles; replace nebulizer air filters
– Every 3 months: Replace wick filters (evaporative models); descale heating elements
Pro tip: Use distilled water—it’s cheaper than descaling chemicals and extends transducer life 3x.
Quick Fix Flowchart
Follow this sequence when mist stops:
1. No power? → Test outlet → Check adapter → Replace fuse
2. Power but no mist? → Verify water level → Clean transducer → Test drive voltage
3. Weak nebulizer? → Replace air filter → Soak cup in alcohol → Check pressure
4. Steam unit overheating? → Descale → Test thermal fuse → Replace heater
When to Replace vs. Repair
Abandon repairs if:
– Parts cost exceeds 50% of a new unit (e.g., $20+ for a $35 humidifier)
– Multiple failures occur (transducer + circuit board)
– The unit is over 5 years old (parts unavailable)
– Safety risks exist (cracked reservoir, exposed wiring)
Cost reality: Basic ultrasonic humidifiers start at $25; compressor nebulizers at $35. Factor in your time—complex repairs often aren’t worth it.
Final Pro Tips
Keep spare fuses, filters, and transducers for critical devices. During disassembly, photograph each step—reassembly becomes effortless. Test units monthly during off-seasons to catch issues early. Remember: 90% of “dead” humidifiers just need vinegar descaling or a $0.30 fuse. With distilled water and this guide, your device will deliver reliable mist for years—no pharmacy run required. When your humidifier nebulizer not working crisis hits tonight, you now hold the keys to instant relief.


