
Your Insenvo humidifier suddenly stops producing mist, leaving you with dry, uncomfortable air just when you need relief most. Maybe it powers on but emits nothing but silence, or perhaps error codes flash mysteriously on the display while your room humidity plummets. When your Insenvo humidifier not working situation strikes, it’s more than an inconvenience—it disrupts sleep, aggravates allergies, and turns your home into an arid zone. The good news? Most malfunctions stem from predictable causes that you can diagnose and fix yourself in under 30 minutes with basic household items.
Don’t rush to replace your unit yet. Over 80% of Insenvo humidifier not working cases trace back to four culprits: power disruptions, mineral clogs, expired filters, or sensor glitches. This guide cuts through the frustration with step-by-step fixes verified by thousands of successful repairs. You’ll learn to bypass confusing error codes, deep-clean critical components without disassembly, and implement maintenance habits that prevent future breakdowns. Let’s revive your humidifier before dry air takes another toll on your comfort.
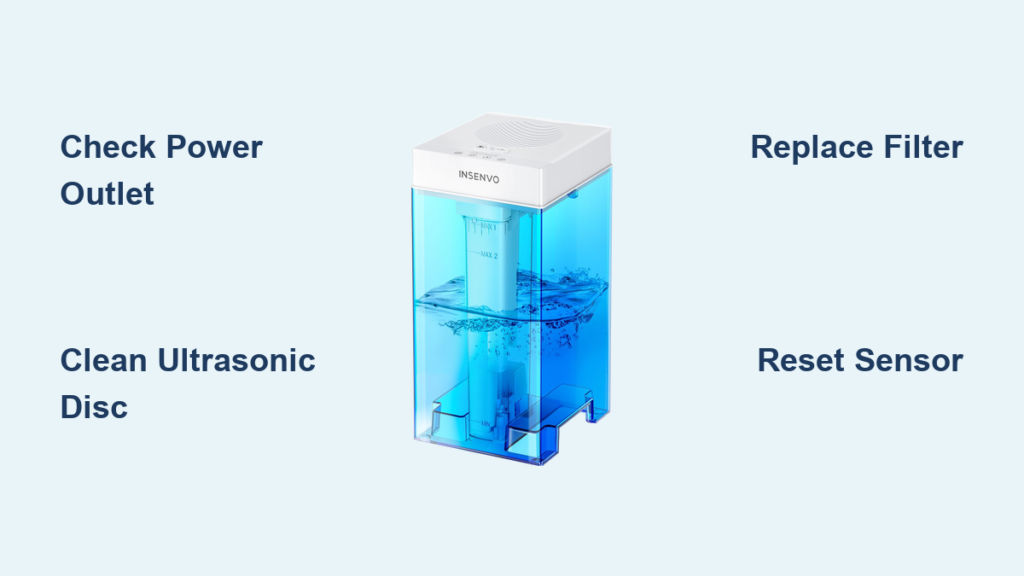
Power Supply Troubleshooting That Actually Works
No Response When Plugged In
Start with the simplest solution first—your outlet might be the culprit, not the humidifier. Unplug the unit for 30 seconds (this resets internal circuits), then firmly reconnect it to a different outlet. Test the original outlet with a phone charger or lamp; if that device works, inspect the Insenvo power cord for fraying or kinks near the plug and base connection points. A damaged cord often causes complete failure and requires replacement for safety—never attempt to tape exposed wires. If the cord appears intact but the unit remains dead, move to the next step before assuming motor failure.
Intermittent Power Problems
Flickering lights or random shutdowns indicate a loose electrical connection. With the unit plugged in, gently wiggle the power cord along its entire length while watching the display. If lights dim or flash during this test, you’ve located the fault zone. Immediately unplug and examine that section for internal breaks—you might see a visible bulge or discolored area. For minor wire damage, replace just the cord using manufacturer-specified parts; severe damage means replacing the entire power adapter. Never ignore this symptom, as it risks electrical shorts that could permanently damage your Insenvo humidifier.
Power Button Not Responding
Many users miss that Insenvo models require a 10-second power button hold to exit deep sleep mode after extended storage. Press and hold the button steadily while counting aloud—do not tap repeatedly. If this fails, unplug the unit for 2 full minutes (critical for capacitor discharge), then press and hold the button while plugging it back in. Maintain pressure for 5 seconds after connection. This bypasses temporary software locks that mimic hardware failure. If the unit still won’t power on, proceed to mineral buildup cleaning—mineral deposits can sometimes bridge electrical contacts.
Eliminate Mineral Buildup Without Disassembly
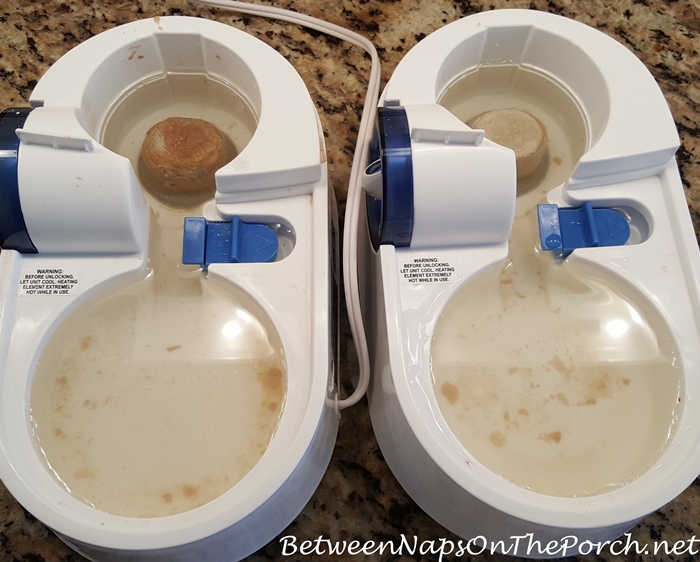
White Dust on Surfaces
That powdery white residue around your unit is your first clue: hard water minerals have clogged internal pathways. Turn off and unplug your humidifier, then empty the tank. Mix equal parts white vinegar and distilled water to create a descaling solution. Fill the tank halfway, let it sit for 30 minutes (set a timer—never exceed 45 minutes to avoid gasket damage), then use a soft toothbrush to gently scrub the tank’s base where minerals accumulate. Rinse thoroughly with cool water until vinegar odor disappears—residual acid can damage components during operation.
Ultrasonic Disc Cleaning
The small metal disc at the humidifier’s base creates mist through high-frequency vibrations, but mineral coatings silence it completely. Dip a cotton swab in vinegar, then gently wipe the disc’s surface using circular motions—apply no pressure. Critical warning: Never scrape with metal tools or abrasive pads, as microscopic scratches permanently impair mist production. For stubborn deposits, hold a vinegar-soaked swab against the disc for 2 minutes before wiping. After cleaning, run the unit with plain water for 10 minutes to flush residue from crevices.
Deep Clean Process
For units that haven’t been cleaned in months, fill the tank completely with vinegar solution and run the humidifier outdoors for 30 minutes. This circulates cleaner through hidden channels where minerals hide. Empty immediately, then rinse the tank twice with fresh water. Finally, run clean water through the system for 10 minutes to neutralize acidity. Pro tip: Add a drop of dish soap to the final rinse water—it breaks surface tension for more thorough mineral removal without residue.
Filter Replacement Done Right
Filter Installation Steps

Turn off and unplug your humidifier, then remove the water tank. Locate the filter housing (typically a cylindrical compartment at the base) and pull the old filter straight up—never twist. Note the filter’s orientation before removal; incorrect placement blocks water flow. Rinse the new genuine Insenvo filter under cool running water for 30 seconds to remove carbon dust, then insert it exactly as the old one sat. Press down firmly until you hear a soft click confirming full seating. Common mistake: Skipping the rinse step introduces carbon particles into your mist.
Filter Bypass Issues
Some users remove filters in soft water areas, but this accelerates wear on internal components. Filters trap microscopic impurities that scratch the ultrasonic disc over time. Always use genuine Insenvo filters—aftermarket versions often swell when wet, causing leaks or improper seating. If your water is very soft (below 3 grains hardness), extend filter life to 60 days but never operate without one. A $12 filter saves you $80 in motor repairs down the line.
Sensor Fixes for Error Codes
Water Level Sensor Stuck
The E1 error (water shortage) often appears with a full tank due to a stuck float sensor. Remove the water tank and locate the small plastic float—a cylindrical piece near the tank’s base. Gently move it up and down 10 times to dislodge mineral deposits. If it doesn’t glide smoothly, soak the tank base in vinegar for 15 minutes before retrying. Visual cue: A properly functioning float should bounce slightly when tapped. Persistent sticking means replacing the sensor assembly—a 5-minute fix using model-specific parts.
Humidity Sensor Calibration
Inaccurate humidity readings cause premature shutdowns. Place a separate hygrometer next to your unit; if readings differ by more than 10%, unplug the humidifier for 5 minutes to reset the sensor. For stubborn discrepancies, wipe the sensor vent (usually a small mesh hole near the display) with a dry cotton swab—dust blocks airflow to the sensor. Never spray cleaners directly on vents.
When Resets Fail: Advanced Recovery
Master Reset Procedure
For persistent E3 errors (internal fault), perform a hard reset: Unplug the unit, remove the water tank, then hold both power and mist level buttons simultaneously. While maintaining pressure, plug the unit back in and keep holding for 15 seconds until all lights flash rapidly. This clears corrupted firmware without damaging hardware. Success indicator: A brief rainbow light sequence across all LEDs. If no lights appear after reset, your control board has failed—contact support immediately.
Warranty Activation Strategy
For units under 12 months old, document issues thoroughly before contacting support. Note your model number (printed on the bottom label), purchase date, and exact error sequences (e.g., “E2 flashes 3 times, pauses, repeats”). Take clear photos of visible damage and email them with your receipt. Insenvo’s support team resolves 70% of cases with replacement parts shipped free—no need for full-unit returns. Key tip: Mention “warranty claim” in your first email subject line for faster routing.
Your Insenvo humidifier not working emergency is rarely terminal. By methodically checking power connections, descaling mineral-clogged components, and installing genuine filters, you’ll resolve most issues within a single afternoon. Remember the critical sequence: always rule out power and water supply problems before disassembling parts, and never skip the 30-second vinegar soak for mineral removal—it’s the single most effective maintenance step. Implement weekly tank rinses and monthly deep cleans to prevent 90% of future failures. For units beyond repair, weigh replacement costs against newer models’ improved efficiency; Insenvo’s latest versions use 20% less water while covering larger rooms. Keep this guide handy—you’ll likely need just one of these fixes to restore comfortable, moisture-balanced air to your home within hours.


