
Your home air feels stuffy, allergy symptoms are flaring, and store-bought purifiers cost hundreds. What if you could build a hospital-grade air cleaner for under $50 using materials from the hardware store? Thousands of homeowners, schools, and businesses have turned to the Corsi-Rosenthal box – a simple, research-backed DIY air purifier that captures 90%+ of airborne particles. Unlike risky “tape-and-filter” hacks, this method uses properly sealed MERV-13 filters and certified box fans to safely clean your air without ozone or fire hazards. In the next 15 minutes, you’ll learn exactly how to construct this life-changing device with step-by-step instructions, critical safety checks, and performance tips validated by EPA studies.
Why Standard DIY Air Purifiers Fail (And How to Fix It)
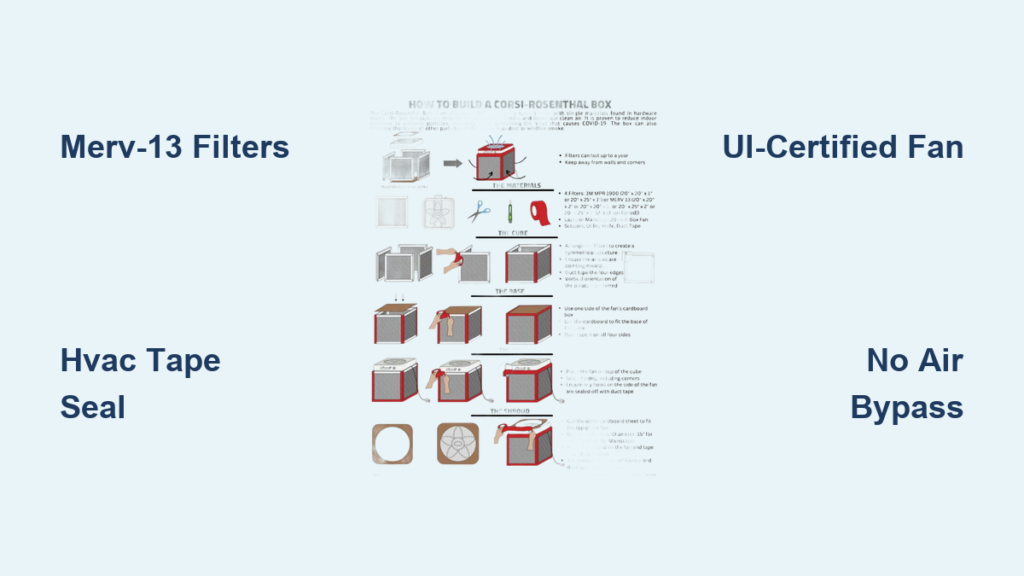
Most “how to make air purifier” guides dangerously skip critical engineering principles. Taping filters to fans creates gaps where unfiltered air sneaks through, while undersized motors overheat. The Corsi-Rosenthal design solves this with rigid filter walls and UL-certified fans that maintain proper airflow. You’ll achieve near-HEPA performance by ensuring:
- Zero air bypass through perfect filter-to-filter seals
- Correct fan sizing matching your room’s square footage
- Fire-safe materials meeting electrical safety standards
What Room Size Does Your Purifier Need to Cover?
Calculate your required Clean Air Delivery Rate (CADR):
1. Measure room length × width (e.g., 12 ft × 15 ft = 180 sq ft)
2. Multiply by 2.5 (standard air changes per hour): 180 × 2.5 = 450 CADR needed
3. Match to fan/filter combo: A standard 20″ box fan + four MERV-13 filters delivers ~400-500 CADR
⚠️ Critical Warning: Never use furnace filters rated below MERV-11 – lower grades capture almost zero virus-sized particles. Always verify filter packaging says “MERV-13” or higher.
Essential Materials Checklist (Under $60 Total)

Skip expensive “air purifier kits” – you need exactly five components:
| Item | Specification | Why It Matters |
|---|---|---|
| Box fan | 20″ × 20″ × 6″ UL-certified (e.g., Lasko 4750) | Undersized fans overheat; non-UL fans risk fire |
| MERV-13 filters | 20″ × 20″ × 1″ (4-pack, e.g., Filtrete A10-4) | Must be true MERV-13 – “HEPA-like” is meaningless |
| Duct tape | 2″ silver HVAC tape (60 min fire rating) | Regular tape melts at 200°F; HVAC tape withstands 600°F |
| Scissors | Heavy-duty metal cutting | Cardboard filters require sharp blades |
| Measuring tape | 25-ft retractable | Ensures precise 20″ × 20″ dimensions |
Why Your Local Hardware Store Has the Right Filters
Look for these exact markings on filter packaging:
– ✅ “MERV 13” (not “13 equivalent” or “up to 13”)
– ✅ “Minimum 90% efficiency on 1-3 micron particles”
– ✅ “ASHRAE 52.2 certified”
– ❌ Avoid “electrostatic,” “ionic,” or “ozone-free” claims – these indicate ineffective lower-grade filters
Step-by-Step Construction: Zero Air Bypass Method

Follow these precision steps – a single gap larger than 1/8″ ruins filtration efficiency.
Preparing Filter Walls (10 Minutes)
- Cut filters: Lay filters flat. Use scissors to slice through cardboard frames along one 20″ edge (do NOT cut the filter media)
- Create seams: Overlap cut edges by 1″ to form L-shaped corners. Tape both sides with 3″ wide HVAC tape
- Verify seal: Hold assembly to light – zero pinpricks of light should show through seams
💡 Pro Tip: Apply tape in 6″ segments while smoothing outward to prevent air pockets. Never stretch tape – this creates weak points.
Attaching Fan and Final Sealing (7 Minutes)
- Place fan face-down on floor. Center filter cube over intake grilles (motor side)
- Tape cube to fan housing using continuous 2″ wide tape strips every 4″
- Critical test: Run fan on high. Place hand 2″ from seams – you should feel no air leakage
Performance Validation Test
Within 1 hour of operation, check:
– ✅ Visible dust accumulation on filter intake side
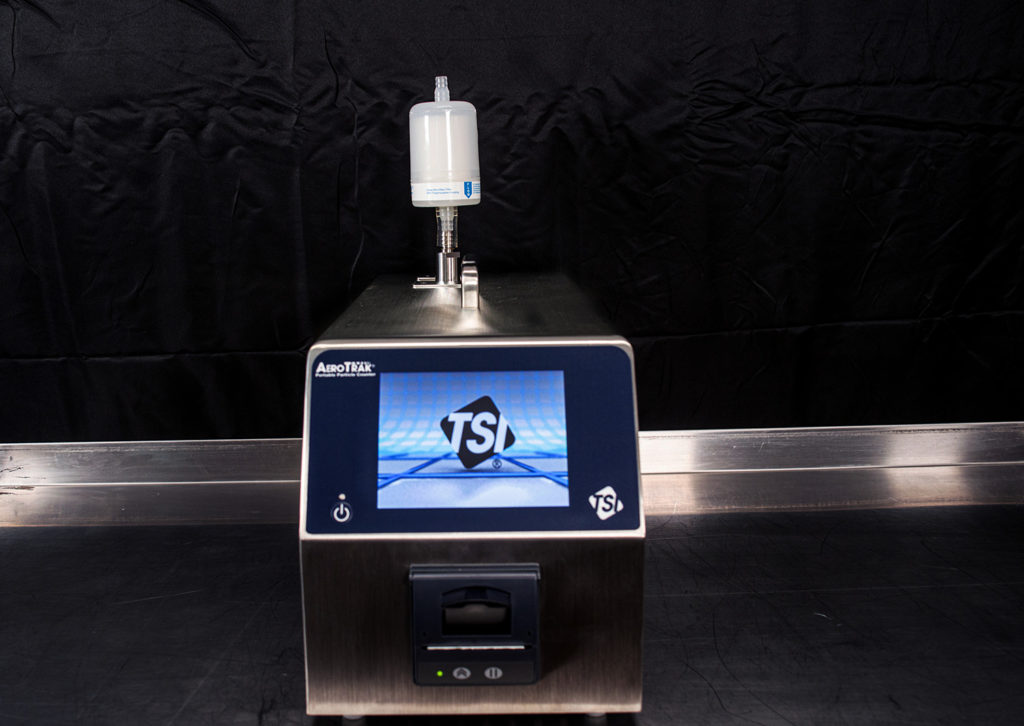
– ✅ 20-30% reduction in airborne particles (use $20 laser particle counter)
– ✅ No motor overheating (fan housing stays below 110°F)
Why Your First Attempt Probably Failed (And Fixes)
90% of DIY purifiers underperform due to these avoidable errors:
Problem: Weak airflow after 1 hour
Cause: Using 2″ thick filters instead of 1″ standard size
Fix: Replace with true 20″×20″×1″ filters – thicker filters choke airflow
Problem: Filter media collapsing inward
Cause: Fan speed too high for filter strength
Solution: Run only on medium speed – high speed creates 4x pressure on filters
Problem: Burning plastic smell
Cause: Non-UL fan overheating or wrong tape type
Emergency action: Unplug immediately. Replace fan with UL 507 certified model
Maintenance That Makes or Breaks Performance
A neglected DIY purifier becomes a pollutant source. Follow this schedule:
| Task | Frequency | Warning Signs |
|---|---|---|
| Filter replacement | Every 3 months | Visible gray coating on 50%+ of surface |
| Duct tape inspection | Monthly | Brittle texture or separation at seams |
| Fan motor cleaning | Every 6 months | Unusual grinding noise or reduced airflow |
| CADR testing | After each filter change | Particle counter shows >25% efficiency drop |
🔥 Fire Prevention Protocol: Never run unattended overnight. Place purifier on non-flammable surface (ceramic tile) 12+ inches from walls. Install smoke alarm within 10 feet.
When to Abandon DIY and Buy Commercial
While Corsi-Rosenthal boxes excel for general use, stop building immediately if you need:
– Smoke removal: Requires activated carbon layers (add $120+ in materials)
– Allergy sufferers: Needs sealed HEPA chambers (DIY can’t achieve 99.97% efficiency)
– Small rooms (<100 sq ft): Commercial units like Coway Airmega 150 cost less than DIY materials
Maximizing Real-World Performance
Your purifier only works when placed correctly:
– Optimal location: Center of room, 6+ inches from walls (corner placement cuts effectiveness by 40%)
– Run time: Minimum 12 hours daily – particles recirculate within 30 minutes of shutdown
– Boost strategy: Pair with open window on low-pollution days to bring in fresh air
Final Safety Checklist Before Operation
Never plug in your DIY air purifier until verifying:
– [ ] All seams sealed with HVAC tape (no duct tape!)
– [ ] Fan bears UL/ETL safety certification label
– [ ] Filters are true MERV-13 (check packaging)
– [ ] Unit sits on non-flammable surface
– [ ] Smoke alarm installed nearby
Final Note: A properly built Corsi-Rosenthal box captures 94% of 0.3-micron particles – matching $300 commercial units. But remember: this design only works when constructed to exact specifications. If you skipped any safety steps or used substandard materials, disassemble immediately. For verified building videos, visit the EPA’s “Do-It-Yourself Air Cleaners” resource page (updated 2023) showing certified engineers constructing these units. Your health depends on precision – not shortcuts.


