
Discovering your new MOOKA air purifier in the box brings excitement about cleaner indoor air, but proper setup makes all the difference in performance. These compact yet powerful units remove dust, allergens, and airborne particles from your home or office environment, yet their effectiveness depends entirely on correct installation and usage. Whether you own the M01, M200L, or any other MOOKA model, understanding the precise operation techniques ensures you maximize your investment from day one. This comprehensive guide walks you through every step from unboxing to long-term maintenance, so you can breathe easier knowing your air purifier works at peak efficiency.
Before diving into specifics, recognize that MOOKA manufactures multiple air purifier models including the M01, M02, M03, M200L, M05, PR1, TL2867, KJ190L, KJ217, E-300L, B-D02L, KJ067L, and AP-S0610L—each with slightly different features. The fundamental setup and operation principles, however, remain consistent across their product line. Throughout this guide, you’ll learn universal practices that apply to virtually any MOOKA air purifier, ensuring you can confidently operate your specific model.
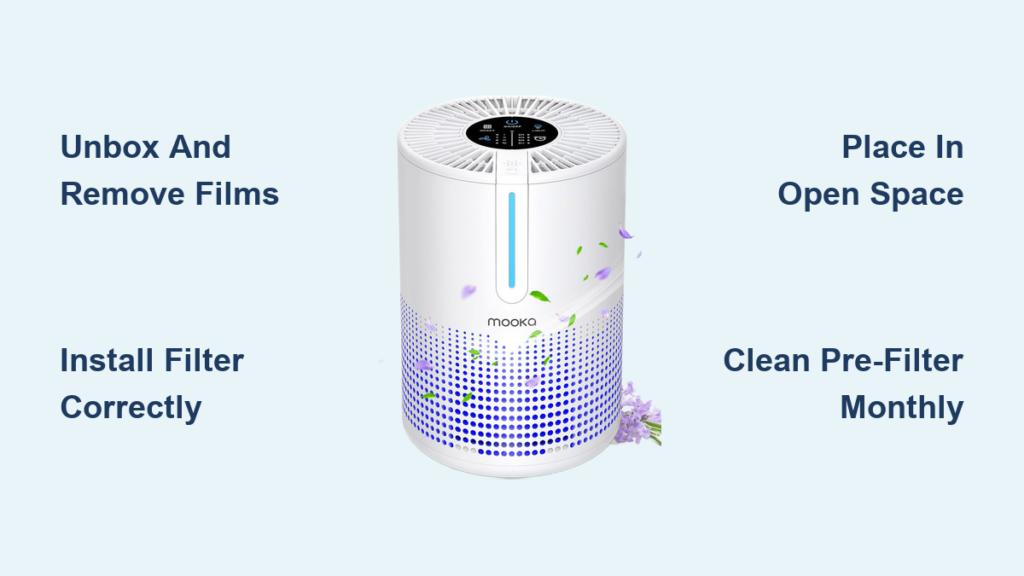
Unbox and Prepare Your MOOKA Air Purifier
Proper preparation before first use prevents common setup mistakes that compromise your MOOKA air purifier’s performance. Begin by selecting a clean, spacious area near your intended operating location where you can work comfortably. Carefully remove all packaging materials, paying special attention to protective films covering the exterior surfaces and control panel. These thin plastic films prevent shipping scratches but must be completely removed before operation to ensure proper sensor accuracy and heat dissipation.
Equally crucial is removing all internal packaging materials. MOOKA air purifiers ship with filters sealed in plastic to maintain cleanliness during transport, and some models include cardboard supports or foam inserts securing the filter. Locate the filter compartment—typically accessible from the back or side—and remove every trace of packaging material. Leaving these items in place restricts airflow and can damage the fan motor during operation.
Take 30 seconds to inspect your unit for shipping damage before proceeding. Check for dents, scratches, or missing components. If you notice any damage, contact the manufacturer or retailer immediately rather than attempting to operate the device. This simple inspection prevents troubleshooting headaches later that stem from initial shipping damage.
Install the Filter Correctly

Filter installation represents the single most critical setup step for your MOOKA air purifier. Most models feature a combination filter design with a pre-filter layer plus primary HEPA or activated carbon filtration medium. This multi-layer approach captures both large particles like dust and hair along with smaller allergens and microscopic pollutants.
Locate your specific model’s filter compartment, which may require removing a back panel, opening a side door, or accessing an internal chamber. Remove the filter from its sealed packaging and check for directional indicators on the filter frame. Align the filter carefully according to these arrows, ensuring it seats fully and evenly within the compartment. Installing the filter backward significantly reduces purification efficiency and strains the fan motor.
After positioning the filter correctly, secure the compartment cover firmly without excessive force. If the cover doesn’t close properly, reposition the filter before proceeding. Some models require a filter reset procedure through the control panel to clear pre-installed filter timers—check your manual for model-specific instructions.
Consider running a brief “burn-in” period at maximum speed for several hours. This practice removes residual manufacturing oils from the filter media, allowing it to reach optimal purification efficiency faster. While not mandatory, this step makes a noticeable difference in air quality during the initial weeks of operation.
Position Your Air Purifier for Maximum Efficiency

Strategic placement directly impacts how effectively your MOOKA air purifier cleans your indoor air. Avoid the common mistake of tucking your unit into a corner or behind furniture, which creates dead zones where polluted air circulates poorly.
Place your purifier in the most open location possible within your intended coverage area, providing clear access to both air intake and exhaust vents. Maintain at least 12 inches of clearance around the unit from walls and large furniture pieces—this prevents the purifier from drawing in already-circulated air and allows proper heat dissipation. Placing the unit against a wall or inside a closed cabinet causes motor overheating and triggers automatic shutdown protections.
For larger spaces exceeding your model’s specified coverage area, consider purchasing additional MOOKA units for zoned coverage rather than expecting one unit to clean the entire space. The manufacturer’s room coverage rating provides essential guidance, but remember that actual performance varies based on ceiling height, room layout, and your specific air quality concerns.
Keep your purifier away from heat sources, humidity, and direct sunlight. Positioning near heating vents, air conditioners, or in bathrooms damages internal electronics and affects filter performance. Direct sunlight degrades plastic components over time and may affect sensor accuracy on models with air quality monitoring.
Master the Control Panel and Settings
Understanding your MOOKA air purifier’s controls transforms it from a simple on-off device into a sophisticated air management system. Most models feature these essential control functions:
- Power function: Activates the unit from standby mode, typically with a dedicated button
- Fan speed selection: Offers multiple settings (low, medium, high) with some models including automatic mode
- Sleep mode: Reduces fan speed to quietest setting, dims or turns off display lights
- Timer programming: Automates operation schedules for energy efficiency
- Air quality display: Shows current pollution levels through color-coded indicators
During normal daily operation, medium fan speed typically provides the best balance between purification efficiency and noise levels. Switch to high speed when you need rapid air cleaning—such as after cooking or when allergens peak. Use low speed with sleep mode activated for quiet overnight operation in bedrooms.
Program your timer to run the purifier before you wake up, throughout the day when you’re away, or shut off at bedtime. This automation extends filter life by preventing unnecessary operation while maintaining optimal air quality when you need it most.
Maintain Your MOOKA Air Purifier
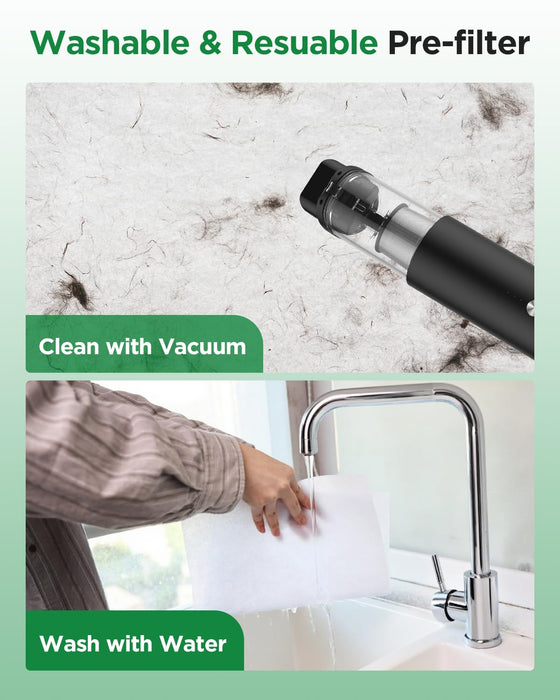
Regular maintenance preserves your purifier’s performance throughout its operational lifespan. Follow these essential maintenance procedures:
- Pre-filter cleaning: Vacuum or wash the pre-filter monthly (more frequently with pets or in dusty environments)
- Filter replacement: Replace primary filters every 6-12 months depending on usage intensity
- Exterior cleaning: Wipe outer surfaces with a soft, dry cloth every few weeks
- Vent inspection: Periodically check air intake and exhaust vents for obstructions
When replacing filters, always purchase genuine MOOKA replacement filters designed for your specific model. Aftermarket filters often feature inferior filtration media that reduces purification efficiency or doesn’t fit properly, allowing unfiltered air to bypass the system.
Troubleshoot Common Issues
Even with proper setup, you may occasionally encounter issues with your MOOKA air purifier. Address these common problems:
- Unit won’t turn on: Verify the outlet works with another device and check power cord connections
- Unusual noises: Inspect for airflow obstructions and ensure filter is properly installed
- Reduced airflow: Check filter condition and verify all vents are clear of obstructions
- Error codes: Consult your manual to interpret specific codes and recommended actions
- Unexpected shutdowns: Allow unit to cool for 15 minutes and check for airflow restrictions
Most error conditions resolve by power-cycling the unit—turning it off, unplugging for 30 seconds, then restarting. If problems persist, consult your model-specific manual for advanced troubleshooting or contact MOOKA customer support.
Extend Your Purifier’s Lifespan
Take these proactive steps to maximize your MOOKA air purifier’s operational life:
- Operate consistently at moderate speeds rather than frequent on/off cycling
- Position away from direct sunlight, heating vents, and extreme temperature environments
- Store properly during extended non-use with clean filters and in climate-controlled conditions
- Register your product with the manufacturer to access warranty support
By following these setup, operation, and maintenance practices, you’ll ensure your MOOKA air purifier delivers reliable, efficient air purification for years. The initial investment in proper care pays dividends in cleaner air, lower operating costs, and extended device lifespan—making your investment in indoor air quality truly worthwhile.


