
Dry winter air making your throat scratchy and furniture crack? Your Ecobee thermostat holds the solution—but only if you bypass the common wiring trap that forces humidifiers to run solely during heating cycles. Most homeowners assume their whole-house humidifier must activate only when the furnace kicks on, leaving summer air equally parched. This critical misconfiguration means you’re missing out on Ecobee’s smart humidity control during cooling seasons and fan-only operation. By following these precise wiring and configuration steps, you’ll create an independent humidification circuit that maintains 35-40% relative humidity whether it’s 95°F outside or 15°F. Let’s transform your Ecobee into a year-round comfort controller.
Essential Hardware Requirements Checklist
Before touching any wires, gather these non-negotiable components. Your Ecobee thermostat must be a model with accessory terminals (SmartThermostat Enhanced, SmartThermostat Premium, or older Ecobee4). Crucially, your whole-house humidifier must be 24V-triggered and 120V-powered—verify this on the unit’s label before proceeding. You’ll need 18-22 gauge low-voltage wire in two distinct colors (red and brown recommended), plus a short 3-4 inch jumper wire for the power bridge. Wire nuts and electrical tape are mandatory for moisture-resistant connections near the furnace. While not strictly required, a multimeter prevents dangerous guesswork by confirming 24V presence before humidifier activation. Skip the label maker at your peril; photographing wire positions before disconnecting saves hours of troubleshooting later.
Create Constant 24V Power Bridge
Why Your Humidifier Won’t Activate Without This Step
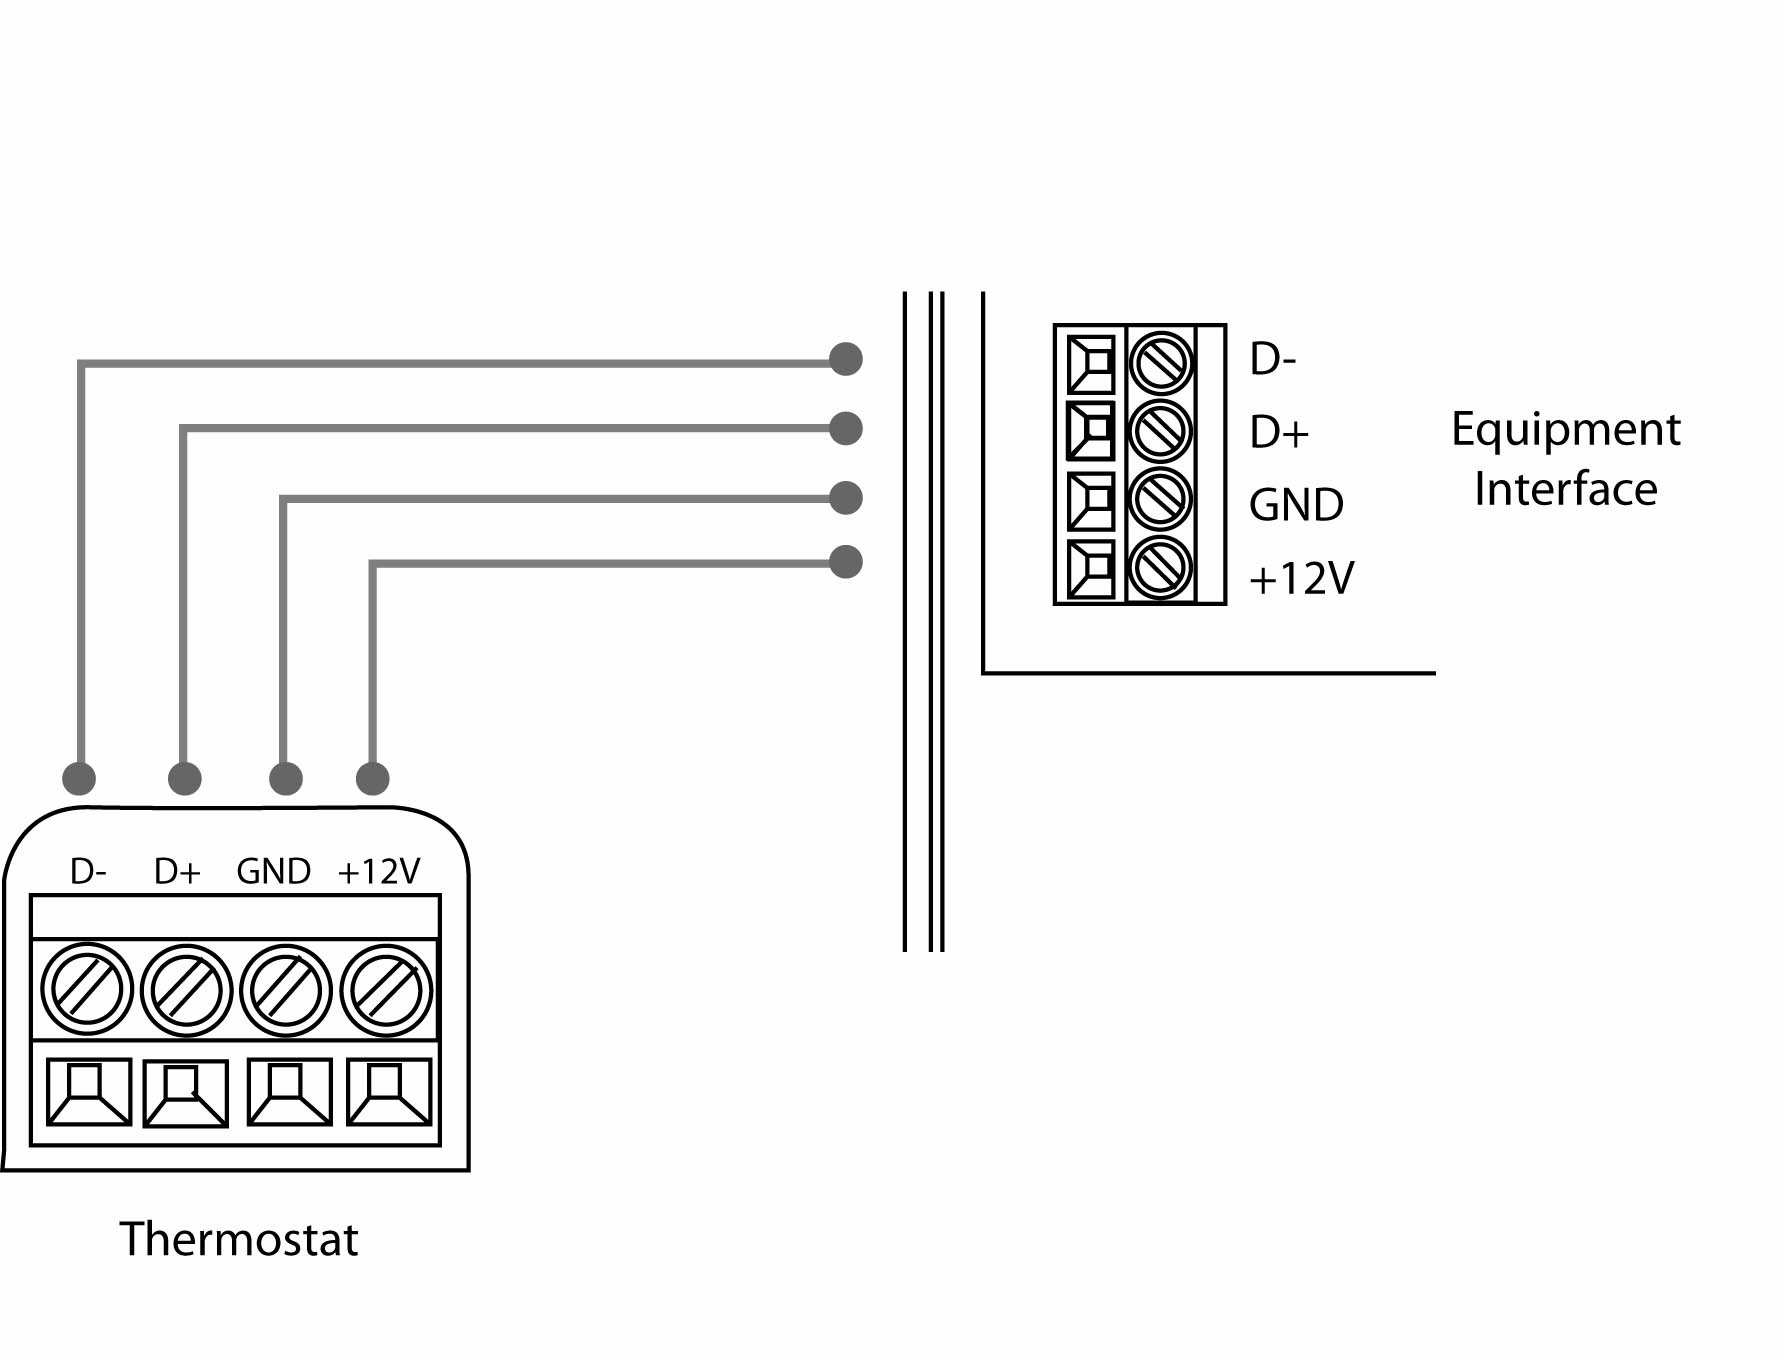
Traditional furnace wiring ties humidifier operation exclusively to heating cycles through the control board’s 24V circuit. Your Ecobee’s accessory terminals solve this—but only when you establish a dedicated power source. Locate the Ecobee Equipment Interface mounted near your furnace blower compartment. With furnace power OFF at the breaker, connect a short jumper wire between the R/H terminal (providing constant 24V) and the ACC1r terminal on the interface. This creates an independent 24V pathway that doesn’t rely on heating calls. Use green wire if available—it matches Ecobee’s reference diagrams and prevents confusion during future maintenance. Before proceeding, restore power temporarily and verify 24V between ACC1r and COM terminals with your multimeter. No voltage here means your humidifier will never activate regardless of thermostat settings.
Wire Humidifier Control Circuit
Connect Primary Trigger Wire to Ecobee
Take your red low-voltage wire and strip 1/4 inch from both ends. Connect one end securely to the ACC1 terminal on the Ecobee Equipment Interface—this is the “switch” that activates when humidity drops. Route the wire toward your humidifier, avoiding sharp metal edges that could damage insulation. At the humidifier, attach the other end to either of the two low-voltage trigger leads (polarity doesn’t matter for this simple circuit). Twist connections clockwise before securing with wire nuts, then wrap thoroughly with electrical tape to prevent moisture ingress where condensation forms. Never daisy-chain wires; each connection point must be individually insulated.
Complete Circuit to Furnace Control Board
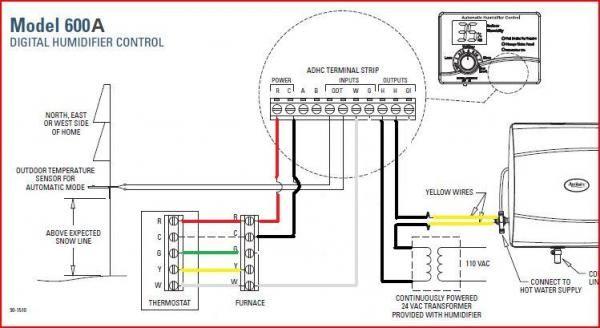
Your brown wire bridges the humidifier to the furnace’s common ground. Connect one end to the humidifier’s remaining trigger lead, then route it toward the furnace control board. Here’s where most DIYers fail: the 24V/COM terminal typically has multiple wires already attached. Instead of forcing your brown wire under the terminal screw (which causes loose connections), add it to the existing bundle using a new wire nut. If your furnace lacks a dedicated 24V COM terminal, you’ll need the advanced transformer solution covered later. Double-check that all COM connections feel solid—wiggle tests prevent intermittent operation that mimics equipment failure.
Configure Ecobee Settings for Independent Operation

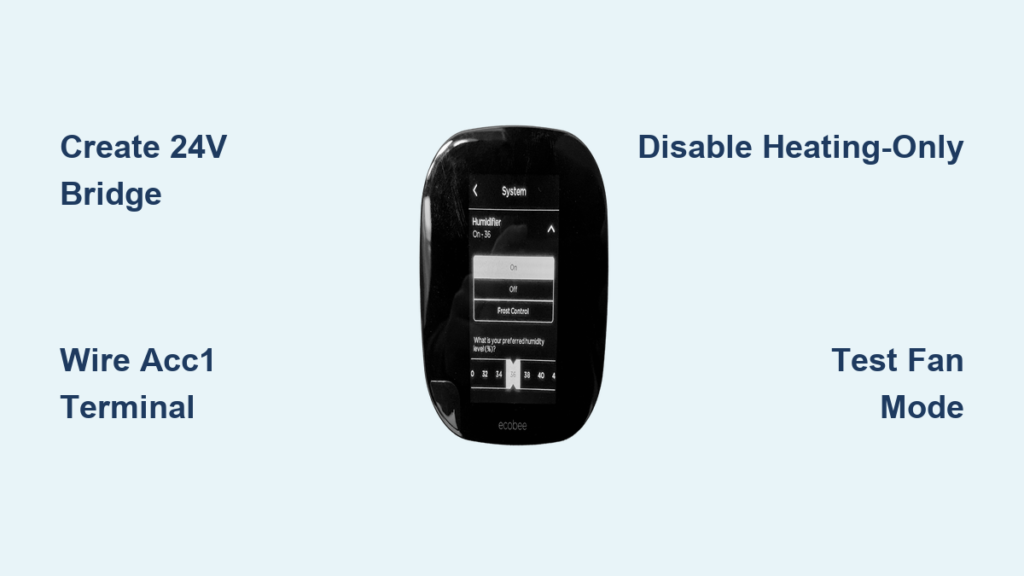
Disable Heating-Only Humidification
This single setting makes or breaks year-round functionality. Navigate your Ecobee screen: Main Menu → Settings → Installation Settings → Equipment → Humidify only while Heating. The default “Yes” setting is why your humidifier stays silent during summer. Change this to “No” immediately. This instructs Ecobee to trigger humidification based solely on humidity levels, not heating calls. While here, verify your humidifier type is correctly set under Humidifier Type (typically “Evaporative” for whole-house units). Incorrect type selection causes improper runtime calculations.
Validate Operation with Fan-Only Test
Don’t wait for winter to confirm success. Set your Ecobee’s humidity target 10% above the current reading, then switch to Fan Only mode. Within 30 seconds, you should hear the humidifier’s solenoid valve click open and see water flowing through the distribution tray. Check for proper drainage at the floor drain—stagnant water indicates wiring errors or clogged lines. If the humidifier doesn’t activate, immediately check three things: ACC1r-to-R/H bridge security, 24V at humidifier leads, and Ecobee’s status screen showing “Humidifier On.” Never assume settings took effect without physical verification.
Troubleshooting Critical Failure Points
No Activation Despite Correct Settings
When your humidifier stays silent, perform this diagnostic sequence: First, confirm Ecobee shows “Humidifier On” during test mode—if not, revisit the “Humidify only while Heating” setting. Next, measure voltage between ACC1 and COM at the Equipment Interface with humidifier active; no 24V here means faulty jumper or terminal connection. Finally, check the humidifier’s 120V power—many units have independent shutoff switches near the unit. A frequent oversight is overlooking the humidifier’s built-in solenoid valve; if it’s clogged with mineral deposits, no wiring fix will help.
Intermittent Operation During Heating Cycles
Random on/off behavior often traces to overloaded COM terminals. Furnace control boards have current limits—adding humidifier wiring can exceed this if multiple devices share one terminal. Solution: Identify secondary COM terminals on your control board (often labeled COM2 or C2) and redistribute connections. If unavailable, install a 24V relay ($8 at HVAC suppliers) that handles the humidifier load while Ecobee only triggers the relay coil. Also inspect wire nuts at the humidifier; thermal cycling loosens connections near heat sources.
Advanced Configuration for Non-Standard Systems
When Furnace Lacks 24V Output
If your older furnace only provides 120V at the control board, install a step-down transformer. Mount a 120V-to-24V transformer ($15) near the furnace, connecting its primary leads to 120V furnace power. Attach the transformer’s secondary leads to create a new 24V circuit: one wire to ACC1r (replacing the R/H bridge), the other to COM. Then connect ACC1 to the humidifier as before. This isolates the humidifier circuit from furnace voltage limitations while maintaining Ecobee control.
Optimizing Seasonal Humidity Targets
Set Ecobee to maintain 40% humidity when outdoor temps stay above 35°F. Below 20°F, drop to 30% to prevent window condensation—a common side effect of over-humidification in extreme cold. Enable Ecobee’s “Follow Me” sensor feature so humidity adjusts based on occupied rooms rather than the thermostat’s location. During summer cooling, set minimum humidity to 45% to prevent over-drying from AC operation. These dynamic adjustments maximize comfort while minimizing energy waste from unnecessary humidifier runtime.
Critical Safety Verification Protocol
Always power down at both furnace and Ecobee breakers before wiring. Test terminals with a multimeter before touching—residual voltage causes dangerous shorts. When connecting to COM terminals, ensure the wire bundle doesn’t exceed 50% of the terminal’s capacity; overcrowding causes arcing. After installation, inspect connections monthly for corrosion—especially near humidifier drain pans where mineral deposits accelerate wire degradation. If your furnace displays error codes post-installation, immediately disconnect humidifier wires; this indicates circuit overload requiring professional assessment.
Your Ecobee now intelligently manages humidity regardless of season or HVAC mode. This independent circuit eliminates the “winter-only” limitation of traditional setups, providing consistent moisture levels that protect hardwood floors, reduce static shocks, and ease respiratory irritation year-round. Remember to replace humidifier water panels quarterly in hard water areas—mineral buildup will sabotage even perfect wiring. For ongoing optimization, check Ecobee’s humidity history graph weekly; sudden drops indicate wiring issues before they cause discomfort. With this setup complete, you’ve unlocked one of smart thermostats’ most overlooked features: truly climate-aware indoor air quality.


