
That dry, scratchy throat and static electricity zapping you every time you touch a doorknob? Your humidifier pad probably needs replacing. Most homeowners don’t realize this simple component controls their entire home’s comfort level—and it’s something you can swap out yourself in under 30 minutes. Learning how to replace humidifier pad correctly prevents costly HVAC damage while restoring ideal indoor humidity levels between 30-50%.
Whether you’re dealing with reduced humidity output, white dust around vents, or it’s simply been a year since your last change, this guide walks you through the exact process. You’ll learn which tools you need, safety steps that prevent costly mistakes, and pro tips that extend your humidifier’s life. Skip the $150 service call—this how to replace humidifier pad tutorial gives you the confidence to handle it yourself.
Safety First: Power Down Your System Before Pad Replacement
Shut Off Power and Water Supply Immediately
Before touching anything, flip the breaker for both your humidifier and HVAC system at the electrical panel. Don’t rely on the thermostat alone—this dual shutdown prevents electrical shock and furnace damage. Next, locate the small copper water line feeding your humidifier and turn its valve clockwise until fully closed. These two critical steps eliminate the top risks during how to replace humidifier pad procedures: electrocution and water damage from accidental line breaks.
Allow Components to Cool Before Working
Wait 15-20 minutes for furnace and humidifier parts to cool completely. These components reach scalding temperatures during operation and can cause severe burns if handled prematurely. While waiting, gather your replacement pad (must match your model exactly), Phillips and flathead screwdrivers, adjustable wrench, small bucket, work gloves, and white vinegar. Having everything ready prevents rushed mistakes when working in tight HVAC spaces.
Access Your Humidifier Unit Without Damage
:max_bytes(150000):strip_icc()/anatomy-of-the-home-furnace-humidifier-1824773color-d41575bdba834fd59ac29178949a1e2a.png)
Locate and Open Your Specific Humidifier Model
Your humidifier mounts directly on either the return air duct (where air enters the furnace) or supply duct (where heated air exits). Look for a rectangular metal box roughly the size of a microwave near your furnace. Most covers lift straight off, but some require removing 2-4 screws on the front panel. Keep screws secure in a container—losing them in ductwork creates expensive retrieval headaches later.
Identify Your Frame Type for Correct Pad Removal
Inside the unit, you’ll see one of three common frame designs: A U-shaped metal frame (Aprilaire/Space-Gard models), a rotating drum assembly (Honeywell units), or a simple slide-out rectangle (Bryant/Carrier systems). This identification step is crucial—you must know your frame type before attempting how to replace humidifier pad. Note any model numbers on the housing to verify pad compatibility at the store.
Remove Old Pad Safely Without Breaking Components
Slide Out the Frame Assembly Correctly
Grasp the water panel frame firmly and pull straight toward you until it clears the tracks. Most frames slide smoothly, but mineral buildup may cause sticking. If resistance occurs, gently wiggle the frame side-to-side while applying steady pressure—never force it. Keep your bucket positioned underneath since standing water often spills during removal. Forcing a stuck frame can bend tracks, requiring expensive professional repairs.
Extract the Used Pad Without Damage
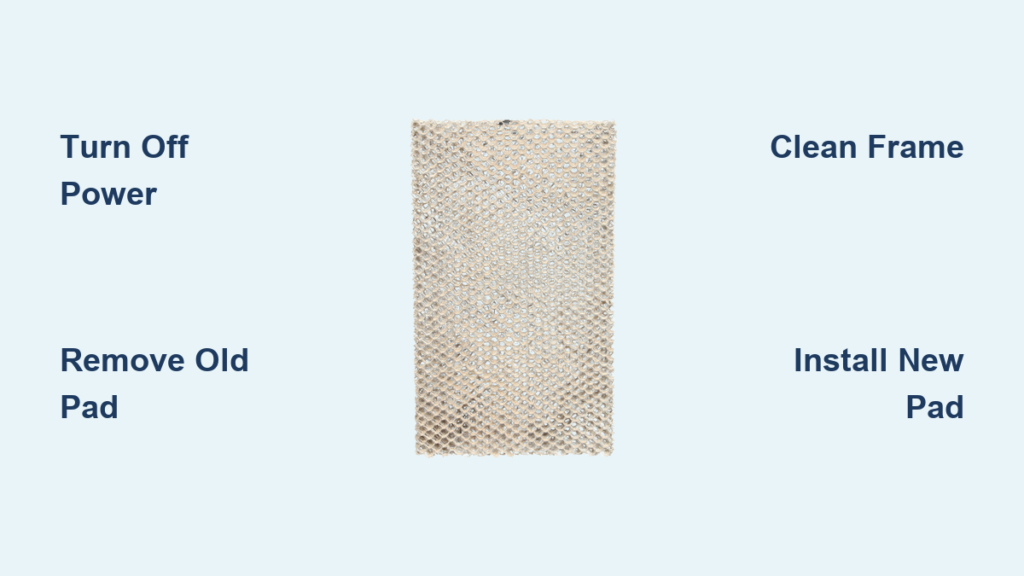
Examine how the old pad sits in the frame before removal—it may wrap around mesh supports, clip into retainers, or rest on rods. Most pads have directional arrows or “TOP” markings that must be replicated during new installation. As you remove it, note the heavy white mineral crust coating the surface. This scale buildup is why regular pad replacement is critical; it blocks evaporation and strains your furnace.
Clean Frame and Housing Thoroughly for Optimal Performance
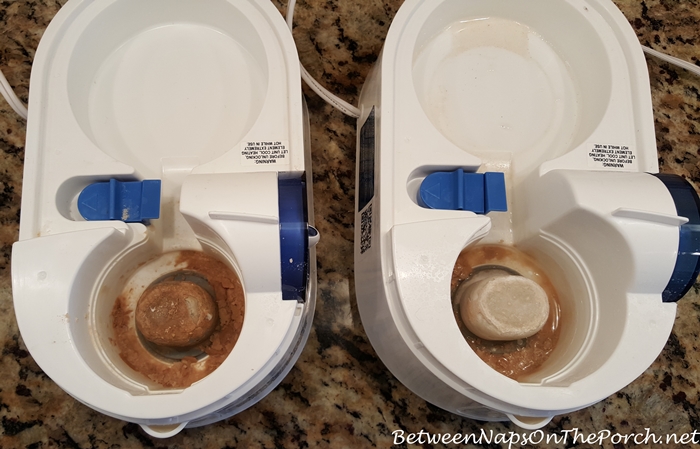
Remove Mineral Buildup With Vinegar Soak
Submerge the metal frame in a 50/50 white vinegar and warm water solution for 15-30 minutes. This dissolves mineral deposits that reduce efficiency by up to 50% according to HVAC performance data. While soaking, wipe the humidifier interior with a damp cloth, paying special attention to the water distribution tray above the frame. Clogged trays cause uneven water flow that drowns new pads prematurely.
Rinse and Dry Components Completely
After soaking, gently scrub the frame with a soft brush to remove stubborn deposits—never use metal tools that scratch protective coatings. Rinse all parts thoroughly with clean water to eliminate vinegar residue. Allow components to air dry completely before reassembly; installing a new pad on damp surfaces traps moisture that breeds mold. This cleaning step extends new pad life by 3-6 months in hard water areas.
Install New Humidifier Pad With Perfect Orientation

Check Pad Directional Markings Before Insertion
Unpack your new pad and locate orientation indicators—Aprilaire pads have colored top marks, Honeywell drum pads show rotation arrows, and most others feature “TOP” labels. Installing backwards is the #1 DIY mistake during how to replace humidifier pad procedures. Backward pads reduce evaporation efficiency by 40% and often cause water overflow that damages flooring. Hold the pad at eye level to verify markings match your frame’s requirements.
Secure Pad in Frame Without Gaps or Compression
Position the new pad exactly as the old one sat, ensuring even distribution with no bunching. Some universal pads require trimming—use scissors to leave 1/4 inch extra on all sides for a snug fit. The pad should rest flat against the frame without gaps (causing dry spots) or compression (reducing water absorption). Test by lightly pressing the center; it should spring back without creasing.
Reassemble and Test Operation Immediately
Slide Frame Back and Restore Utilities
Push the frame with new pad straight back into the humidifier tracks until it seats fully with an audible click. Replace the cover and secure all screws. Turn the water supply valve counterclockwise to restore flow—open it slowly to prevent water hammer. Finally, flip both breakers back on. Skipping this sequence risks leaks or electrical issues during your how to replace humidifier pad process.
Verify Proper Function in 15 Minutes
Run your furnace with the humidistat set to 40% for 10-15 minutes. Watch for these critical signs: Water flowing evenly across the pad surface (not pooling in corners), no dripping from connections, and steady humidity readings on your hygrometer. If you spot overflow or hear grinding noises, shut down immediately and recheck pad orientation. Properly installed pads should show visible moisture without dripping.
When to Replace Your Humidifier Pad Proactively
Recognize Visual Failure Indicators Immediately
Replace pads the moment you see white mineral deposits covering over 30% of the surface, yellow/brown discoloration, or musty odors. Reduced humidity despite correct settings also signals failure—your furnace may run 20% longer to compensate, spiking energy bills. During winter, inspect pads monthly; waiting until complete failure risks mold growth in the humidifier housing.
Follow Hard Water Replacement Schedule
In hard water areas (common in 85% of US homes), replace pads every 3-6 months. With softened water, extend to 6-12 months. Mark the installation date on the humidifier housing with permanent marker—this simple step prevents guessing games during emergencies. Never exceed 12 months regardless of water quality; degraded pads harbor bacteria that circulate through your ducts.
Fix Common Post-Replacement Issues Fast
Stop Water Leaks With Three Quick Checks
If water drips after replacement, first confirm the frame is fully seated in its tracks—misalignment causes 70% of post-installation leaks. Second, verify the water supply line connections are hand-tight (over-tightening cracks fittings). Third, check that the pad isn’t blocking the distribution tray. Clear drain line clogs with a 12-gauge wire if overflow persists.
Restore Low Humidity Output Immediately
Low output usually means the pad is installed backward or the water valve isn’t fully open. Confirm the humidistat reads 5-10% below your target setting—this differential triggers operation. During extreme cold (below 20°F), reduce settings to 25-30% to prevent window condensation. If problems continue, check for furnace short-cycling that doesn’t allow enough runtime for evaporation.
Extend Pad Life With Professional Maintenance
Optimize Seasonal Performance
Use distilled water in portable units to eliminate mineral buildup. For whole-house systems, install an inline water softener if your water exceeds 7 grains of hardness. During summer shutdown, remove the pad, clean thoroughly, and leave the cover ajar 2 inches to prevent mold. This simple step avoids musty odors when restarting in fall.
Maximize Efficiency With Smart Settings
Adjust humidity levels based on outdoor temperatures: 35-40% when above 20°F, 30-35% between 10-20°F, and 25-30% below 10°F. A clean pad improves efficiency by 30-50%, potentially saving 5-15% on heating costs according to energy studies. Never set humidity above 50%—this wastes energy and risks window condensation damage.
Pro Tip: Buy two replacement pads at once—store one in a sealed bag with the model number visible. Note the installation date on the humidifier housing with permanent marker for instant tracking. During hard water seasons, keep vinegar on hand for emergency frame cleanings between full replacements. This simple habit prevents 90% of preventable humidifier failures.


