
Waking up with dry, itchy skin and a scratchy throat? You’re not alone—millions struggle with indoor air that’s too dry, especially during winter months. A properly configured Dreo humidifier can transform your living space into a comfortable oasis, but incorrect setup leads to poor performance and frustrating issues. This guide delivers exactly what you need to know to get your Dreo humidifier running perfectly from day one, including water requirements, smart features, and the setup mistakes 90% of users make.
You’ll learn the precise assembly sequence, why water type matters more than you think, and how to configure advanced smart features most owners never discover. Whether you’re setting up your first humidifier or upgrading to a Dreo model, this step-by-step process ensures optimal performance and prevents common pitfalls.
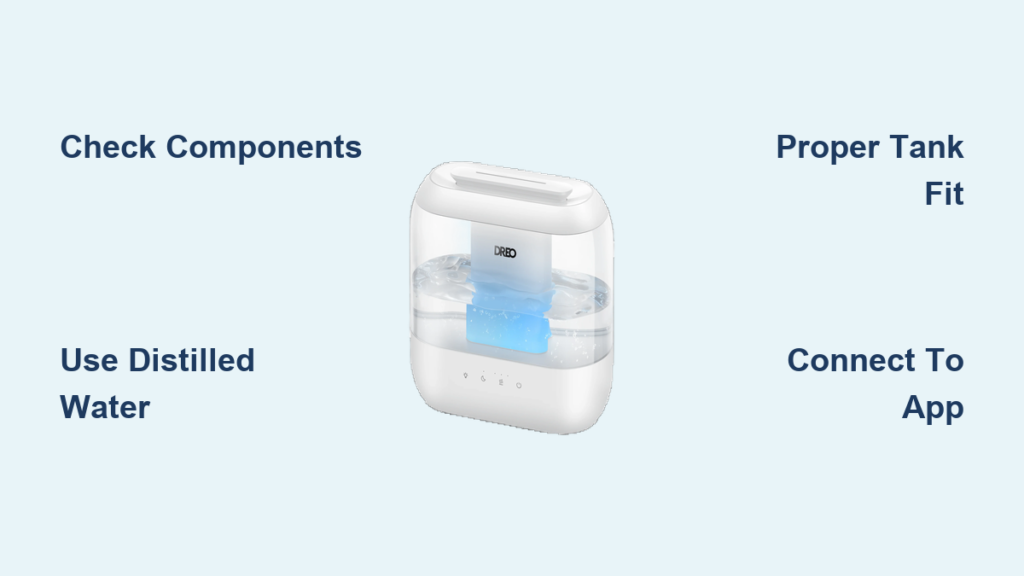
Verify All Components Before Assembly
Don’t skip this critical step—missing parts discovered mid-setup waste valuable time and create unnecessary frustration. Before touching any components, lay everything out on a clean surface and cross-reference with the inventory list.
- Main humidifier base unit with control panel
- Water tank (4-6 liter capacity depending on model)
- 360-degree rotating mist nozzle
- Power adapter with 4-5 foot cord
- User manual and quick reference guide
- Cleaning brush for maintenance
Inspect each piece carefully for shipping damage—cracks in the water tank, a bent mist nozzle, or frayed power cord. Remove all plastic films from the unit and tank before assembly begins. If anything appears damaged or missing, contact Dreo customer support immediately with your proof of purchase.
Position Your Humidifier for Maximum Effectiveness
Your placement choice directly impacts performance—a poorly positioned unit works harder, creates uneven moisture distribution, and risks damaging nearby electronics. Follow these exact placement guidelines for optimal results.
Ideal location specifications:
– Minimum 3 feet from walls, furniture, and electronics
– Stable surface supporting 5-6 pounds when tank is full
– Away from direct sunlight and heat sources
– Near electrical outlet (cord length: 4-5 feet)
– Room temperature between 41°F-95°F (5°C-35°C)
Pro tip: Place your Dreo on a waterproof mat or tray to protect surfaces from accidental spills or condensation. Avoid carpeted floors—moisture can wick into fibers and create mold issues.
Assemble Components in Correct Sequence
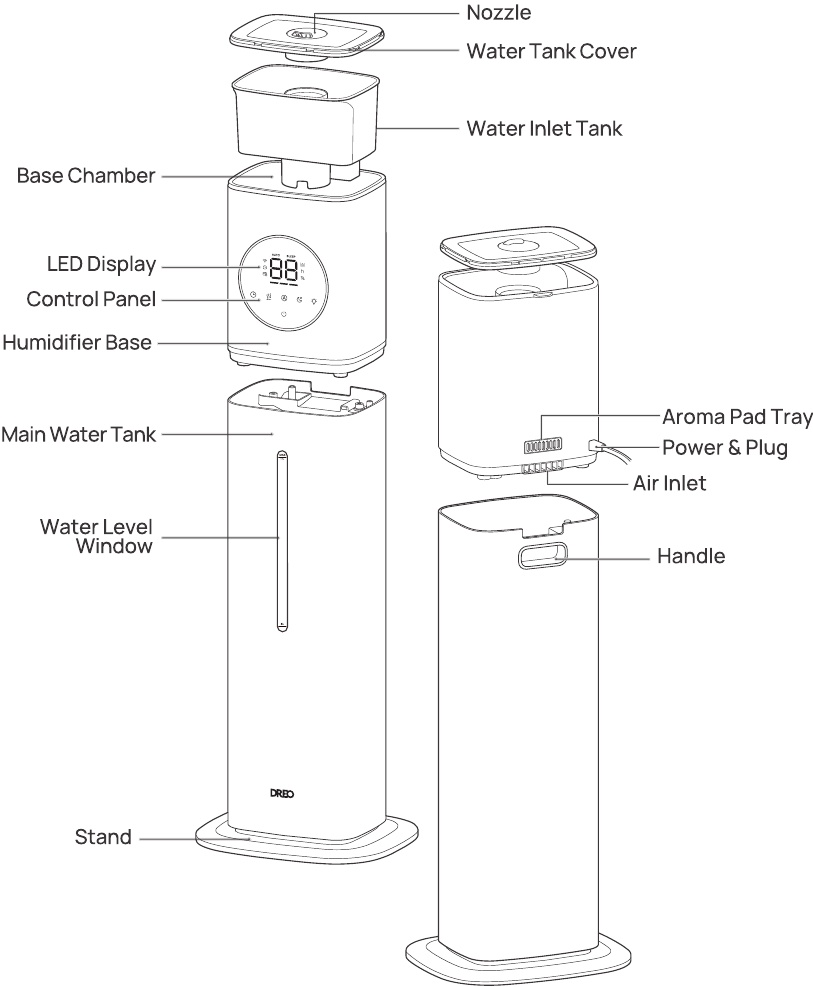
Connect Base Unit and Water Tank Properly
- Position base unit with control panel facing your primary viewing direction
- Confirm water sensor probe is clean and unobstructed
- Ensure rubber feet make full surface contact for stability
- Verify tank cap (located on tank bottom) is tightly sealed
- Align tank grooves with base unit guides and lower gently
- Check tank sits level without wobbling—adjust if needed
Critical mistake to avoid: Forcing the tank into position. If it doesn’t slide smoothly, realign before proceeding. A misaligned tank causes leaks and triggers false low-water alerts.
Install Mist Nozzle for Optimal Coverage
- Align nozzle base with top tank slot—look for alignment markers
- Press down firmly until you hear a distinct click
- Test 360-degree rotation by gently turning nozzle left and right
- Point nozzle away from electronics and toward room center
Filter models only: Rinse filter under cool water for 30 seconds, shake gently to remove excess water, then install following directional arrows on filter housing. A dry filter causes white dust and reduces efficiency.
Fill Water Tank Using Correct Technique
Why Water Type Affects Performance
Use distilled or demineralized water to prevent white mineral dust and internal buildup. Tap water works only if your local supply is low in minerals (check your water report). Never add hot water, essential oils, or additives unless your specific Dreo model explicitly allows it—doing so voids your warranty and damages internal components.
Step-by-Step Filling Process
- Power off and unplug unit completely before handling tank
- Lift tank straight up using handle—don’t tilt
- Unscrew cap counterclockwise—set aside carefully
- Fill slowly to MAX line—never overfill (typically 4-6 liters)
- Screw cap on tightly clockwise until resistance increases
- Invert tank and reinstall on base—check for proper seating
- Verify no gaps exist between tank and base unit
Tank capacity tip: Larger tanks (6L) run 20-30 hours on low mist, while smaller tanks (4L) last 8-12 hours on high mist. Choose your model based on room size and how often you want to refill.
Power Up and Configure Essential Settings
First-Time Startup Sequence
Connect power adapter to DC input port, then plug into wall outlet. Your Dreo emits a brief startup beep indicating successful initialization—no sound means check connections.
Master Control Panel Functions
- Power button: Single press on, hold 3 seconds off
- Mode cycling: Auto → Manual → Sleep modes (press mode button)
- Humidity range: Set target between 30%-90% (use +/- buttons)
- Mist levels: Adjust Low/Medium/High/Auto as needed
- Timer: Program 1-12 hour auto-shutoff periods
Display shows current room humidity, target setting, mist level, timer countdown, and water level warnings. If display remains blank after power-up, perform a factory reset by holding power and mode buttons for 10 seconds.
Connect Dreo App for Smart Control
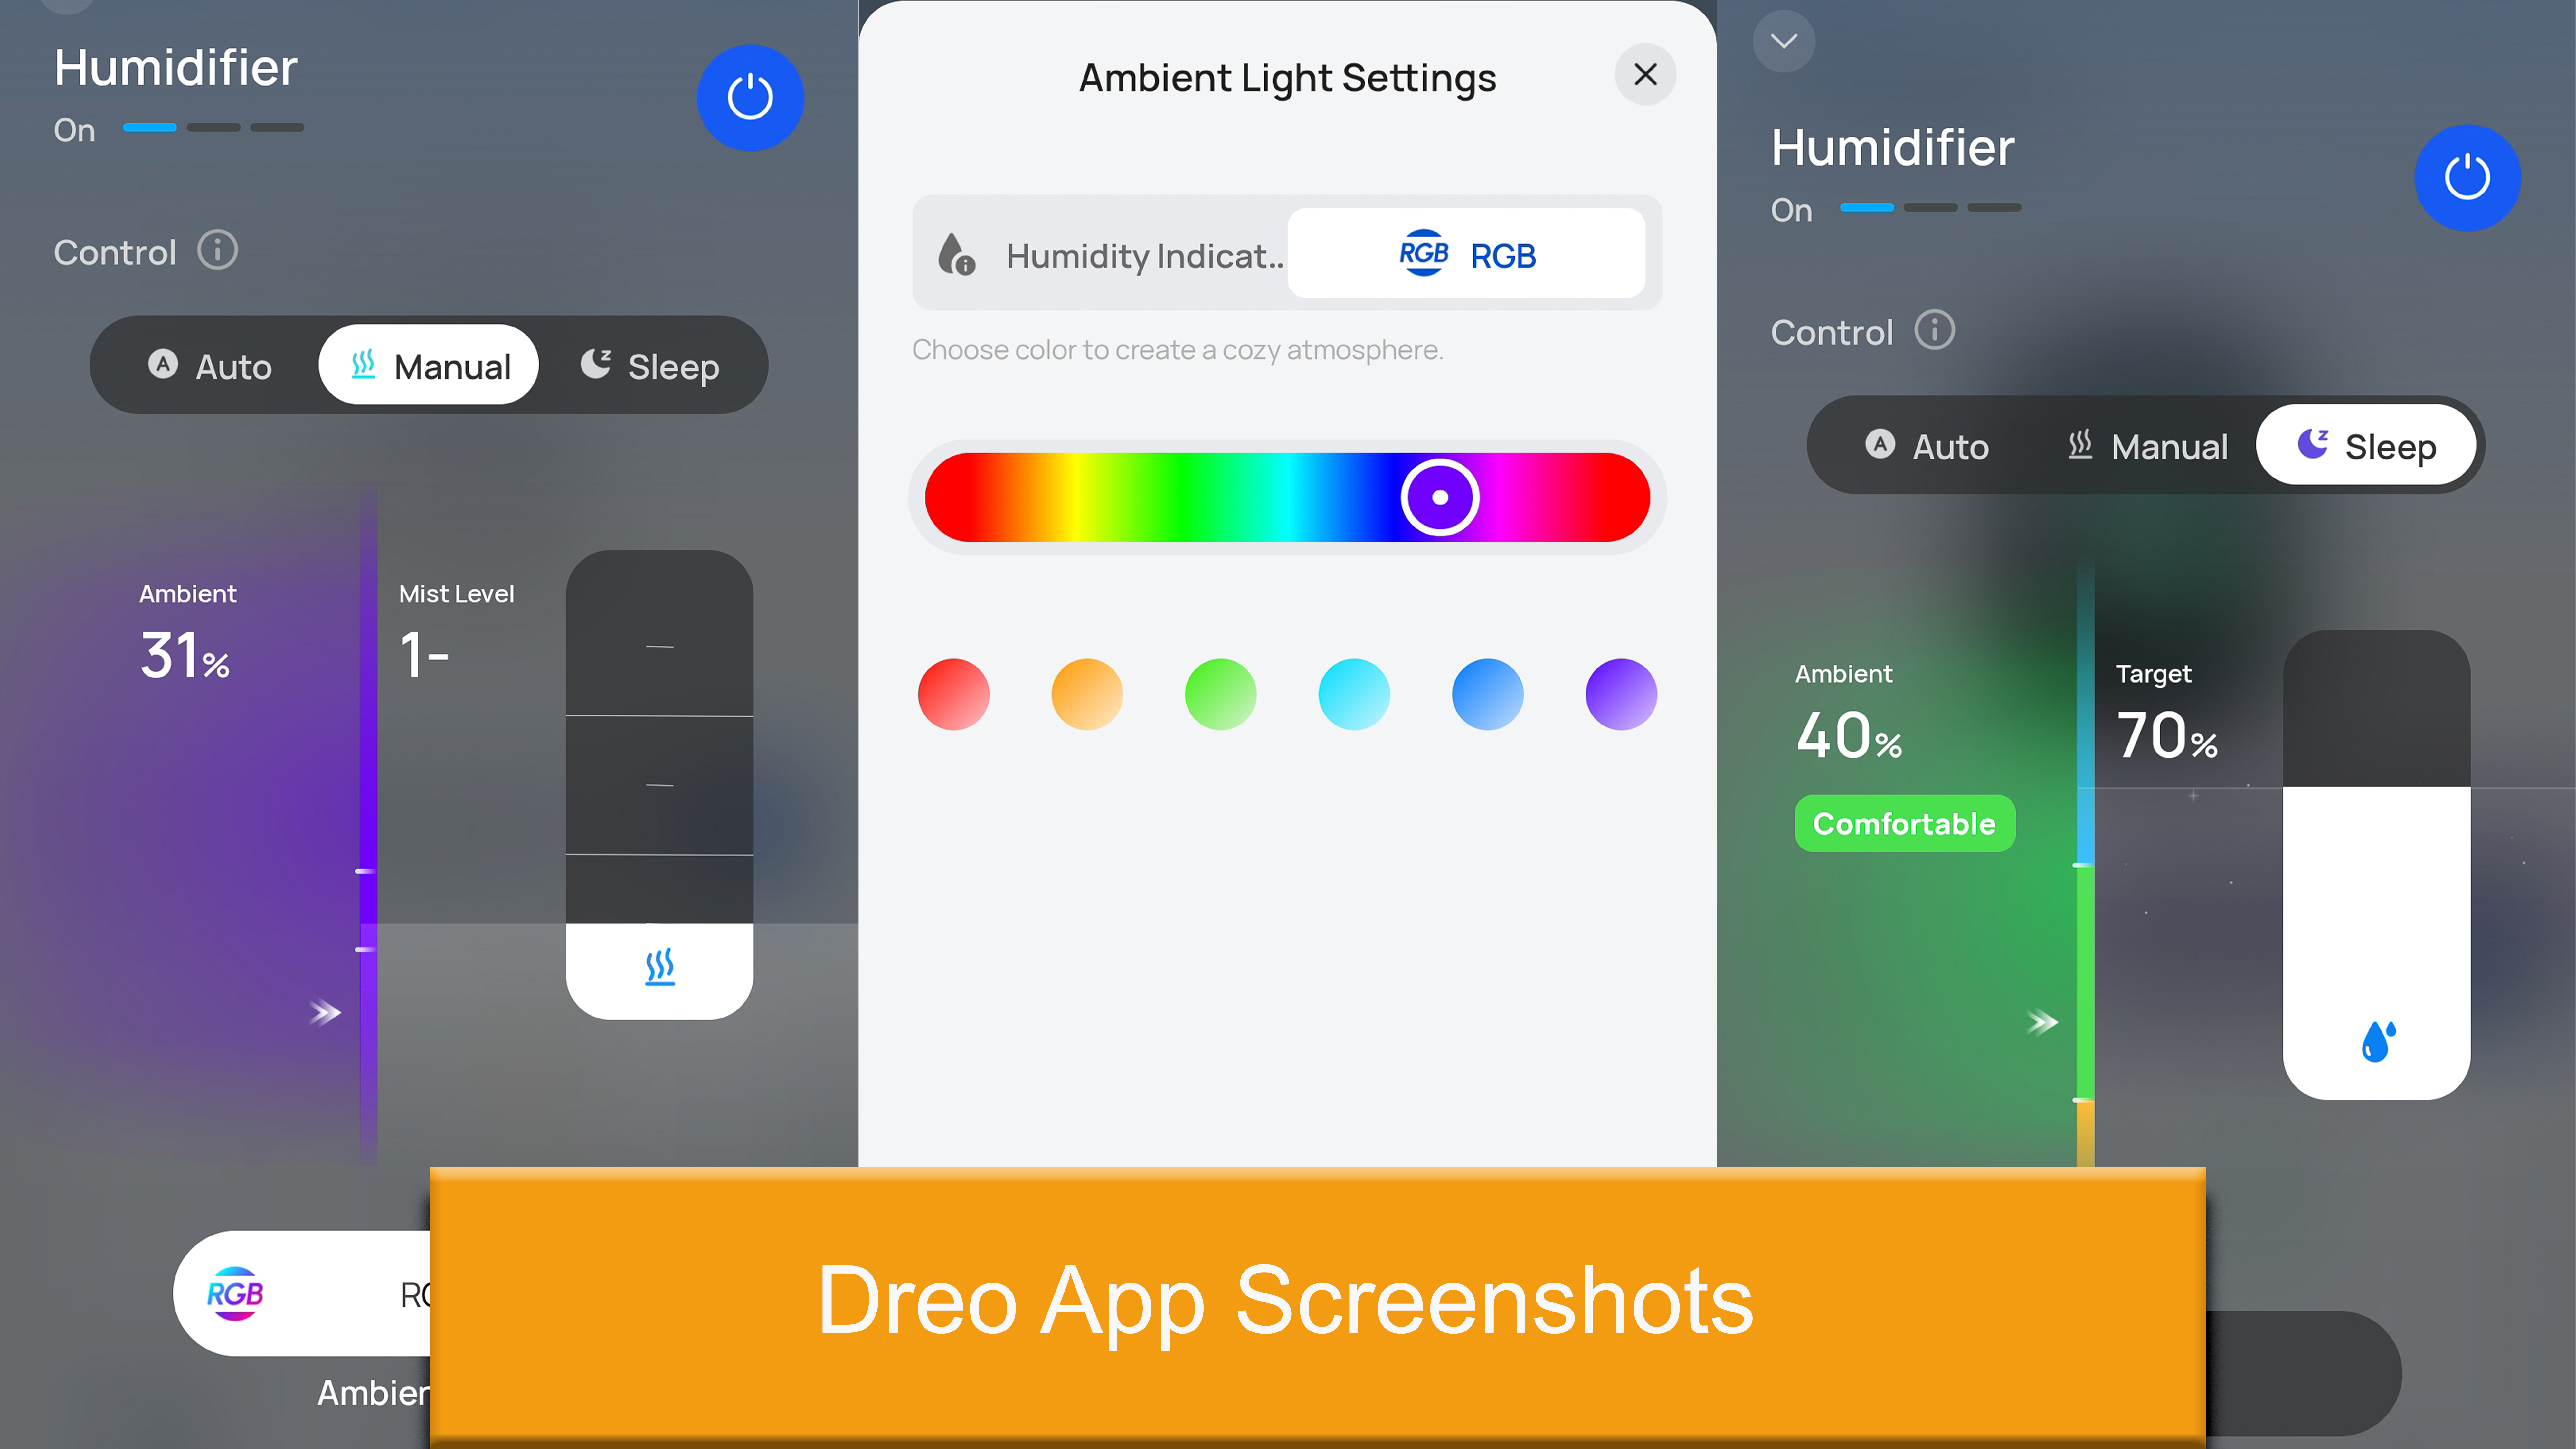
Pairing Process in 7 Steps
- Install “Dreo” app from App Store or Google Play
- Create account or sign in to existing
- Enable Bluetooth and location services
- Put humidifier in pairing mode (WiFi indicator blinking)
- Select “Add Device” → choose your humidifier model
- Enter WiFi password for 2.4GHz network only
- Wait for successful pairing confirmation
Must-Configure Smart Features
Remote control lets you adjust settings from anywhere. Scheduling automates on/off times based on your routine. Scene modes provide pre-configured settings—try “Sleep Mode” for quieter nighttime operation. Voice control works with Amazon Alexa or Google Assistant—say “set humidifier to 50%.” Usage statistics track runtime patterns, while filter life tracking sends timely replacement reminders.
Optimize Settings for Your Specific Environment

Ideal Humidity Configuration
Target humidity stays between 40-60% for optimal comfort and health—below 40% causes dryness, above 60% encourages mold growth. Room effectiveness spans 200-500 square feet depending on your Dreo model.
Runtime estimates based on mist level:
– Low mist: 20-30 hours per tank (best for overnight)
– Medium mist: 12-18 hours per tank (ideal for daytime)
– High mist: 8-12 hours per tank (quick moisture boost)
Environmental Adjustments
Seasonal changes require humidity increases in winter (45-55%), decreases in summer (40-50%). Air circulation improves with ceiling fans on low speed—moisture distributes evenly without creating damp spots. Maintain 12-18 inches clearance from walls and 3+ feet from electronics to prevent condensation damage.
Prevent Common Setup Mistakes
Avoid these errors that plague 80% of new Dreo owners:
– Placing on uneven surfaces causing leaks and wobbling
– Using hot water or additives in non-compatible models
– Overfilling past MAX line creating dangerous overflow
– Positioning too close to walls restricting airflow
– Skipping initial water tank rinse before first use
Quick fixes for immediate problems:
– No power: Test outlet with another device, check adapter connection
– No mist: Verify tank has water, check for proper tank seating
– Leaking: Tighten tank cap, inspect for hairline cracks
– Strange noise: Level the unit, check for debris in fan housing
Establish Daily Maintenance Routine
First Week Critical Checks
- Monitor water level indicator twice daily
- Wipe condensation from surfaces daily
- Refill tank if water sits longer than 24 hours
- Check for error codes on display panel
Weekly Maintenance Must-Dos
- Empty and rinse tank with clean water
- Wipe tank interior using soft cloth (no abrasives)
- Clean mist nozzle with provided brush
- Check air intake for dust buildup
Pro tip: Add a drop of dish soap to tank water during cleaning—this breaks down mineral deposits without damaging components. Rinse thoroughly afterward.
Advanced Configuration for Custom Comfort
Create Personalized Scenes
Baby mode reduces mist output by 30% and noise levels for peaceful sleep. Plant mode increases humidity to 60-65% for tropical plants with extended runtime. Allergy relief maintains steady 45-50% humidity with activated carbon filters when available.
Smart Home Integration Shortcuts
Connect to SmartThings or IFTTT for advanced automation. Automation rules trigger based on outdoor humidity or weather changes (“If outdoor humidity drops below 30%, turn on humidifier”). Voice commands include “Alexa, set humidifier to 50%” or “Hey Google, turn off humidifier”—no app required.
Your Dreo humidifier is now fully optimized for peak performance. Check water levels twice daily during the first week to establish your usage patterns. Monitor comfort levels—ideal humidity feels comfortable without condensation on windows or walls.
Immediate next steps: Download the Dreo app if you haven’t already, set up voice commands, and create your first automation schedule. With proper setup and maintenance, your Dreo humidifier will provide years of comfortable, healthy air—transforming dry, uncomfortable spaces into your personal comfort zone. Remember, correct setup isn’t just about assembly—it’s the foundation for reliable performance and healthier indoor air quality all year long.


