
That first crisp morning when you realize your Aprilaire humidifier hasn’t kicked in can trigger panic—dry sinuses, static shocks, and cracked wood floors loom as winter threats. With months of dormancy, even seasoned homeowners forget the precise activation sequence involving damper positions, control types, and seasonal settings. Mastering how to turn on Aprilaire humidifier units isn’t just about flipping a switch; it requires understanding model-specific controls and critical safety checks. This guide cuts through the confusion with actionable steps for every Aprilaire series, ensuring your home maintains that perfect 35-45% humidity sweet spot from the first furnace cycle.
Unlike plug-and-play appliances, Aprilaire humidifiers integrate directly with your HVAC system, demanding seasonal reactivation. Skipping key steps like bypass damper positioning or water panel replacement causes 70% of “failed activation” calls to HVAC technicians. Whether you own a basic 400-series dial model or a smart 865 steam unit, this walkthrough delivers the exact sequence to activate your system safely. You’ll learn to diagnose common no-start issues, set humidity levels for your climate, and avoid costly water damage—transforming winter comfort from guesswork to precision.
Identify Your Aprilaire Control System
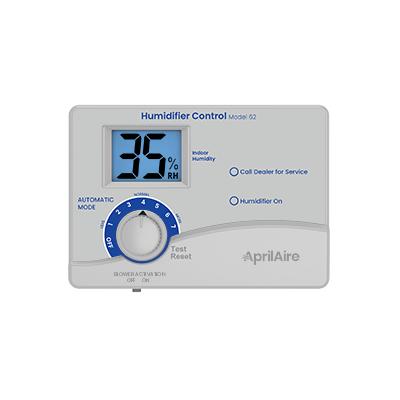
Manual Dial Humidistats (400-700 Series)
Locate the circular dial mounted on your return air duct or adjacent wall—it’s labeled with percentages (15-45%) and an “OFF” position. This dial is your activation trigger, not a mere indicator. Turn it clockwise from “OFF” to 35% to initiate operation. The click you hear confirms the humidifier is now monitoring ambient humidity. Crucially, the unit won’t run immediately; it activates only when your furnace cycles on and indoor humidity drops below your set point. If your dial feels stiff after summer storage, gently rotate it through all positions to free internal components before setting.
Digital Control Panels (800-865 Series)
Find the rectangular display unit with LED/LCD screen, typically near your thermostat. Press and hold the power button for 3 seconds—this prevents accidental activation from brief touches. When the display lights up, verify it shows your last humidity setting (default is often 35%). Use the arrow keys to adjust; digital models allow precise 1% increments. A flashing “ON” or water droplet icon confirms active status. If the screen remains blank, check your furnace’s 24V transformer connections—digital panels draw power directly from the HVAC system.
Thermostat-Integrated Activation
For systems where humidifier controls live in your thermostat menu, navigate to “HUMIDITY” or “HUM” settings. Set your target humidity level (35-45%) and ensure “AUTO” mode is selected. These units activate seamlessly when: 1) The furnace blower runs, 2) Indoor humidity dips below your set point, and 3) The water panel is correctly installed. If no humidifier option appears, consult your thermostat manual—older models may require wiring to a separate humidistat.
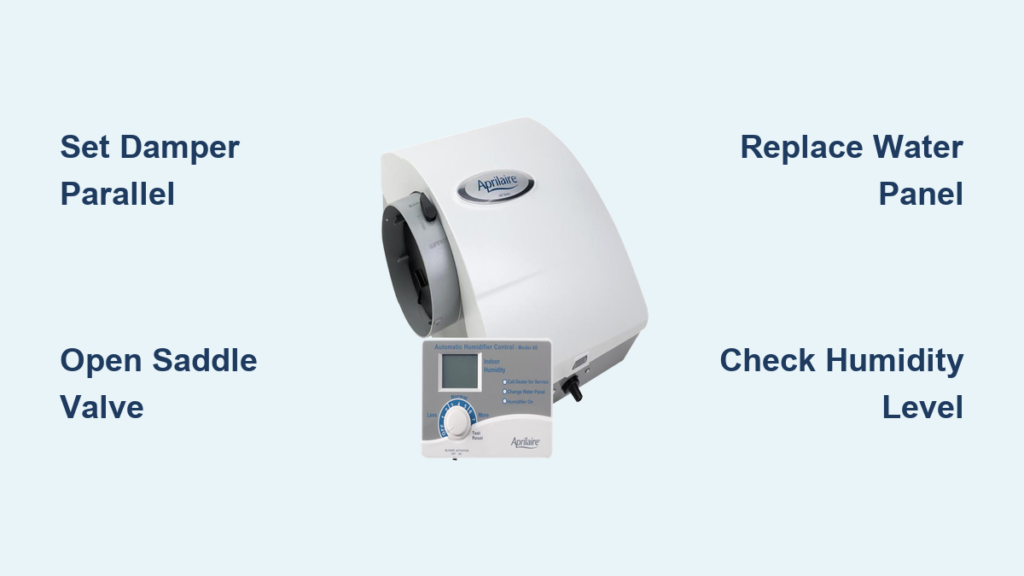
Bypass Damper: The Critical Winter Switch

Correct Winter Position: Handle Parallel to Duct
This often-overlooked component controls airflow through your humidifier. Locate the damper handle on the bypass duct (a small metal tube connecting to your humidifier). For heating season operation, the handle must run parallel to the ductwork—this opens the air path. If it’s perpendicular (crosswise), rotate it 90 degrees until aligned. A closed damper starves the unit of airflow, causing complete failure to humidify despite correct control settings. Listen for a soft “clunk” as it locks into position.
Why Summer Position Causes Activation Failure
During summer, the damper should be closed (handle perpendicular) to prevent cooled air from escaping through the humidifier. If left closed in winter, 0% of heated air reaches the water panel, explaining why your unit “won’t turn on” even with correct settings. Always verify damper position before troubleshooting electrical components—this resolves half of no-moisture complaints.
Water Supply Activation Sequence
Fully Open the Saddle Valve
Find the copper tube feeding water to your unit and locate the saddle valve (a small T-shaped valve with a handle). Turn the handle counterclockwise until it stops—partial opening restricts flow, causing intermittent operation. You’ll hear a brief water rush as pressure equalizes. Never force the valve; if stiff, apply penetrating oil and wait 10 minutes before turning.
Immediate Leak Verification Protocol
Inspect all connections for drips within 60 seconds of opening the valve. A properly activated system shows zero external moisture. If water beads form: 1) Immediately close the valve, 2) Tighten compression fittings with a wrench (¼ turn max), 3) Reopen slowly. Persistent leaks indicate worn seals requiring professional replacement—don’t risk water damage to your furnace closet.
Seasonal Startup Checklist
Mandatory Pre-Activation Steps
Complete these before powering on to avoid damage:
– Replace the water panel (annual requirement—mineral buildup blocks moisture output)
– Clear the drain line by blowing air through it
– Scrape mineral deposits from the distribution tray with a plastic knife
– Confirm furnace power is ON at the disconnect switch
Test Run Validation Process
After initial activation:
1. Set humidistat to 35%
2. Trigger a furnace cycle by lowering thermostat temp
3. Listen for solenoid valve “click” within 90 seconds of blower start
4. Check drain line for steady water flow after 15 minutes
5. Confirm humidity rise on a standalone hygrometer within 24 hours
Pro Tip: Place a paper towel under the drain line during testing—dampness confirms water flow.
Troubleshooting No-Start Emergencies
Furnace Interlock Failure Diagnosis
Your humidifier physically cannot run without furnace heat. If the furnace isn’t producing warm air, the humidifier stays off—even with correct settings. Verify: 1) Thermostat set to “HEAT” mode, 2) Furnace door safety switch engaged, 3) No error codes on furnace display. If the furnace runs but humidifier doesn’t, move to humidity verification.
Humidity Setting vs. Ambient Reality
Current indoor humidity may already exceed your set point. Fall homes often maintain 40-50% humidity naturally. Use an independent hygrometer to check actual levels—if it reads 42% and your set point is 35%, the system is correctly inactive. Lower your setting to 30% temporarily to force activation during testing.
Water Supply Blockage Detection
No water flow = no humidification. During a furnace cycle: 1) Remove the water panel, 2) Place a cup under the distribution tray, 3) Trigger humidifier activation. If no water drips: 1) Confirm saddle valve is fully open, 2) Check solenoid valve for clicking (no click = electrical fault), 3) Inspect water tube for kinks. A clogged solenoid orifice requires vinegar soaking—never use force.
Advanced Digital Model Features

Outdoor Sensor Auto-Adjustment
Models with external temperature sensors (800+ series) prevent window condensation by lowering humidity targets during extreme cold. When “AUTO” appears on the display, the system is actively adjusting—don’t override this setting. If outdoor temps drop below 20°F, it may cap humidity at 30% regardless of your manual setting.
Water Panel Reminder Protocol
Digital panels flash “REPLACE PANEL” after 365 days of operation. This alert doesn’t disable the unit but indicates reduced efficiency. After installing a new panel: Press and hold the reset button for 5 seconds until the icon disappears. Skipping this causes inaccurate humidity readings and overuse.
Safety Systems You Must Understand
Low Water Auto-Shutoff Mechanics
All Aprilaire units halt operation if water supply stops. If your humidifier starts then immediately stops: 1) Check saddle valve position, 2) Verify drain line isn’t clogged (causing false “full” signal), 3) Inspect water panel for salt bridge formation. Never disable this feature—a dry unit can overheat.
High Humidity Lockout Thresholds
When indoor humidity hits 50%, the system shuts down to prevent structural damage. If this occurs frequently: 1) Lower your set point by 5%, 2) Run exhaust fans during cooking/showers, 3) Check for basement moisture sources. Persistent lockouts indicate oversized humidifier capacity for your home.
Post-Activation Fine-Tuning
First 72-Hour Adjustment Window
Increase settings by 3% every 24 hours until reaching comfort. Example: Day 1 at 35%, Day 2 at 38%, Day 3 at 41%. Stop immediately if window condensation appears—this is your maximum safe humidity for current outdoor temps. Track changes using a $10 hygrometer placed away from vents.
Temperature-Driven Weekly Calibration
For every 10°F drop in outdoor temperature, add 3-5% humidity. When temps fall from 40°F to 30°F, raise settings from 38% to 41%. Conversely, as spring arrives, decrease settings gradually. Digital models with outdoor sensors handle this automatically—watch the display for “AUTO” mode confirmation.
Final Note: Properly executing how to turn on aprilaire humidifier systems prevents the top winter complaints: bloody noses, peeling wallpaper, and warped hardwood floors. Start conservatively at 35% humidity, verify damper position first during troubleshooting, and replace water panels annually—this trio solves 95% of activation issues. Remember, window condensation isn’t a humidity “success” but a warning sign; your ideal setting is always just below the condensation threshold. With these steps, you’ll transform your Aprilaire from a dormant box into a silent guardian of winter comfort.


