
That slimy film coating your Levoit humidifier base isn’t just gross—it’s actively pumping bacteria and mold into your bedroom air every night. When water sits stagnant in the chamber, minerals crystallize into hard white scale while bacteria multiply in hidden corners. Left uncleaned, these contaminants turn your air-purifying device into a health hazard. The fix? A systematic 15-minute cleaning ritual that destroys buildup at the source. Follow this exact process to restore crystal-clear mist and extend your humidifier’s lifespan by years.
Your humidifier’s base chamber is ground zero for contamination because it traps residual water even after the tank empties. Tap water minerals bake onto surfaces during operation, creating porous limescale that shelters mold spores. When the humidifier runs, these toxins aerosolize through your mist output. Weekly cleaning isn’t optional—it’s the only way to guarantee you’re breathing clean moisture. Skip this step, and you’ll notice reduced mist output, musty odors, and that telltale pink slime spreading across plastic surfaces.
Why Your Levoit Base Becomes a Bacteria Hotspot
Stagnant water in the base chamber creates perfect conditions for biofilm—a slippery layer of bacteria that resists soap and water. Minerals in tap water accelerate this process, forming limescale that traps moisture in microscopic pores. Within 72 hours of last use, colonies of Aspergillus mold can establish themselves in warm, damp corners near the float mechanism. When you restart the unit, these contaminants blast into your air as invisible particles. Worse, mineral buildup around the water outlet valve restricts flow, forcing the humidifier to work harder while producing less mist.
Daily Base Maintenance That Prevents Major Cleaning
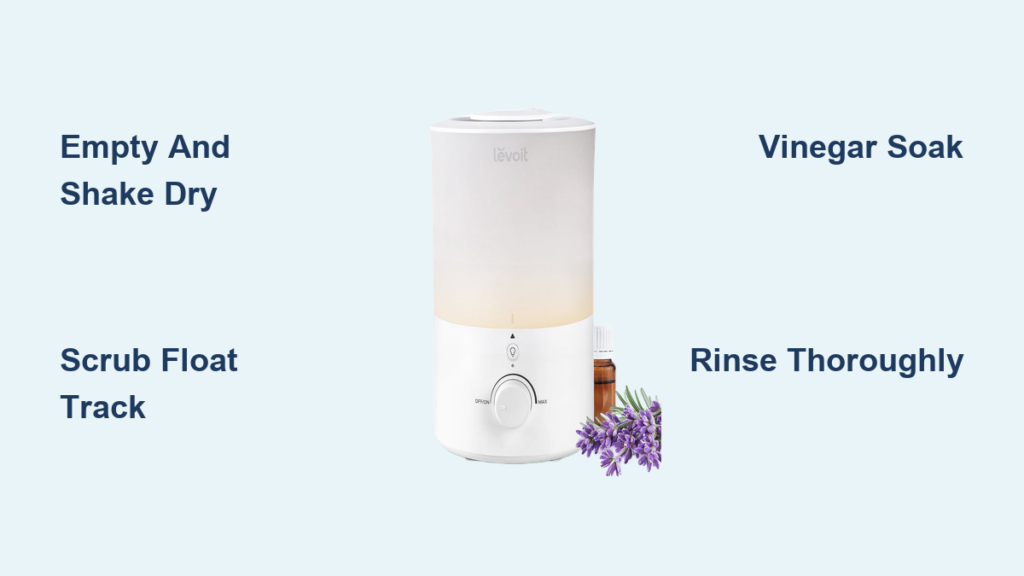
Empty and Shake-Dry Procedure
Leaving even a tablespoon of water overnight invites bacterial growth. Unplug the unit immediately after turning it off. Lift the tank straight off and pour out all visible water. Now the critical step: hold the base over your sink and shake vigorously for 10 seconds—you’ll hear hidden water sloshing in the float chamber. Wipe the interior with a dry microfiber cloth, paying special attention to the crevice where the tank seats. Never store the base damp; air-dry for 30 minutes with the tank off before reassembly.
30-Second Visual Inspection Checklist
Before refilling your tank, spot trouble early with this targeted scan:
– Run your finger along the base rim—gritty texture means mineral crystals forming
– Check the float housing for pink or black discoloration (early mold signs)
– Peer into the water outlet valve—cloudy residue indicates bacterial growth
Catching these issues daily means your weekly deep clean takes half the time.
Weekly Deep Cleaning: 5-Step Base Revival
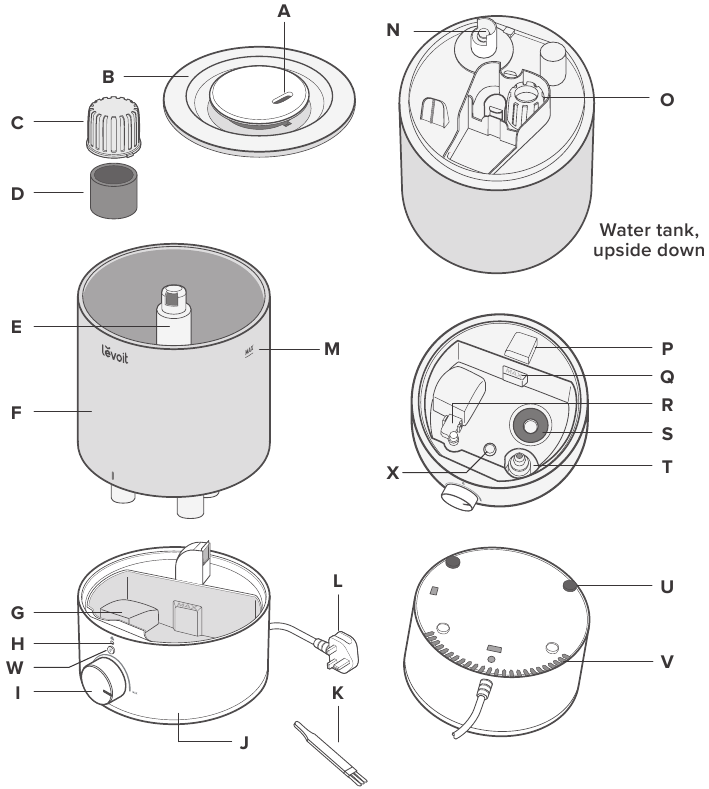
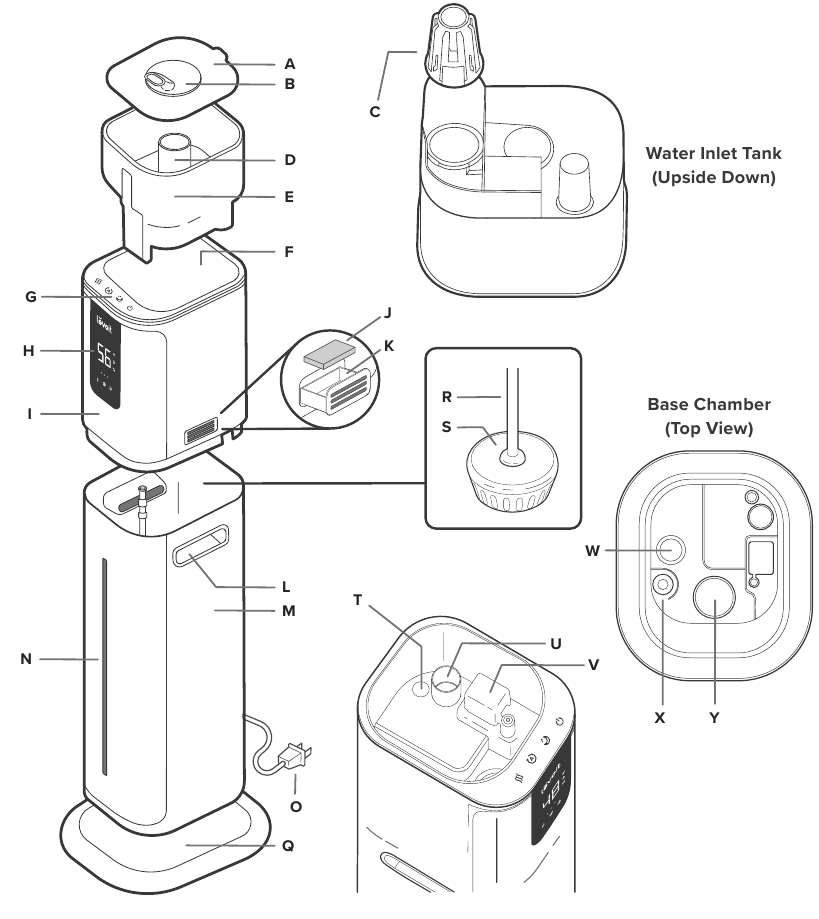
Safe Disassembly Without Damage
- Unplug and wait 5 minutes if warm mist was used (prevents thermal shock)
- Lift tank straight up—no twisting (avoids misaligning electrical contacts)
- Remove all base components:
– Float assembly (pull straight up)
– Water outlet valve (twist counterclockwise)
– Noise silencer (if model has one)
– Any foam pads near mist outlet
Targeted Scrubbing Protocol
Never submerge the entire base—electrical components live underneath. Fill your sink with room-temperature water and:
– Hold base at 45-degree angle while rinsing to avoid water entering air vents
– Scrub chamber walls using the Levoit-branded soft brush in small circles
– Focus on the float track where gunk jams moving parts (use brush tip)
– Clean water outlet valve by rotating brush inside the opening
Stop immediately if you see white plastic flakes—this means you’re scrubbing too hard.
Rinse and Dry Like a Pro
Tilt the base sideways while running water through it to flush hidden pockets near the float chamber. Shake out excess water 3 times. Pat dry with a lint-free cloth, then place upside down on a towel for 20 minutes. Verify dryness by feeling the electrical contact points—any moisture here risks short-circuiting.
Monthly Vinegar Descaling: Crush Stubborn Limescale
Precision Vinegar Soak Method
Pour 3 cups (710mL) undiluted white vinegar into the water tank while it’s seated on the base. Let it drain slowly into the chamber—this targets scale exactly where it forms. Keep the float in place during soaking to dissolve buildup around its mechanism. Set timer for 20 minutes (never exceed 30 minutes—vinegar can degrade plastic seals).
Post-Soak Scale Removal
After soaking, you’ll see white flakes floating loose. Use the soft brush to gently dislodge remaining deposits from the chamber floor. Remove the float and scrub its stem under running water—mineral crystals love this spot. Rinse the base 5 times until the vinegar smell vanishes completely. One whiff of vinegar means residue remains, which will taint your mist.
Fixing Urgent Base Problems

Heavy Mineral Buildup That Won’t Budge
When scale forms thick, chalky layers:
1. Extend vinegar soak to 45 minutes (check every 15 minutes)
2. Apply vinegar to a cotton swab and rub directly on stubborn spots
3. Scrub with soft brush using light pressure—never scrape with metal
4. Repeat weekly until the base shines like new
Pink Slime or Black Mold Growth
If you spot slimy residue after cleaning:
– Soak affected areas with 3% hydrogen peroxide for 10 minutes (not vinegar!)
– Scrub with soft brush while peroxide bubbles (kills spores)
– Rinse 6+ times to eliminate chemical traces
Never mix vinegar and hydrogen peroxide—this creates corrosive peracetic acid.
Musty Odors After Cleaning
Persistent smells mean:
– Incomplete drying (check under float mechanism)
– Vinegar residue (rinse base while shaking vigorously)
– Hidden mold in mist tube (clean with vinegar-soaked pipe cleaner)
Water Choices That Slash Cleaning Time
Distilled water is your base’s best friend—it contains zero minerals, preventing 95% of limescale. At $1/gallon, it pays for itself by eliminating monthly descaling. Purified water works as a budget alternative but requires biweekly vinegar soaks. Tap water? Only if you enjoy weekly battles with crusty buildup. Crucially, never add essential oils—they react with minerals to form stubborn, oily residues that ruin mist output. Levoit’s warranty explicitly voids for oil-related damage.
Safety-Critical Cleaning Rules
Electrical Danger Zones
Water and electronics mix only in one place: the chamber. Keep the base’s underside completely dry—this houses the motor and sensors. Always unplug before cleaning, and inspect the power cord for cracks during disassembly. If you spot frayed wires, stop using the unit immediately.
Chemical Safety Non-Negotiables
- Ventilate your workspace—vinegar fumes can irritate lungs
- Never use bleach—it corrodes plastic and creates toxic chlorine gas with vinegar
- Rinse until odor-free—residue causes coughing fits when misted
Maintenance Schedule That Works
| Frequency | Task | Time Required |
|---|---|---|
| Daily | Empty base + shake dry | 2 minutes |
| Every 3 Days | Full rinse + air-dry | 5 minutes |
| Weekly | Deep scrub + component check | 15 minutes |
| Monthly | Vinegar descale + disinfect | 30 minutes |
Keep Your Levoit Base Spotless Long-Term
The secret to effortless maintenance? Empty the base every time you turn off the humidifier. That single habit prevents 90% of bacterial growth. Pair this with weekly 15-minute deep cleans using distilled water, and your base will stay slime-free for years. When reassembling, ensure the float moves freely—sticking causes overflow. Store the unit completely dry in a cool place during summer months. Within two weeks of consistent cleaning, you’ll notice stronger mist output, zero odors, and that satisfying smooth glide of the float mechanism. Your lungs will thank you every time you breathe easy.


