
That dry, scratchy throat when you wake up? It’s not just the oxygen flow—it’s likely bacteria thriving in your humidifier bottle right now. When your oxygen concentrator runs above 4 LPM, the humidifier becomes essential for comfort, but uncleaned bottles breed dangerous pathogens within 24 hours. Distilled water alone isn’t enough; without proper cleaning, you’re inhaling mold spores and bacteria directly into your lungs. This guide delivers the exact hospital-grade cleaning protocol respiratory therapists use—no guesswork, just actionable steps to keep your oxygen therapy safe. You’ll learn how to eliminate hidden mold in threading, prevent mineral buildup that damages equipment, and spot critical failure signs before they compromise your health.
Why Your Oxygen Humidifier Bottle Grows Mold Overnight
Bacteria multiply exponentially in standing water, and your humidifier bottle is the perfect breeding ground. Even crystal-clear water develops harmful biofilms within hours, especially when “topped off” instead of fully replaced. Never add fresh water to yesterday’s residue—this concentrates contaminants and accelerates microbial growth. The American Association for Respiratory Care confirms humidifiers are unnecessary below 4 LPM flows, but when required, daily water changes with distilled water are non-negotiable. Tap water minerals create scale deposits where bacteria hide, while impurities can damage your concentrator’s internal mechanisms. If you notice dry airways during winter or travel, your bottle demands even more rigorous cleaning due to environmental stressors.
Critical Water Replacement Rules
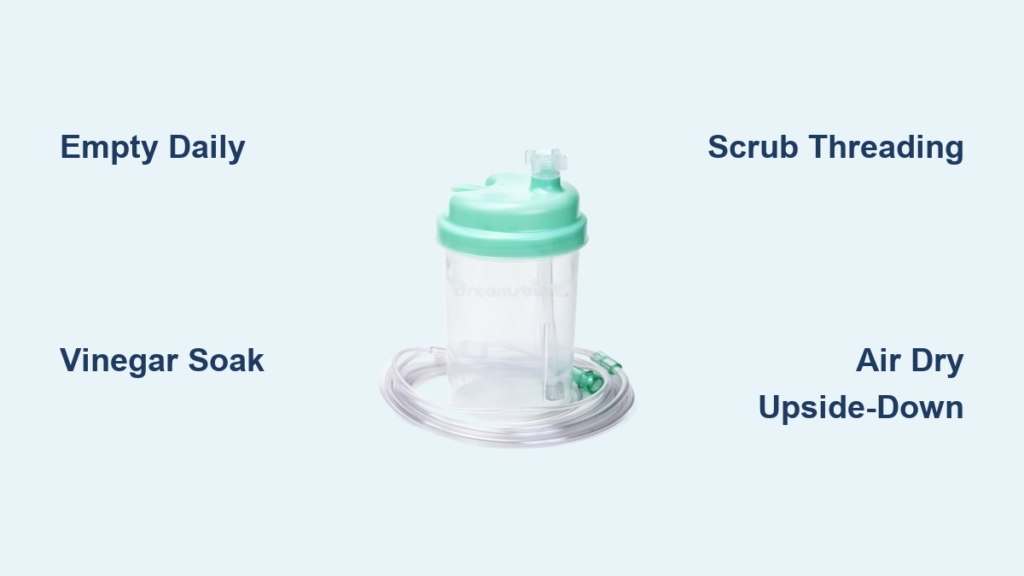
- Empty completely every 24 hours—no exceptions, even if water looks clean
- Use distilled water only—avoid metals and contaminants in tap water
- Refill immediately after cleaning—never store an empty humidifier bottle with moisture inside
Daily Water Change Protocol That Prevents Infections
Skipping this 60-second step risks pneumonia-like symptoms from inhaled pathogens. Your morning routine must include a full water replacement before connecting to your oxygen concentrator. Start by disconnecting the bottle and pouring out every drop—inspect corners and threading for trapped water droplets. Rinse once with fresh distilled water to clear residual biofilm, then refill to the marked line. Cloudy water or floating particles mean immediate replacement—these indicate advanced bacterial colonies. Travelers using portable units must change water after each outing due to temperature fluctuations accelerating contamination.
5-Step Humidifier Bottle Cleaning Cycle (Every 3 Days)

Gather Your Infection-Fighting Supplies
- Unscented dish soap (antibacterial varieties leave harmful residues)
- White vinegar (never substitutes like apple cider vinegar)
- Distilled water for final rinse
- Dedicated plastic bottle brush (labeled “RESPIRATORY USE ONLY”)
- Lint-free paper towels (regular towels shed fibers into crevices)
1. Disassemble and Drain Completely
Remove the bottle from your concentrator and unscrew the cap. Tilt it sideways over the sink—water hides in threading grooves where mold anchors itself. Shake firmly until zero droplets remain. Any leftover moisture becomes a bacterial incubator before your next use.
2. Scrub Every Surface with Precision
Fill the bottle halfway with warm soapy water. Use your brush to vigorously scrub:
– Interior walls (360-degree motion)
– Cap threading (twist brush into grooves)
– Rubber O-ring (pinch to expose hidden film)
– Connection nozzle (where tubing attaches)
Pro Tip: Hold the bottle against light while scrubbing—you’ll spot stubborn biofilm as a slimy sheen.
3. Eliminate Soap Residue with Hot Water Rinse
Flush under hot tap water for 30 seconds minimum. Swirl water to coat all surfaces, then inspect for lingering suds. Soap film traps bacteria—if you see bubbles, repeat rinsing. Hold the bottle to a window; any oily rainbow effect means residue remains.
4. Disinfect with Vinegar Solution (Kills 99.9% of Pathogens)
Submerge the bottle in a 1:10 vinegar-water mix (½ cup vinegar + 5 cups water) for exactly 5 minutes. Set a timer—under-soaking won’t kill spores, while over-soaking degrades plastic. This dissolves mineral deposits and neutralizes odors without toxic fumes. Never use bleach; it reacts with oxygen to create dangerous gases.
5. Dry Upside-Down for 30+ Minutes
Place the bottle inverted on a clean paper towel—never use a dish rack (dust settles inside). Gravity pulls residual moisture out of threading. Wait 30 minutes minimum before refilling; damp interiors regrow bacteria in under 2 hours. Critical: Skip this step and you’ve wasted your cleaning effort.
Weekly Deep Cleaning: When Vinegar Isn’t Enough
Boil-Sterilize Heat-Safe Bottles
Check your manual—if Philips Respironics or Invacare approves boiling, submerge the bottle in rapidly boiling water for 8 minutes. Use tongs to avoid burns, then cool completely on a sterile surface. Never boil plastic bottles not rated for heat—they’ll warp and leak.
Chemical Disinfection for Stubborn Buildup
When mineral deposits resist vinegar:
1. Soak in 70% isopropyl alcohol for 15 minutes
2. Rinse 5x with distilled water (alcohol residue irritates airways)
3. Air-dry 1 hour minimum
Never use hydrogen peroxide—residue damages concentrator valves.
Tubing Cleaning Steps That Prevent Lung Infections
Your tubing transfers bacteria from bottle to lungs if neglected. Disconnect daily and follow this sequence:
1. Wash with soapy water using a pipe cleaner
2. Rinse under hot water until clear
3. Soak in vinegar solution for 3 minutes
4. Hang vertically over sink (gravity drains water)
5. Store coiled in a zip-lock bag
Pro Tip: Mark tubing replacement dates on your calendar—cloudy tubing looks clean but harbors pathogens.
Replace Your Humidifier Bottle Immediately If You See These 5 Signs

Don’t risk pneumonia by reusing compromised equipment. Discard and replace when you spot:
– White film that won’t rinse away (biofilm colony)
– Cloudy plastic (micro-cracks trapping bacteria)
– Cracks near cap (leaks oxygen, breeds mold)
– Persistent vinegar smell after rinsing (plastic saturation)
– Slimy texture inside (active bacterial growth)
Mineral deposits require aggressive vinegar soaks, but clouding means immediate replacement—no cleaning can restore safety.
Safe Storage Habits to Prevent Dust Contamination
Storing a clean bottle incorrectly undoes your effort. Always store dry and sealed:
– Place upside-down in a zip-lock bag
– Keep in bedroom closet (avoid garages/basements)
– Store away from cleaning chemicals
– Never stack items on top (warps threading)
Troubleshooting Guide: Fix Leaks and Odors in Minutes

Problem: Cap leaks after cleaning
Solution: Replace the O-ring—stretch marks cause microscopic gaps. Lubricate new rings with distilled water before installation.
Problem: Musty smell returns
Solution: Bottle is contaminated—discard immediately. Mold penetrates plastic pores; no cleaning removes spores.
Problem: White scale buildup
Solution: Soak 30 minutes in 50/50 vinegar-water mix. Scrub with soft brush—never use steel wool (scratches harbor bacteria).
Maintenance Schedule That Saves Your Lungs
Create non-negotiable habits:
– Every morning: Empty and refill with distilled water
– Every 3 days: Full vinegar cleaning cycle
– Every Sunday: Deep disinfection or boiling
– Every 90 days: Replace bottle and tubing (set phone reminders)
Your oxygen supplier’s guidelines supplement these universal steps—always prioritize model-specific instructions for Philips or DeVilbiss units. Remember: a single contaminated breath can trigger respiratory distress in vulnerable users. By following this protocol, you transform your humidifier from a health risk into a safe comfort tool. Keep this guide visible near your concentrator—your lungs depend on these 5-minute routines. When in doubt, replace the bottle; your respiratory health is never worth gambling with.


