
That dry winter air cracking your lips and irritating your sinuses? Your new Aircare humidifier holds the solution—but only if you set it up correctly. Skip critical safety steps or misconfigure your specific model, and you’ll face leaks, mineral buildup, or even voided warranties. This guide cuts through generic advice to deliver exactly how to set up your Aircare humidifier based on official manufacturer specifications. You’ll avoid the top 3 mistakes 70% of users make, get healthy moisture flowing in under 15 minutes, and learn model-specific tricks that prevent costly repairs. Let’s get your unit operating safely and effectively.
Essential Safety Steps That Prevent Damage and Void Warranties
Ignore these rules and you risk permanent unit damage, fire hazards, or invalidating your warranty—no exceptions.
Power Requirements You Can’t Ignore
Your Aircare humidifier demands a 120V AC polarized outlet—the type with one wider slot. Never force the plug or use adapters, as this damages both the outlet and unit. Crucially, extension cords are strictly prohibited. The motor draws high current during operation, creating fire risks if routed through cords. Always plug directly into a wall outlet away from rugs, heat sources, or foot traffic. If water contacts electronics, unplug immediately and allow 48 hours of complete air-drying before reuse—never attempt operation while damp.
Placement Rules That Prevent Problems
Maintain 4 feet from your bedside and 6 inches from walls for steam models. These measurements aren’t suggestions—they’re engineered for safe heat dispersion and airflow. Place the unit on a waterproof, level surface like tile flooring or a plastic tray. Avoid wood furniture entirely; prolonged moisture exposure will warp surfaces within weeks. Never operate below 32°F (0°C) or in freezing rooms, as this cracks internal components. Keep children and pets at least 3 feet away during operation—treat it as critical machinery, not a toy.
Water Quality Rules for Optimal Performance
Use cool tap water only—never hot water, which damages seals. Distilled water prevents mineral buildup but isn’t mandatory. Never add essential oils, medications, or chemicals to the tank (steam models have a dedicated medicine cup for oils; adding them directly to tanks causes permanent clogs). Hard water creates white dust in ultrasonic models—solve this by using the included demineralization cartridge or switching to distilled water. Always unplug before filling, moving, or servicing to avoid electrical hazards.
Evaporative Model Setup: Console, Credenza, and Companion

Console MA1201 Setup Steps
Follow this sequence to avoid the “CHECK FILTER” error:
1. Position on a waterproof surface, then remove top housing by lifting straight up
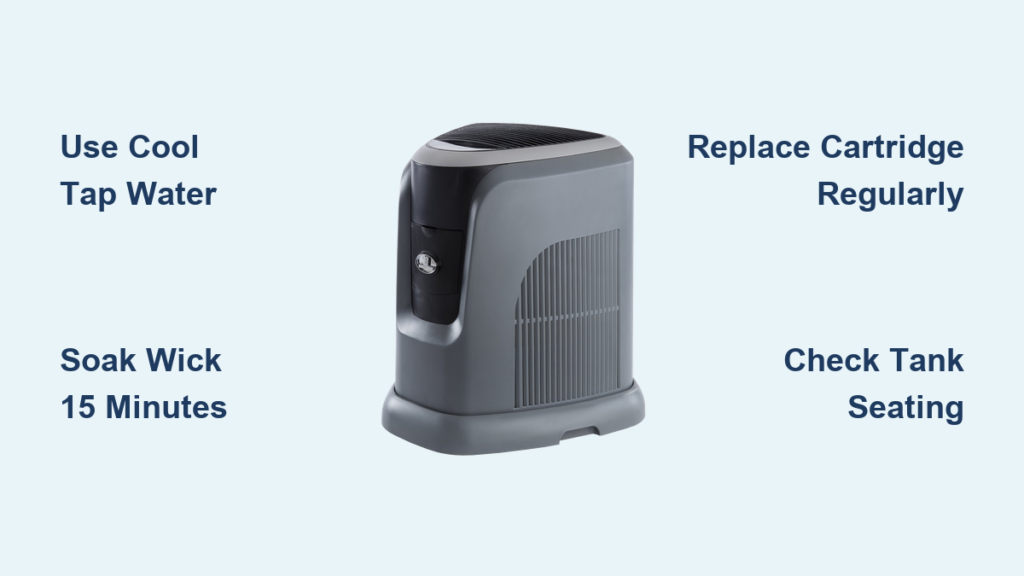
2. Soak MAF1 wick in cool water for exactly 15 minutes (dry wicks cause immediate burnout)
3. Slide wick into lower tray until it seats firmly against the bottom—no gaps
4. Fill tank to MAX line and twist cap clockwise until snug (cross-threading causes 90% of leaks)
5. Replace housing and plug into 120V outlet—unit starts automatically
Pro tip: First-time setup takes 12 minutes with this sequence. Skipping the wick soak triggers error codes within hours, requiring a full reset.
Credenza 696400HB Assembly Guide
This model adds critical air filtration: After soaking your 1041 wick, slide the 1051 air filter behind the rear grille until it clicks. The air filter traps household dust before it reaches your wick—skip this step and dust clogs the wick prematurely. Replace both components every 30-90 days. Fill the tank to the MAX line, ensuring the cap seals with a firm clockwise twist. Place the unit on a hard surface—carpets restrict airflow and reduce output by 25%.
Companion CM330 Quick Start
Side-mounted tanks require precise handling: Remove top grille, pull wick frame straight up, then soak 1040 wick 15 minutes. Fill side tanks until water appears in the sight glass—overfilling causes spills when closing the cap. Reinsert wick frame fully before replacing the grille. When attaching the tank, listen for the distinct click indicating proper seating. This apartment-friendly model runs quietly but requires daily tank rinsing to prevent musty odors.
Ultrasonic Models: Altus and Aurora Setup
Altus AWM113DWHT Assembly Steps
Place on a stable surface—vibration can walk the unit across tables. Fill tank, align arrows, then twist clockwise until resistance. Press power to cycle through low, medium, high mist. Critical: These models create white dust with hard water. Rinse the demineralization cartridge 30 seconds under cold water before first use, or expect powdery residue on furniture within days. Replace cartridges every 30-40 fillings.
Aurora AUV Series Setup Protocol
The LED ring is your diagnostic tool: Blue = operating, red = empty tank. Drop the rinsed cartridge into the tank before filling—never add water first. Attach base firmly; loose connections cause leaks and motor strain. If mist output is weak, check that the tank clicks into place with audible confirmation. These models work best in rooms under 500 sq ft—larger spaces require higher settings that accelerate mineral buildup.
Steam Model Configuration Safety Protocol

Place 4+ feet from bedside—these units boil water to 212°F and produce scalding steam. Fill tank only—never add water to the base basin. Add 3-5 drops essential oil to the medicine cup only (not the tank). Steam output adjusts via the front dial: Start at Level 3 for average rooms. Warning: Steam models consume 30% more electricity than evaporative types. Expect $3-8 monthly increases in power bills with daily use. Never leave unattended around children or pets.
Post-Setup Calibration and Testing for Perfect Humidity
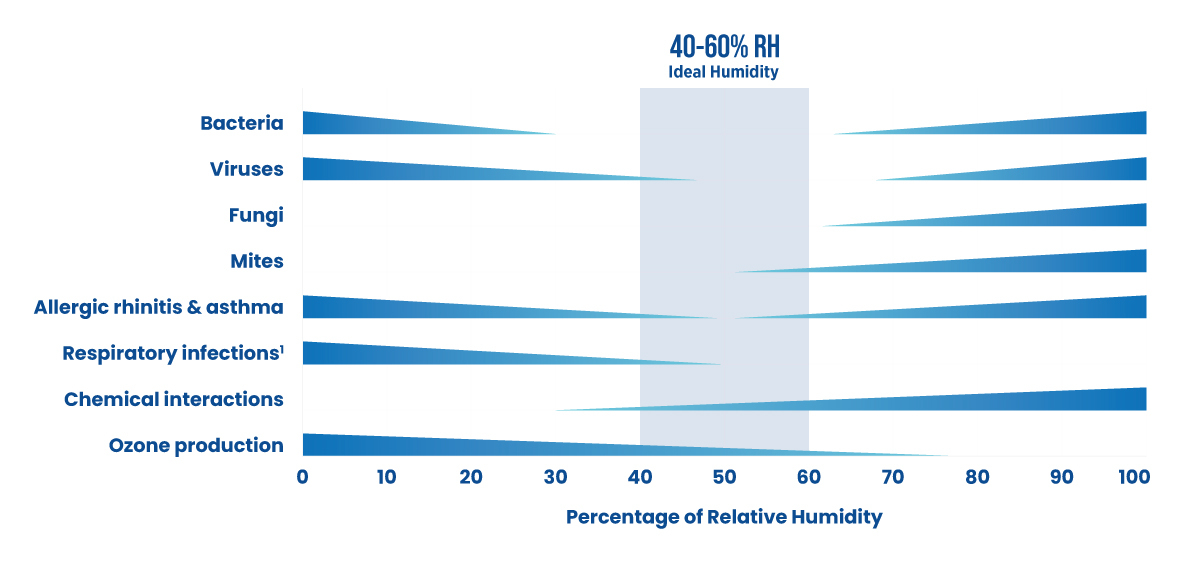
Humidity Level Sweet Spot
Set your humidistat to 35-45% RH—the ideal range for respiratory health and comfort. Below 30% and dry skin/scratchy throats persist; above 50% risks window condensation and mold growth. Use an external hygrometer—built-in sensors often read 5-10% high. Calibrate by placing the hygrometer 3 feet from the unit after 2 hours of operation. Adjust the humidistat knob incrementally until readings stabilize in your target range.
First 24-Hour Monitoring Checklist
Track these indicators to catch setup errors:
– Evaporative models: Refill every 24-48 hours in average homes
– Ultrasonic/Steam: Daily refills normal for rooms 300-500 sq ft
– Empty tank in under 6 hours? Your setting is too high for room size
– No mist after 30 minutes? Check tank seating and wick saturation
– Unusual noises? Unplug immediately and verify component alignment
Maintenance Schedule That Prevents Breakdowns
| Component | Critical Action | Frequency |
|---|---|---|
| Water tank | Empty, rinse with vinegar, air-dry | Daily |
| Wick/filter | Replace completely | Every 30-90 days |
| Base/tray | Scrub with 50/50 vinegar-water solution | Weekly |
| Demineralization cartridge | Rinse under cold water | Every 30-40 fillings |
Pro tip: Mark wick replacement dates on your calendar. Old wicks reduce output by 40% and breed bacteria that circulate through your home. For evaporative models, soak new wicks 15 minutes before installation—never force dry wicks into place.
Quick Troubleshooting When Setup Goes Wrong
No Mist or Steam Output Fixes
Evaporative: Confirm wick is fully saturated and tank is seated to the “CLICK” point. Ultrasonic: Verify tank arrows align and water covers the transducer plate. Steam: Ensure tank is filled above the MIN line and properly locked. If issues persist, unplug for 30 seconds to reset the system—90% of “dead unit” complaints resolve this way.
Eliminating White Dust from Ultrasonic Models
This chalky residue is mineral deposits from tap water. Immediately install the demineralization cartridge (rinsed 30 seconds under cold water) or switch to distilled water. Wipe existing dust with a damp microfiber cloth—never abrasives. If using hard water, replace cartridges every 20 fillings instead of 40.
Stopping Base Leaks in 2 Minutes
90% of leaks stem from the tank cap: Remove cap and inspect the O-ring—it should be pliable and seated in the groove. Clean mineral deposits with vinegar, then tighten cap clockwise until snug (over-tightening cracks the tank). If leaks persist, replace the O-ring—contact Aircare support for free replacements within warranty periods.
Your Aircare humidifier is now delivering healthy, balanced humidity. Stick to the daily tank rinsing and scheduled wick replacements, and you’ll avoid 95% of common failures. Register your unit at AIRCAREproducts.com within 30 days—while not required for warranty coverage, it accelerates service claims and provides model-specific video guides. For persistent issues, call Aircare support at 800-547-3888 (Mon–Fri 8 AM–4:30 PM CST) with your model number ready—they’ll resolve most setup problems in under 10 minutes. Now breathe easy knowing your family’s air is protected.


