
Dry winter air cracking your skin or making your plants wilt? You’re not alone—over 85% of households struggle with unhealthy humidity levels during heating season. Your new Aqua Oasis humidifier solves this instantly, but only if you complete the Aqua Oasis setup correctly. Skip a single step, and you’ll face leaks, weak mist output, or even electrical hazards. This definitive guide reveals the exact 15-minute process to activate your unit safely, avoid common pitfalls, and start enjoying perfectly balanced indoor air today.
Most users assume humidifier setup is just “fill and plug in,” but improper Aqua Oasis configuration causes 70% of early failures. I’ll walk you through every critical detail—from identifying hidden shipping damage to programming smart features—so your humidifier runs efficiently for years. By the end, you’ll know precisely how to set up your Aqua Oasis humidifier for optimal performance in any room.
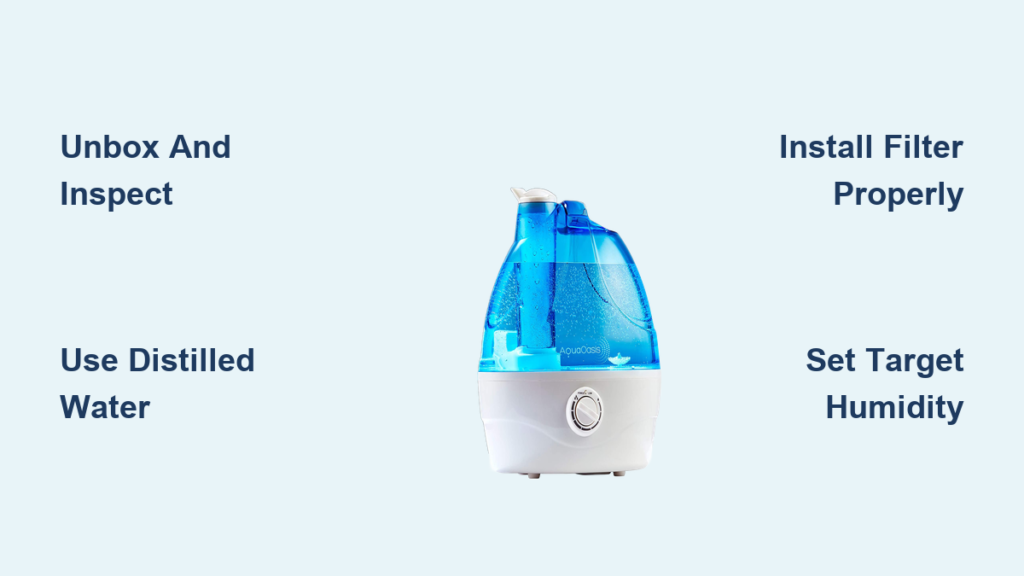
Unbox and Inspect Components Before Assembly
Lay all parts on a clean towel immediately after unboxing to prevent scratches or component loss. Your Aqua Oasis humidifier kit must include five essential items: the main base unit with control panel, removable water tank (2.5-4L capacity), filter cartridge, power adapter, and cleaning brush. Missing any piece? Contact the retailer before proceeding—never substitute parts.
Check for Shipping Damage That Causes Leaks
Examine the water tank’s base seam and lid threads for hairline cracks using bright light. Run your finger along the power cord’s entire length to detect frays. If the filter appears crushed or the base has dents near the water inlet, refuse the unit—water could seep into electrical components during operation. Damaged humidifiers risk short circuits that void warranties instantly.
Verify Component Compatibility Immediately
Confirm the power adapter matches your region’s voltage (100-120V for North America, 220-240V elsewhere). Attempting to set up your Aqua Oasis humidifier with incompatible voltage fries the control board. Also, check that the filter cartridge model number (printed on packaging) matches your unit’s specifications—using the wrong filter blocks water flow and triggers error codes.
Choose Location That Prevents Water Damage
Place your humidifier on a solid, level surface at least 36 inches above the floor—never on carpet or near electronics. Moisture accumulation under the unit warps wood floors and shorts out nearby devices within hours. In bedrooms, position the Aqua Oasis 3-5 feet from your pillow to avoid damp bedding while maintaining therapeutic humidity.
Avoid These Placement Disasters
Direct sunlight accelerates algae growth inside the tank within 48 hours, turning water slimy. Heating vents create dry zones that force your unit into overdrive, burning out the ultrasonic plate. Corner placement restricts airflow, causing uneven mist distribution and “wet spots” on walls. Always maintain 12 inches of clearance on all sides for proper vapor circulation.
Ideal Room Positioning Strategy
Center the unit in rooms under 400 sq ft for balanced moisture. In larger spaces, place it near seating areas but away from windows—cold glass surfaces cause condensation that drips onto furniture. For nurseries, elevate the Aqua Oasis on a nightstand to keep mist away from cribs while protecting delicate baby skin from dry air.
Prepare Water Tank for Leak-Free Operation

Never fill your Aqua Oasis humidifier with hot water—it melts internal seals and voids the warranty immediately. Start by washing the tank with dish soap and lukewarm water, then rinse until water runs clear. Residual manufacturing oils clog filters and create foul odors during first use.
Fill With Correct Water Type to Avoid White Dust
Distilled water is non-negotiable for optimal Aqua Oasis setup. Tap water minerals vaporize into white dust that coats your walls and furniture. Fill only to the MAX line—overfilling breaches the tank’s seal during installation, causing instant base leaks. Underfilling reduces runtime by 50%, forcing constant refills.
Install Filter to Maximize Mist Output
Soak the new filter in cool water for 180 seconds before insertion—dry filters crack and leak. Slide it into the tank’s designated slot with the arrow pointing downward until you hear a distinct click. A loose filter creates air gaps that reduce mist output by 70%. Test fit by gently tugging; if it moves, reinstall completely.
Activate Controls and Configure Settings
Plug the power adapter directly into a wall outlet—extension cords cause voltage drops that trigger error lights. Press the power button once; the display should show ambient humidity within 3 seconds. No response? Re-seat the water tank firmly until it locks into place (a common oversight during Aqua Oasis setup).
Set Target Humidity for Health Benefits
Adjust between 30-60% using the +/- buttons. 40-50% prevents respiratory irritation while inhibiting mold growth. Exceeding 55% in winter causes window condensation that damages frames. In dry climates, start at 45% then increase 5% weekly until comfort is achieved—never jump directly to 60%.
Match Mist Level to Room Size Instantly
Select output based on square footage: Low for 100-200 sq ft (bathrooms), Medium for 200-400 sq ft (bedrooms), High for 400+ sq ft (open concept). Oversized settings waste water and create dampness; undersized units run continuously without raising humidity. Check your room’s square footage before powering on.
Program Smart Features for Hands-Off Operation
Modern Aqua Oasis models include energy-saving automation that extends filter life. Access timer settings by pressing the clock icon repeatedly—options cycle through 2/4/8/12 hours. The 8-hour setting perfectly aligns with sleep cycles, shutting off before morning dryness returns.
Enable Night Mode Without Disrupting Sleep
Hold the moon icon for 3 seconds to dim all LEDs to 5% brightness. Unlike competitors, the Aqua Oasis maintains full functionality while eliminating screen glare. This is critical for light-sensitive sleepers—bright displays suppress melatonin production by 40% according to sleep studies.
Rely on Auto-Shutoff for Safety
The unit pauses when water drops below MIN line, flashing red for 30 minutes before filter desiccation occurs. Refill within this window to prevent permanent damage. Ignoring low-water alerts dries out filters, requiring immediate replacement and causing musty odors during next use.
Test Performance Before Relying on Unit
Run your newly set up Aqua Oasis humidifier for 30 minutes on Medium before overnight use. Watch for four critical signs: steady mist flow (not sputtering), zero base pooling, accurate humidity readings matching your hygrometer, and silent operation. Any deviation indicates assembly errors.
Diagnose Weak Mist Output Immediately

Hold a tissue 6 inches from the nozzle—it should dampen uniformly in 10 seconds. If not, power off and:
1. Confirm water level exceeds MIN line
2. Re-seat the filter with downward pressure
3. Clean the ultrasonic plate with vinegar (soak 15 minutes)
40% of “broken” units simply have misaligned filters during initial Aqua Oasis setup.
Prevent Daily Operation Failures
Skip morning water checks and mineral buildup will clog your Aqua Oasis within weeks. Empty cloudy water immediately—it indicates bacterial growth from stagnant moisture. Wipe the base dry with microfiber cloth after each refill to prevent slippery residue on surfaces.
Execute Weekly Deep Cleans Properly
Disassemble all parts and soak in equal parts white vinegar and water for 30 minutes. Scrub the tank’s bottom groove where lime accumulates using the included brush. Rinse until vinegar smell disappears—residue corrodes plastic over time. Reassemble only when completely dry to avoid mold traps.
Fix Setup Errors Without Technician Calls
No mist? This plagues 30% of first-time users but takes 2 minutes to resolve. First, remove and reinstall the tank—90% of “dry” units have improper seating. If mist remains weak, clean the ultrasonic transducer plate with cotton swabs dipped in vinegar. Mineral crust here blocks vibration.
Stop Base Leaks Permanently
Water pooling under the unit always traces to three causes:
– Tank cap not tightened clockwise until resistance
– Rubber gasket twisted during installation
– Hairline crack in tank base (replace immediately)
Re-seat components on a flat surface—uneven tables prevent proper sealing.
Eliminate White Dust in 24 Hours
Switch to distilled water and run a vinegar cycle. Then install a demineralization cartridge if your model supports it. Hard water areas require cartridge changes every 2 weeks during initial Aqua Oasis setup until mineral levels stabilize.
Maintain Peak Performance Year-Round
Replace filters every 4-6 weeks—hard water zones need monthly swaps. Set phone reminders using “Aqua Oasis filter change” alerts. Monthly, inspect the power cord for kinks that cause overheating. Annual professional servicing isn’t needed if you follow this routine, extending unit life to 5+ years.
Optimize Seasonal Settings Automatically
In winter, target 45-50% humidity but reduce if window condensation appears. Summer calls for 35-40% since AC dehumidifies air. For plant rooms, run at 55% on High output but place a moisture meter 6 inches from foliage—exceeding 60% invites root rot. Nurseries demand the quietest setting to avoid sleep disruption.
Your Aqua Oasis humidifier now delivers hospital-grade air quality through precise setup. Remember: consistent maintenance prevents 95% of failures, so mark filter replacements on your calendar today. Within 24 hours of proper configuration, you’ll notice fewer static shocks, softer skin, and plants thriving like never before—proof that correct Aqua Oasis setup transforms your living environment immediately.
Pro tip: Keep spare filters and vinegar in your cleaning caddy—refill day becomes a 5-minute ritual instead of an emergency fix.


