
That crackling static shock when you touch the doorknob? Or waking up with a throat so raw it feels like sandpaper? Your Kenmore humidifier solves these problems—but only if you use it correctly. Whether you just unboxed a 758.154120 console model or revived last winter’s 997.151230 warm-mist unit, this guide delivers precise, model-specific instructions. You’ll learn exactly where to position it, how to avoid white dust disasters, and why filling past the “MAX” line causes leaks. No fluff—just actionable steps to turn dry, uncomfortable air into ideal 40% humidity levels within 20 minutes.
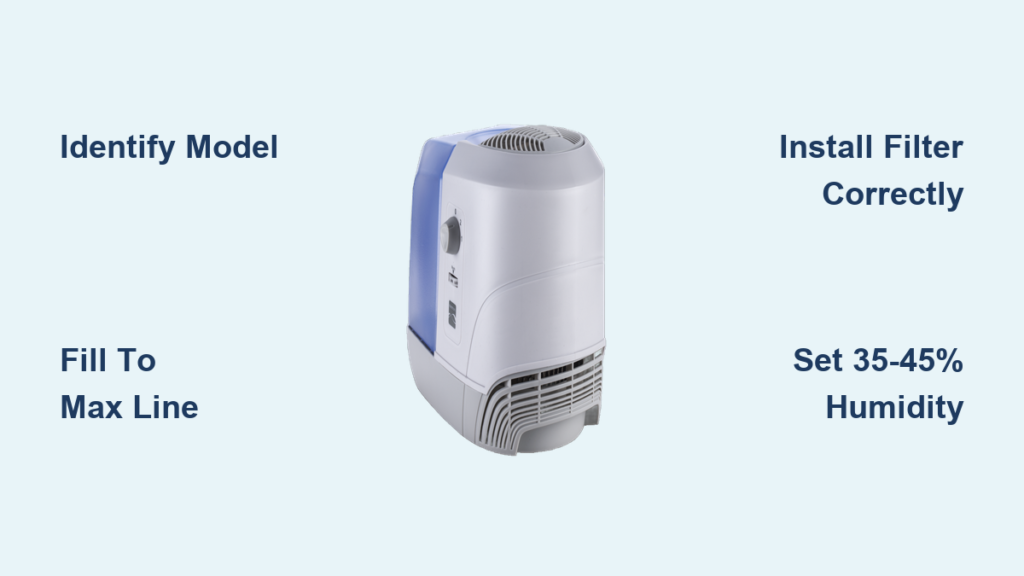
Identify Your Kenmore Model Before Powering On
Your humidifier’s behavior depends entirely on its model number—confusing a warm-mist unit with an evaporative console model risks leaks or electrical damage. Find your exact number before plugging in.
Locate your model ID in 30 seconds:
– Flip the unit over—check the bottom panel label
– Examine the rear housing near electrical ports
– Look for 9-digit codes starting with 758 (evaporative), 997 (warm-mist), or 42 (tabletop)
Critical model decoder:
– 758.144xxx: Whole-house bypass (12-gallon output, connects to HVAC)
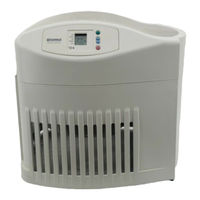
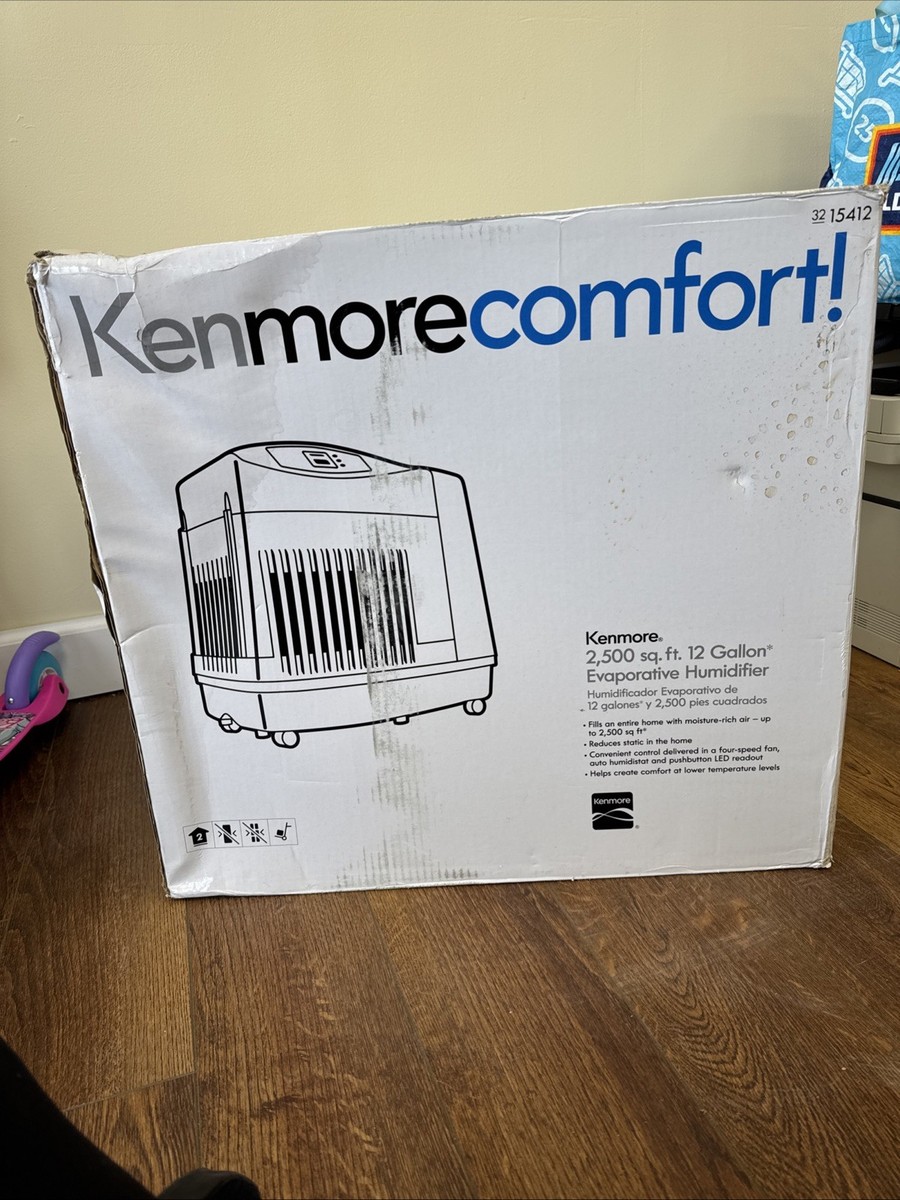
– 758.154xxx / 299xxx: Console evaporative (16-36 gallon capacity)
– 997.151230/50: Warm-mist tabletop (2-3.5 gallons, heating element)
– 1700 series: 6-gallon tabletop evaporative
– 42.14121: 3-gallon compact evaporative
Why this matters: Warm-mist units require demineralization cartridges to prevent white dust, while evaporative models need antimicrobial wicks. Using distilled water in a warm-mist unit? You’ll waste money—the cartridge handles minerals. Using tap water in hard water areas (>12 grains) with an evaporative model? White dust explosions guaranteed.
Why Model-Specific Setup Prevents Costly Mistakes
A 758.154120 console owner once filled their tank past the “MAX” line, causing leaks that warped hardwood floors. Why? Evaporative models use float sensors that malfunction when overfilled. Meanwhile, a 997.151230 warm-mist user ignored the “blue side out” wick instruction, coating their walls in mold within weeks. Always match procedures to your model—this isn’t optional.
Position Your Kenmore for Maximum Efficiency and Safety
Evaporative and tabletop units:
Place on a hard, level surface at least 6 inches away from walls—this airflow gap prevents moisture buildup that causes mold on drywall. For warm-mist models like the 997.151230, add 12 inches of overhead clearance so steam disperses safely. Never place on carpet—even minor spills wick into fibers, creating slip hazards and mildew. Pro move: Slide a plastic drip tray (like a plant saucer) under tabletop units for instant leak protection.
Whole-house models (758.144160):
Position level with your HVAC return duct within 4 feet of a grounded outlet. Route the overflow hose directly to a floor drain—kinks here cause basement floods during heavy use. If your saddle valve leaks, tighten it only until dripping stops (over-tightening cracks copper pipes).
The 2-Minute Clearance Test You Must Do
After positioning, slide your hand behind the unit. If you feel warm air or hear restricted airflow, move it farther from furniture. Blocked vents force evaporative models like the 758.154200 to work 30% harder, burning out motors prematurely. For warm-mist units, inadequate overhead space concentrates steam on ceilings—peeling paint is the first sign of trouble.
Fill Water Tanks Correctly to Avoid White Dust and Leaks
Evaporative models (758.154xxx/1700 series):
1. Press tank-release latches and lift the reservoir
2. Rinse with lukewarm water (removes factory lubricants causing odors)
3. Fill only to the MAX line with cold tap water
4. Hard water areas: Use distilled water—tap water here creates visible white dust
Warm-mist units (997.151230):
Twist the reservoir counter-clockwise, lift off, and fill exactly to the MAX line under your faucet. Overfilling triggers the safety shut-off—no mist until you restart. Seat it firmly with a clockwise twist until it clicks; loose tanks leak within hours.
Whole-house bypass (758.144160):
Open the saddle valve fully until water reaches the distribution tray. Check for drips at connections—1 drip per minute wastes 10 gallons monthly.
Why “Just a Little Over MAX” Causes Disasters
That extra cup of water seems harmless—until the float sensor in your 758.154120 sticks “full,” blocking water flow to the wick. Result? The wick dries out, overheats, and emits a burning smell within 24 hours. Or worse: warm-mist reservoirs like the 997.151230 overflow when moved, shorting the heating element. Always stop filling when the meniscus touches MAX.
Install Filters and Cartridges the Right Way
Evaporative wicks (758.154xxx/299xxx models):
Slide the blue antimicrobial-coated side facing outward into the housing frame. The white side must contact the water tray—reversing this traps bacteria. Push until the top edge clicks under the retainer clip. A misaligned wick causes uneven moisture and musty smells in 48 hours.
Warm-mist demineralization cartridges (997.1512xx):
Snap the cartridge into the recess under the reservoir cap. No click? It’s not seated—white dust appears within days. Replace monthly, or immediately if you see grayish residue on furniture.
Pro fix for forgotten replacement dates:
Write the install date with a waterproof marker on the filter’s edge. Evaporative wicks last 30-60 days depending on water hardness—ignore this, and efficiency drops 50% after 70 days.
Power Up and Set Controls for Perfect Humidity
Console evaporative units (758.154120):
– Press Power—blue LED confirms standby
– Set humidity dial to 35-45% (ideal for winter)
– Select Auto fan for quiet bedrooms; High for rapid humidification in dry rooms
Auto mode in action:
If your room is 30% RH but set to 40%, the fan runs high until hitting 37%. Then it drops to low until reaching 40%. Exceeds 42%? Fan stops completely. This prevents over-humidification that triggers window condensation.
Warm-mist units (997.151230):
Turn the power knob to 1 (Low) for gentle mist in nurseries or 2 (High) for quick relief in dry bedrooms. Rotate the mist outlet away from walls—directing steam at drywall causes peeling paint in 2 weeks.
Whole-house models (758.144160):
Match the manual humidistat dial to outdoor temps:
– 20°F outside? Set dial to 35%
– 0°F outside? Set to 25%
Digital upgrades let you select 40% RH—the unit cycles with your furnace.
Solve 5 Critical Problems Before They Worsen

Refill light stays red after filling:
The float magnet in your tank is misaligned. Remove the tank, locate the thin metal stem at the bottom, and ensure it moves freely. Reinsert slowly—you’ll feel it “drop” into place. Ignoring this drains your wick dry in 90 minutes, requiring replacement.
White dust covering surfaces:
Your water hardness exceeds 12 grains. Immediate fix: Switch to distilled water. Long-term: Replace the demineralization cartridge in warm-mist units or install a whole-house softener for evaporative models. Dust reappears within hours if ignored.
Musty odor within days:
Bacteria is growing in stagnant water. Empty and sanitize the tank immediately with 1 tsp bleach per gallon (soak 20 minutes). Replace the wick if it smells sour—reusable wicks harbor mold after 2 uses without cleaning.
Water leaking from base:
Overfilling is the culprit 90% of the time. Empty to MAX line, then inspect tank seams for hairline cracks (common after storage). Warm-mist users: Ensure the reservoir is twisted fully clockwise—you’ll hear a distinct click.
Humidity not rising:
Check if windows/doors are open—just one cracked window drops output by 70%. Raise the set-point to 50% temporarily. If still failing, your wick is clogged; replace it now before the motor burns out.
End-of-Season Storage That Prevents Mold
- Run the unit empty for 30 minutes to evaporate residual moisture
- Discard all filters/wicks (store spares in sealed bags with silica gel)
- Sanitize the tank with vinegar solution, then air-dry completely
- Coil the power cord loosely—tight wrapping damages wires
- Store in original box in a climate-controlled space (garages cause plastic brittleness)
Critical step: For whole-house models, close the saddle valve and drain the distribution tray via the petcock. Left full, stagnant water breeds Legionella bacteria over summer.
Final Note: Your Kenmore delivers ideal humidity when used correctly—no more static shocks or scratchy throats. Stick to the 35-45% winter humidity sweet spot, replace filters on schedule, and clean weekly with vinegar. Keep this quick-reference checklist taped near your unit: Position with clearances → Install fresh filter → Fill to MAX → Power on → Set 40% humidity → Mark filter date. In 20 minutes, you’ll breathe easier with perfectly balanced air.


