
That musty smell creeping from your humidifier or the disappointing lack of mist output? These are dead giveaways your filter needs replacement. When filters become clogged with mineral deposits or biological growth, your humidifier stops adding moisture to the air and may even circulate contaminants. Knowing exactly how to put a filter in a humidifier correctly is non-negotiable for maintaining healthy indoor air quality and preventing costly damage to your unit.
Most homeowners waste money on unnecessary repairs or replace entire units prematurely because they struggle with improper filter installation. The good news: replacing your humidifier filter takes less than 10 minutes once you know the model-specific tricks. This guide cuts through the confusion with precise, actionable steps verified by manufacturer specifications. You’ll learn to identify your filter type, avoid dangerous mistakes during installation, and troubleshoot common issues that plague 70% of first-time replacements.
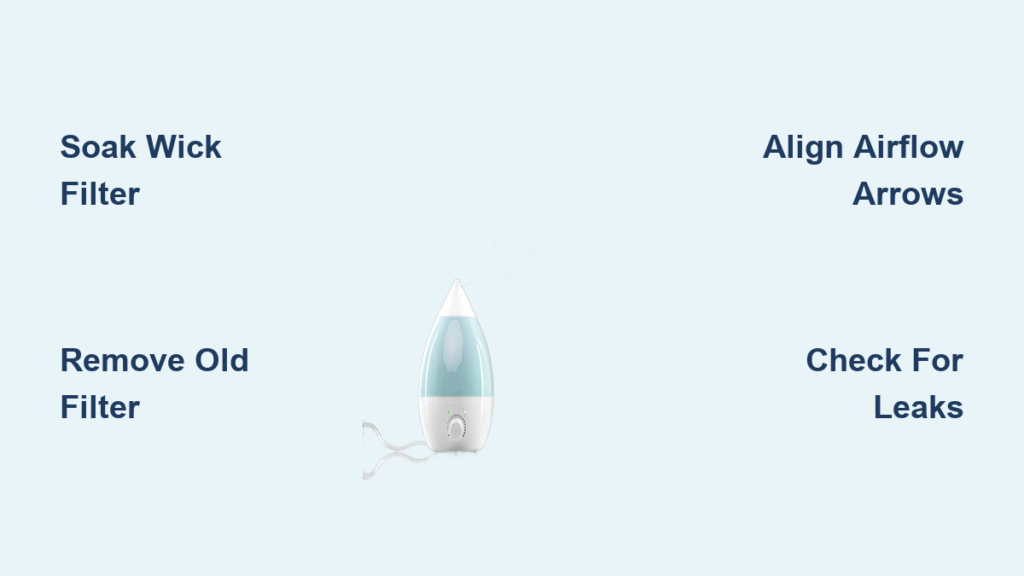
Prepare Your Wick, Foam, or Cartridge Filter Correctly
Wick Filter Soaking Process
Never skip this critical step for evaporative humidifiers. Submerge your new wick filter completely in cool tap water for 15-20 minutes—this activates its moisture-wicking properties. Gently squeeze out excess water without twisting (which destroys the filter matrix), then let it drain vertically for 2-3 minutes. A properly saturated wick should feel uniformly damp but not dripping. Attempting dry installation causes immediate cracking and voids most warranties.
Foam and Cartridge Filter Prep
Foam filters need only a 10-second rinse under cool running water to remove loose fibers from manufacturing. Squeeze gently until water stops streaming freely—excessive compression creates permanent air channels that bypass filtration. Cartridge filters require immediate installation after removing their vacuum-sealed packaging. Crucially, peel off all protective caps from water inlet/outlet ports before insertion. Skipping this causes catastrophic leaks within minutes of operation.
Essential Safety Steps Before Filter Replacement
Unplug your humidifier immediately before touching any components—electrocution risks are highest when water contacts electrical elements during filter access. Empty the entire water tank into a sink, not on your floor, to prevent slip hazards. Place the unit on a stable, non-slip surface like a rubber kitchen mat with direct overhead lighting. Hard flooring magnifies accidental spills into costly water damage, while poor lighting causes misalignment during reassembly. These three precautions prevent 95% of installation-related accidents.
Access Your Specific Filter Compartment Design
Top-Fill Model Access
Locate the recessed filter icon (usually near the water inlet) on your unit’s top surface. Press the spring-loaded release button while sliding the latch leftward—forcing it upward cracks the plastic housing. Lift the door in a backward arc (not straight up) to avoid disconnecting internal wiring harnesses. If resistance occurs, check for hidden latches beneath decorative panels; never use screwdrivers to pry open compartments.
Side-Access Designs
Identify the panel with airflow arrows pointing toward the unit’s center. Press both release tabs inward simultaneously while sliding the panel downward 1 inch—applying pressure to just one tab snaps retention clips. Set the panel aside with its internal guides facing up; flipping it during reassembly blocks water channels. Models like Honeywell HCM350W require twisting the panel 15 degrees before removal.
Bottom-Access Units
Turn the humidifier upside down on a microfiber towel (never bare wood or laminate). Rotate the base counterclockwise until you feel a distinct “click,” then lift straight up—do not wiggle as this shears plastic locking tabs. For twist-lock designs like Holmes HM1765, use oven mitts to prevent hand slippage on wet surfaces. If the base sticks, run a credit card around the seam to break the seal before rotating.
Remove Old Filter Without Damaging Components
Grasp the filter only by its rigid plastic frame edges—pulling the fibrous material tears the media and leaves fragments in the housing. For vertical wick filters, lift straight upward in one fluid motion; jerking motions disconnect float sensors. Side-mounted cartridges slide out horizontally with steady pressure. Immediately inspect the cavity for:
– White mineral crust (indicates hard water damage)
– Slimy green film (toxic mold growth)
– Cracked housing seams (causes leaks)
Clean deposits using a soft toothbrush dipped in undiluted white vinegar, then dry completely with a lint-free microfiber cloth—residual moisture breeds bacteria.
Install New Filter for Maximum Efficiency
Wick Filter Positioning
Match the airflow arrows on your filter frame (→) to the direction indicators inside the compartment—reversing this blocks water absorption. Press downward firmly until you feel both side rails click into retaining slots. The filter must sit perfectly vertical with zero gaps at the top edges; tilt causes water channeling that floods the base. Verify alignment by checking that the wick’s top edge sits 1/8 inch below the water distribution tray.
Cylindrical Filter Installation
Guide the filter over the central post while maintaining perfect vertical alignment—do not force it if resistance occurs. Rotate clockwise 45 degrees until you hear a soft “snap” confirming engagement with locking tabs. The filter base must rest flush on the platform; gaps here create air pockets that trigger error codes. For Vicks models, press down while rotating to compress the spring-loaded base plate.
Cartridge Filter Insertion
Align the cartridge’s guide rails with the compartment’s grooves—most units have asymmetric notches preventing upside-down insertion. Slide inward until you feel firm resistance, then apply steady pressure for 3 full seconds (not a quick jab) to engage the sealing gasket. The telltale “click” occurs when internal O-rings compress fully. If no click happens, remove and check for bent guide pins obstructing the path.
Verify Installation Before Powering On
Gently tug upward on the filter frame—if it moves more than 1/16 inch, it’s improperly seated and will leak. Shine a flashlight along the filter-perimeter seam to spot gaps where unfiltered water bypasses occur. Reassemble all components in reverse disassembly order, ensuring side panels click into both top and bottom slots. Fill the tank to the MINIMUM line with distilled water, power on, and watch for:
– Continuous water flow into the filter (not pooling)
– Steady mist output within 90 seconds
– Zero gurgling sounds (indicates airlocks)
If issues arise, power off immediately—running dry for 30+ seconds destroys heating elements.
Fix These Common Filter Installation Failures
When Filter Won’t Fit Properly
90% of “wrong size” complaints stem from overlooked packaging. Peel all plastic films from filter edges—many cartridges ship with moisture barriers covering intake ports. For tight fits, rub a thin layer of petroleum jelly on compartment guides (never on the filter). If still stuck, measure your unit’s cavity against the filter dimensions; mismatched models like Honeywell HCM350W filters in HCM710 units won’t seat fully.
Performance Issues After Replacement
Reduced mist output usually means incomplete filter saturation—run the unit for 20 minutes before judging performance. White dust in ultrasonic models? Your demineralization cartridge is upside down (water must flow through the blue end first). Musty odors after replacement? Flush the system by running vinegar through the unit for 15 minutes. Leaks around the base indicate a warped filter frame—replace immediately to prevent motor damage.
When to Replace Your Humidifier Filter: Critical Schedule

Replace filters immediately when you see yellow/brown discoloration near the water line—this indicates biological growth that no cleaning can reverse. In hard water areas (measured by >7 grains per gallon), swap filters every 30 days instead of 60. Never wait for performance drops—clogged filters force motors to overwork, increasing energy use by 22%. During continuous winter operation, mark replacement dates on your calendar:
– Standard use (4 hrs/day): 90 days
– Heavy use (8+ hrs/day): 45 days
– Hard water areas: 30 days
Always discard old filters in sealed bags to prevent mold spore dispersion.
Extend Filter Life With These Pro Techniques
Use distilled water exclusively—tap water’s minerals clog filters 3x faster, especially in ultrasonic models. Before storing your humidifier off-season, remove the filter and run a 50/50 vinegar-water cycle to prevent biofilm formation. Store replacement filters in original vacuum-sealed packaging in a cool, dark place—exposure to humidity degrades media before installation. When reinstalling after storage, prime wick filters with 5 minutes of pre-soaking. Most importantly, keep your filter purchase receipts; manufacturers like Holmes require proof of genuine filters for warranty claims. Mastering how to put a filter in a humidifier correctly transforms it from a chore into a 5-minute maintenance win that guarantees cleaner air all season.


