
That chalky white film coating your humidifier isn’t just unsightly—it’s mineral deposits slowly killing your unit’s efficiency. These stubborn calcium and magnesium buildups form every time tap water evaporates, leaving concentrated minerals behind. The harder your water, the faster these deposits accumulate, eventually blocking mist output and creating that dreaded white dust settling on furniture.
Whether you’re battling weekly film or years of neglected buildup, this guide delivers proven methods to restore your humidifier’s performance. You’ll learn which cleaning agents work fastest, safety steps that prevent damage, and prevention tricks to keep deposits from returning. Most importantly, you’ll discover exactly how to remove mineral deposits from humidifier components without voiding warranties or damaging sensitive parts.
Essential Safety Steps Before Cleaning
Electric shock risks multiply when cleaning plugged-in humidifiers. Always unplug your unit and wait 30 minutes for warm mist models to cool completely. Never submerge electrical bases—water intrusion causes permanent damage or dangerous shorts. Work near open windows when using acidic cleaners to avoid respiratory irritation.
Chemical safety is non-negotiable during mineral removal. Wear rubber gloves to protect skin from vinegar or citric acid. Never mix bleach with vinegar—it creates toxic chlorine gas. Rinse every component until chemical smells disappear completely, as residual acids can disperse into your air during operation. If you smell vinegar while running the unit, repeat rinsing immediately.
Required Cleaning Supplies for Mineral Removal
:max_bytes(150000):strip_icc()/SPR-how-to-clean-a-humidifier-with-vinegar-8744907-hero-80a7ae9e956d481891aa655dc298e531.jpg)
White distilled vinegar dissolves 90% of mineral deposits safely. Its 5% acetic acid concentration breaks down calcium without harming plastic components. For severe buildup, citric acid powder outperforms vinegar—mix 2-3 tablespoons per cup of warm water for maximum effectiveness.
Critical tools make mineral removal thorough:
– Soft-bristled bottle brush for tank walls
– Cotton swabs for ultrasonic disc precision cleaning
– Wooden toothpicks to dislodge deposits from narrow channels
– Microfiber cloths for streak-free drying
Skip steel wool and abrasive pads—they scratch surfaces, creating mineral traps that accelerate future buildup. Always verify cleaning agents are compatible with your humidifier’s materials using the manufacturer’s manual.
Vinegar Cleaning Method for Light to Moderate Buildup
This 30-minute process handles most mineral deposits. Fill your water tank completely with equal parts white vinegar and warm water. For thicker buildup, use undiluted vinegar straight from the bottle. Let the solution soak for 30-60 minutes, swishing gently every 15 minutes to dislodge particles.
Critical ultrasonic disc care:
1. Dampen a microfiber cloth with vinegar solution
2. Wipe the metallic disc in circular motions with light pressure
3. Use cotton swabs for edges and sensor areas
4. Never scrub—the disc surface is easily damaged
Heating element warning: Never submerge electric components. Instead, apply vinegar solution with a cloth, focusing on visible mineral crust. After cleaning, rinse all parts until water runs clear and vinegar smell vanishes—this typically takes 3-4 full water cycles.
Citric Acid Heavy-Duty Treatment for Stubborn Deposits
When vinegar fails, citric acid dissolves rock-hard mineral buildup. Mix 2-3 tablespoons of food-grade powder with one cup of warm water until fully dissolved. For extreme cases, create a thick paste (equal parts powder and water) to apply directly to crusty areas.
Application protocol:
– Apply solution to affected zones using cotton swabs
– Wait 15-30 minutes for chemical reaction (do not exceed)
– Gently brush deposits with soft-bristled tool
– Rinse thoroughly under running water
– Repeat if white residue remains visible
Pro tip: Slightly warm (not hot) citric acid solutions work faster, but boiling temperatures can warp plastic components. Always test on inconspicuous areas first if using commercial descalers.
Ultrasonic Disc Deep Cleaning Without Damage
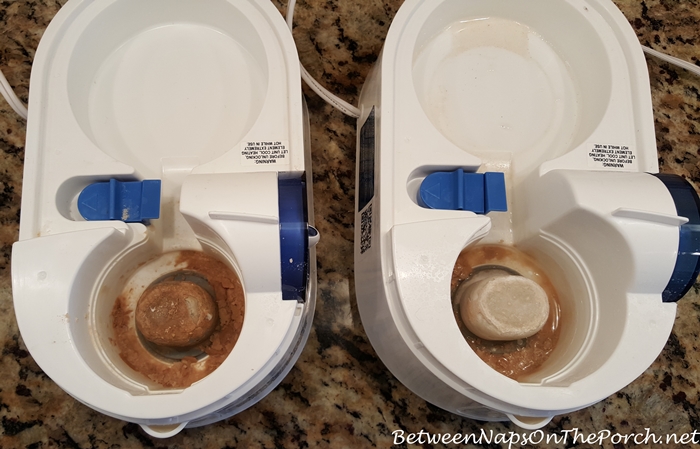
Mineral film on ultrasonic discs causes weak or nonexistent mist output. Remove the disc if your model allows (consult manual), then soak it in vinegar for 30 minutes maximum. For non-removable discs, invert the base and pour vinegar solution only over the disc area—never submerge electrical parts.
Critical technique:
– Use wooden toothpicks—not metal—to scrape disc edges
– Wipe center with vinegar-dampened cotton balls
– Rinse with distilled water to prevent new deposits
– Air dry completely before reassembly
Never use abrasive tools on these vibration-sensitive components. If the disc appears pitted or corroded after cleaning, replacement is necessary for proper function.
Wick Filter Replacement vs Cleaning Decisions
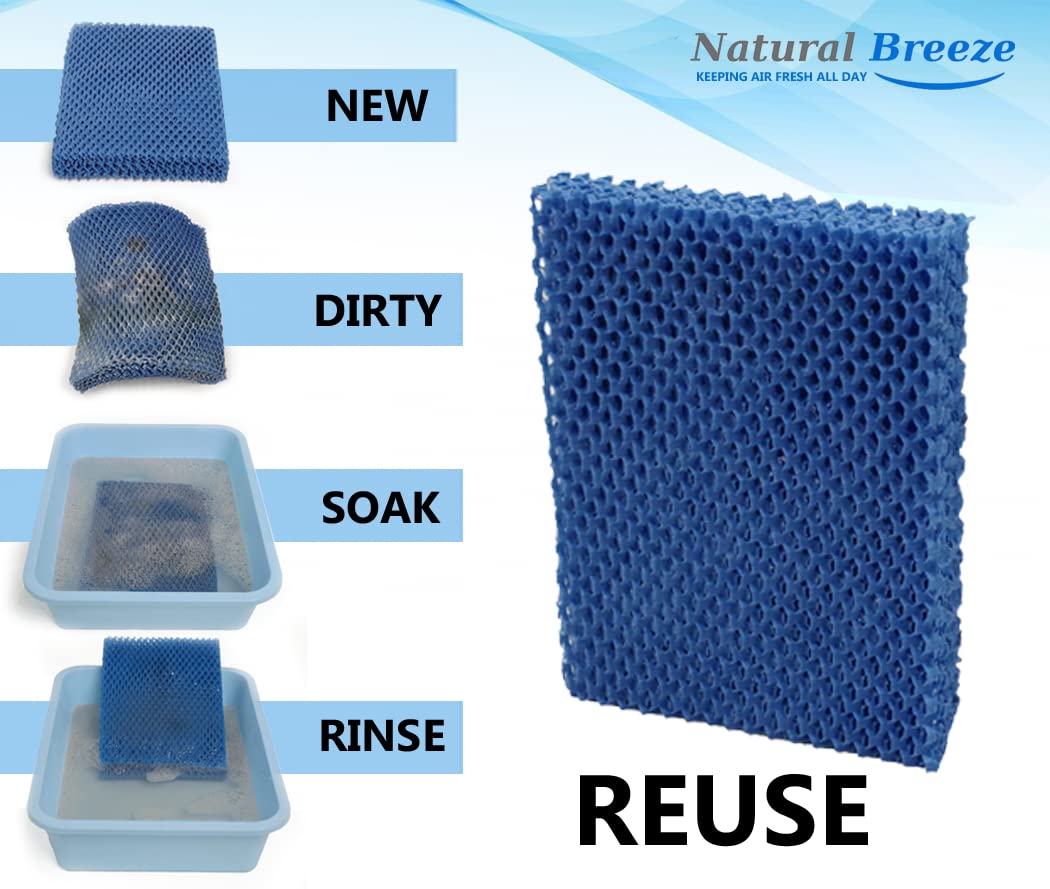
Evaporative humidifier wicks trap minerals deep within fibers, making cleaning ineffective. If your wick feels rigid, shows white crust, or develops musty odors, replacement is more practical than cleaning. Attempting to clean heavily mineralized wicks often damages their water-absorbing structure.
Salvageable wick protocol:
– Soak for 20 minutes maximum in vinegar solution
– Rinse under warm running water until clear
– Air dry completely (24+ hours) before reuse
– Replace immediately if stiffness persists
Check wicks weekly during heavy use—mineral-clogged filters reduce humidity output by up to 70% and strain motor components.
Prevent Mineral Buildup Before It Starts
Distilled water eliminates 90% of mineral deposit problems. Though slightly more expensive than tap water, it prevents the $50-$300 cost of premature humidifier replacement. Install water hardness test strips near your unit to monitor mineral levels—switch to distilled water when tests exceed 7 grains per gallon.
Daily prevention habits that work:
– Empty and rinse the tank daily
– Never leave standing water for more than 24 hours
– Wipe tank interior with dry cloth before refilling
– Store unit in a dry location during off-seasons
For hard water areas, add a demineralization cartridge to your humidifier—it captures calcium before it reaches critical components.
Troubleshooting Common Mineral Deposit Issues
White dust coating furniture? Your water hardness exceeds the unit’s capacity. Immediately switch to distilled water and inspect demineralization cartridges for damage. Persistent dust indicates severe internal buildup requiring citric acid treatment.
Weak mist output points directly to mineral-coated components. Clean the ultrasonic disc first, then check water inlet channels for blockages. If noise accompanies weak output, mineral particles are likely jamming fan mechanisms—disassemble and rinse impeller bearings carefully.
Odors after cleaning mean inadequate rinsing. Run three full water cycles with distilled water before regular use. Never operate the unit until all vinegar or citric acid smells disappear completely.
Emergency Quick Fixes for Immediate Use
Guests arriving with a crusty humidifier? Drop two denture cleaning tablets into the water tank, let fizz for 15 minutes, then rinse thoroughly. For spot treatment, apply lemon juice concentrate to visible deposits using a cotton swab—rinse after 10 minutes.
Rapid deposit assessment saves time:
– Shake the tank—audible rattling means loose particles
– Shine a flashlight through water channels for blockages
– Run your finger along tank walls—roughness indicates buildup
These temporary fixes buy 24-48 hours of clean operation but don’t replace proper deep cleaning.
Maintenance Schedule for Long-Term Prevention
Daily during use:
– Empty and rinse water tank
– Wipe exterior surfaces
– Check mist output strength
Weekly deep clean:
– Soak all parts in vinegar solution for 60 minutes
– Scrub tank corners and water channels
– Replace filters if applicable
Monthly intensive care:
– Use citric acid for stubborn deposits
– Sanitize with hydrogen peroxide solution (1:3 ratio)
– Inspect seals and gaskets for wear
Consistent maintenance prevents the severe buildup requiring aggressive chemicals. Mark your calendar for weekly cleaning sessions—you’ll extend your humidifier’s life by 2-3 years while maintaining optimal air quality.
Final Maintenance Tips Before Storage
Store your humidifier properly between seasons. Complete a full citric acid cleaning cycle, then disassemble all parts. Dry every component thoroughly with microfiber cloths—moisture left in crevices causes mold and hardens minerals. Store in original packaging if available, with silica gel packets to absorb ambient humidity.
Never store with water inside—this creates ideal conditions for mineral crystallization and bacterial growth. Before winter storage, run one final cycle with distilled water to flush residual minerals. When you retrieve your unit next season, you’ll avoid the frustration of dealing with rock-hard deposits that form during storage. Your consistent attention to how to remove mineral deposits from humidifier components ensures years of whisper-quiet operation and clean, comfortable air.


