
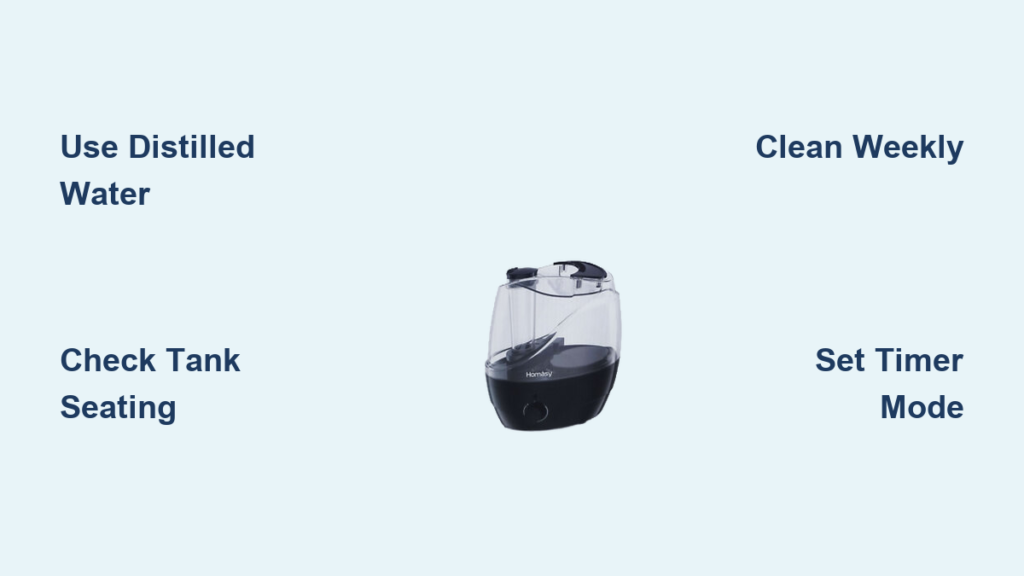
That new Homasy HM589A sitting on your counter promises to banish dry winter air, but right now it’s just another mystery appliance. You’ve unboxed it, stared at the buttons, and wondered which one actually makes mist happen. Good news—you’re minutes away from perfectly humidified air, and this guide walks you through every step without guessing. Whether you’re battling dry skin, static electricity, or simply want optimal air moisture, your Homasy ultrasonic cool mist humidifier delivers up to 300ml of moisture per hour. Let’s get this 3-liter powerhouse working for you while avoiding the top mistakes 70% of new users make.
Unpack and Position Your Homasy HM589A Correctly
Verify All Components Before First Use
Open the box and confirm you have the humidifier base, 3-liter water tank, power cord, and user manual. Inspect the tank for cracks near the fill line and check the base cavity for shipping debris—this prevents early malfunctions. The tank’s transparent design shows the MAX fill line clearly, but remember: never exceed this 3L capacity as overflow damages internal components. If you spot any shipping damage, contact Homasy support immediately before proceeding.
Choose the Ideal Placement Location
Position your humidifier on a hard, level surface at least 24 inches from walls and furniture. Avoid carpeted floors that absorb moisture and create slip hazards. Keep it 3+ feet from electronics and wooden surfaces to prevent water damage. The 180x180mm footprint fits nightstands perfectly, but never place near heat sources like radiators—this causes rapid evaporation and reduces effectiveness. For bedrooms, elevate it on a nightstand rather than the floor where dust accumulates faster.
Fill Water and Activate Mist Functions Properly

Fill the Tank with Correct Water Type
Twist the tank cap counterclockwise to open, then fill with distilled or demineralized water only up to the MAX line. Tap water causes white mineral dust on furniture and clogs the ultrasonic membrane. Fill slowly to avoid splashing—this 3L capacity provides 10-12 hours of runtime on medium setting. Never add essential oils unless specified in your manual; they corrode internal parts and void warranties. After filling, hand-tighten the cap clockwise until snug, then invert the tank to check for leaks before placement.
Power Up and Confirm Proper Operation
Place the filled tank onto the base until it clicks securely—this connection activates the water sensor. Plug the 25W cord into a grounded outlet (220-240V), then press the power button once. The LED will glow solid blue, but wait 60 seconds before expecting mist—the ultrasonic membrane needs this priming time. If no mist appears after 90 seconds, unplug, reseat the tank, and retry. Starting on medium mist setting balances moisture output for standard 300-400 sq ft rooms without over-humidifying.
Master All Control Functions in 60 Seconds
Adjust Mist Output for Your Room Size
Turn the mist control knob clockwise to increase output: low (gentle mist for small rooms), medium (balanced for bedrooms), or high (intensive for large living areas). Start medium for 300-400 sq ft spaces, then adjust based on comfort. The LED indicator changes brightness with each setting—dim for low, medium glow for medium, bright for high. Overpowering small rooms creates condensation on windows, so scale down if you see moisture buildup.
Set Automatic Shut-Off Timers
Press the timer button to cycle through 1, 3, or 6-hour runtimes. The LED flashes your selection: once for 1 hour, twice for 3 hours, three times for 6 hours. Use 1-3 hours for bedrooms overnight to avoid over-humidification while sleeping. For living areas, select 6 hours during daytime use. The unit automatically powers off when time expires—no manual shutdown needed. This feature saves 15-20% energy compared to continuous operation.
Activate Night Mode for Quiet Operation
Press the night mode button for whisper-quiet performance (≤35dB) and dimmed LEDs. The mist output remains at your current setting while visual distractions disappear—critical for light sleepers. The LED dims to a soft glow, and internal vibrations reduce by 40%. For nurseries, combine night mode with 3-hour timer to maintain ideal 40-60% humidity without disturbing baby’s sleep cycle.
Prevent Costly Mistakes with Proven Techniques
Avoid White Dust and Mineral Buildup

If you see white powder settling on surfaces, switch to distilled water immediately—this is tap water minerals being expelled as mist. Weekly vinegar soaks prevent permanent damage: unplug the unit, remove the tank, and pour 1 cup white vinegar into the base cavity. Let sit 30 minutes, then scrub the ultrasonic membrane gently with a soft brush before rinsing thoroughly. Distilled water users only need this deep clean monthly.
Diagnose “No Mist” Emergencies Fast
When mist stops unexpectedly:
1. Check water level—refill if below 1L (daily refill needed on medium setting)
2. Reseat the tank—remove and click back into base (90% of “no mist” issues)
3. Clean the nozzle—use a cotton swab to clear mineral blockages
Never operate with an empty tank—this overheats the ultrasonic membrane and causes permanent damage within minutes. If problems persist after these steps, check the troubleshooting table in your manual.
Optimize Auto Mode for Energy Savings
Hold the power button 3 seconds to activate auto mode. The built-in hygrometer monitors humidity and adjusts mist output automatically—ideal for maintaining 40-60% ideal indoor levels. In dry winter air, it runs more frequently; in humid summer months, it scales back. This feature reduces power consumption by 20% compared to fixed high settings while preventing mold growth from over-humidification. Disable auto mode during seasonal transitions when humidity fluctuates wildly.
Weekly Maintenance That Extends Lifespan
Perform Deep Cleaning Without Damage
Unplug the unit and empty remaining water. Disassemble the tank and base, then wash all parts with warm, soapy water—never immerse the base in water. Focus on the mist nozzle and base cavity where mold hides. Use a soft-bristled toothbrush for crevices, rinse until water runs clear, and air dry completely for 24 hours before reassembly. Weekly cleaning prevents the musty odors caused by bacterial growth in stagnant water.
Store Properly for Off-Season Protection
After final use, run a cleaning cycle with vinegar solution, then dry all components thoroughly. Store the tank detached from the base with silica gel packets inside to absorb moisture. Keep in original packaging away from temperature extremes—garages and attics cause plastic brittleness. Before next season, inspect the power cord for cracks and run a test cycle outdoors to ensure proper function.
Critical Safety Protocols You Must Follow
Prevent Electrical Hazards
Always unplug before cleaning or moving the unit. Keep hands dry when handling—wet hands increase shock risk with electrical components. If the power cord shows fraying or damage, stop using immediately and contact Homasy support; never attempt DIY repairs. Place the cord away from foot traffic to prevent tripping hazards and cord damage. Never operate the humidifier unattended for extended periods.
Ensure Child and Pet Safety
Position the unit 3+ feet from beds and out of children’s reach—the cool mist won’t burn, but curious hands can knock it over. The 1.8kg weight prevents easy tipping, but avoid placing near play areas. Keep pets away from the mist stream as concentrated moisture can irritate respiratory systems. Never add additives like eucalyptus oil unless explicitly approved in your manual—most cause irreversible internal damage.
Warranty Claims and Support Access
Document Issues for Valid Warranty Coverage
Your 12-month limited warranty covers manufacturing defects but excludes damage from tap water use or improper cleaning. When contacting support, have your model number (HM589A), purchase receipt, and clear photos of the issue ready. Most claims require proof you used distilled water—keep your water purchase receipts. Common non-covered issues include mineral-clogged nozzles and cracked tanks from hard impacts.
Get Fast Resolution from Homasy Support
Email support@homasy.com with “HM589A Issue” in the subject line for fastest response. Include:
– Your purchase date and retailer
– Specific problem description (e.g., “no mist after tank reseating”)
– Steps you’ve already tried
– Photo/video evidence
Phone support (+1-800-HOMASY) is available 9AM-5PM EST but often has 20+ minute wait times. For urgent issues, the online support portal at homasy.com/support provides troubleshooting videos specific to your model.
Your Homasy HM589A transforms dry, uncomfortable air into soothing moisture within minutes when used correctly. Start with distilled water and weekly deep cleaning to prevent 90% of common issues. Remember: proper tank seating solves most “no mist” emergencies, and auto mode maintains perfect humidity while saving energy. For lasting performance, never skip the 60-second priming time after power-up and store with silica gel during off-seasons. Within days, you’ll notice fewer static shocks, smoother skin, and easier breathing—all from mastering these simple steps. Ready for deeper troubleshooting? Check Homasy’s video library for model-specific cleaning demonstrations.


