

Changing your Coway air purifier filter properly is the single most important maintenance task to ensure clean, healthy air in your home. When filters become clogged with dust, pollen, and other airborne particles, your Airmega unit struggles to maintain optimal performance, wasting energy while delivering diminishing air quality results. This comprehensive guide walks you through every step of the Coway air purifier filter change process, from recognizing when replacement is needed to troubleshooting common issues that arise after installation.
Most Coway Airmega models require filter replacement every 6 to 12 months, though actual timing depends on your indoor environment and usage patterns. Homes with pets, smokers, or proximity to construction areas may need more frequent changes. Your unit may include intelligent filter monitoring that alerts you when replacement is necessary, or you may need to track replacement timing manually. Following proper filter change procedures protects your investment and ensures your family breathes clean air year-round.
Spot These 5 Warning Signs Your Coway Filter Needs Replacement
Filter indicator lights on Coway Airmega models provide the most reliable monitoring method, tracking actual operating hours and airflow volume to alert you when replacement is due. These smart systems offer personalized recommendations rather than relying solely on calendar intervals, which proves especially valuable in households with varying air quality demands. If your unit’s indicator light turns red or displays a filter replacement message, don’t ignore it—your air quality is already suffering.
Without indicator lights, you’ll need to monitor replacement timing yourself. Mark your calendar when installing new filters and plan for replacement within 6 to 12 months. However, certain physical signs suggest your filter needs attention sooner than scheduled:
- Visible dust buildup on surfaces throughout your home despite regular cleaning
- Unusual operational noise from the motor straining against restricted airflow
- Reduced airflow from output vents compared to when the unit was new
- Darkened HEPA media that has changed from white/light gray to noticeably darker
- Increased allergy symptoms among household members that correlate with unit operation
Physical inspection provides another indicator, though proceed with caution if you have allergies. Carefully remove the front panel and examine the pre-filter and HEPA cartridge. Remember that operating with an exhausted filter allows captured particles to gradually release back into your indoor environment.
Don’t Skip These Essential Filter Change Supplies
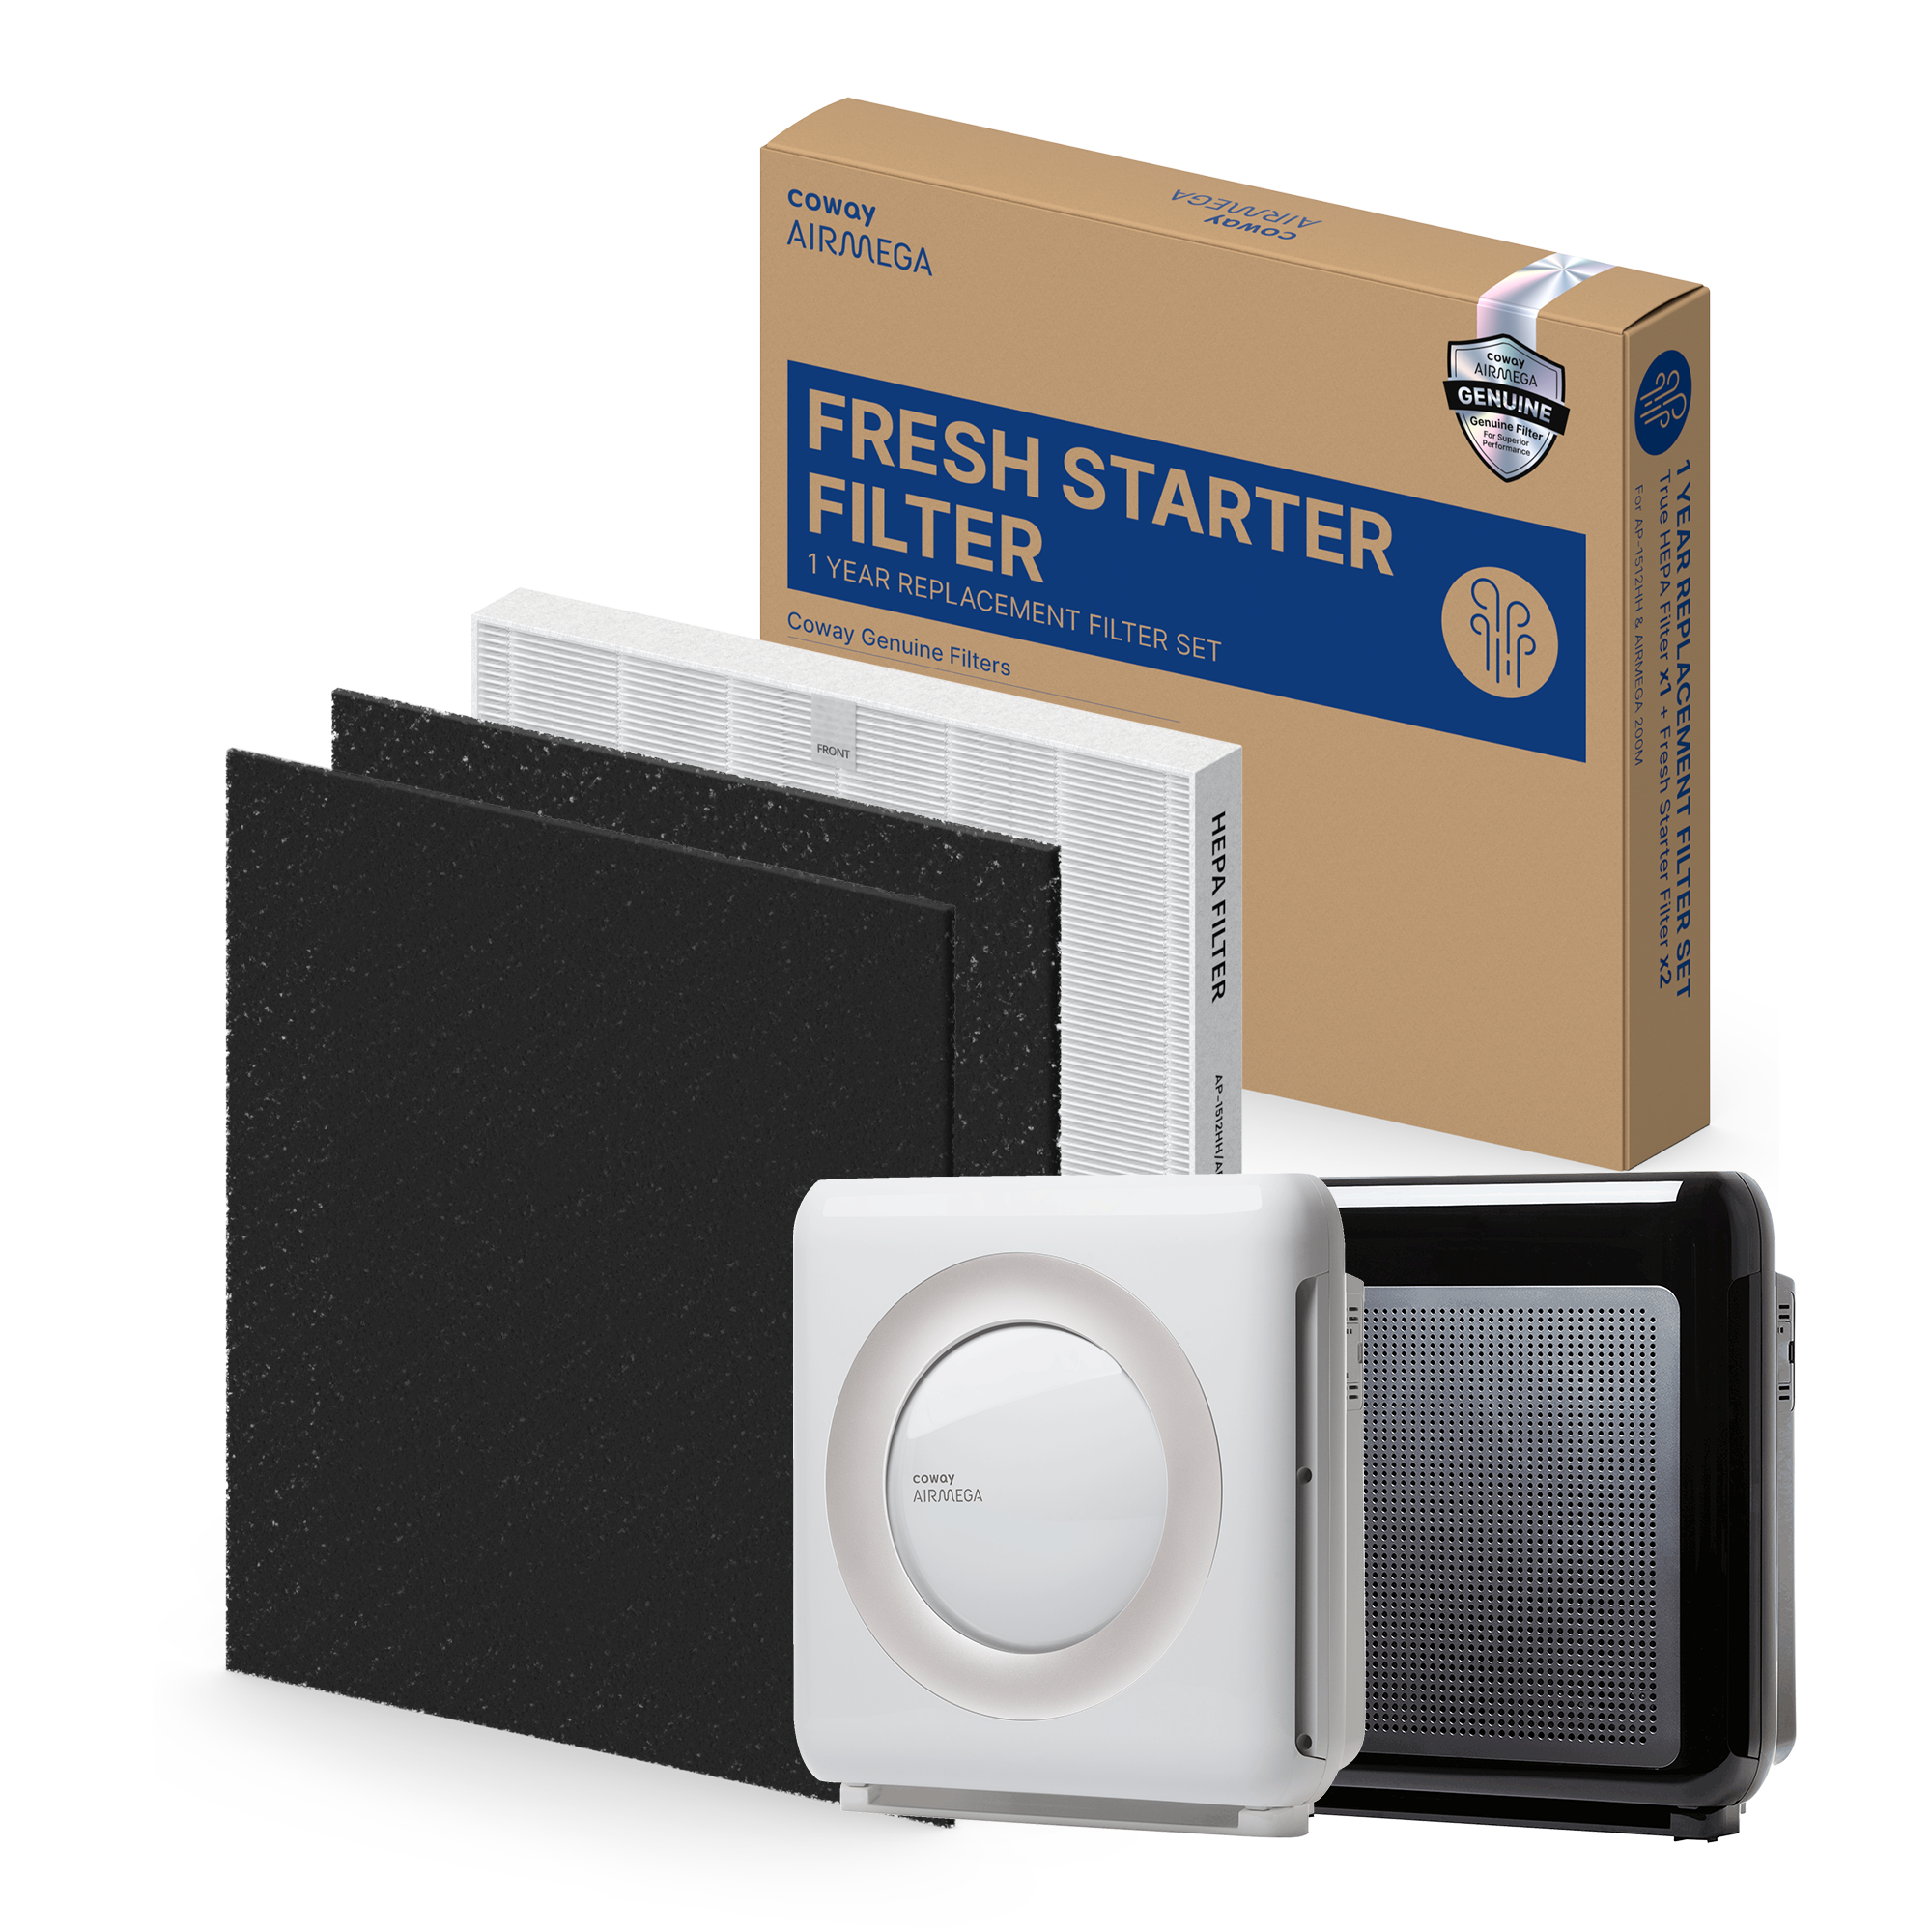
Before beginning your Coway air purifier filter change, gather these critical supplies to complete the task efficiently. Always use genuine Coway replacement filters specifically designed for your model number. Coway strongly recommends authentic filters over third-party alternatives because genuine filters are engineered for your unit’s airflow system and ensure proper fit and seal integrity. Third-party filters often compromise performance through poor fitment that creates air bypass channels.
Identify your specific Coway model before ordering replacements. Model information appears on a sticker attached to the back or bottom of the unit. Many newer Coway Airmega models use the Max2 cartridge design, which combines filtration components into a single replaceable unit. Confirming your exact model prevents the frustration of discovering incompatibility after opening the package.
You’ll also need:
– A soft brush or dry microfiber cloth for cleaning the housing compartment
– A small flashlight to inspect interior crevices for accumulated debris
– Your user manual for model-specific reset procedures
– The Coway Smart Home app installed on your smartphone (for Wi-Fi models)
Access Your Filter Compartment Without Damage
Turning off and unplugging your Coway air purifier before filter replacement is non-negotiable—this critical safety step prevents electrical hazards regardless of the unit’s location. Never attempt filter replacement while the unit remains connected to electricity.
Locate the front panel of your air purifier. Most Coway Airmega models feature either a simple latch mechanism or sliding design that allows the panel to be lifted or slid open without tools. Examine the panel edges for release buttons, tabs, or handles indicating the opening mechanism. Apply gentle, consistent pressure in the direction indicated—typically upward for lift-off panels or toward a designated arrow for sliding panels.
Handle the front panel carefully during removal. Set it aside where it won’t be damaged, especially in homes with children or pets. Avoid touching internal components unnecessarily, as skin oils attract dust. With the panel removed, note the filter arrangement and orientation before proceeding—this mental picture ensures correct reinstallation.
Models With Sliding Panels
For Coway models with sliding front panels, locate the release button or handle typically positioned at the bottom center. Press and hold the release while simultaneously sliding the panel in the direction indicated by the arrow (usually toward you). Continue sliding until the panel disengages completely from the housing.
Models With Lift-Off Panels
On lift-off panel models, locate the release tabs on both sides of the front panel. Press both tabs inward while simultaneously lifting the panel upward in a smooth motion. The panel should release without requiring excessive force—if you encounter resistance, double-check that both release mechanisms are fully engaged.
Remove and Dispose of Your Used Filter Safely
With the filter compartment exposed, carefully remove the old filter from its housing. For the pre-filter—designed to capture large particles like dust, hair, and pet fur—gently pull it away from its position to minimize releasing trapped debris. The pre-filter is washable and can be reused if in good condition, though many homeowners replace it with the HEPA cartridge.
The primary HEPA filter requires careful handling due to its role in capturing fine particulate matter. Pull it straight out from the housing, maintaining steady motion to avoid tearing accumulated material. For Max2 cartridge models, both filtration components remove together as a single unit. The used filter may feel heavier than expected due to trapped particles—this confirms it was working effectively.
Dispose of the used HEPA filter according to local regulations for HEPA-grade materials. Place it in a sealed plastic bag before disposal to prevent captured particles from becoming airborne. Individuals with allergies should consider wearing a mask during this step or having someone else handle the used filter.
Install Your New Coway Filter Without Common Mistakes
Before installing your new filter, inspect the housing compartment for accumulated dust using a soft brush or dry cloth. This preparation prevents trapped particles from bypassing the new filter or damaging internal components. If you used any moisture during cleaning, allow the compartment to dry completely before proceeding.
This critical step is often overlooked: remove all plastic packaging from your new filter. New filters arrive wrapped in protective plastic to maintain cleanliness during shipping, and this must be completely removed before installation. Operating with plastic packaging in place restricts airflow significantly, causing loud operational noise and potentially leading to premature motor failure.
Align the new filter with the designated slot, ensuring correct orientation as indicated by markings on the filter frame or airflow direction arrows. The filter should slide into position smoothly without requiring excessive force. If you encounter resistance, double-check alignment rather than forcing it. Verify the filter seats completely and fits snugly to prevent air bypass channels that reduce purification efficiency.
Reset Your Filter Indicator in 60 Seconds
After physical filter replacement, reconnect your Coway air purifier to power and turn it on. Many models feature automatic detection that recognizes a new filter installation and resets the indicator without user action. The system senses the fresh filter and adjusts tracking accordingly—this seamless process typically requires the unit to run for several minutes before recognition occurs.
For models requiring manual reset, consult your user manual for the specific procedure as button combinations vary across models. Common methods include:
– Holding the filter reset button for 5-10 seconds until the indicator light flashes
– Accessing the filter reset option through the settings menu
– Using a specific button combination (often power + fan speed buttons simultaneously)
Wi-Fi-enabled Coway air purifiers allow filter reset confirmation through the Coway Smart Home application. Open the app and navigate to your device’s filter status section to verify the replacement has been registered. The app also provides filter life monitoring and can automate reordering to ensure you have replacements available when needed.
Double Your Filter Lifespan With These Maintenance Tips
While HEPA filters require periodic replacement, proper maintenance of supporting components extends overall filtration effectiveness. Clean the washable pre-filter every 2-4 weeks through vacuuming or rinsing with water. This routine maintenance removes large particles before they reach the HEPA filter, preventing premature clogging.
Never reinstall a damp pre-filter—allow it to dry completely in a well-ventilated area away from direct sunlight. Trapped moisture promotes mold growth and can damage internal components. A fully dried pre-filter typically requires several hours of air drying.
Proper unit placement significantly impacts filter longevity. Coway recommends positioning your Airmega in the middle of spaces where clean air is desired, with six to twelve inches of free space around all vents. Central placement allows efficient air drawing and distribution while maintaining unobstructed airflow.
Wipe the air quality monitor sensor with a cotton swab every two months. Dust accumulation on this sensor impedes accurate particulate detection, leading to incorrect air quality readings and improper fan speed adjustments. Similarly, clean exterior covers and air outlets with a dry cloth every two months to maintain proper airflow.
Fix These 3 Common Post-Replacement Problems Immediately
Loud or unusual noise following filter replacement typically indicates one of three causes: remaining plastic packaging, improper filter seating, or a loose front panel. First, turn off and unplug the unit, then verify all packaging material has been removed. Next, check that the filter is properly oriented and fully seated. Finally, ensure the front panel clicks securely into place.
If the filter replacement indicator fails to reset after following your model’s procedure, confirm you’re using the correct button combination by referencing your user manual. For Wi-Fi models, refresh the status through the Coway Smart Home application. Automatic detection systems may require the unit to run for several minutes before recognizing the new filter.
Reduced airflow after filter replacement indicates improper seating or orientation issues. Remove the filter and reinstall it, paying close attention to airflow direction indicators marked on the filter frame. Verify no packaging remnants block the filter media. If issues persist, confirm you purchased a genuine Coway filter designed specifically for your unit rather than a third-party alternative with inconsistent dimensions.


