
Installing your Dyson air purifier correctly ensures maximum filtration efficiency and years of reliable clean air delivery. Whether you’ve just unboxed a new TP4A tower or are setting up a TP01, TP02, or BP01 model, following the precise installation sequence prevents common setup mistakes that could compromise performance. This comprehensive guide walks through every critical step of the dyson air purifier installation process, from unpacking to initial configuration, so you can achieve optimal air purification from day one.
The entire setup takes just 15-30 minutes with no special tools required, though skipping even one step can lead to reduced airflow, error messages, or premature filter wear. By understanding your specific model’s requirements before starting, you’ll avoid frustration and ensure your warranty remains fully valid. Let’s get your Dyson Pure Cool tower purifier running at peak performance.
Unbox and Verify Your Dyson Purifier Components
Before removing any protective materials, lay out all components on a clean surface to verify nothing is missing or damaged during shipping. Your Dyson tower purifier package should contain the main unit in upright configuration, a model-specific remote control, the pre-installed filter (with protective packaging), and documentation.
For TP4A models, check for the Part No. 969154-24 remote control with its distinctive curved design that magnetically attaches to the tower. Older TP01, TP02, and BP01 models use the Part No. 965824-07 remote. These remotes aren’t interchangeable between model lines, so confirming you have the correct one prevents future compatibility headaches.
Critical verification points:
– Inspect the tower housing for dents or cracks, especially around the filter compartment
– Ensure the remote control buttons respond when pressed (battery is pre-installed)
– Confirm the filter packaging is intact but not torn or damaged
– Check all documentation is included for your region
If any components appear damaged or missing, contact your retailer immediately before proceeding with installation—attempting setup with compromised parts could void your warranty.
Remove Protective Filter Packaging Before First Operation
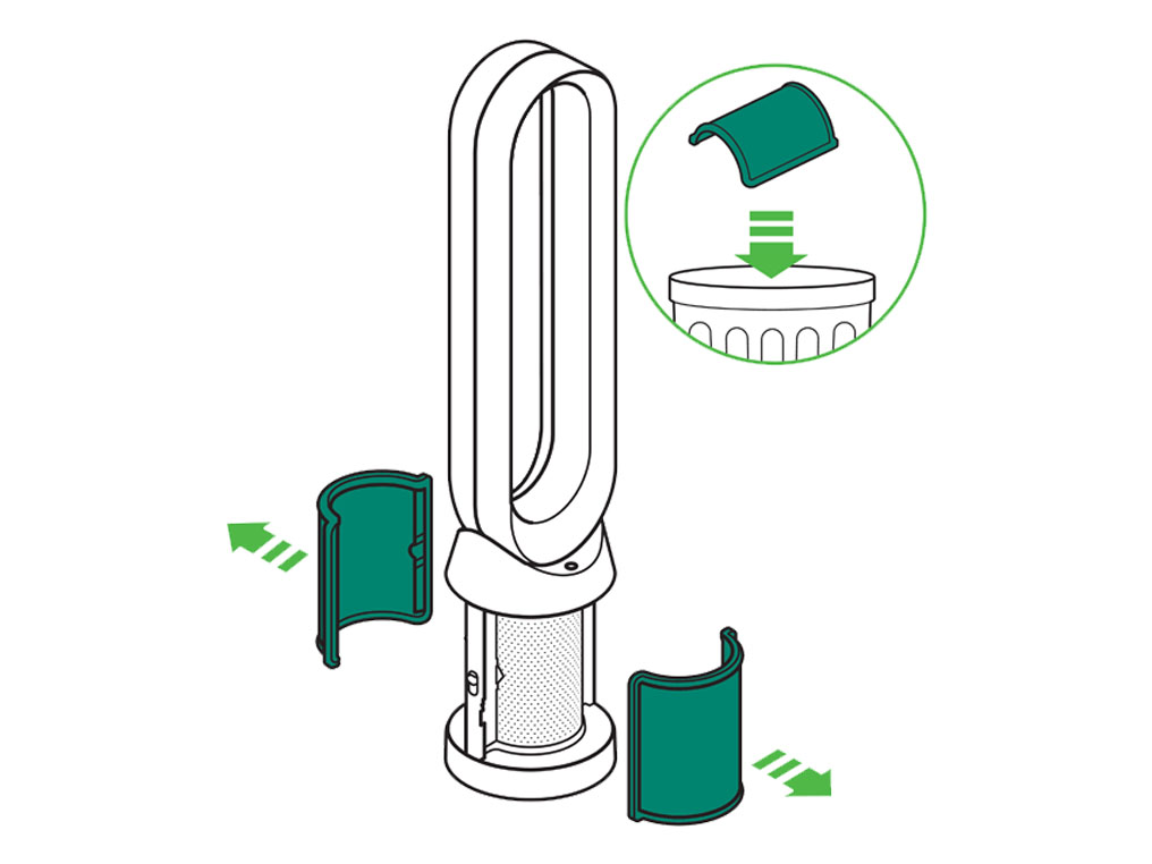
This step causes the most installation errors for first-time Dyson owners. TP4A models ship with a distinctive purple and green protective wrapper around the filter that must be completely removed before powering on the unit. Leaving even a small piece of this packaging in place will severely restrict airflow and trigger error messages.
To access the filter compartment:
1. Locate the release mechanism at the base or mid-section of your tower
2. Gently open the compartment cover (no tools required)
3. Carefully extract the filter with both hands
4. Peel away all plastic and paper packaging
5. Dispose of packaging materials properly
6. Reinsert the now-exposed black filter into the compartment
For TP01, TP02, and BP01 models, you’ll find a pre-installed all-black filter without the colored wrapper, but still verify no additional packaging remains. This initial filter removal applies only to first-time setup—subsequent filter changes will involve replacing worn all-black units rather than wrapped ones.
Position Your Dyson Air Purifier for Maximum Airflow
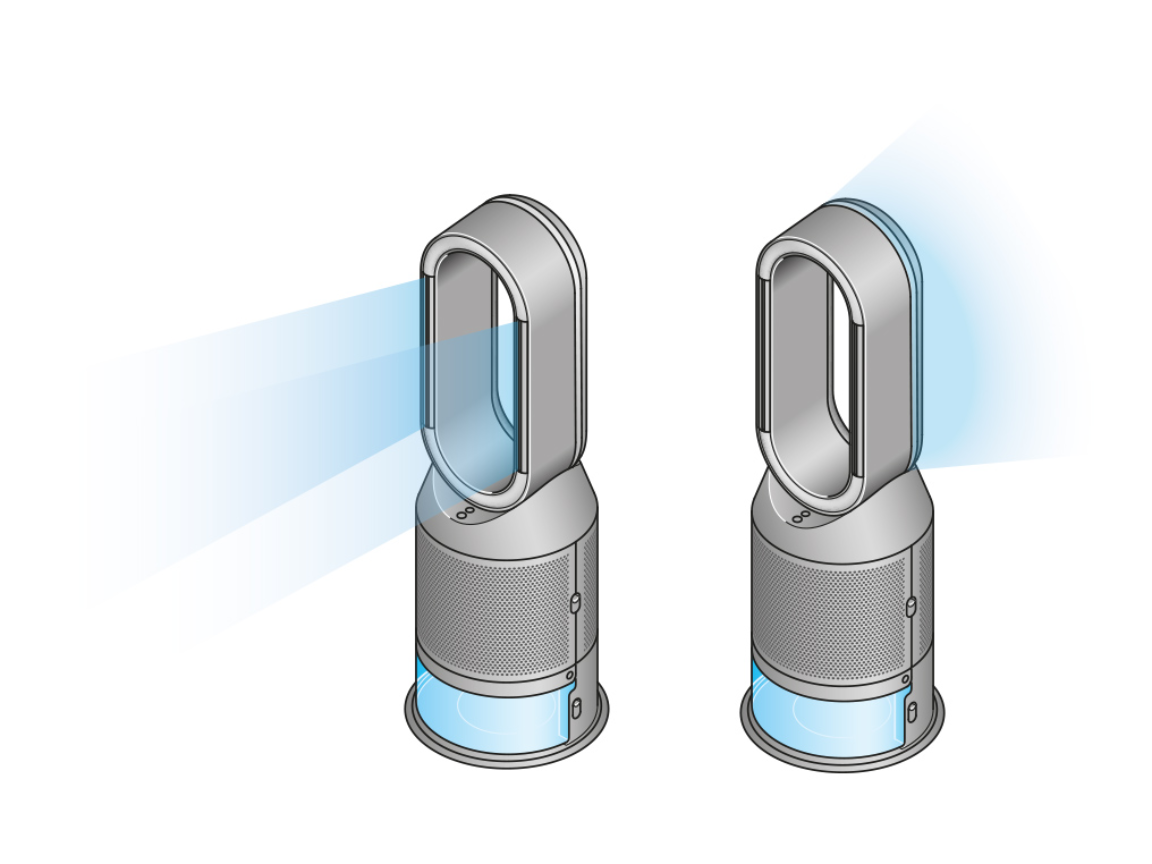
Where you place your purifier dramatically impacts its effectiveness. Dyson’s engineering requires at least 12 inches of clearance on all sides to maintain proper air intake and distribution. Placing the unit against a wall or behind furniture creates airflow obstruction that reduces purification efficiency by up to 40%.
Optimal placement guidelines:
– Position centrally in the room rather than in corners
– Keep away from heat sources like radiators or direct sunlight
– Place on a hard, level surface (carpeted floors require extra stability check)
– Ensure oscillation path remains completely unobstructed
– Avoid locations near open windows where outdoor pollutants enter
The tower design’s small footprint means you can position it strategically without sacrificing floor space. Proper placement allows the oscillation mechanism to distribute purified air throughout the entire room rather than concentrating it in one direction.
Connect Power and Verify Electrical Safety
Before plugging in your Dyson air purifier, perform these critical safety checks:
- Confirm the filter compartment is fully closed and secured
- Verify no packaging materials remain inside the unit
- Ensure the power cord shows no signs of damage or fraying
- Check your electrical outlet works by testing with another device
Plug the cord directly into a grounded wall outlet—avoid extension cords or power strips that could cause voltage fluctuations. The TP4A and older models draw minimal power (comparable to a standard lamp), but direct connection ensures stable operation during oscillation. If the unit powers on but immediately shuts off, double-check that all protective filter packaging has been removed, as this is the most common cause of startup failure.
Set Up and Program Your Magnetized Remote Control
The curved remote control isn’t just for aesthetics—it’s engineered to attach magnetically to a specific point on your tower purifier for secure storage. For TP4A models, locate the slightly indented area near the top of the unit where the remote snaps firmly into place. Older models have a designated magnetic zone midway up the tower.
Remote control functions you’ll use daily:
– Power button (top center)
– Fan speed adjustment (up/down arrows)
– Oscillation toggle (circular arrow icon)
– Timer settings (hourglass icon)
– Auto mode selection (A icon)
Before first use, press each button to verify responsiveness. If any buttons feel sticky or unresponsive, check for manufacturing debris under the keys. The remote’s battery typically lasts 12-18 months, but if you experience intermittent function, replace the CR2032 battery with proper orientation (positive side up).
Install or Replace Filters for Optimal Purification
Filter installation differs slightly between model generations but follows the same core principles. For TP4A models, you’ll use the 360° Glass HEPA and Activated Carbon Filter (Part No. 965432-01), which combines two filtration technologies in one unit. Older TP01, TP02, and BP01 models use the Dyson Genuine Filter (Part No. 972426-01).
Complete filter installation process:
1. Power off the machine completely
2. Access the filter compartment using the release mechanism
3. Remove old filter by grasping the edges firmly
4. Insert new filter ensuring correct orientation (it only fits one way)
5. Close compartment until it clicks securely
6. Reset filter life indicator through the remote control
After installation, reset the filter monitoring system by holding the filter reset button on your remote for 6 seconds until the indicator light changes. Skipping this step causes persistent replacement alerts even with a new filter installed.
Configure Initial Settings for Your Room Size
Your first operational settings significantly impact initial air quality improvement. Start with these optimal configurations:
- Set oscillation to ON for whole-room coverage
- Begin with fan speed 5-7 for the first 30 minutes to quickly clean air
- Reduce to speed 2-3 for maintenance operation
- Enable auto mode if your model supports it for intelligent adjustment
The TP4A’s advanced sensors automatically adjust fan speed based on air quality readings, while older models require manual adjustment. Allow 24 hours for the machine to establish baseline air quality readings before relying on auto mode performance.
Troubleshoot Common Dyson Installation Problems

Even with careful setup, these installation issues commonly occur:
Purifier won’t power on after setup:
– Check power cord connections at both ends
– Test the outlet with another device
– Verify all filter compartment panels are fully closed
– Remove any remaining protective packaging
Persistent filter replacement alerts:
– Reset filter life indicator using model-specific procedure
– Hold remote reset button for full 6 seconds
– Power cycle the unit after reset
Remote control not responding:
– Check battery orientation and charge level
– Clean button contacts with soft, dry cloth
– Ensure no physical obstruction between remote and unit
– Try resetting by removing battery for 30 seconds
Access Dyson Support Resources When Stuck
When installation questions arise beyond this guide, Dyson provides multiple support channels:
- Phone support: 1-866-693-9766 (8am-8pm CST weekdays, 9am-6pm weekends)
- Live chat: Available 7am-12am CST through Dyson’s website
- Video guides: Step-by-step setup demonstrations on Dyson’s YouTube channel
- User manuals: Model-specific PDFs available on Dyson’s support site
The TP4A manual (5.90 MB) and general Pure Cool manual (1.96 MB) contain exploded diagrams showing exact filter placement and compartment access points—download these before starting your installation.
Maintain Proper Installation for Long-Term Performance
Your initial dyson air purifier installation creates the foundation for years of reliable service. To preserve optimal performance:
- Reset the filter indicator after every replacement
- Keep at least 12 inches of clearance around the unit at all times
- Clean exterior surfaces weekly with a dry microfiber cloth
- Replace filters every 12 months regardless of usage
- Check for firmware updates annually through the Dyson Link app
Proper installation combined with consistent maintenance ensures your Dyson air purifier delivers maximum air purification efficiency throughout its service life. By following these precise setup steps for your specific model, you’ll enjoy cleaner, healthier air with minimal ongoing effort—turning your new tower purifier into a seamless part of your daily wellness routine.


