
That soothing mist from your humidifier should refresh your air, not coat your furniture in white dust or fill your room with musty odors. When mineral deposits clog your humidifier nozzle, you’ll notice weaker output, sputtering sounds, and potentially harmful particles circulating through your home. Learning how to clean humidifier nozzle components properly restores full performance while protecting your family from contaminants. This guide delivers proven, model-specific techniques to dissolve stubborn buildup and disinfect problem areas—no guesswork required.
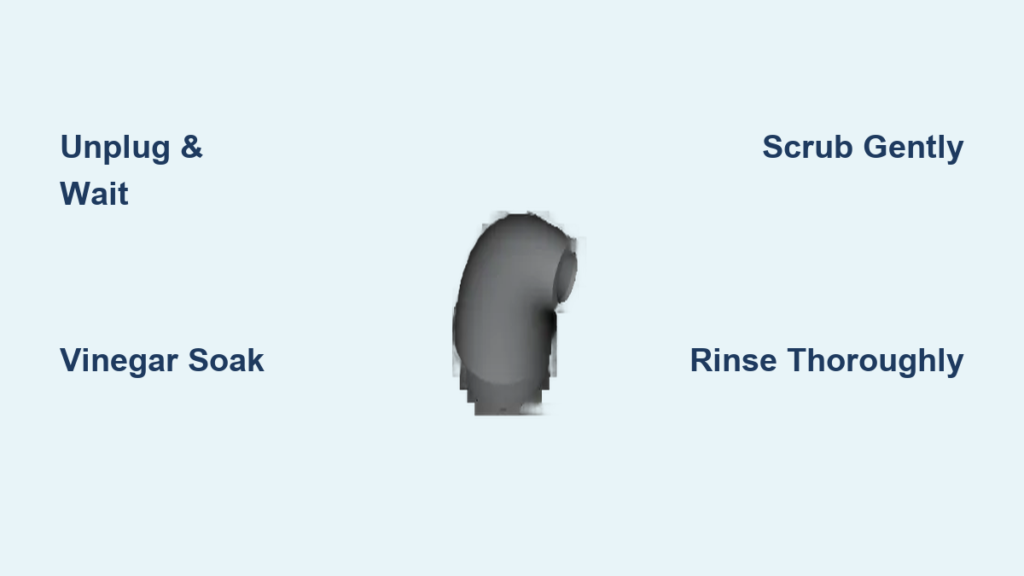
Spot These 4 Signs Your Humidifier Nozzle Needs Cleaning
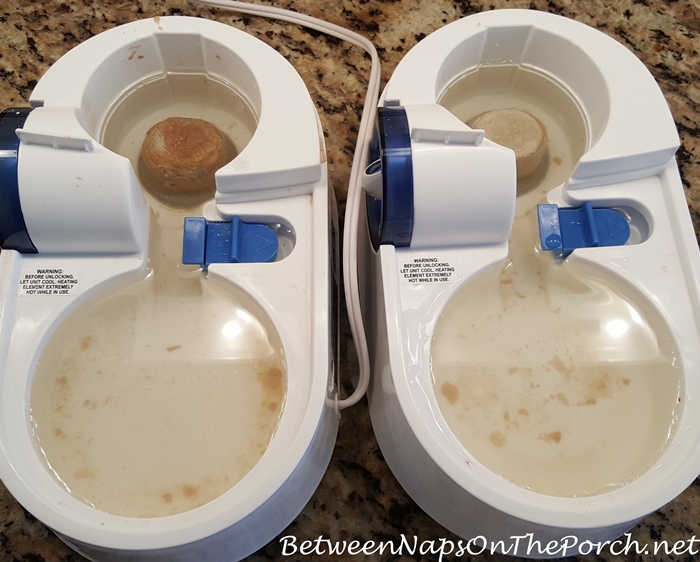
Your nozzle sends unmistakable distress signals when mineral deposits take hold. Reduced mist flow appears first—what once filled your bedroom now barely reaches your nightstand. You’ll also notice white dust accumulating on nearby surfaces within hours of operation, especially on dark furniture where it’s most visible. Persistent musty odors when the unit runs indicate microbial growth inside the nozzle chamber.
Critical warning indicators requiring immediate cleaning:
– Sputtering or uneven spray patterns during operation
– Visible crusty white or green deposits around nozzle openings
– Discolored mist (gray or cloudy appearance)
– Unexplained allergy flare-ups when humidifier is active
Power Down and Disassemble Without Damage
Unplug and wait 5 minutes before touching any component—this prevents electrical shock from residual current. Never attempt cleaning while water sits above circuit boards. Disassembly varies by technology:
– Ultrasonic units: Lift nozzle straight up (no twisting)
– Warm-mist models: Rotate counterclockwise until release click
– Evaporative designs: Press side latches while lifting
Prepare your workspace on a water-resistant surface near a sink. Kitchen counters work perfectly—lay two towels to protect finishes and contain spills. Keep all small parts organized on a labeled plate to avoid misplacement during reassembly.
Remove Limescale Buildup in 20 Minutes
Vinegar Soak for Daily Maintenance
Submerge the nozzle in undiluted white vinegar (5% acetic acid) for routine cleaning. For heavy deposits, use cleaning vinegar (6% concentration) in a narrow glass container. Watch for active bubbling—this confirms mineral dissolution. Light buildup dissolves in 20 minutes; knife-resistant crust requires 8-12 hours.
Pro scrubbing technique: After soaking, use a soft-bristled toothbrush to clean interior channels. For tight openings, twist a vinegar-soaked cotton swab inside the nozzle. Rinse under warm water until the vinegar smell disappears—typically 2-3 minutes.
Citric Acid for Extreme Buildup
When vinegar fails, create a descaling solution with 2 tablespoons citric acid powder per half-gallon warm water. Submerge the nozzle for 30-60 minutes, checking progress every 15 minutes. Never use metal tools—scratches create future buildup sites. For stubborn deposits, gently work the nozzle joints back and forth during soaking to dislodge particles.
Disinfect Mold and Bacteria Safely
Bleach Method for Heavy Contamination
Mix precisely: ½ teaspoon regular bleach (5.25-6%) in ½ gallon cool water. Higher concentrations crack plastics. Submerge nozzle for exactly 20 minutes—longer exposure weakens components. Critical safety step: Rinse under running water for 3 full minutes to eliminate chlorine residue.
Never combine vinegar and bleach—this creates toxic chlorine gas. Always complete thorough rinsing between descaling and disinfection steps. Air-dry the nozzle for 4+ hours before reassembly to ensure complete chlorine dissipation.
Hydrogen Peroxide for Sensitive Materials
Use 3% hydrogen peroxide when dealing with delicate plastics. Fill the nozzle cavity completely, let stand 30 minutes, then rinse thoroughly. While safer for polycarbonate components, note that peroxide is less effective against established mold colonies than bleach. Ideal for weekly maintenance between deep cleans.
Clean Specific Nozzle Types Correctly

Ultrasonic Nebulizer Nozzles
Remove both components: Lift off the nozzle cap, then clean the vibrating disc beneath with a vinegar-soaked cotton swab. Critical inspection point: Check the disc for hairline cracks—these harbor bacteria and require replacement. Never scrub the disc surface aggressively.
Warm-Mist Steam Outlets
Separate into three parts: Unscrew the upper steam chimney, remove the cooling chamber lid, and detach directional vanes. Soak all components together, but pay special attention to the cooling chamber where minerals accumulate rapidly. Reassemble in reverse order.
Cool-Mist Directional Spouts
Extend fully during cleaning to access pivot joints—minerals love hiding in these moving parts. Work the joint back and forth under running water while scrubbing. Dry in both open and closed positions to prevent moisture trapping.
Fix Severe Clogs with Advanced Methods
Overnight Vinegar Treatment
For rock-hard deposits that resist brushing:
1. Stand nozzle vertically in a narrow glass
2. Fill with vinegar until deposits submerge
3. Cover with plastic wrap to prevent evaporation
4. After 12 hours, crusts flake off with light brushing
Heated Vinegar (Use Extreme Caution)
Only attempt with ABS plastic nozzles:
– Warm vinegar to 120°F (never boil)
– Submerge nozzle 15-20 minutes
– Enhanced heat dissolves minerals 3x faster
– Critical warning: Use oven mitts—hot vinegar causes severe burns
Verify Performance After Cleaning
10-Minute Functionality Test
After reassembly:
1. Fill tank with distilled water
2. Run humidifier 10 minutes in ventilated area
3. Confirm these results:
– Steady mist without sputtering
– Zero white dust particles
– No unusual odors
Spray Pattern Diagnostic
Direct mist toward a dark surface in dim light. Clean nozzles produce a uniform, fine haze. Contaminated units show droplet formation, uneven distribution, or visible “streams” in the mist. Repeat cleaning if patterns remain irregular.
Build a Foolproof Maintenance Schedule
Weekly Quick Clean (3 Minutes)
- Rinse nozzle under warm tap water
- Inspect for early mineral deposits
- Wipe exterior with vinegar-dampened cloth if needed
Monthly Deep Clean (20 Minutes)
- Complete disassembly and descaling
- Full disinfection cycle
- Crack inspection and part replacement if needed
Seasonal Storage Protocol
Before storing:
1. Perform deep clean and disinfection
2. Blow dry nozzle with compressed air
3. Store in breathable cotton bag
4. Attach cleaning date tag for next season
Solve Recurring Problems Fast
White Dust Returns Immediately
This signals hard water contamination—not inadequate cleaning. Switch to distilled water or install an inline demineralization cartridge. The deposits come from your water supply, not residual nozzle buildup.
Mold Reappears Within 48 Hours
Internal tank contamination exists beyond the nozzle. Disassemble the entire unit: scrub the water tank with vinegar, replace filters, and run a full bleach cycle through all internal pathways. Store in a dry, low-humidity location.
Nozzle Turns Cloudy After Cleaning
White vinegar sometimes causes temporary clouding in polycarbonate plastics. This is purely cosmetic and doesn’t affect function. Switch to citric acid solutions for future cleans if appearance matters.
Material Safety Guidelines
Compatibility Quick Reference
- ABS Plastic: Safe with vinegar, bleach, citric acid
- Polycarbonate: Avoid bleach—causes stress cracking
- Silicone Seals: Remove before bleach exposure
- Metal Components: Dry immediately to prevent corrosion
Eco-Friendly Disposal
- Vinegar solutions: Pour safely down any drain
- Bleach solutions: Dilute 10:1 with water before disposal
- Heavy sludge: Seal in plastic bag for trash—never flush
A properly cleaned humidifier nozzle transforms your indoor air quality instantly. Mineral-free pathways restore full mist output while eliminating harmful particles. By following this precise how to clean humidifier nozzle protocol monthly, you’ll extend your unit’s lifespan by years and protect your family’s respiratory health. Mark your calendar for the next deep clean—it’s the simplest step toward breathing easier tonight.


