
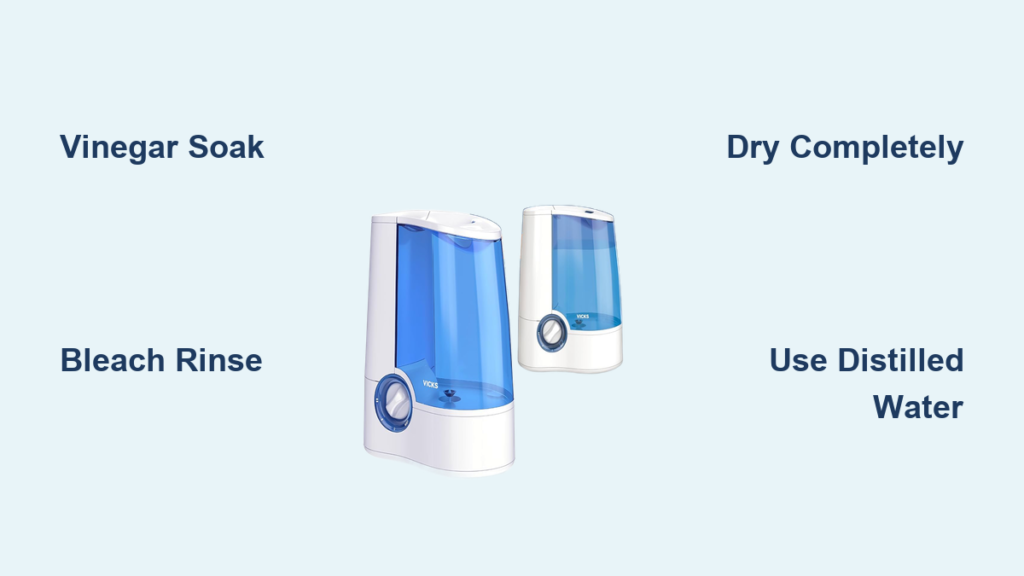
Your Vicks warm mist humidifier works tirelessly to soothe dry sinuses and ease breathing during cold season. But when mineral deposits crust the heating element and bacterial slime coats the water tank, that comforting mist becomes a health hazard. Unclean units spray mold spores and bacteria directly into your bedroom air—turning relief into risk. The good news? This targeted cleaning method takes just 15 minutes weekly and prevents 90% of common breakdowns. Follow these exact steps to keep your humidifier running efficiently and your air genuinely healthy.
Remove Mineral Buildup in 20 Minutes
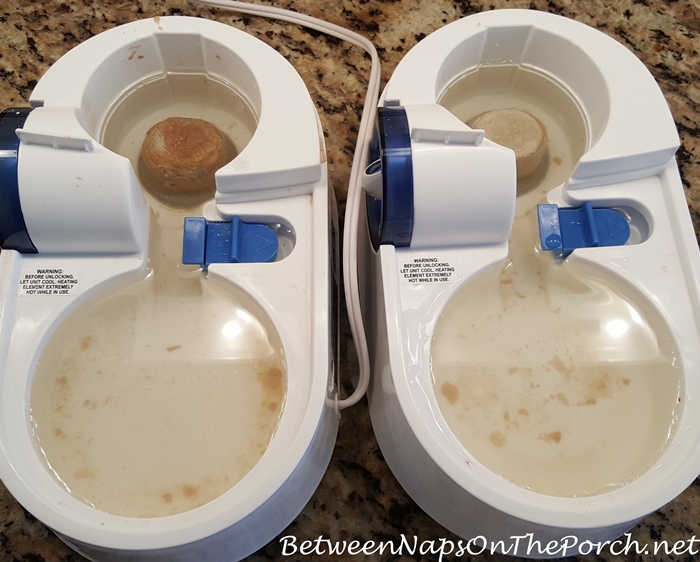
Mineral deposits from tap water coat your heating element like barnacles on a ship’s hull. Left unchecked, this crusty layer forces your humidifier to work 30% harder while reducing steam output. Worst of all, it traps bacteria that get aerosolized into your breathing space. Don’t just wipe the tank—attack the root cause at the heating element.
Disassemble Components for Deep Access
Unplug your humidifier and let it cool completely—touching warm components with cold vinegar risks cracking the base. Remove three critical parts: lift the water tank straight up, slide out the cooling chamber, and pull the removable tray forward using its front tab. Place all parts near your sink on a towel to catch drips. Never skip cooling time; thermal shock can shatter the plastic housing.
Execute the Vinegar Soak Correctly
Pour undiluted white vinegar into the base unit until the heating element is fully submerged—but stop before liquid reaches electrical contacts. For stubborn white crust, extend soaking to 4 hours or overnight (never exceed 12 hours). During soaking, gently scrub the element’s coils with a soft toothbrush, focusing where scale clusters in corners. Critical mistake alert: Using diluted vinegar or insufficient soak time leaves mineral deposits intact.
Complete the Rinse Cycle
Drain vinegar into the sink, then rinse the base under running water while scrubbing scale-free areas. Shake vigorously to dislodge trapped vinegar. Continue rinsing until the sharp vinegar smell vanishes—typically 3-4 rinses. Any lingering odor means minerals remain. For the water tank, fill halfway with cool water, cap tightly, and shake for 30 seconds before emptying. Repeat until no sour scent remains.
Disinfect All Components to Eliminate Bacteria
Bleach sanitizing kills mold and bacteria vinegar can’t reach, but miscalculating the ratio risks toxic fumes or plastic damage. This step isn’t optional—even crystal-clear water hides dangerous microbes after 48 hours of stagnation. Get the chemistry precise: too little bleach won’t sanitize, while too much degrades seals and leaves harmful residues.
Mix the Exact Bleach Solution
Combine ½ teaspoon unscented household bleach with ½ gallon (1.9 L) cool tap water in a measuring cup. Never use warm water—it accelerates chlorine gas release. Never exceed this concentration; stronger mixtures warp plastic housings. Pour this solution into the water tank, replace the cap, and swirl gently for 5-10 seconds to coat all interior surfaces. Place the tank onto the base so solution drains into the water tray below.
Time the Sanitizing Soak Precisely
Let all components soak for exactly 20 minutes—set a timer. This duration eliminates 99.9% of pathogens without damaging parts. Longer exposure eats away at plastic integrity, while shorter durations leave bacteria alive. During soaking, slide the blue mist chimney latch forward and lift the chimney out to submerge it. Remove the heating element cover through the large round opening and dunk it too.
Rinse Until Odor-Free
Pour all bleach solution down the sink—never reuse. Rinse every component under running water for 60+ seconds while rubbing surfaces with your fingers. Smell each part: if bleach odor lingers, repeat rinsing 2-3 more times. Pay special attention to the water tray’s crevices and the chimney’s narrow channels. Pro tip: Hold parts up to light to spot residual film—clear plastic should look brand new.
Clean Hard-to-Reach Parts That Harbor Mold

The mist chimney and heating element cover trap slimy biofilm that standard rinsing misses. These components sit directly in the steam path, meaning any contamination here gets blasted into your air. Skipping them turns your “clean” humidifier into a pathogen sprayer.
Target the Mist Chimney Thoroughly
Slide the blue locking latch toward the front, then lift the chimney straight up. Soak it in your bleach solution during the 20-minute sanitizing phase. After rinsing, use a bottle brush to scrub its entire length—especially the curved top where condensation pools. Hold it under running water while twisting to flush debris from hidden corners. Dry with a lint-free cloth to prevent dust accumulation.
Refresh the Heating Element Cover
Lift this dome-shaped cover from the large round opening above the heating element. Rinse it under the faucet while rubbing the underside with a paper towel—it often harbors a gritty mineral film. For stubborn deposits, soak it in vinegar during the descaling phase, then scrub gently with your toothbrush. Ensure all surfaces are completely dry before reassembly to prevent electrical shorts.
Reassemble Without Causing Damage

Moisture trapped between parts breeds mold within hours and risks electrical faults. Many users rush reassembly while components are damp, undoing their cleaning work. Patience here prevents musty odors and extends your humidifier’s lifespan by years.
Dry Components Completely
Air-dry all parts on a clean towel for 30+ minutes. Never wipe the heating element—lint fibers can ignite when heated. Verify dryness by touching seams and crevices; cool, dry plastic feels smooth, while damp spots feel slightly tacky. Critical check: Smell the water tray and chimney—if any vinegar or bleach lingers, rinse and dry again. Reassemble only when every component passes this test.
Snap Parts into Secure Position
Place the dry water tray into the base, aligning its tab with the front latch. Insert the cooling chamber until it clicks into place. Set the water tank straight down—never force it—and listen for the secure thunk. The mist chimney should slide smoothly into its slot with the blue latch facing forward. A properly assembled unit has zero gaps or wobbles.
Prevent Future Buildup With Daily Habits
Hard water transforms your humidifier into a science experiment overnight. But strategic water choices and simple routines cut cleaning frequency by half while boosting performance. These habits take seconds but prevent the frustrating crusty messes that ruin weekend mornings.
Use Distilled Water in Hard Water Areas
Tap water with high mineral content (common in 85% of US households) accelerates scaling. Switching to distilled water reduces descaling needs from weekly to every 3-4 weeks. For moderate hardness, mix 50% tap and 50% distilled water. Never use softened water—sodium residues corrode heating elements faster than minerals.
Empty and Dry After Each Use
Don’t just top off the tank—empty remaining water daily and leave the tank upside down on its cap. Wipe the base with a dry cloth to remove standing moisture. This simple habit prevents 70% of bacterial growth since microbes need stagnant water to multiply. For overnight trips, run the unit dry for 2 minutes to evaporate residual moisture.
Avoid These 4 Costly Cleaning Mistakes
Mixing Vinegar and Bleach Creates Toxic Gas
Storing vinegar-soaked parts near bleach solution generates chlorine gas—causing coughing, chest pain, and eye burning. Always complete descaling, rinse thoroughly, THEN start disinfection. Never combine these chemicals in the same sink session.
Using Soap Leaves Harmful Residues
Dish soap seems logical but leaves oily films that reduce mist output and create foamy overflow. Vinegar and bleach are the only safe cleaners—soap residues require multiple vinegar soaks to remove.
Skipping the 20-Minute Bleach Soak
Rushing disinfection leaves live bacteria. Set a visible timer—pathogens need full contact time to die. But exceeding 25 minutes degrades plastic seals, causing future leaks.
Reassembling While Damp Causes Mold
Trapped moisture between the water tray and base creates hidden mold colonies. If parts feel cool to the touch, wait 15 more minutes. Proper drying prevents the musty smell that makes users think their humidifier is “broken.”
Final Note: A clean Vicks warm mist humidifier runs quieter, produces purer steam, and lasts years longer. Stick to this weekly 15-minute ritual—set phone reminders for consistency—and you’ll avoid costly replacements. For hard water areas, keep distilled water on hand to stretch cleaning cycles. Always store your unit bone-dry with parts separated if unused for over a week. When done right, your humidifier stays a health ally, not a hidden hazard.


