
When your ventilator patient develops dry, hacking coughs or thick mucus plugs, inadequate humidification is likely the culprit. Properly connecting a humidifier to ventilator circuits prevents airway damage, maintains secretion clearance, and transforms uncomfortable ventilation into therapeutic support. This guide delivers the exact, step-by-step protocol for safely integrating humidification—whether using heated systems or passive HME alternatives—directly from clinical best practices. You’ll learn sterile connection techniques, real-time troubleshooting, and critical safety checks that prevent life-threatening complications like ventilator-associated pneumonia.
Verify Equipment and Safety Protocols First
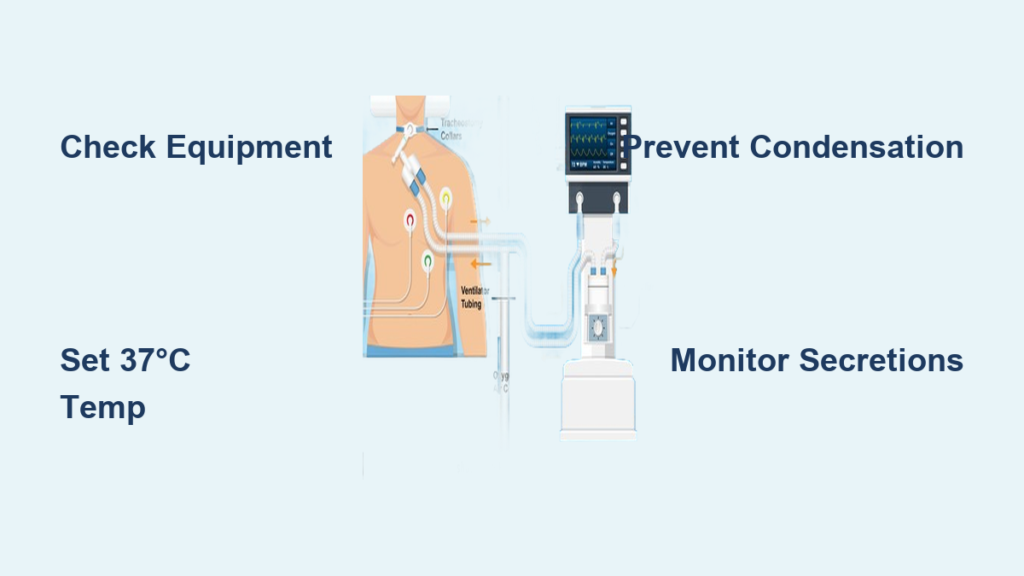
Complete Component Checklist
Before touching any equipment, confirm you have all critical elements ready. For ventilator systems, you need the operational unit with patient-specific settings, complete circuit (inspiratory/expiratory tubing, Y-piece, connectors), and bacterial/viral filters. Your humidification setup requires either a heated humidifier (water chamber, heating element, control unit) or sterile HME device plus sterile distilled water—never tap water due to mineral contamination risks. Essential monitoring tools include a temperature probe for airway monitoring, humidity sensors, and oxygen analyzer. Missing any component risks improper humidification that leads to airway injury.
Non-Negotiable Safety Measures
Infection prevention starts with you: Wash hands thoroughly before and after handling components, then maintain strict sterile technique throughout connection. One lapse can cause ventilator-associated pneumonia. Temperature control is life-or-death: Always set humidifiers to 37°C (body temperature). Exceeding this causes airway burns; falling below creates thick secretions that block airways. Prepare for emergencies: Keep an Ambu bag within arm’s reach and a backup HME ready. If humidifier failure occurs, you must disconnect and manually ventilate within seconds to prevent hypoxia.
Install Heated Humidifier System Correctly
Step 1: Circuit Inspection and Assembly
Examine every connection point under bright light before assembly. Look for hairline cracks in tubing, loose fittings, or worn seals—these cause dangerous leaks. Attach inspiratory tubing to the ventilator’s output port, then connect expiratory tubing to the expiratory port. Ensure the Y-piece is securely attached and ready for patient connection. Any visual defect means immediate component replacement; never risk compromised integrity.
Step 2: Water Chamber Preparation
Fill the humidifier chamber only with sterile distilled water to the “max” line—overfilling causes spills that short-circuit heating elements. Tap water introduces minerals that damage equipment and deliver contaminants to airways. Verify the heating element sits flush in the chamber base with no gaps. If mineral deposits are visible, replace the chamber immediately as they impair heating efficiency.
Step 3: Humidifier Integration Sequence
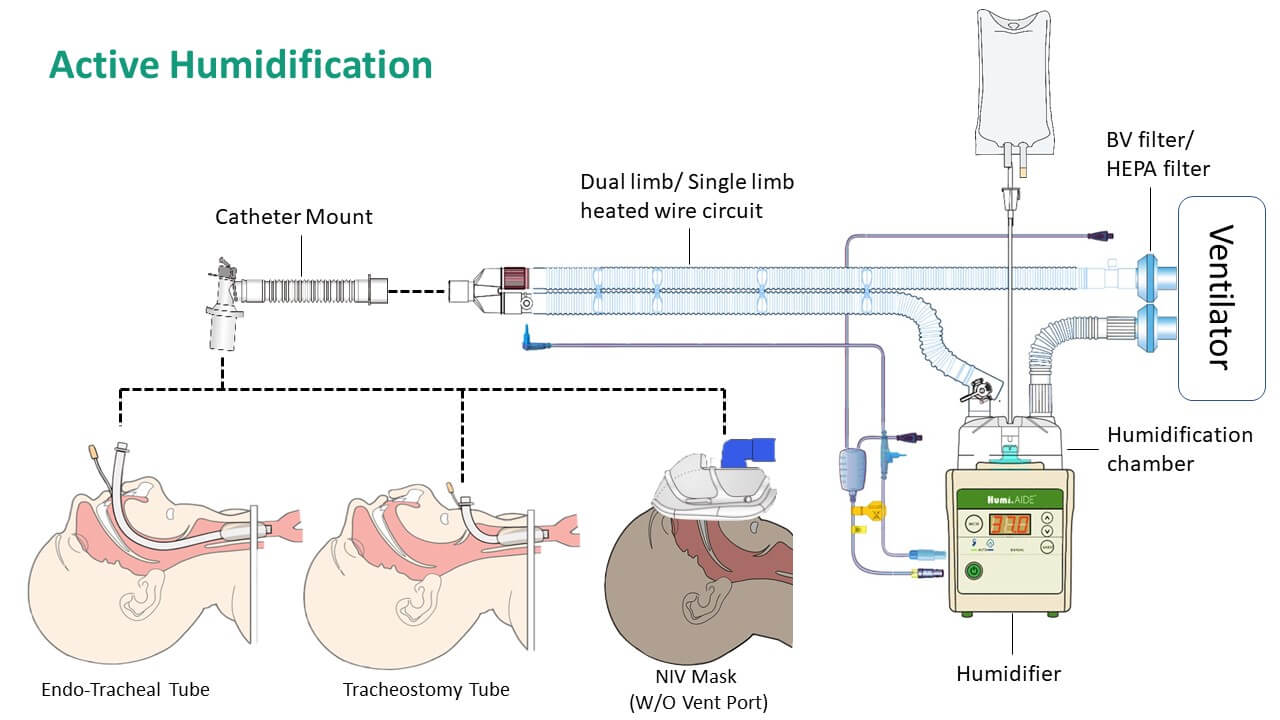
Connect the ventilator’s output tubing directly to the humidifier’s input port. The humidifier must sit between the ventilator and patient—not after the Y-piece. Run tubing from the humidifier’s output port to the patient’s Y-piece, ensuring no kinks. Secure all connections with clamps rated for medical use; finger-tightening alone risks disconnection during ventilation. For heated systems, plug in the heated wire circuit now to prevent “rainout.”
Step 4: Precision Parameter Setup
Set humidifier temperature to exactly 37°C and absolute humidity to 32 mg/L as your starting point. These settings deliver optimal moisture without condensation. Adjust based on real-time patient response: thin secretions indicate over-humidification (reduce temp by 1°C), while thick, crusty secretions mean under-humidification (increase temp by 1°C—but never exceed 37°C).
Implement HME Alternative Safely
When HME Is Appropriate
Choose HME only for short-term ventilation under 96 hours or when heated humidifiers fail. HMEs capture exhaled moisture to passively humidify inhaled air but increase circuit resistance. They’re unsafe for patients with thick secretions, low tidal volumes, or high minute ventilation over 10 L/min. Never use HMEs as a long-term solution—they lose effectiveness after 24-48 hours.
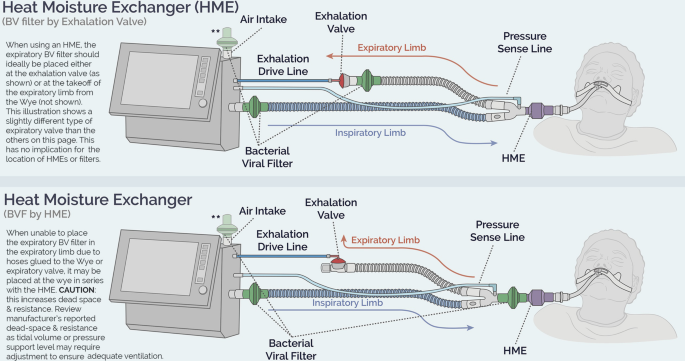
Correct HME Placement
Position the HME directly between the ventilator circuit and the patient’s artificial airway (ET tube or tracheostomy). After 3-4 breaths, the HME should feel warm to the touch. If it remains cold, immediately check for blockages or circuit disconnections. Incorrect placement—such as after the Y-piece—renders it useless and risks airway dryness.
Conduct Mandatory Connection Tests
Leak Detection Under Pressure
Visually inspect every connection while gently tugging tubing—no movement should occur. Run the ventilator’s built-in leak test: pressure must hold steady. Persistent leaks show as frequent low-pressure alarms or hissing sounds. Critical check: Verify the water chamber seats flush in the humidifier base. Even a 1mm gap causes leaks that deliver unhumidified air directly to the airway.
Humidity Optimization Protocol
Start conservatively at 37°C/32 mg/L humidity. Watch for “rainout”—water droplets in tubing—which indicates condensation. If rainout occurs near the patient, reduce humidifier temperature by 1-2°C immediately. Ensure heated wire circuits function by checking for uniform warmth along tubing. Position tubing with a slight downward incline toward the humidifier so condensation flows away from the patient.
Monitor Patient Response Continuously
Ideal Humidification Signs
Look for moist, clear-to-white secretions, absence of coughing fits, no visible condensation in patient tubing, and stable ventilator pressures. These confirm proper humidification. Pro tip: Place your gloved finger near the expiratory port—if it feels comfortably warm without moisture beads, settings are optimal.
Emergency Warning Signals
Under-humidification demands immediate action: Dry, crusty secretions, frequent coughing, increased airway resistance, or mucus plugs indicate dangerously dry airways. Over-humidification risks: Water droplets in tubing near the patient, excessive watery secretions, or visible water in the ETT mean condensation is entering the airway. Reduce temperature by 1-2°C or switch to HME if persistent.
Perform Daily Maintenance to Prevent Failure
Water Chamber Protocol
Disposable chambers: Replace every 24 hours—never refill. Mineral buildup after one use impairs heating. Reusable chambers: Clean daily with mild soap and warm water, then sterilize per manufacturer guidelines. Inspect for cloudiness or residue; any discoloration means immediate replacement. Always dry completely before reuse to prevent bacterial growth.
Circuit and Filter Discipline
Single-use circuits: Replace after each patient or when visibly soiled—never attempt cleaning. Reusable circuits: Sterilize daily and inspect for cracks or stiffness. Filters: Change bacterial/viral filters every 24 hours. A clogged filter increases resistance by 30%, reducing ventilation effectiveness and triggering pressure alarms.
Troubleshoot Critical Failures Instantly

Condensation Emergency
If water enters the patient circuit: Disconnect humidifier immediately. Suction the airway, then switch to backup HME. Solutions include: checking heated wire circuit functionality (replace if damaged), reducing humidifier temperature by 1-2°C, increasing room temperature to 24°C, and repositioning tubing with a downward incline toward the humidifier.
Inadequate Humidification Fix
For dry airways: First verify water chamber level—low water is the #1 cause. Check for circuit leaks using the ventilator’s leak test. If water level is adequate and no leaks exist, increase temperature by 1°C increments (max 37°C). Inspect the heating element for white mineral deposits; if present, replace the chamber.
Circuit Leak Response
For low-pressure alarms: Systematically tighten all connections starting from the ventilator output. Replace any cracked tubing immediately—do not tape. Run the ventilator leak test to pinpoint the source. Critical check: Ensure the water chamber is fully seated; a misaligned chamber causes 70% of humidifier-related leaks.
Execute Emergency Protocols Without Delay
Humidifier Failure Sequence
Within 5 seconds: Disconnect the humidifier from the circuit. Within 10 seconds: Switch to backup HME. Continuously: Monitor for coughing or desaturation—these indicate airway drying. Have your Ambu bag ready to manually ventilate if SpO₂ drops below 90%. Document the failure time and patient response immediately.
Equipment Changeover Procedure
Pre-warm your backup humidifier to 37°C before disconnecting the failed unit. During changeover, have one clinician manage the patient airway with the Ambu bag while another completes the swap. Minimize circuit disconnection time to under 15 seconds to prevent atelectasis. Always verify new settings match the original before reconnecting to the patient.
Final Note: Mastering how to connect humidifier to ventilator systems prevents airway trauma and keeps patients stable. Prioritize sterile technique, maintain 37°C precision, and monitor for condensation or dryness daily. Replace water chambers every 24 hours, keep HME backups ready, and practice emergency disconnections monthly. Your vigilance in humidifier integration directly determines whether mechanical ventilation heals—or harms—the airways it’s meant to support. Always verify connections during shift changes and document all adjustments to ensure seamless continuity of care.


