
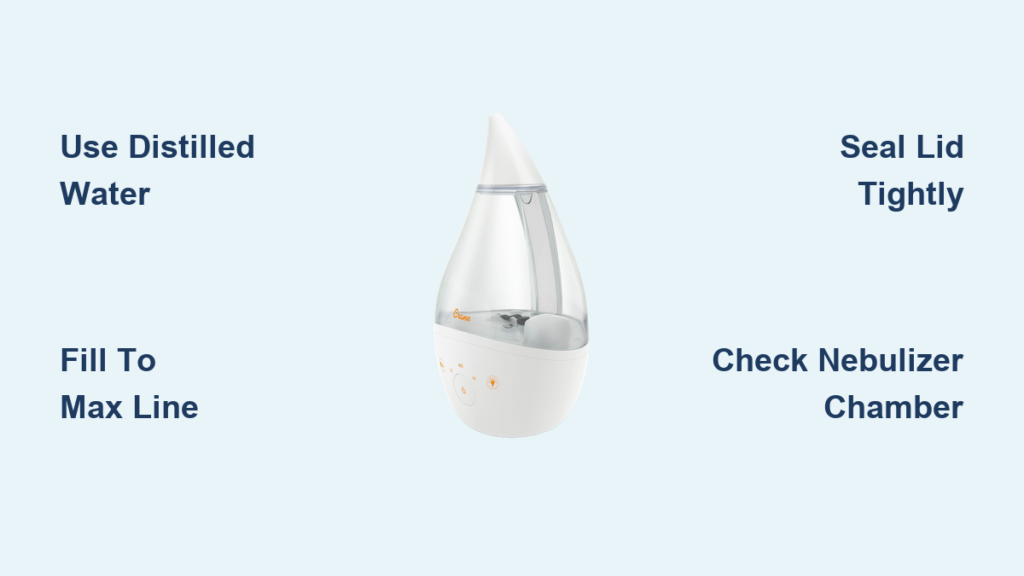
That static shock when you touch the doorknob? The way your throat feels like sandpaper by 3 AM? Your Crane humidifier sits silently on the nightstand, promising relief—but only if you fill it correctly. Forget confusing manuals or YouTube videos showing the wrong model. Whether you have the classic 1-gallon blue/white unit or the white top-fill powerhouse, this guide delivers spill-proof filling in under 4 minutes. You’ll learn exactly where to pour, how much water to use, and why skipping one step turns your bedroom into a dusty Sahara. Let’s get moisture flowing—no overflows, leaks, or mysterious white film included.
Identify Your Crane Humidifier Model in 10 Seconds
Flip the unit upside down right now—the model number sticker hides on the bottom plate. This single step prevents 90% of filling disasters.
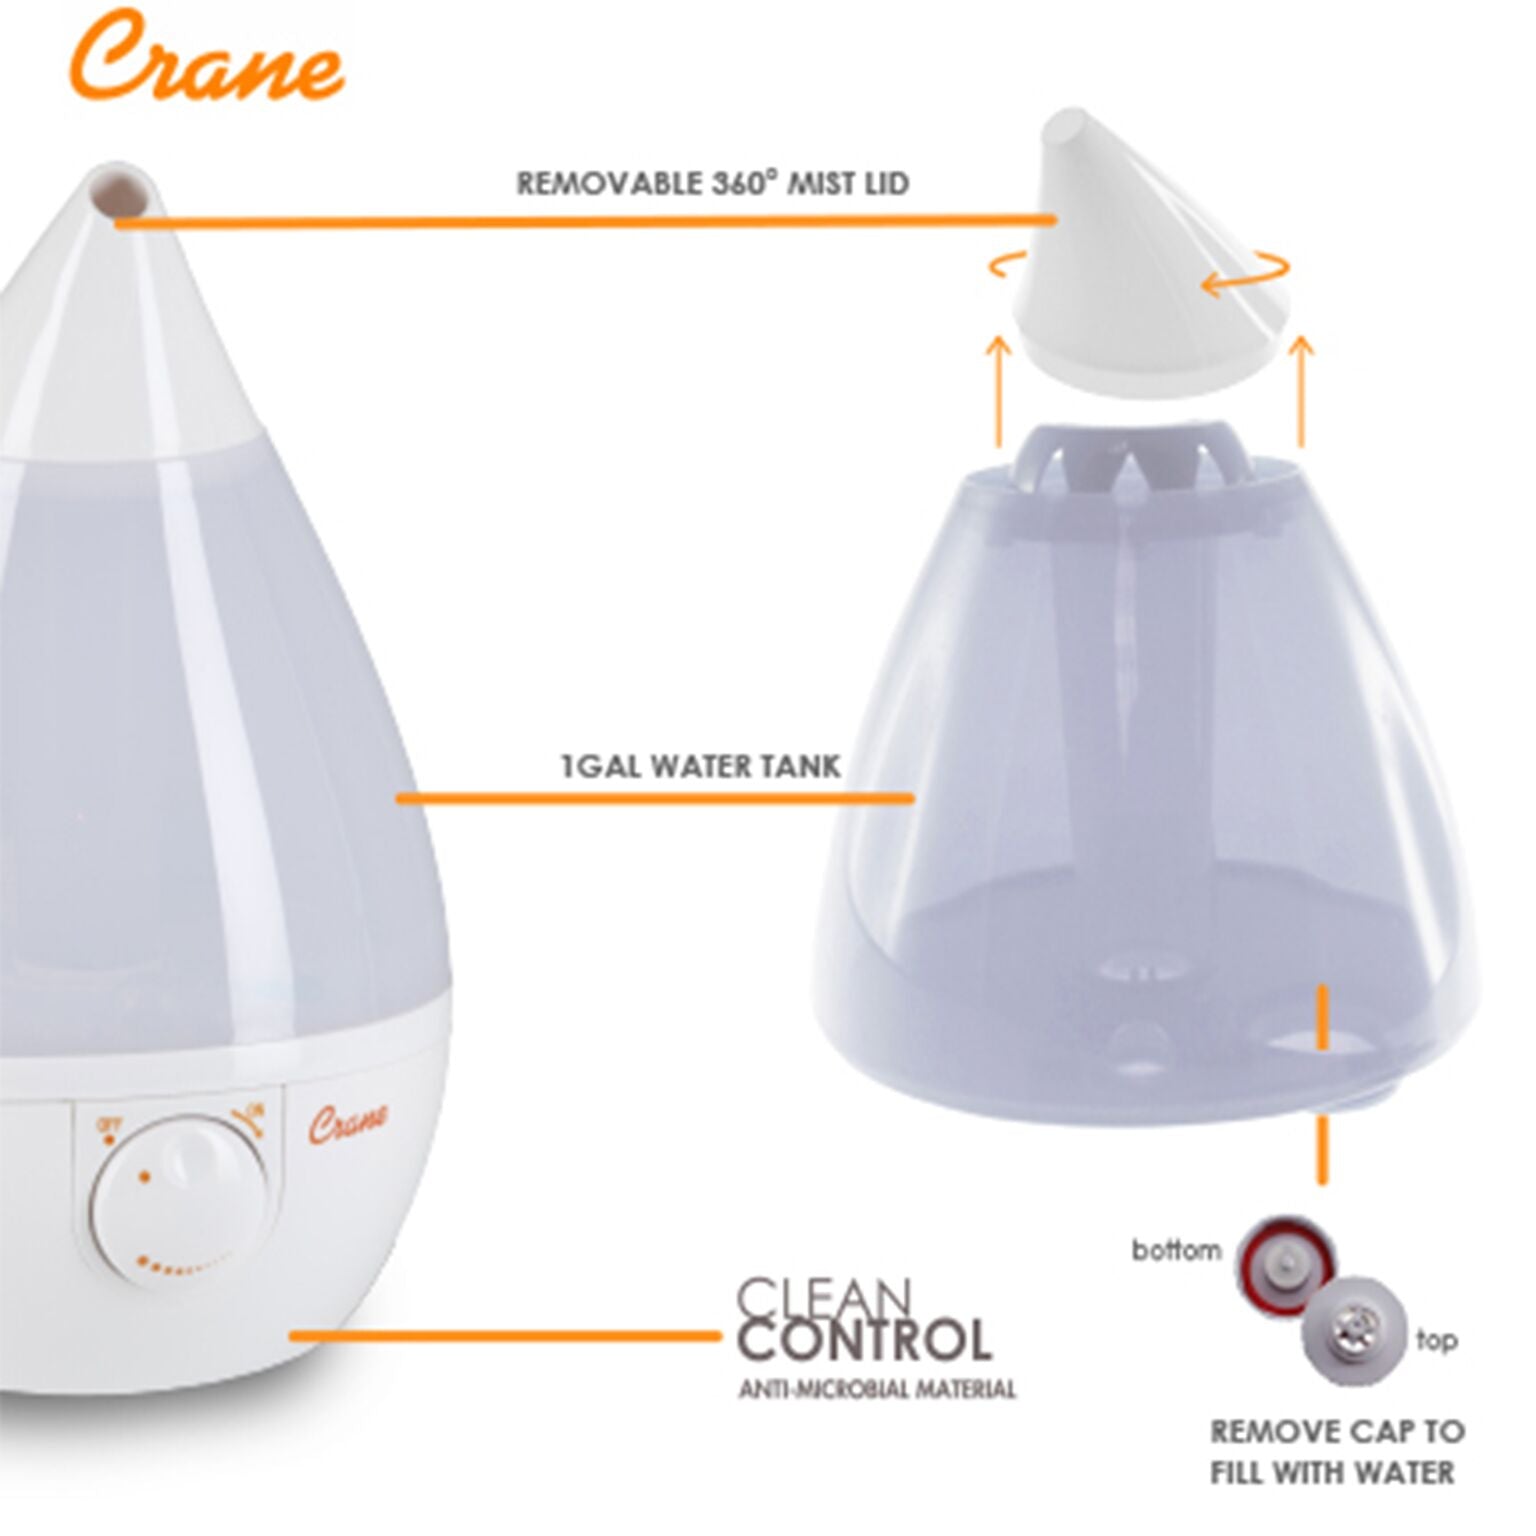
– Removable tank models (EE-5301, EE-5302, etc.) feature blue/white plastic and a clear 1-gallon reservoir you lift off the base.
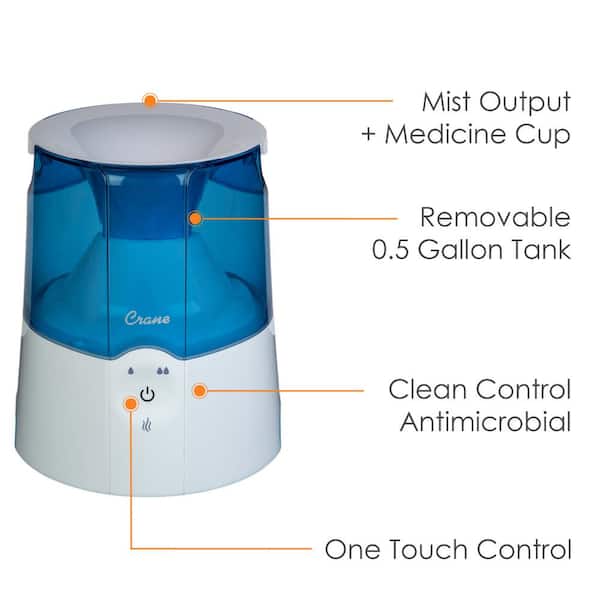
– Top-fill models (EE-5950, EE-5951) are pure white with a 1.2-gallon tank you fill while the unit stays in place.
Mistake alert: Trying top-fill steps on a removable tank model floods your nightstand. Match your humidifier below and skip the irrelevant section—your carpet will thank you.
Fill Removable Tank Model (1-Gallon) in 4 Steps
Power Down and Prep Your Workspace
Unplug immediately—never fill while connected to power. Carry the entire unit to a hard countertop (not wood or carpet). Place it at least 2 feet above the floor to prevent moisture damage to surfaces. Lay down a towel; stray drips trigger the auto-shutoff sensor, wasting your time.
Remove Tank Components Without Damage
- Lift the white nozzle straight up—no twisting required. If it sticks, wiggle gently side-to-side.
- Grip the clear tank firmly by its sides and pull upward. The base stays put.
- Flip the tank upside-down—the molded carry handle now faces upward for easy handling.
Pro tip: If water sloshes out, you didn’t fully detach the nozzle. Re-seat it and try again—this model leaks if components aren’t perfectly aligned.
Fill and Seal the Tank Properly
- Unscrew the white center cap by turning counter-clockwise (“lefty-loosy”). No buttons or levers—just twist.
- Pour cool distilled water to the thread line inside the tank—never above it. (Tap water? Only if your area has soft water; hard water causes white dust.)
- Hand-tighten the cap clockwise until snug. Critical warning: Over-tightening cracks the plastic threads, ruining your tank.
- Reassemble in reverse order: Tank right-side-up onto base (listen for the click), then press nozzle firmly into place.
Time-saver: Fill the tank at the sink while upside-down—water pours cleanly through the wide fill port. Takes 90 seconds max.
Fill Top-Fill Model (1.2-Gallon) Without Moving the Unit
Prep the Stationary Unit Correctly
Keep the humidifier exactly where it operates—this model never moves to a sink. Unplug and remove the entire white lid in one motion (no latches). Place it on a dry towel. Confirm the unit sits on a non-porous surface ≥2 feet high—carpet or wood invites mold growth from hidden spills.
Check Mist Chamber Before Adding Water
Twist the clear plastic chamber clockwise until it clicks over the nebulizer disc. Skip this after daily fills, but always do it after cleaning or if the unit sat empty. An unsecured chamber causes weak mist and error lights.
Pour Water Directly Into the Tank
- Use a measuring cup or pitcher—the tank opening faces upward, so no sink trip needed.
- Add cool water up to the MAX line molded inside (visible as a blue ring). Never exceed it—overfilling voids your warranty and leaks onto electronics.
- Add essential oils ONLY here: Drop 3–5 drops into the water (never onto the dry nebulizer). Lavender? Eucalyptus? Done right, it fills your room with fragrance in minutes.
Visual cue: The MAX line is 1 inch below the tank’s rim. If you see water touching the lid gasket, you’ve overfilled.
Close and Activate Mist Safely
- Press the lid down firmly until it’s flush with the base—no gaps.
- Plug in and press the left button—blue light turns green when ready.
- Tap the middle button for HIGH (green light) or LOW (blue light) mist output.
- Cycle night-light with the right button: color rotation → fixed color → off.
Pro tip: Run the unit for 5 minutes after filling. If mist sputters, the chamber isn’t seated—repeat Step 2.
Why Distilled Water is Non-Negotiable for Crane Humidifiers
| Water Type | White Dust Risk | Best For | Filling Frequency |
|---|---|---|---|
| Distilled | None | All regions, year-round | Every refill |
| Filtered (RO/DI) | Very low | Hard-water areas | Every refill |
| Soft tap water | Low | Soft-water regions only | Monitor surfaces |
| Hard tap water | High | Emergencies only (causes buildup) | Avoid if possible |
Quick white dust test: Run the humidifier overnight. White powder on your nightstand or walls? Switch to distilled water immediately—mineral deposits clog the nebulizer within weeks. In hard-water zones, even filtered water needs weekly vinegar soaks to prevent gunk.
4 Costly Filling Mistakes That Break Your Crane Humidifier
Overfilling Triggers Leaks and Sensor Failures
- Removable tank: Water spills when flipping the tank upright, soaking the base electronics.
- Top-fill model: Excess water leaks from the mist outlet, creating puddles under the unit.
Fix: Fill to the thread line (tank model) or MAX line (top-fill). When in doubt, leave ½ inch of space.
Hot Water Cracks Plastic and Kills the Nebulizer
Never use warm or hot water—it warps the tank and shatters the ultrasonic disc. Stick to cool water only. If your room is cold, let tap water sit 10 minutes to reach room temperature.
Skipping the Weekly Deep Clean Causes Permanent Damage
Mineral buildup from any water type clogs the nebulizer. After every fill:
– Empty remaining water
– Rinse tank with cool water
– Wipe base dry with microfiber cloth
Weekly: Soak tank and base in 1:1 white vinegar/water for 20 minutes, then scrub the nebulizer disc gently with a soft toothbrush.
Forgetting the Lid Seal Leads to Weak Mist
A loose top-fill lid or misaligned nozzle (removable tank) reduces mist output by 70%. Before powering on, press down firmly around the entire lid edge. If mist feels weak, reseat the components—no tools needed.
Troubleshoot Filling Failures in 60 Seconds
“Water Leaks From the Bottom After Filling”
- Removable tank model: Tank isn’t fully seated on the base. Lift and re-click it into place.
- Top-fill model: Lid isn’t flush. Press down harder, especially near the mist outlet.
Still leaking? Check for hairline cracks in the tank—replace immediately if found.
“No Mist Comes Out After Filling”
- Confirm the nebulizer chamber is twisted clockwise until clicking (top-fill model).
- Verify the white nozzle is fully pressed down (removable tank).
- Empty and refill—minerals may have clogged the disc during filling.
“White Dust Coats Everything Overnight”
You’re using hard tap water. Switch to distilled water and deep-clean the unit:
– Run a 20-minute cycle with undiluted white vinegar
– Rinse 3 times with cool water
– Refill with distilled water
Stop fighting dry air and start breathing easy tonight. Fill your Crane humidifier using these exact steps—distilled water to the MAX line, components seated with a firm click, lid sealed tight—and wake up to relief without the dusty mess. Place it on a hard surface two feet high, run it on LOW while you sleep, and enjoy air that feels like a spring morning. Your sinuses (and your furniture) will notice the difference by tomorrow. Ready for maintenance tips? Check Crane’s weekly cleaning guide next—your nebulizer’s lifespan depends on it.


