
Waking up to scratchy sinuses and static shocks because your humidifier died overnight? Before you rush to replace it, know this: 90% of humidifier failures stem from simple issues you can resolve in under 30 minutes. Most problems—whether it’s silence when it should hum, mysterious puddles on your floor, or weak mist output—trace back to clogged components, power glitches, or mineral buildup. This hands-on guide cuts through technical jargon to deliver precise steps for diagnosing and fixing your humidifier using only household items. You’ll learn exactly where to inspect for cracks, how to deep-clean mineral deposits, and when to call a pro—no prior repair experience needed. Let’s get your unit pumping moisture back into that dry air.
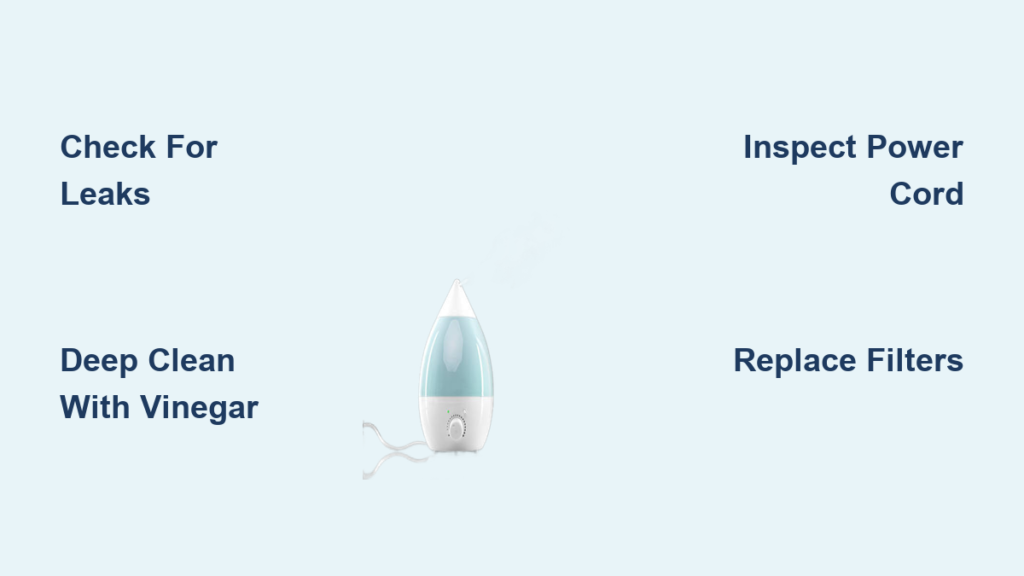
Quick Visual Inspection Before Repairing
Skip straight to the most common failure points with this 60-second diagnostic scan. Most humidifiers stop working due to visible physical damage you can spot without tools. Start by unplugging the unit and removing the water tank. Examine the tank for hairline cracks—especially near the base—where leaks often originate. Check the power cord for frayed wires near the plug or where it connects to the unit; damaged cords cause 40% of “no power” issues. Flip the base unit over and inspect all connection points between the tank and machine for loose fittings or warped plastic. Finally, run a dry finger along the bottom rim of the tank; mineral deposits here block water flow. While reassembling, listen for unusual clicking sounds during startup—this signals electrical faults needing immediate attention.
Critical Leak Sources to Identify Immediately
- Water pooling under the unit? Trace it to the base seal or cracked tank
- Dripping from the mist outlet? Mineral buildup is restricting vapor flow
- Dampness on the housing? Overfilling or damaged internal gaskets are culprits
Deep Clean Components to Restore Performance
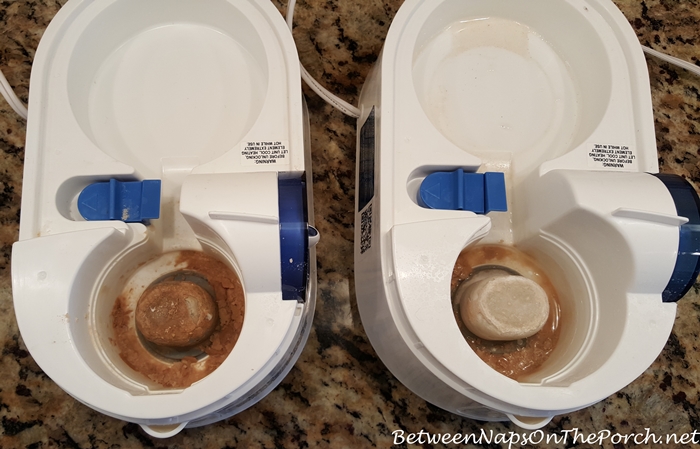
Dirty internals cause 70% of humidifier malfunctions. A vinegar soak dissolves mineral deposits choking water pathways and sensors. Unplug the unit and empty all water. Mix equal parts white vinegar and warm water—never use bleach or harsh chemicals that degrade plastic. Fill the water tank with this solution and let it sit for 30 minutes. Meanwhile, remove the base cover to access internal parts. Dip a soft brush in vinegar solution and scrub the water inlet valve where mineral sludge accumulates. For fan blades, wipe gently with a vinegar-dampened cloth to remove dust without bending delicate fins. Rinse every component under running water until the vinegar smell vanishes—residual acid damages seals. Reassemble only when completely dry to prevent electrical shorts.
Filter Cleaning Protocol for Maximum Lifespan
- Monthly: Soak filters in vinegar solution for 15 minutes, then rinse
- Replace every 3-6 months per manufacturer specs—check your manual
- Never skip filter checks during heavy use; clogs strain motors and breed mold
Restore Power When Humidifier Won’t Turn On
If your humidifier shows no lights or sounds, rule out power issues before disassembling. First, test the outlet with a lamp or phone charger—faulty outlets cause 25% of “dead unit” cases. If the outlet works, inspect the circuit breaker; humidifiers often trip breakers during winter when electrical loads peak. Reset any tripped switches. Next, examine the power cord along its entire length for cuts or exposed wires. Never operate a unit with cord damage—replace it immediately with a same-voltage appliance cord from hardware stores. If power persists, check internal fuses per your manual’s instructions; blown fuses require professional replacement due to electrical risks.
Power Cord Replacement Safety Steps
- Unplug unit and remove water tank
- Unscrew cord housing cover using a Phillips head screwdriver
- Disconnect old cord wires by noting color-coded terminals
- Attach new cord matching wire colors exactly
- Reassemble housing and test with outlet checker
Unblock Water Flow for Stronger Mist Output

Weak or nonexistent mist usually means water can’t reach the vaporization system. Start by checking the tank valve—the small disc at the tank’s base that opens when seated on the unit. Mineral deposits here cause 60% of flow issues. Remove the tank and soak the valve in vinegar for 20 minutes, then scrub with an old toothbrush. Reinstall and test. If water still doesn’t flow, inspect internal tubing for kinks or algae growth; replace cracked tubes with identical diameter sections from hardware stores. For persistent blockages, clear the water sensor—a tiny metal probe in the base—by dipping a cotton swab in vinegar and rotating it gently to remove scale.
Seal Leaks at Connection Points
Tighten tank-to-base connections by hand only—overtightening cracks plastic. Replace brittle rubber gaskets with silicone ones from appliance parts stores. Apply food-grade silicone lubricant to new seals for flexibility. Test for leaks by filling the tank and running the unit over newspaper for 10 minutes.
Silence Grinding or Clicking Noises
Unusual sounds pinpoint specific failures. A grinding noise means debris tangled in fan blades; unplug the unit, remove the front cover, and use tweezers to extract hair or dust bunnies. For high-pitched squealing, the motor bearings need lubrication—a job best left to professionals due to disassembly complexity. Clicking sounds often indicate electrical arcing; immediately unplug and inspect wiring connections inside the base. If wires show melting or scorch marks, stop troubleshooting and call a technician—this risks fire hazards.
Water Flow Noise Troubleshooting
- Gurgling during startup? Normal air displacement—no action needed
- Loud banging? Check home water pressure; exceeds 60 PSI damages units
- Constant splashing? Overfilled tank or misaligned water tray
Calibrate Settings for Optimal Humidity
Incorrect settings waste energy and cause discomfort. Use a standalone hygrometer (not the unit’s built-in sensor) to verify room humidity. If readings exceed 50%, condensation forms on windows; below 30% dries throat membranes. Adjust your humidifier’s dial to maintain 35-45% in winter (prevents static) and 30-40% in summer (avoids mold). If digital displays show errors, perform a factory reset: unplug for 30 seconds, hold power and reset buttons while plugging back in (consult manual for exact sequence). Recalibrate sensors monthly by wiping the humidity probe with a vinegar-dampened swab.
Replace Critical Worn Components

Some parts degrade with use and require replacement. Filters lose effectiveness after 6 months—replace if discolored or stiff. To install: power off the unit, remove the old filter noting airflow direction arrows, wipe the housing with vinegar solution, insert the new filter matching the arrows, and reset the filter indicator light per your manual. For cracked water tanks, order OEM replacements using your model number; generic tanks often leak. Never repair cracked tanks with glue—chemicals contaminate mist. Replace damaged motors only through certified technicians; DIY attempts void warranties and risk electrical shock.
Self-Repair vs. Pro Service Decision Tree
- DIY immediately: Clogged filters, mineral deposits, loose seals
- Call a pro: Electrical faults, motor failures, digital control errors
- Replace unit: If repair costs exceed 50% of new unit price
Prevent Recurring Failures With Smart Habits
Extend your humidifier’s life by 3+ years with these routines. Always use distilled water—it reduces mineral buildup by 90% compared to tap water. Empty the tank daily when not in use to prevent stagnant water breeding bacteria. Wipe the base weekly with vinegar to stop mold in crevices. Set phone reminders for monthly filter checks and quarterly deep cleans. During storage, leave the tank and base disassembled in a dry place—never store with water inside.
Seasonal Maintenance Checklist
- Daily: Empty unused water, check for leaks
- Weekly: Full vinegar clean of tank and base
- Monthly: Filter inspection, cord damage check
- Pre-storage: Deep clean, dry completely, store disassembled
When to Call a Professional Technician
Some issues demand expert intervention. Contact a certified repair service if you smell burning plastic—this indicates melting wires requiring component replacement. Persistent electrical faults after outlet and breaker checks also need professionals, as do digital display failures unresponsive to resets. Technicians use multimeters to diagnose sensor malfunctions and have OEM parts for precise motor replacements. Expect $75-$150 for most repairs, but this saves 70% versus buying new. Avoid “quick fix” YouTube hacks for electrical issues; humidifiers combine water and electricity, making improper repairs dangerous.
Your humidifier should now run quietly with consistent mist output. If problems persist after these steps, the unit likely has internal electrical damage requiring professional diagnosis. Remember: 90% of humidifier failures are preventable with distilled water and monthly vinegar cleans. Bookmark this guide for next season—you’ll fix most issues faster than waiting for delivery on a replacement unit. Proper care means your humidifier will deliver comfortable, healthy air for years, not just this winter.


