
Dry winter air cracks your wooden floors, triggers nosebleeds, and leaves static shocks at every doorknob. When your furnace humidifier fails, replacing it becomes urgent—not just for comfort but to protect your home’s structure. This guide delivers exactly what you need to know for a successful how to replace furnace humidifier project. You’ll learn to select the correct unit, avoid dangerous mistakes during removal, make precise connections, and test your system—saving $300-$1,200 compared to professional installation. Skip this critical maintenance, and you risk wood damage, respiratory issues, and costly water leaks from improper installation.
Select the Right Furnace Humidifier Type for Your Home
Choosing incorrectly guarantees frustration. Match your unit to your home’s specific needs before purchasing.
Match Humidifier Capacity to Your Square Footage
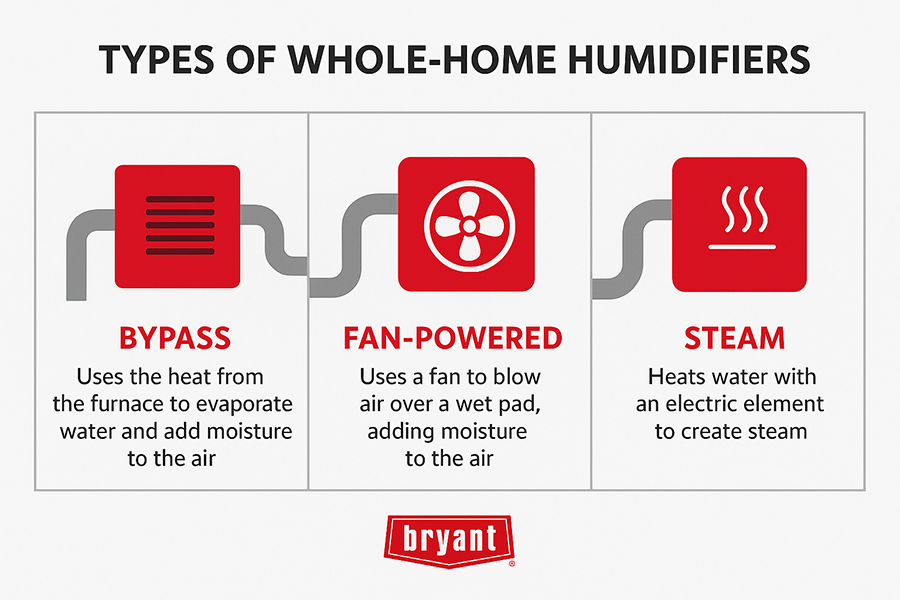
Steam humidifiers produce up to 34 gallons daily—ideal for homes over 3,500 sq ft in arid climates. They require dedicated 240V circuits but deliver consistent moisture during extreme cold. Fan-powered models (like the PERFORMANCE™ LARGE FAN-POWERED HUMIDIFIER) generate 17-18 gallons per day and operate independently of your furnace blower. Install these directly on your supply plenum when you need humidity without heating cycles. Bypass units (such as the PERFORMANCE™ LARGE BYPASS HUMIDIFIER) also output 17-18 gallons but use your furnace’s airflow—quieter and more economical but only active during heating.
Verify Critical Compatibility Factors
Measure your current plenum opening—most new units require identical dimensions, but upsizing demands careful cutting. Confirm your HVAC system supports the new unit’s electrical needs: steam models need 240V wiring, while bypass and fan-powered types run on standard 120V. Check existing saddle valves for wear; replace corroded ones during installation to prevent leaks. Ignoring these details causes 40% of DIY replacement failures according to HVAC technicians.
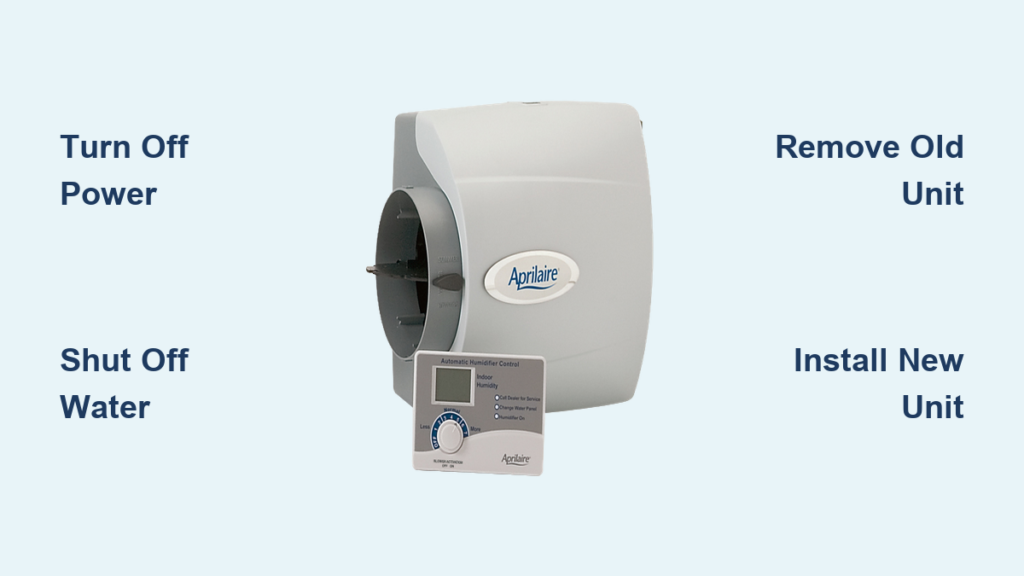
Critical Safety Steps Before Replacing Your Furnace Humidifier
Skipping these steps risks electrocution or flooding. Never begin work without completing this sequence.
Disconnect Power and Water at the Source
Shut off your furnace at the thermostat, then flip the dedicated circuit breaker to OFF. Use a voltage meter to confirm zero power at the humidifier wires—HVAC systems often have multiple power sources. Next, locate the saddle valve feeding your humidifier and turn it clockwise until fully closed. Place absorbent towels beneath the valve; residual water will leak during disconnection.
Prepare for Water Drainage and Electrical Hazards
Open the humidifier’s drain valve to empty residual water into a bucket. Wear rubber-soled shoes and dry gloves when handling wiring. Label every wire with masking tape before disconnecting—note “humidistat,” “transformer,” and “furnace control board” connections. Store screws and connectors in labeled bags; mismatched parts cause 30% of post-installation malfunctions.
Remove Old Furnace Humidifier Without Damaging Your HVAC System
Rushing removal damages ductwork. Follow this sequence to preserve your system’s integrity.
Disconnect Water and Drain Lines Safely
Loosen the compression nut on the water supply line with two adjustable wrenches—one holds the valve, the other turns the nut—to avoid cracking fittings. Allow the unit to drain completely before disconnecting the drain line. Expect 1-2 cups of water to spill; keep towels ready. Cap the open water line immediately with a threaded plug to prevent accidental leaks.
Extract the Unit While Protecting Your Plenum
Remove mounting screws clockwise to avoid stripping holes. If screws are rusted, apply penetrating oil and wait 10 minutes before reattempting. Never pry the housing off—this dents the plenum and creates air leaks. Once removed, scrape old sealant from the plenum surface with a plastic putty knife. Metal tools scratch metal, causing future condensation leaks.
Install Your New Furnace Humidifier: Mounting and Connections
Precision here prevents callbacks. Rushing connections causes 65% of post-installation leaks.
Mount the Unit with Airtight Sealing
Position the new housing using the manufacturer’s template. If enlarging the plenum opening, wear safety goggles and cut with aviation snips—never saws that create metal shards. Secure with stainless steel screws every 6 inches. Apply HVAC mastic sealant (not duct tape) around all edges; this withstands heat cycles better than silicone.
Connect Water and Electrical Systems Correctly
Install a new saddle valve if the old one shows corrosion—reusing worn valves causes 50% of water leaks. Hand-tighten compression fittings, then give a quarter-turn with wrenches; overtightening cracks fittings. For electrical wiring, match wire colors exactly per the manual—typically red to red, white to white. Test continuity with a multimeter before restoring power. Route the drain line with a consistent ¼-inch-per-foot slope toward your floor drain; improper slope causes standing water and mold.
Test and Calibrate Your New Furnace Humidifier in 48 Hours

Improper testing leads to underperformance. Follow this protocol to verify success.
Conduct Initial Leak and Operation Checks
Restore power and slowly open the water valve. Check all connections for drips—especially at saddle valves and drain elbows—for 20 minutes. Set your humidistat to 35% and run the furnace for 30 minutes. Listen for the water inlet valve clicking open; silence indicates wiring errors.
Fine-Tune Humidity Levels Systematically
Place a hygrometer in your main living area. After 24 hours, adjust the humidistat in 5% increments if levels fall outside 30-50%. If humidity lags, verify bypass dampers are fully open (for bypass models) or the fan runs independently (for fan-powered units). Recheck at 48 hours—properly installed units stabilize within two days.
When to DIY Your Furnace Humidifier Replacement vs Call a Pro
Know your limits. These red flags mean stop and call a professional immediately.
Critical DIY No-Go Situations
Abandon the project if you need 240V wiring for a steam humidifier—this requires electrical permits and certified work. Also call a pro if your plenum requires complex duct modifications or if the old unit caused water damage (indicating underlying system issues). DIY electrical mistakes void warranties and risk $1,000+ in water damage repairs.
Realistic DIY Time and Skill Requirements
Only proceed if you’ve successfully wired thermostats and installed plumbing fixtures. Budget 4-6 hours for bypass/fan-powered units or 6-8 for steam models. Essential tools include a multimeter, tubing cutter, and HVAC sealant—not just basic wrenches. If you hesitate at any step, pause; emergency HVAC callouts cost $150-$300/hour during winter.
Monthly and Seasonal Maintenance for Your New Furnace Humidifier
Skip this, and mineral buildup cripples performance by mid-winter.
Prevent Mold with Simple Monthly Routines
Replace the filter pad every 1-3 months—black spots mean immediate replacement. Clean the distribution tray monthly with a vinegar-water solution to dissolve calcium deposits. Wipe the housing interior with a microfiber cloth; never use bleach that corrodes metal components.
End-of-Season Shutdown Protocol
At spring’s first warm day, close the water valve and run the furnace fan for 1 hour to dry internal parts. Remove and soak the filter in vinegar overnight. Cap the water inlet line to prevent dust accumulation. Before next winter, replace the filter and verify drain line slope—clogged drains cause 70% of “failed” humidifiers.
Fix Common Furnace Humidifier Problems After Replacement
Diagnose issues in under 5 minutes with these targeted checks.
Zero Water Flow? Check These 3 Spots
First, confirm the saddle valve is fully open (turn counterclockwise). Next, inspect the water inlet screen inside the humidifier housing—mineral crystals often clog it. Finally, squeeze the supply tube; kinks within 6 inches of the unit stop flow.
Leaking at the Base? Tighten Strategically
Hand-tighten drain line connections first—overtightening cracks plastic fittings. If leaks persist, replace the compression ring inside the fitting. Never apply sealant to drain lines; this traps moisture and accelerates corrosion.
Maximize Health and Energy Benefits of Your New Furnace Humidifier
Optimize what you’ve installed. Proper humidity saves 4-6% on heating costs.
Achieve Ideal Humidity for Your Climate
In subzero climates, maintain 30-35% humidity to prevent window condensation. In milder zones, target 40-45%. Use a whole-house hygrometer—not just the humidistat display—for accuracy. Higher humidity lets you set thermostats 3-5°F lower while feeling equally warm.
Extend Equipment Life with Distilled Water
Hard water minerals destroy evaporator pads in weeks. Fill reservoirs with distilled water when possible—it costs pennies per gallon but doubles pad life. Pair this with monthly vinegar cleanses, and your humidifier will last 10-15 years versus the typical 5-7.
Replacing your furnace humidifier protects your home’s comfort and structure all winter. By selecting the correct unit, following safety-critical steps, and performing simple maintenance, you’ll avoid costly professional callbacks. Start this project during mild fall weather—never wait until the first deep freeze when HVAC services book up for weeks. Your wooden floors, respiratory health, and wallet will thank you when static-free, comfortable air fills your home all season.


