
Nothing ruins the excitement of a new Boneco humidifier faster than confusing setup instructions and disappointing results. Whether you’ve just unboxed a Boneco U350, W200, or other model, improper initial configuration leads to common problems like white dust on furniture, uneven humidity distribution, or mysterious shutdowns. Getting your Boneco humidifier set up correctly from the start prevents weeks of frustration and ensures you’re actually improving your indoor air quality instead of creating new problems.
This comprehensive guide walks you through the exact steps to configure your Boneco humidifier for maximum effectiveness. You’ll discover why water type matters more than you thought, where placement affects performance by 30% or more, and the critical calibration step 90% of users skip during initial setup. Follow these instructions precisely, and your Boneco will deliver consistent, healthy humidity levels without the common headaches most owners experience.
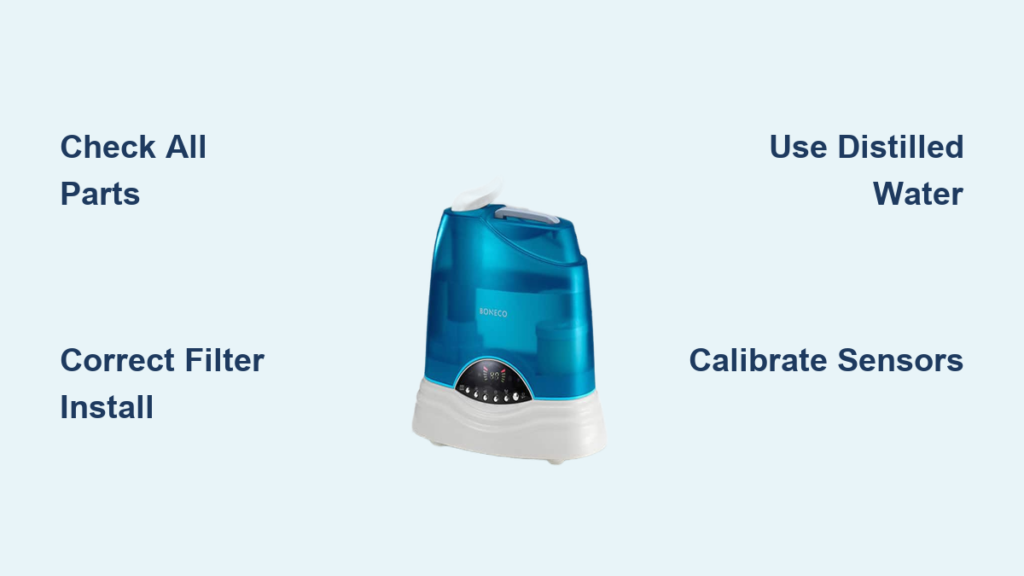
Unbox and Verify All Boneco Humidifier Components
Before connecting power or adding water, thoroughly inspect your unboxing experience. Boneco humidifiers ship with model-specific components that must all be present for proper operation. Missing parts often go unnoticed until you’re halfway through setup, causing unnecessary delays.
Immediately check for these essential items:
– Main humidifier base unit with control panel
– Removable water tank (size varies by model)
– Evaporator filter or demineralization cartridge
– Dedicated cleaning brush for internal components
– Comprehensive user manual with model-specific instructions
– Correct power adapter (voltage varies by region)
Critical inspection points before proceeding:
Examine the water tank for hairline cracks near the cap connection point—these cause slow leaks that damage floors. Check filter integrity for bent frames or torn material that compromises performance. Verify all electrical components show no signs of shipping damage. Boneco’s warranty requires documentation of defects within 48 hours of delivery, so don’t wait to report issues.
Position Your Boneco Humidifier for Maximum Airflow Efficiency

Where you place your Boneco humidifier dramatically impacts its effectiveness—improper location reduces output by up to 40% and creates moisture-related problems. The ideal placement follows specific spatial requirements that most users overlook.
Absolute placement requirements:
Keep your unit at least 36 inches away from walls to prevent moisture buildup that leads to mold growth behind furniture. Maintain 24 inches of clearance from electronics and wooden surfaces to avoid condensation damage. Never place directly under ceiling fans which disrupt proper humidity distribution.
Best surfaces for Boneco humidifiers:
Hard, waterproof surfaces like tile, sealed hardwood, or plastic trays work best. Avoid carpeted areas where moisture wicks upward and damages flooring. The surface must support 12-18 pounds when the tank is full—check manufacturer specifications for your exact model weight. If using on wood surfaces, place a moisture-absorbing mat underneath to catch accidental spills.
Install Boneco Filter According to Model Specifications

Filter installation direction makes or breaks your humidifier’s performance. Boneco uses different filtration systems depending on whether you have an evaporative or ultrasonic model, and installing them backward creates immediate problems.
For evaporative models (U series):
Remove the new filter from packaging and rinse thoroughly under cool running water for 30 seconds to remove manufacturing residues. Insert with the blue identification strip facing outward toward the room—this orientation ensures proper airflow through the wicking material. Press firmly until you hear a soft click indicating proper seating in the housing compartment.
For ultrasonic models (U700, U200):
Locate the demineralization cartridge slot near the water reservoir. Insert the cartridge with the alignment notch matching the guide inside the compartment. Twist clockwise until resistance indicates secure placement—typically about 1/8 turn. These cartridges require replacement every 60 days in hard water areas but can last up to 90 days with distilled water.
Critical mistake to avoid:
Installing filters backward reduces moisture output by nearly half while increasing energy consumption. The colored identification side always faces outward—this simple detail separates proper operation from disappointing results.
Fill Boneco Water Tank with Correct Water Type
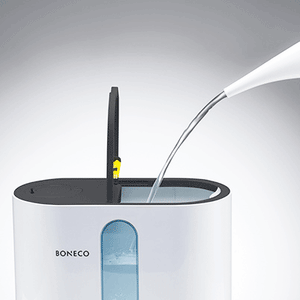
Water quality directly impacts your Boneco humidifier’s performance and longevity. Many users unknowingly create white mineral dust problems by using inappropriate water sources.
Recommended water types:
– Distilled water: Best for preventing mineral buildup (ideal for ultrasonic models)
– Filtered water: Good alternative when distilled isn’t practical
– Tap water: Only acceptable with demineralization cartridge installed
Proper filling procedure:
1. Remove tank from base unit completely
2. Unscrew cap counterclockwise until fully detached
3. Fill with cool water to just below the MAX fill line
4. Screw cap on clockwise with firm, even pressure
5. Wipe exterior thoroughly with clean cloth
6. Place on level surface for 2 minutes to check for leaks
Professional tip: Fill your tank in the sink, let it sit for two minutes, then gently tilt in multiple directions. Any leaks at this stage indicate a loose cap—fixing this now prevents the most common “my Boneco won’t start” issues.
Complete Initial Power Calibration Sequence
Your Boneco humidifier requires precise startup procedures to calibrate internal sensors properly. Skipping this step leads to inaccurate humidity readings that compromise performance.
Critical first-time power sequence:
– Plug directly into a grounded wall outlet (no extension cords)
– Press power button once (don’t hold)
– Allow 3 full minutes for humidity sensor calibration
– Set initial humidity level to 45% using control buttons
– Run continuously on medium setting for first 30 minutes
Interpret indicator lights correctly:
– Solid green: Normal operation (should appear after calibration)
– Blinking red: Low water level (requires immediate refill)
– Solid red: Filter replacement needed (reset after installation)
– Blinking green: Timer function active (customize as needed)
This calibration period allows the hygrometer to establish an accurate baseline reading for your specific environment—never skip this step even if the unit appears to be working immediately.
Configure Boneco Humidity Settings for Your Climate
Setting the correct humidity level prevents condensation problems while maximizing health benefits. Most users make the mistake of setting levels too high initially, causing window condensation and potential mold issues.
Recommended starting configuration:
Press the humidity button once, then use the adjustment arrows to set 45% as your baseline. This mid-range setting accommodates most climates while preventing over-humidification. Press the timer button to activate scheduling if you want automatic shut-off during sleeping hours.
Seasonal adjustment guidelines:
– Winter months: Maintain 45-50% (cold air holds less moisture)
– Summer months: Reduce to 40-45% (high ambient humidity)
– Allergy season: Lower to 35-40% (reduces dust mite proliferation)
– Dry climates: Increase gradually to 50-55% (monitor for condensation)
Wait at least 24 hours before making additional adjustments—humidity changes occur gradually, and premature tweaks create unstable conditions.
Verify Boneco Humidifier Output Within First Hour
Proper verification ensures your setup succeeded before leaving the unit unattended. Many problems become serious if not caught during initial operation.
Essential first-hour checks:
– Place your hand near the output vent to feel consistent airflow
– Observe water movement in transparent tanks (should show circulation)
– Listen for unusual grinding or clicking sounds
– Check display for rising humidity percentage
Immediate troubleshooting steps:
– No mist/output: Verify water level, check filter installation direction
– Low performance: Increase fan speed setting, inspect for blocked vents
– Water leakage: Tighten tank cap, ensure unit sits perfectly level
– Unusual noise: Remove any remaining shipping protection tapes
These quick checks prevent minor issues from developing into major problems that require professional service.
Program Boneco Maintenance Reminders for Longevity
Modern Boneco units include intelligent maintenance tracking that requires initial setup. Activating these features extends your humidifier’s lifespan by 30% or more.
Essential maintenance configurations:
– Set filter replacement reminder for 60-90 days based on water hardness
– Enable weekly cleaning notifications for mineral buildup prevention
– Schedule monthly deep cleaning alerts for thorough maintenance
Pro tracking method: Take a clear photo of your setup date and filter serial number with your smartphone. Store this in a dedicated “Boneco Maintenance” folder for quick reference when ordering replacement parts or filing warranty claims.
Monitor First Week Performance for Optimal Results
The first seven days require active monitoring as your Boneco humidifier adapts to your specific environment. Daily checks prevent minor issues from becoming persistent problems.
Daily verification checklist:
– Water consumption rate (should decrease after first 48 hours)
– Actual room humidity levels using separate hygrometer
– Any water accumulation on or near the unit
– Filter appearance (should darken gradually with use)
Adjustment protocol:
Increase humidity setting if levels remain below 40% after 24 hours of continuous operation. Decrease immediately if condensation forms on windows—this indicates over-humidification. Reposition the unit if humidity distribution feels uneven throughout the room.
Activate All Boneco Safety Features During Setup
Boneco humidifiers include multiple safety features that prevent damage and improve efficiency, but many require manual activation during initial setup.
Critical safety configurations:
– Auto shut-off: Always active (verify by running until empty)
– Child lock: Activate by holding timer button for 3 seconds
– Timer mode: Set by pressing timer button repeatedly
– Night mode: Engage by holding power button 2 seconds
These features protect your investment and ensure safe operation, especially important in homes with children or pets. Verify each function works properly before leaving the unit unattended for extended periods.
Your Boneco humidifier setup success hinges on proper initial configuration—most performance issues stem from skipped steps during the first use. By following these precise instructions, you’ve positioned your unit for optimal performance while avoiding the common pitfalls that plague new owners. Remember that clean water, correct placement, and regular filter maintenance matter more than any single setting adjustment. Within 3-5 days of proper setup, your Boneco will maintain ideal humidity levels automatically, creating a healthier indoor environment without constant tinkering. For best results, revisit these setup steps seasonally as temperature and humidity needs change throughout the year.


