
That first dry cough of winter, static shocks from doorknobs, or chapped lips by noon—these are dead giveaways your indoor air needs help. Your Hume Sense Top-Fill Humidifier solves this with quiet, efficient operation, but only if you set up Hume Sense top fill humidifier correctly from day one. Skip these steps and you’ll battle leaks, weak mist, or premature breakdowns. This guide cuts through confusion with exact actions that get your unit running optimally in one try. You’ll learn where to position it for even moisture distribution, how to fill without spills, and critical safety checks most manuals bury on page 12.
Identify All Hume Sense Parts Before Setup
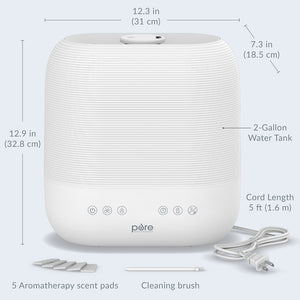
Open the box on a clean, dry surface and verify these 4 components are present:
– 4L top-fill water tank (with integrated handle and wide mouth opening)
– Main base unit (containing ultrasonic mechanism and LED display)
– Power adapter (specific to 110V outlets)
– Cleaning brush (for nozzle maintenance)
Immediately inspect for cracks in the tank or base. Shipping damage won’t self-repair—contact Hume Sense support before first use if you spot issues. The tank’s handle isn’t just for show; it’s engineered for one-handed removal even when full, preventing slips on wet surfaces.
How to Safely Remove and Open Your Top-Fill Tank
Never skip this step: Lift the tank straight up from the base using the molded handle—do not twist or tilt. The top-fill design means future refills happen without removing the tank, but initial setup requires full detachment. Grasp the handle firmly and pull upward until the tank releases with a soft click.
Now open the fill port:
1. Hold the tank upright on a towel (spills happen!)
2. Squeeze both side latches inward simultaneously
3. Lift the top cover straight up to reveal the 4-inch wide opening
Pro tip: Place a folded washcloth under the tank rim. If water sloshes during filling, it absorbs drips instead of soaking your counter.
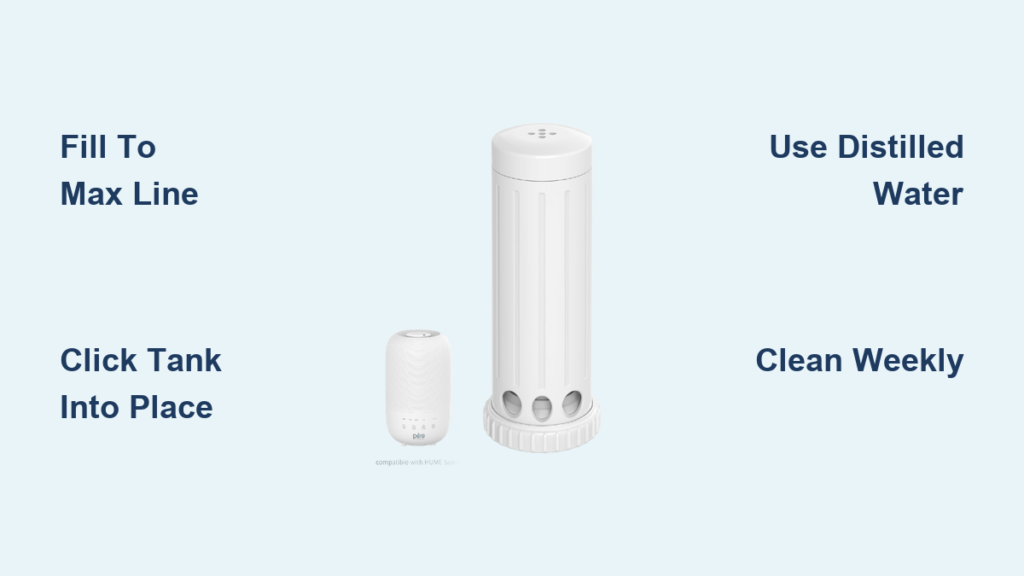
Fill Correctly to Prevent Leaks and Mineral Buildup
Pour cool tap water slowly into the open tank until it reaches the max line (a subtle ridge 1cm below the rim). Never fill beyond this point—overfilling forces water into the base electronics during reassembly. For hard water areas (test yours with a $5 strip), use distilled water exclusively. Tap water leaves chalky deposits inside the tank within weeks, clogging the mist nozzle and voiding warranty coverage.
If your model has a filter:
– Slide the white cartridge into the tank’s side slot
– Rinse under cool running water for 30 seconds
– Never force it—proper alignment ensures water flow
Critical mistake alert: Adding vinegar or cleaning solutions before first use corrodes internal seals. Only use pure water during initial operation.
Position the Base Unit for Maximum Safety and Efficiency
Place the base on a hard, level surface at least 12 inches from walls, furniture, or electronics. Why this matters:
– Distance prevents moisture damage to wood surfaces
– Level positioning stops uneven water drainage
– Airflow clearance maintains mist dispersion
Never place on:
❌ Carpets (traps moisture, breeds mold)
❌ Near heat sources like radiators (distorts humidity readings)
❌ In direct sunlight (accelerates plastic aging)
Plug the adapter into the base before positioning—its short cord (18 inches) limits placement options. Test the outlet with a lamp first to avoid “no power” frustrations later.
Reassemble Without Causing Water Leaks
Align the filled tank directly over the base—do not angle it. Press down firmly until you hear two distinct clicks (one for the water intake valve, one for the electrical connection). Misalignment here causes 90% of “leaky humidifier” complaints. To verify:
1. Gently wiggle the tank side-to-side
2. If it moves more than 1/8 inch, lift and reseat
3. Check the base for water droplets after 5 minutes
Visual cue: The tank’s bottom rim should sit flush against the base with no visible gaps. Any tilt creates pressure points that force water out during operation.
Configure Mist Settings for Your Room Size

Power on the unit—LED lights should illuminate immediately. Press the “+” button to set target humidity between 40-60% (ideal for health and comfort). Now adjust mist output:
| Setting | Best For | Mist Visibility | Noise Level |
|---|---|---|---|
| Low (1-2 bars) | Bedrooms overnight | Barely visible | Near-silent (25 dB) |
| Medium (3-4 bars) | Living rooms (up to 300 sq ft) | Light haze | Quiet hum |
| High (5 bars) | Large rooms (500+ sq ft) | Dense plume | Noticeable but not loud |
| Auto | All room sizes | Self-adjusting | Variable |
Expert note: Start in Auto mode for 24 hours. The sensor learns your room’s dry spots, then you can fine-tune manually.
Fix Common Startup Failures in 60 Seconds
No mist? Don’t panic—95% of issues resolve with these checks:
1. Water level: Must cover the circular sensor in the base (add 1 cup if low)
2. Tank seating: Lift and re-click into place—listen for dual snaps
3. Power: Test outlet with another device; some models need 10 seconds to boot
4. Mist setting: Ensure it’s above “0” (a common toddler “adjustment”)
Leaking from base? Immediately unplug and:
– Dry all surfaces with microfiber cloth
– Verify tank lid clicks shut before reassembly
– Check for hairline cracks near the handle
Activate Smart Features Without App Headaches
For Wi-Fi models:
1. Download “Hume Sense Connect” before setup (iOS/Android)
2. Enable Bluetooth and location services on phone
3. Press and hold the power button for 5 seconds until LED pulses blue
4. Follow app prompts—do not skip the firmware update step
Time-saving hack: Name your humidifier “Bedroom” or “Living Room” during setup. Voice commands like “Hey Google, set Bedroom to 50%” work instantly.
Add Essential Oils Safely (Without Voiding Warranty)
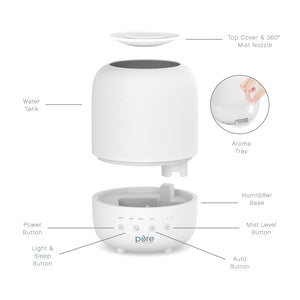
Locate the dedicated oil tray (a small slot on the top cover, not inside the tank). Add 3-5 drops max of water-soluble oils only. Never pour oils directly into water—they coat internal sensors, causing permanent failure. Clean the tray weekly:
1. Wipe with cotton swab dipped in rubbing alcohol
2. Air-dry 10 minutes before reuse
3. Never use citrus oils—they degrade plastic over time
Warning: Oil residue in the tank voids warranty. If you accidentally add oils, run 3 full vinegar cleaning cycles before reuse.
Establish Your First Maintenance Schedule
Start these habits immediately to avoid mold and mineral clogs:
– Daily: Empty leftover water each morning (stagnant water grows bacteria in 12 hours)
– Weekly: Scrub tank with included brush + 1:1 vinegar solution; air-dry upside down
– Monthly: Replace filter (soak in vinegar for 15 mins if extending life)
Pro tip: Set phone reminders labeled “Hume Sense Tank Rinse” and “Filter Swap.” Missed cleanings cause white dust (mineral deposits) that coats your furniture.
Optimize Placement for Healthier Airflow
Move the unit to where moisture is needed most:
– For allergies: Place 3-4 feet from your bed to moisten nasal passages overnight
– For baby rooms: Position on dresser across from crib (never directly facing)
– Large spaces: Center in room—mist travels only 3-5 feet before dissipating
Critical: Keep 24+ inches from electronics. Condensation damages TVs and sound systems over time.
Final Checks Before Continuous Operation
Run these tests for 15 minutes before leaving the unit unattended:
✅ Steady, cool mist from nozzle (no sputtering)
✅ Humidity reading rises within 10 minutes
✅ Zero leaks at tank-base junction
✅ Auto-shutoff triggers when water is low
Your Hume Sense Top-Fill Humidifier is now primed for silent, reliable operation. Stick to the weekly vinegar cleaning schedule—this single habit prevents 80% of long-term failures. For persistent issues, consult the QR code in your manual for video troubleshooting. Within 24 hours, you’ll notice softer skin, fewer static shocks, and deeper sleep as optimal humidity (45-55%) becomes your new normal.


