
You’ve just unboxed your new Miro humidifier, ready to improve your indoor air quality, but now you’re facing an unexpected hurdle: where do you actually begin the setup process? Unlike many appliances that come with detailed step-by-step instructions, Miro humidifiers require a different approach to proper setup—one that aligns with the brand’s core philosophy of health, safety, and accessibility. This guide cuts through the confusion by focusing on what we know about Miro’s design principles to help you establish proper operation of your NR07, NR08, NR MAX, or MH7000 model.
Miro has engineered their entire humidifier range with contemporary aesthetics that don’t compromise on functionality. Whether you’ve chosen the sleek NR07 series, the powerful NR08, the compact NR MAX, or the advanced MH7000, each model shares the same foundational design priorities: hygiene, user-friendliness, and health-focused engineering. Understanding these principles is actually the most critical first step in proper setup, as Miro’s approach to humidification centers on creating environments that promote well-being through thoughtful design rather than complicated procedures.
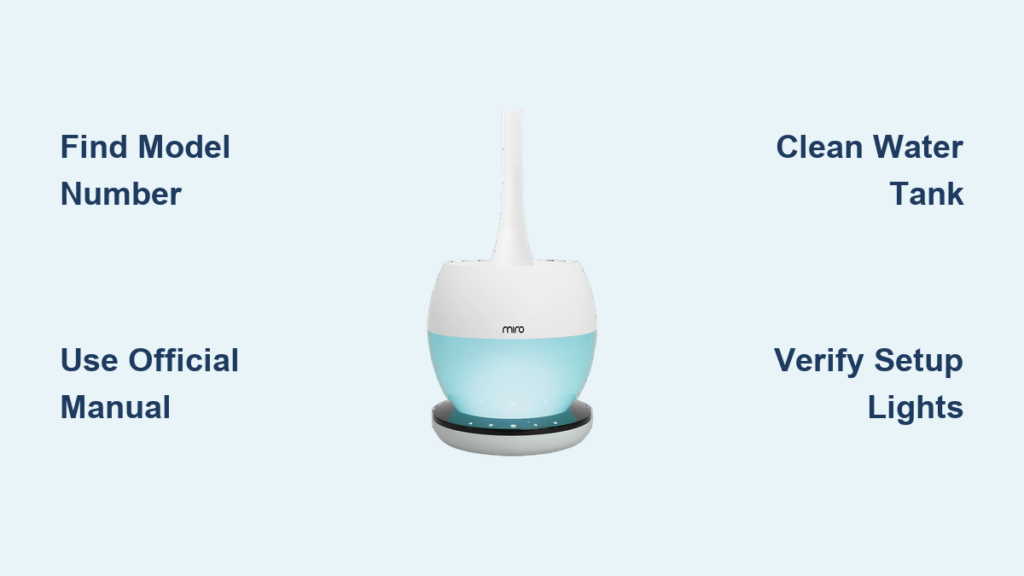
Locate Your Model-Specific User Manual First
Identify Your Exact Miro Humidifier Model
Before attempting any setup, locate the specific model number on your unit—typically found on the bottom or back panel. Miro produces four distinct humidifier lines (NR07, NR08, NR MAX, and MH7000), each with its own operational characteristics despite sharing the same core design philosophy. Your model number determines which user manual applies to your unit, as setup procedures can vary between models even within the same product family.
Access Official Setup Documentation
Miro provides user manuals for all active models, but these aren’t always included in physical packaging. Check for a QR code on your unit or packaging that links directly to digital documentation. If unavailable, visit Miro’s official website and navigate to the support section for your specific model. Never rely on generic humidifier setup guides, as Miro’s health-first engineering means their units may have unique requirements that differ from standard humidifiers.
Verify Manual Authenticity
Ensure you’re using an official Miro document by checking for the company logo, copyright information, and model-specific illustrations. Counterfeit or third-party guides might not account for Miro’s safety systems and accessibility features. The authentic manual will reflect Miro’s commitment to clear, user-friendly instructions that prioritize your health and safety throughout the setup process.
Understand Miro’s Core Setup Philosophy

Health-Centered Design Principles
Miro engineers all humidifiers with health as the primary consideration—this means setup isn’t just about making the unit work, but ensuring it functions in a way that actively improves your breathing environment. Their contemporary design aesthetic never compromises on hygiene priorities, so proper setup must maintain the integrity of these health-focused systems. Unlike conventional humidifiers that simply add moisture, Miro units are designed to create balanced humidity levels that prevent both dry air discomfort and excessive moisture that could encourage mold growth.
Safety Integration in Setup Process
Miro’s safety-first approach means certain setup steps are non-negotiable for proper operation. Their engineering incorporates automatic shut-off systems and moisture controls that only function correctly when the unit is assembled according to specifications. Attempting to bypass recommended setup procedures could disable these critical safety features, turning what should be a health-promoting appliance into a potential hazard. Always follow the sequence outlined in your manual, as Miro designs each step to activate specific safety mechanisms.
Accessibility-Focused Assembly
Miro prioritizes user-friendliness in every design decision, which means their setup process should feel intuitive rather than technical. If you find yourself struggling with assembly, you’re likely missing a key design cue—Miro’s contemporary engineering incorporates visual and tactile indicators to guide proper setup. Pay attention to alignment markers, color-coded components, and the satisfying “click” that confirms proper connection, as these accessibility features are intentional elements of Miro’s user experience design.
Prepare Your Environment for Optimal Performance
Select Location Based on Health Considerations
Miro’s design philosophy emphasizes that placement affects both performance and health outcomes. Choose a location at least 6 inches from walls and furniture to allow proper air circulation—this isn’t just about efficiency but preventing moisture buildup that could damage surfaces or encourage mold. Avoid placing near electronics or valuable items, as Miro’s powerful humidification could potentially affect sensitive materials despite their precise moisture control systems.
Consider Room Size and Layout
Each Miro model (NR07, NR08, NR MAX, MH7000) is engineered for specific room dimensions. Check your manual for coverage specifications, as using an undersized unit in a large space won’t achieve proper humidity levels, while an oversized unit could create excessive moisture. Miro’s health-focused design works best when matched to your room’s actual square footage—this isn’t just marketing but essential to maintaining the 30-50% humidity range recommended for respiratory health.
Ensure Proper Electrical Setup
Miro units incorporate universal voltage compatibility as part of their accessibility commitment, but you must still verify your power source matches your specific model’s requirements. Use only the original power adapter included with your unit, as Miro’s safety engineering depends on precise electrical specifications. Never use extension cords or power strips that could interfere with the unit’s sensitive humidity controls and safety mechanisms.
Perform Initial Activation Correctly
First-Time Water System Preparation
Miro’s hygiene-first approach requires special attention to the water system before initial use. While specific cleaning instructions vary by model, all Miro humidifiers share the principle that the water tank must be thoroughly cleaned with mild soap and warm water before first use. This removes any manufacturing residues that could compromise the health benefits Miro’s engineering promises. Always rinse multiple times to ensure no soap residue remains—Miro’s design prioritizes purity in every component that contacts water.
Power-Up Sequence Verification
When activating your Miro humidifier for the first time, watch for specific indicator lights that confirm proper setup. Miro’s safety systems perform internal diagnostics during startup—flashing lights or error codes indicate setup issues that must be addressed before continuing. Unlike basic humidifiers, Miro units won’t operate if critical components aren’t properly assembled, reflecting their commitment to preventing unsafe operation.
Initial Humidity Level Calibration
Miro’s health-focused design includes automatic calibration during first use. Allow your unit to run for at least 30 minutes in an empty room to establish baseline humidity readings. This critical step enables Miro’s smart systems to adjust output based on your specific environment—bypassing this process could result in inaccurate humidity control that doesn’t align with Miro’s health optimization goals.
Establish Proper Maintenance Routine from Day One
Create a Cleaning Schedule Aligned with Miro’s Philosophy
Miro’s design incorporates user-friendly maintenance because they understand that hygiene directly impacts health outcomes. While exact cleaning intervals vary by model, all Miro humidifiers require daily water changes and weekly deep cleaning to maintain the sanitary conditions their engineering promises. Set reminders in your phone that correspond with Miro’s recommended maintenance schedule—this isn’t just about longevity but ensuring the health benefits you purchased.
Monitor Performance Using Miro’s Health Metrics
Rather than just watching for visible mist, track how your body responds to the humidified environment. Miro engineers their units to create conditions that reduce dry skin, improve sleep quality, and support respiratory health—these are your most important performance indicators. If you don’t notice these benefits within a week of proper setup, your unit may not be configured correctly for your specific environment.
Document Your Setup Experience
Miro continually improves their designs based on real-world user experiences. Keep a simple log of your setup process, noting any challenges or observations. This documentation serves two purposes: it helps you troubleshoot future issues by establishing a baseline of normal operation, and it provides valuable feedback you can share with Miro to help them enhance their user-friendliness commitment.
Final Note: Setting up your Miro humidifier properly isn’t just about following mechanical steps—it’s about aligning with the brand’s core philosophy of health, safety, and accessibility. Without access to model-specific setup instructions, your most important resource remains the official user manual designed specifically for your NR07, NR08, NR MAX, or MH7000 unit. Remember that Miro’s contemporary engineering means every aspect of setup serves a purpose in creating a healthier breathing environment. When in doubt about any step, contact Miro’s customer support directly rather than guessing—this respects both their safety-first design principles and your commitment to creating a truly healthy home environment. Proper setup transforms your Miro humidifier from a simple appliance into an active participant in your household’s well-being, working silently to maintain the optimal humidity levels your health deserves.


