
That new Vicks cool mist humidifier box sitting unopened while dry winter air irritates your throat? You’re not alone—most people struggle with confusing setup instructions that lead to leaks, weak mist output, or worse, mold growth within days. Getting your Vicks cool mist humidifier properly set up takes just 15 minutes but prevents months of frustration and potential health hazards.
This practical guide shows exactly how to set up Vicks cool mist humidifier units correctly from unboxing to first mist. You’ll learn water type secrets that prevent white dust, placement tricks that maximize coverage, and maintenance habits that stop mold before it starts. Follow these steps and breathe easier tonight—not after days of trial and error.
Unbox and Identify All Components Before Setup Begins
Skip this step and you’ll waste time searching for missing parts mid-assembly. Clear a dry, flat workspace near your electrical outlet before tearing open that packaging tape.
Essential Parts Checklist You Must Verify
Your Vicks cool mist humidifier box contains six critical components—don’t proceed without confirming each one:
- Base unit with visible fan grille and control panel
- Water tank (typically blue-tinted plastic with MAX/FILL lines)
- Mist nozzle that snaps into tank opening
- Replacement filter (in most models—check packaging)
- Small cleaning brush for hard-to-reach areas
- Owner’s manual with model-specific diagrams
Critical warning: If your model requires a filter (check manual), never operate without it—this causes immediate mineral buildup that ruins internal components.
Missing Parts Protocol That Saves Hours of Frustration
Before calling customer service, check these three hidden spots where Vicks commonly secures small parts:
1. Inside the water tank cap compartment
2. Taped to the bottom of the base unit
3. In the plastic bag with your cleaning brush
If components remain missing after thorough checking, locate your model number (stamped on base unit) and contact Vicks with it—never substitute parts with similar-looking items from other humidifiers.
Choose Optimal Placement to Prevent Water Damage and Boost Effectiveness

Where you position your humidifier affects mist distribution, electrical safety, and potential property damage. Most users make this critical mistake within the first hour of setup.
Ideal Placement Requirements You Must Meet
Your Vicks cool mist humidifier needs these exact conditions:
– Hard, level surface like wood furniture (never carpet)
– 4-6 feet from sleeping areas to avoid direct mist inhalation
– Minimum 24 inches clearance from walls and electronics
– Direct plug-in to wall outlet (no extension cords)
– Away from heating vents that create temperature fluctuations
Pro tip: Place a towel under the unit during first use—this catches accidental spills while you verify proper assembly.
Dangerous Placement Mistakes That Cause Costly Problems
Never position your humidifier:
– On shelves higher than 3 feet (creates dangerous mist clouds)
– Near televisions or computers (moisture damages electronics)
– In corners where air circulation is restricted
– Within 3 feet of heating registers (causes rapid condensation)
– On plastic surfaces that can warp from constant moisture
Prepare Water Tank to Avoid Mineral Buildup From Day One

Skipping proper tank preparation causes the #1 reason for early humidifier failure—mineral deposits that clog internal mechanisms within weeks.
Initial Cleaning Steps That Extend Unit Lifespan
Follow this exact sequence before first fill:
1. Remove tank by lifting straight up from base unit
2. Rinse interior with warm water only (no soap—residue affects mist)
3. Fill completely and swirl for 30 seconds to dislodge manufacturing oils
4. Empty thoroughly through main opening (not cap hole)
5. Repeat until water runs completely clear (usually 2-3 times)
Time-saving trick: Do this over your bathtub with the drain stopper in place—catches any accidental drops of tank components.
Filter Preparation for Models That Require It
If your Vicks model includes a filter (check manual):
– Remove from vacuum-sealed packaging
– Rinse under cool running water for exactly 30 seconds
– Gently squeeze out excess moisture (never twist or wring)
– Insert into base unit slot until it clicks into place
– Verify it sits perfectly flat with no gaps around edges
Fill and Install Water Tank Using Correct Water Type
What you put in your Vicks cool mist humidifier determines whether it runs cleanly for years or becomes a mold factory within weeks.
Water Type Recommendations That Prevent White Dust
Your mist quality depends entirely on water choice:
– Distilled water: Best option—zero minerals, cleanest mist
– Filtered tap water: Acceptable alternative if distilled unavailable
– Hard tap water: Causes rapid mineral buildup—avoid completely
– Never use: Hot water (damages components) or essential oils (voids warranty)
Proper Installation Technique That Prevents Leaks
Follow these precise steps:
1. Turn tank upside down and unscrew cap completely
2. Fill to MAX line only (overfilling causes immediate leaks)
3. Hand-tighten cap until resistance increases (no tools needed)
4. Align tank grooves with base unit guides
5. Press down firmly until you hear a distinct click
Critical check: Tilt tank slightly after installation—no water should seep from connection points. If leaks occur, disassemble and repeat steps 4-5.
Connect Power and Configure Initial Settings Correctly
Most users damage their humidifier during first power-up by skipping these critical electrical safety steps.
Power Connection Sequence That Prevents Short Circuits
- Verify tank click by gently tugging upward (no movement = secure)
- Plug directly into wall outlet (power strips cause voltage issues)
- Press power button once for low setting (solid blue light)
- Wait 60 seconds before adjusting to high setting
- Check mist output within 2 minutes (should be visible)
Warning: If mist doesn’t appear within 5 minutes, unplug immediately and check tank seating—forcing continued operation can burn out the motor.
Adjust Mist Direction to Maximize Room Coverage

Improper mist direction causes wall condensation that leads to mold growth behind furniture—fix this during initial setup.
Nozzle Positioning Techniques That Prevent Water Damage
- Rotate nozzle to face room center (never toward walls)
- Angle upward slightly (15-20 degrees) for better air distribution
- For dual-nozzle models: Position both outlets toward open space
- Check every 2 hours during first day—mist direction shifts easily
Pro tip: Place a hygrometer 6 feet from unit to verify humidity increase—should show 5-10% rise within first hour of proper operation.
Monitor First 4 Hours to Catch Setup Errors Early
The critical window where minor setup mistakes become major problems—don’t leave your humidifier unattended during initial operation.
What to Check Every 30 Minutes
- Water level drop: Should decrease gradually (1 inch per hour on high)
- Base dryness: Absolutely no moisture under unit
- Mist visibility: Consistent output without sputtering
- Noise level: Steady hum—not grinding or clicking sounds
Emergency response: If water pools beneath unit, unplug immediately and recheck tank installation—this indicates improper seating that will cause electrical hazards.
Establish Daily Maintenance to Prevent Mold Growth
Your Vicks cool mist humidifier becomes a bacteria factory within 48 hours without these simple daily habits.
Morning Routine That Takes 90 Seconds
- Check water level—refill if below quarter full
- Wipe exterior base with dry microfiber cloth
- Verify nozzle position hasn’t shifted overnight
- Sniff for mustiness—early mold detection prevents full cleaning
Evening Shutdown Procedure That Extends Unit Life
- Turn off using control button (not just unplugging)
- Empty remaining water completely (stagnant water breeds bacteria)
- Leave tank cap off to air-dry interior surfaces
- Store on towel to catch residual drips during drying
Troubleshoot Common Setup Problems Before Calling Support
Save hours on hold with Vicks customer service by fixing these frequent issues yourself.
Unit Won’t Power On Solutions
Most often caused by these three setup errors:
– Tank not fully seated (listen for installation click)
– Water level below minimum (add 1 cup water and retry)
– Outlet issues (test with phone charger first)
Quick fix: Unplug for 60 seconds, then reinstall tank while holding power button.
Weak Mist Output Fixes That Work Immediately
- Clogged filter: Remove, rinse under cool water, reinstall
- Mineral buildup: Run vinegar solution through system
- Low room humidity: Unit automatically reduces output above 50% RH
Warning: Never disassemble internal components—this voids your warranty immediately.
Maintain Peak Performance With Simple Weekly Habits
The difference between a humidifier that lasts 5 years versus one that fails in 6 months comes down to these maintenance steps.
Filter Care Schedule You Must Follow
- Rinse weekly during heavy usage months
- Replace monthly if using tap water, every 2 months with distilled
- Mark replacement dates on calendar with permanent marker
- Buy filters in bulk before winter season begins
Pro tip: Store spare filters in airtight container with silica gel packets to maintain effectiveness.
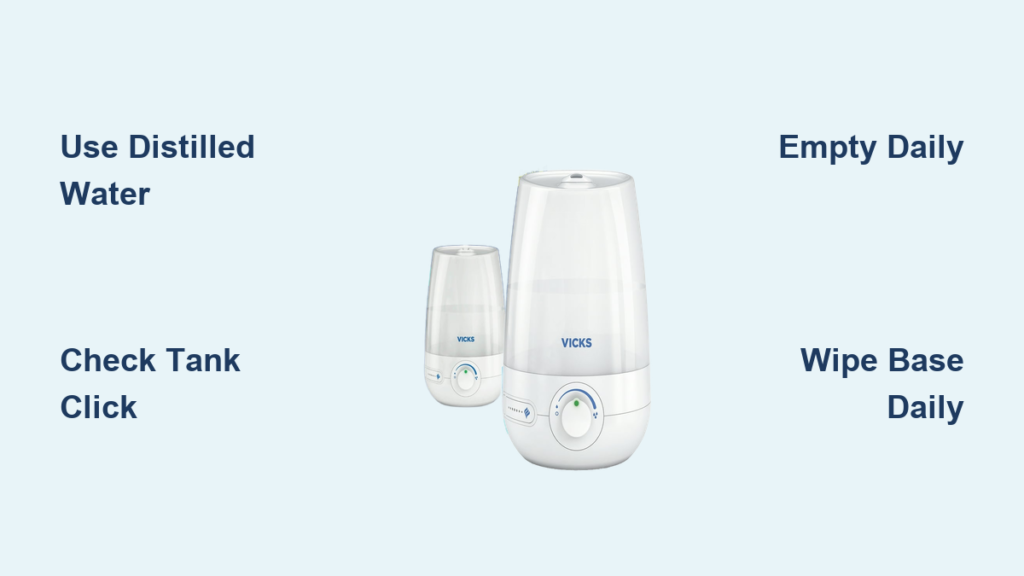
Key Takeaway: Properly learning how to set up Vicks cool mist humidifier prevents 90% of common problems users face. Focus on distilled water, correct tank installation, and daily emptying to avoid mold issues. Your respiratory health depends on getting these setup steps right from day one.
Start tonight by verifying your tank clicks securely into place and using only distilled water—these two actions alone prevent the most frequent repair issues. Within 24 hours of correct setup, you’ll notice easier breathing, better sleep, and no mysterious water spots on your furniture. The few minutes spent perfecting your Vicks cool mist humidifier setup now saves weeks of discomfort later.


