
Your new Temu humidifier promises to transform your home’s air quality, but without proper setup and operation, you might struggle with ineffective performance or even damage the unit. Many first-time humidifier users face common frustrations—water leaks that damage surfaces, mysterious white dust covering furniture, or units that run constantly without improving dry air conditions. These issues often stem from incorrect setup rather than product defects.
This guide provides essential operating principles for humidifiers commonly sold through Temu, based on standard ultrasonic and cool mist technology found in most budget-friendly models. You’ll discover water compatibility requirements that prevent mineral buildup, strategic placement techniques for optimal moisture distribution, and maintenance schedules that extend your unit’s lifespan. Since Temu sells multiple humidifier types without consistent model-specific documentation, this guide focuses on universal best practices applicable to most compact home humidifiers in this price range.
Unbox and Verify Your Components
Carefully inspect all parts immediately after unboxing to address potential shipping issues before use. Most compact humidifiers available through Temu include the main base unit, removable water tank, power adapter, and basic cleaning tools. Check for cracks in the tank, frayed power cords, or missing components before proceeding with setup.
Identify Your Humidifier Type
Determine whether your unit uses ultrasonic technology (produces cool mist through high-frequency vibrations) or evaporative methods (uses a wick filter and fan). Ultrasonic models typically have a visible metal diaphragm inside the water chamber and operate nearly silently, while evaporative units contain a replaceable wick filter and produce audible fan noise. This distinction affects maintenance requirements and optimal usage scenarios.
Essential Setup Supplies
Gather distilled or filtered water (critical for preventing mineral deposits), white vinegar for cleaning, and a soft microfiber cloth before initial operation. Avoid using tap water if your area has hard water, as minerals will quickly accumulate inside the unit. Keep your smartphone nearby if your model includes app connectivity features, though most budget Temu humidifiers rely on physical controls rather than smart technology.
Position for Maximum Effectiveness

Placement significantly impacts your humidifier’s performance and safety. Position the unit at least 2-3 feet away from walls, furniture, and electronic devices to ensure proper air circulation and prevent moisture damage to surfaces. Never place directly on wooden furniture or carpeted floors that could be damaged by accidental spills.
Room Size and Layout Considerations
For rooms under 250 square feet, central placement typically provides even moisture distribution. In larger spaces, position the humidifier near your primary seating area rather than in isolated corners where airflow becomes restricted. Bedrooms benefit from placement near your bed but not directly on your nightstand—elevate the unit on a sturdy shelf or dedicated stand to improve mist dispersion.
Optimal Height and Surface Requirements
Set your humidifier on a stable, waterproof surface 18-36 inches above floor level. Bathroom counters, dedicated plastic trays, or moisture-resistant furniture work best. This elevation allows the mist to disperse more effectively throughout the room rather than settling near the floor. Always use a waterproof mat underneath the unit as a precaution against potential leaks.
Fill the Water Tank Properly
Remove the water tank by lifting it straight up from the base unit. Many compact humidifiers use top-fill designs where you unscrew the cap at the tank’s top, while others feature bottom-fill mechanisms requiring you to invert the tank. Consult any available markings on the tank for fill level indicators.
Water Quality Guidelines
Use only distilled or filtered water to minimize mineral deposits that cause white dust and internal scaling. If you must use tap water, let it sit uncovered for 24 hours to allow chlorine to evaporate, though this won’t remove hard water minerals. Never add essential oils directly to the water reservoir, as this damages internal components and creates potentially harmful airborne compounds.
Fill Level and Technique
Fill to the indicated “MAX” line inside the tank, leaving approximately one inch of space at the top to prevent overflow during operation. Overfilling causes immediate leaks when reattaching the tank to the base. Pour water slowly to avoid splashing, and wipe any exterior moisture before reassembly to prevent electrical hazards.
Power Up and Configure Settings
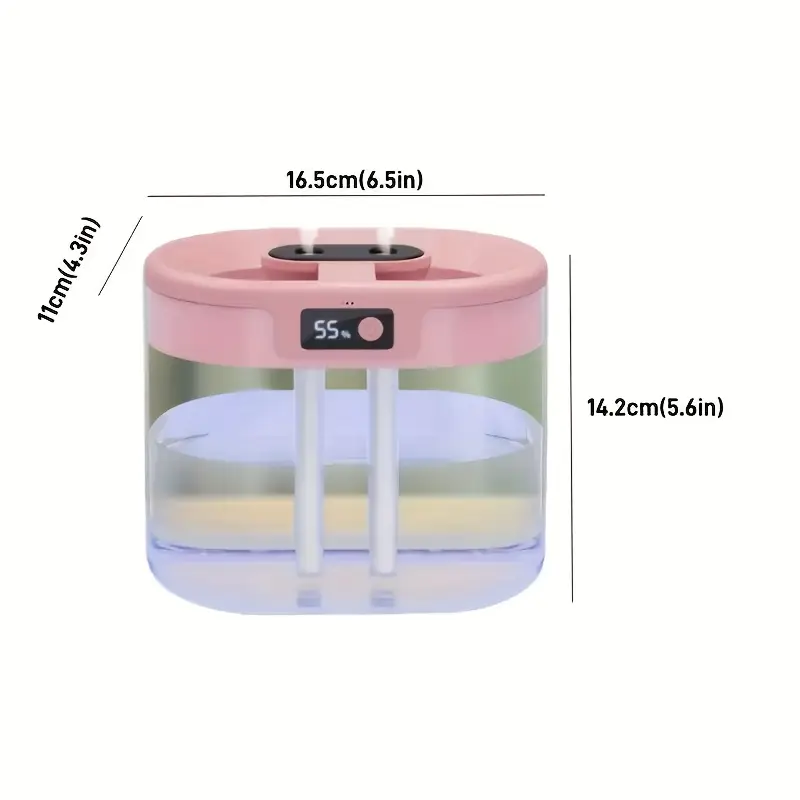
Connect the power adapter directly to a wall outlet—avoid extension cords that might cause voltage fluctuations. Press the power button (typically a circle icon) to activate the unit. Most basic models automatically start at medium mist output, indicated by a steady LED light.
Control Panel Operations
Familiarize yourself with standard control functions: single press for power, repeated presses to cycle through mist levels (usually 1-3 settings), and longer presses (3+ seconds) for timer functions. Indicator lights typically change color to show current settings—blue for low, green for medium, red for high output. Night mode usually dims or turns off all lights for bedroom use.
Target Humidity Recommendations
Aim for 40-50% relative humidity for optimal comfort and health benefits. Without a built-in hygrometer, purchase a separate humidity monitor to track actual room conditions. Higher humidity levels (above 60%) encourage mold growth and cause window condensation, while levels below 30% fail to alleviate dry air symptoms. Start with medium output and adjust based on actual measurements rather than comfort alone.
Daily Operation Best Practices
Establish a consistent usage pattern based on your specific needs. Run the humidifier during sleeping hours for bedroom use, or continuously in extremely dry environments. Check water levels at least once daily—most compact tanks require refilling every 12-24 hours depending on output settings and room conditions.
Mist Output Management
Begin operation at the lowest effective setting rather than maximum output. Allow 30-60 minutes for the room to reach target humidity before increasing the setting. Gradually reduce output as humidity rises to prevent over-saturation. During winter months with forced-air heating, you may need to increase output as temperatures drop.
Overnight Safety Protocols
Always operate the humidifier on a waterproof tray during nighttime use. Set the timer function for 6-8 hours to prevent over-humidification while you sleep. Keep bedroom doors partially open to maintain proper air circulation throughout your living space. Never leave the unit running unattended for extended periods without regular monitoring.
Weekly Cleaning and Maintenance
Empty and rinse the water tank every 48 hours to prevent bacterial growth, even if water remains. Perform a thorough cleaning at least once weekly to remove mineral deposits and biological contaminants that compromise performance and air quality.
Effective Cleaning Procedure
Unplug the unit and empty all water before cleaning. Mix equal parts white vinegar and warm water in the tank, letting it soak for 30 minutes to dissolve mineral deposits. Use the included cleaning brush (or a soft toothbrush) to gently scrub the ultrasonic membrane and tank interior. Rinse thoroughly with clean water multiple times to remove all vinegar residue before reuse.
Filter and Component Care
If your model includes a replaceable wick filter, rinse it weekly and replace every 1-2 months depending on usage. Check the instruction manual for specific replacement schedules, as most budget humidifiers use disposable filters rather than cleanable ones. Inspect all rubber seals and gaskets for wear or cracking during cleaning sessions, replacing damaged components immediately.
Troubleshoot Common Problems

Address operational issues promptly to prevent permanent damage. Most problems stem from water quality issues, improper maintenance, or incorrect placement rather than unit defects.
No Mist Production Solutions
Verify adequate water level, ensure the tank seats properly on the base unit, and confirm power connection. Clean the ultrasonic membrane with vinegar solution if mineral deposits are visible. Reset the unit by unplugging for 60 seconds before restarting. Persistent issues may indicate a failed diaphragm requiring professional repair.
White Dust Elimination
Immediately switch to distilled water if you notice fine white particles settling on surfaces. This dust indicates hard water minerals being aerosolized. Clean all internal components thoroughly with vinegar solution to remove existing deposits. Consider purchasing a demineralization cartridge if your model supports add-on accessories.
Leak Prevention Strategies
Tighten all caps and connections completely before each use. Ensure the tank sits perfectly level on the base unit—slight tilting causes overflow. Replace worn rubber gaskets if leaks persist after verifying proper assembly. Never operate the unit without the water tank properly secured to the base.
Optimize for Seasonal Changes
Adjust your humidifier usage based on seasonal climate variations. Winter heating systems create extremely dry air requiring more frequent operation, while summer humidity may necessitate reduced usage or temporary storage.
Winter Operation Adjustments
Increase mist output gradually as outdoor temperatures drop below freezing. Monitor humidity levels twice daily with a separate hygrometer since built-in sensors often prove unreliable. Target 45% humidity in bedrooms to prevent dry sinuses and static electricity while avoiding window condensation.
Summer Storage and Maintenance
Reduce output settings by 25-50% during humid summer months. Clean the unit more frequently—weekly rather than bi-weekly—as warm conditions accelerate bacterial growth. When not in use for extended periods, store with all components completely dry and the tank lid removed to prevent mold development inside the unit.
Extend Your Unit’s Lifespan
Consistent maintenance dramatically increases your humidifier’s operational life. Create a simple maintenance checklist to ensure you don’t overlook critical care steps during busy periods.
Monthly Deep Maintenance Routine
Disassemble all removable components monthly for thorough cleaning. Soak parts in vinegar solution for 30 minutes, then use compressed air to clear any clogged vents or nozzles. Inspect electrical connections for corrosion and wipe clean with a dry cloth. Document any performance changes that might indicate developing issues.
Proper Storage Between Seasons
Before storing for several weeks or months, empty and dry all components completely. Wrap the unit in breathable fabric rather than plastic to prevent moisture trapping. Store in a climate-controlled space away from direct sunlight and temperature extremes. Discard used filters before storage and install fresh ones when restarting the unit.
Final Note: Your humidifier provides optimal performance when operated with distilled water, proper placement, and consistent cleaning. Since Temu sells multiple models without standardized documentation, always prioritize safety by following general humidifier best practices over unverified online advice. For model-specific guidance, contact the seller directly or search for your exact product listing using the model number typically found on the unit’s base. Regular maintenance prevents most common issues and ensures your investment continues improving your indoor air quality for years to come.


