
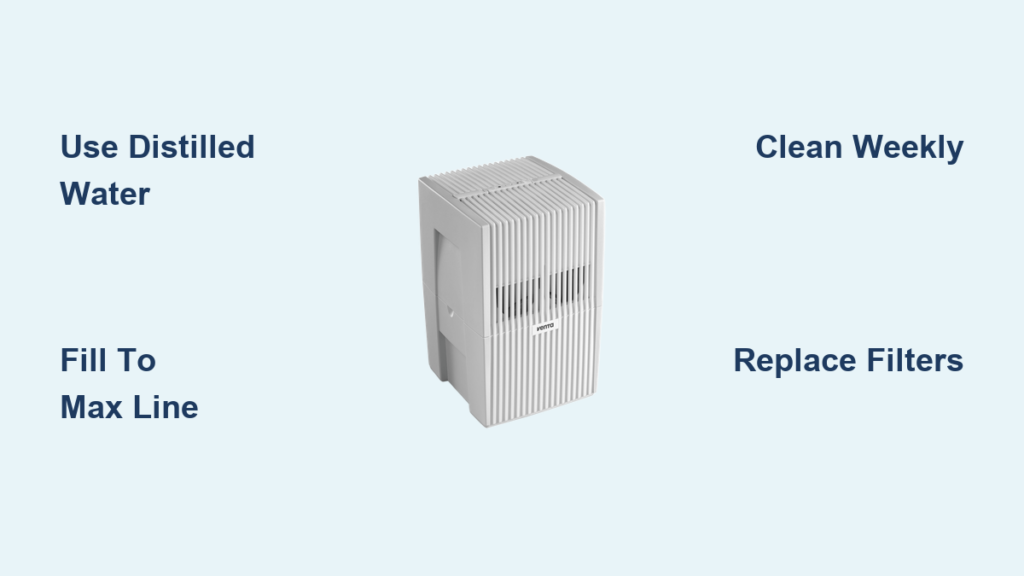
That dry winter air is cracking your skin and waking you up with a scratchy throat—while your unopened Venta humidifier collects dust in the corner. You invested in this premium air washer for a reason: it doesn’t just add moisture but actively cleans pollutants from your home’s air. But without proper setup, you’re missing out on its full benefits while risking mineral buildup and reduced lifespan. This guide gives you the exact steps to master how to use Venta humidifier systems from installation to maintenance, ensuring you breathe cleaner, healthier air starting today.
Whether you chose the compact Original model for your bedroom or the powerful AW902 for your open-concept living space, correct operation determines whether your unit lasts years or fails prematurely. Let’s transform that unopened box into your home’s most essential wellness device—no technical expertise required.
Confirm All Components Before First Use
Unpack with surgical precision to avoid missing critical parts. Lift the unit straight up from the box base, then check for foam inserts wedged between the water tank and base. Every Venta includes these essentials:
– Water tank/reservoir with MAX fill line indicator
– Base unit with evaporative discs and water channels
– Power cord (inspect for frays or kinks immediately)
– User manual and quick-start guide (keep in a safe place)
– Replacement wick filter (included with most new units)
Document shipping damage within 48 hours—cracked tanks or bent fan blades compromise safety and performance. Contact Venta support at 888-333-8218 with photos before discarding packaging. Never assume minor cracks will “seal themselves” during operation.
Why Distilled Water Isn’t Optional
Hard tap water sabotages your humidifier within weeks. Minerals in unfiltered water coat evaporative discs, creating white dust on furniture and reducing output by 40%. Distilled or demineralized water extends filter life by 300% and maintains warranty coverage. Keep a labeled 2-gallon jug of distilled water near your unit—this single habit prevents 90% of maintenance headaches.
Position for Maximum Airflow and Safety
Place on a non-porous, level surface that won’t warp when damp (ceramic tile or sealed wood). Your Venta weighs 15-25 lbs when full—avoid wobbly nightstands or carpeted floors. Critical clearance rules:
– 12 inches from walls/furniture (prevents moisture damage)
– 36 inches from heating vents (avoids temperature conflicts)
– Out of direct sunlight (prevents algae growth in tank)
Never install in bathrooms—existing humidity creates condensation that damages electronics and encourages mold. Bedrooms and home offices are ideal, but verify your model’s coverage: Compact units (Original/Comfort Plus) handle 500 sq ft, while AW902 covers 1,000 sq ft.
How to Test Your Surface Stability
Place a coin under each base foot—if it wobbles when you press the tank, reposition immediately. An unstable unit vibrates excessively, accelerating wear on internal components. Use furniture pads under the base if your floor has minor imperfections.
Fill the Tank Without Leaks or Damage
Stop at the MAX line—every time. Overfilling causes immediate leaks that pool under the base, risking electrical shorts. The tank holds 1.2 gallons (Original models) to 3.0 gallons (AW902)—check your manual for exact capacity. Fill using a narrow-spout pitcher to avoid splashing.
Never add essential oils or medications—these corrode plastic components and void your warranty. Venta units are designed for pure water only; additives damage evaporative discs and create hazardous airborne particles.
Three-Step Fill Verification
- Place tank on scale before filling (full weight: ~10-25 lbs depending on model)
- Shine flashlight through tank to confirm water level aligns with MAX line
- Wipe exterior dry with microfiber cloth to eliminate drips during placement
Secure Assembly That Prevents Costly Leaks

Align connection points like puzzle pieces—most models have molded arrows on tank and base. Hold the tank vertically above the base, then lower straight down until you hear a distinct click. A properly seated tank won’t wobble when you gently twist it.
Test the seal before powering on:
1. Fill tank to MAX line
2. Place assembled unit in sink
3. Press release valve (if equipped) for 5 seconds
4. Verify no water leaks from base connection
If pooling occurs, disassemble and check for hairline cracks in the tank’s outlet port—common during shipping.
Power Up Without Electrical Hazards
Plug directly into a grounded wall outlet—never use extension cords or power strips. Venta units draw consistent power that can overload multi-plug adapters. Confirm your outlet has a third prong hole before proceeding.
Follow this startup sequence:
1. Plug in power cord
2. Set humidity dial to “3” (Original models) or 45% (Connect models)
3. Press power button for 2 seconds until indicator light glows
4. Listen for fan startup (should sound like a quiet whisper)
5. Wait 60 seconds for water to saturate evaporative discs
Never leave unattended during first 2 hours—watch for leaks, unusual noises, or error codes. If the unit shuts off automatically, check if the water tank sits flush with the base.
Dial In Perfect Humidity for Health and Comfort
Set 45% as your winter baseline—this prevents dry skin while avoiding condensation on windows. Original models use a 1-7 dial (start at “4” for 500 sq ft rooms); Connect models show exact percentages on digital displays.
Seasonal adjustment cheat sheet:
– Winter (heating season): Increase to 50%
– Summer (humid months): Reduce to 35%
– Allergy season: Maintain 40% with AH902’s air purification mode
Professional models require mode selection: AW902 uses “Humidify Only” mode, while AH902 needs separate activation of humidification and HEPA filtration.
How to Validate Your Settings
Place a $15 hygrometer 3 feet from the unit after 24 hours. If readings are 10% below your setting, clean the evaporative discs—mineral buildup is blocking moisture output.
Weekly Cleaning That Prevents Mold Growth
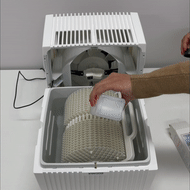
Empty and rinse the tank daily—stagnant water breeds bacteria within 12 hours. For deep cleaning every 7 days:
– Wash tank with 1 tbsp white vinegar + warm water
– Scrub base water channels with soft-bristle toothbrush
– Soak evaporative discs in vinegar solution 30 minutes
– Rinse everything until vinegar smell disappears
Never use bleach or abrasive cleaners—these degrade plastic components and leave toxic residues. Air-dry all parts for 2 hours before reassembly; damp parts cause mold in hidden crevices.
The 15-Minute Weekend Ritual
- Unplug unit (safety first!)
- Empty tank into sink
- Wipe base exterior with vinegar-dampened cloth
- Soak tank in vinegar solution while prepping
- Rinse and dry components
- Reassemble and refill with distilled water
Replace Filters Before Performance Drops
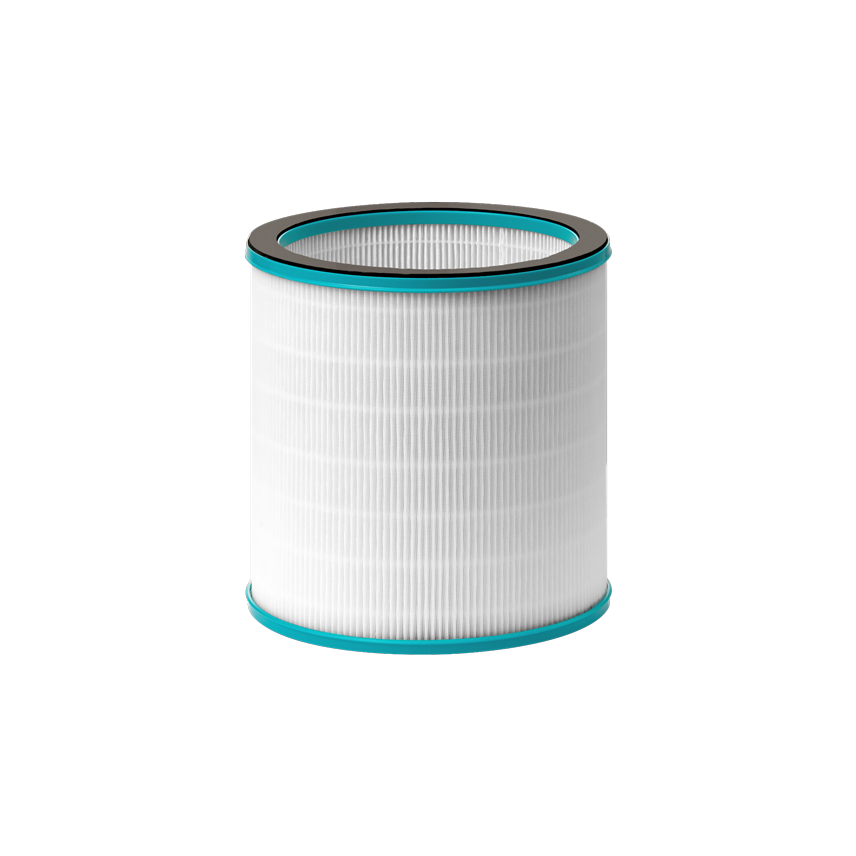
Check wick filters weekly for these failure signs:
– Yellow/brown discoloration (mineral saturation)
– 20% thinner than new filter (indicates wear)
– Musty odor during operation
– Visible mold spots (requires immediate replacement)
Standard replacement schedule:
– Distilled water users: Every 6 months
– Filtered water users: Every 4 months
– Tap water users: Every 2 months (not recommended)
AH902 HEPA filters last 18 months—set a calendar reminder for replacement. Installing a new filter boosts moisture output by 35% and reduces energy use.
Correct Filter Installation Technique
- Unplug unit and remove water tank
- Pull old filter straight up (don’t twist)
- Rinse new filter under distilled water for 10 seconds
- Insert until it clicks into bottom housing
- Reset filter indicator via control panel (if equipped)
Fix Top Problems in Under 10 Minutes
No mist? Try these:
– Refill tank (below MIN line triggers auto-shutoff)
– Clean water intake valve with toothpick
– Rotate evaporative discs to dislodge debris
– Verify 12-inch clearance from walls
White dust on surfaces?:
1. Switch to distilled water immediately
2. Run vinegar descaling cycle (1:1 vinegar/water)
3. Replace saturated wick filter
4. Wipe room surfaces with damp microfiber cloth
Grinding noise?:
– Level the unit using furniture pads
– Remove dust bunnies from fan intake
– Ensure tank clicks fully into base
– Tighten base screws with included hex key
Prevent Costly Repairs With Smart Habits
Distilled water is your #1 defense—it prevents $80 service calls for mineral-clogged units. Always:
– Empty tank if unused for 72+ hours
– Store unit with tank removed during summer
– Clean before seasonal storage
– Keep spare filters on hand
Performance red flags requiring immediate action:
– Water pooling under base (unplug and inspect seals)
– Persistent burning smell (stop use and call support)
– Error codes flashing 3+ times (consult manual)
Never add humidity above 50%—this encourages mold growth in walls and furniture. Use your hygrometer as a guide, not just the unit’s display.
Get Expert Help When Stuck
Call Venta support at 888-333-8218 with your model number (found on base unit) during business hours (Mon-Thu 9 AM-5 PM CT, Fri 9 AM-4 PM CT). Have these ready:
– Purchase receipt (for warranty claims)
– Video of issue occurring
– Recent maintenance records
Free resources you’re entitled to:
– Model-specific video tutorials at venta-airwasher.com
– Digital manuals with troubleshooting flowcharts
– 14-day return window for new units
– Free shipping on filter replacements over $75
Your Venta humidifier now delivers hospital-grade clean air with whisper-quiet operation. Stick to distilled water and weekly vinegar rinses to avoid 95% of common issues. Remember: Proper humidity (30-50%) reduces airborne viruses by 30% while easing allergy symptoms—making this simple routine your home’s invisible health guardian. Check your hygrometer weekly, adjust settings seasonally, and enjoy air so pure you’ll forget you’re using a machine at all.


