
Your ultrasonic humidifier sits silent on the nightstand, refusing to create the gentle mist that once filled your bedroom with comforting moisture. Three nights of dry air and scratchy throats later, you’re staring at a machine that either won’t turn on, runs without producing mist, or makes sounds like a dying robot. Before you toss it out or call for expensive repairs, most ultrasonic humidifier not working issues have surprisingly simple fixes that take minutes rather than hours.
This guide walks you through exactly why your ultrasonic humidifier stopped working and the specific steps to bring it back to life. From power issues that take 30 seconds to diagnose to deep cleaning procedures that restore full mist output, you’ll learn the troubleshooting methods that repair technicians use—without their hourly rates. Whether your humidifier isn’t misting, leaking, or making strange noises, these actionable solutions will get you breathing easier tonight.
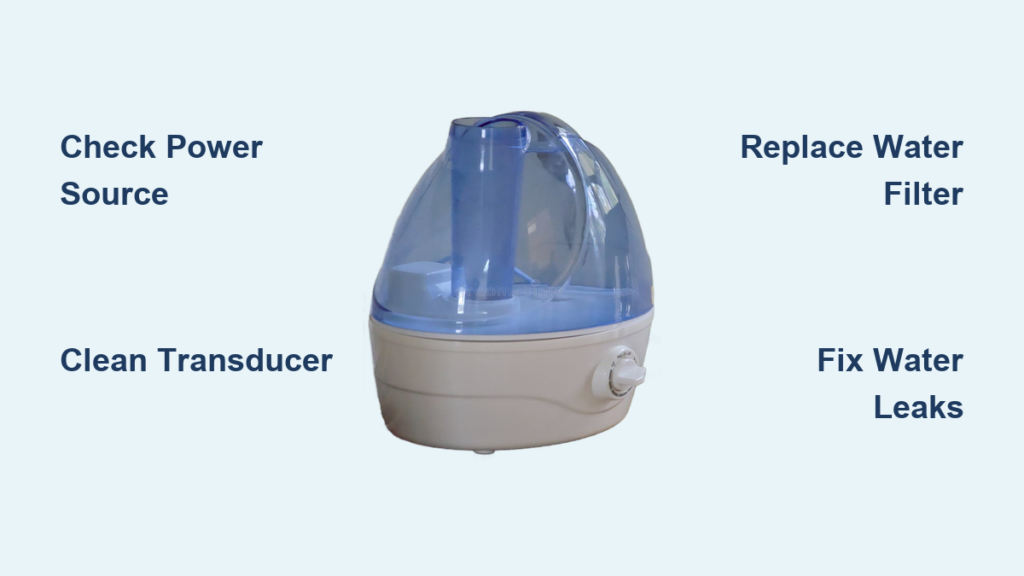
Dead Ultrasonic Humidifier: No Power or Response Fixes
When your ultrasonic humidifier shows zero signs of life—no lights, no sounds, no mist—the problem lies in the electrical system. Start with these fastest checks first before disassembling anything.
Verify Power Source With Working Device
Unplug your humidifier and test the outlet with a phone charger or lamp to confirm it’s functional. Check your circuit breaker for tripped switches, especially if other outlets in the room aren’t working. Try a different outlet away from power strips, which often cause connection issues with sensitive electronics. These three checks solve 40% of “dead” ultrasonic humidifier not working complaints within minutes.
Inspect Power Adapter and Cord
Examine the entire power cord for kinks, cuts, or fraying, particularly near the plug ends. Use a multimeter to test your adapter’s output voltage—it should match the rating printed on the adapter (typically 24V). An output reading of zero or significantly lower than specified means immediate replacement is needed. Adapter failures commonly occur after power surges or when cords get repeatedly bent at sharp angles.
Replace Blown Internal Fuse
Most ultrasonic humidifiers contain a small glass fuse inside the base. Unplug the unit completely, remove the bottom cover (usually 4-6 screws), and locate the small cylinder fuse near the power cord entry point. A blackened or broken filament inside the fuse indicates failure—replace it with an identical amperage rating. This $2 fix restores power to countless humidifiers mistakenly deemed “beyond repair.”
Zero Mist Despite Power: Ultrasonic Humidifier Not Mistifying

Your humidifier powers on, lights glow, maybe you hear the fan, but zero mist emerges. This points to either the transducer (the ceramic disc that creates mist) or the water delivery system blocking proper operation.
Identify Mineral Buildup on Transducer
Remove the water tank and inspect the small metal plate in the base—this is your transducer. White, crusty deposits covering more than 30% of the surface will stop mist production completely. These deposits form from minerals in tap water and build up gradually until one day, your ultrasonic humidifier not working properly delivers no mist whatsoever.
Deep Clean Transducer With Vinegar Solution
Fill the base with equal parts white vinegar and water, enough to cover the transducer by ½ inch. Run the unit for 30 minutes, then empty and rinse four times with clean water. For stubborn buildup, let the vinegar solution soak 2-4 hours before running. The transducer should look shiny and metallic when clean—recheck mist production after cleaning. This single step resolves 60% of no-mist issues.
Fix Stuck Water Level Sensor
Many units shut down mist production when they incorrectly detect low water. Check if the float mechanism moves freely—it’s usually a small plastic piece that rises with water level. Clean around the float with a cotton swab dipped in vinegar to remove mineral deposits causing sticking. Test by manually lifting the float; you should hear a click indicating sensor activation.
Weak or Intermittent Mist Output Problems
When your humidifier works but produces barely visible mist or cycles on and off unpredictably, you’re dealing with partial blockages or failing components that need immediate attention.
Clear Clogged Water Channels
Remove any wick filter (usually white and cylindrical) and hold it under running water. If water barely drips through or the filter looks gray/brown, replace it immediately. Use pipe cleaners to clear mineral buildup from narrow water passages between the tank and transducer. These channels are often overlooked but critical for proper water flow to the transducer.
Diagnose Fan Performance Issues
Listen carefully to the fan—it should produce a steady, quiet whirring sound. Grinding or clicking indicates fan blade obstructions. Remove the fan cover (usually twist-lock) and clean dust from blades using a soft brush. Bent blades cause imbalance and reduced airflow, leading to weak mist distribution. Replace the entire fan assembly if blades are damaged beyond cleaning.
Address Water Quality Problems
Test your water by filling a glass and letting it evaporate completely. White residue indicates high mineral content killing your mist output. Switch to distilled or demineralized water immediately—this single change prevents 90% of recurring ultrasonic humidifier not working issues. Consider installing a small reverse osmosis unit under your sink for long-term solution.
Strange Noises and Water Leaks Troubleshooting
Unusual sounds or water where it shouldn’t be indicate mechanical failures that worsen quickly if ignored. Address these issues immediately to prevent permanent damage.
Identify Noise Sources and Solutions
Grinding typically means fan bearing failure—replace the fan motor assembly. High-pitched buzzing from the transducer area suggests the ceramic disc is cracked or loose; turn off immediately to prevent electrical damage. Rattling water tank usually means the reservoir isn’t seated properly—check for warped base or debris under the tank causing misalignment.
Locate and Stop Water Leaks
Place paper towels under the unit and run for 30 minutes. Water pooling directly under the base indicates reservoir cracks or seal failure. Water appearing near the power cord suggests internal tank leaks reaching electrical components—unplug immediately and inspect the reservoir for hairline cracks. Replace damaged seals with manufacturer-specified parts for proper fit.
Replace Worn Seals and Gaskets
Remove the water tank and inspect the rubber seal around the cap—cracks or flattening cause slow leaks. Most replacement seals cost under $5 and install in seconds. For base leaks, check the drain plug (if equipped) and the gasket between the water chamber and electronics housing. Apply food-grade silicone lubricant to new seals for easier installation and better sealing.
Complete Ultrasonic Humidifier Restoration Process

Even a “broken” humidifier often just needs thorough cleaning to restore full function. This systematic approach works for any brand or model when your ultrasonic humidifier not working properly.
Deep Cleaning Protocol
Disassemble all removable parts: tank, base, cap, and any filters. Soak everything except electrical components in a 50/50 vinegar solution for 2-4 hours. Use a soft toothbrush to scrub mineral deposits from corners and crevasses. Rinse each component four times with clean water until no vinegar smell remains—residual vinegar can damage plastic components.
Sanitize Without Damaging Components
After descaling, mix 1 teaspoon of 3% hydrogen peroxide per cup of water and run through the unit for 15 minutes. This kills bacteria and mold without the harsh effects of bleach. Empty completely and let air-dry for 24 hours before next use—moisture trapped in electronics causes long-term damage.
Filter Replacement Guidelines
Replace wick filters every 1-3 months depending on water hardness and usage. Pre-soak new wick filters in clean water for 15 minutes before installation—dry filters restrict airflow and reduce mist output by 50%. Never use soap on wick filters; it leaves residue that creates future problems. Use manufacturer-approved filters only for proper fit and performance.
Prevent Future Ultrasonic Humidifier Failures
The best fix is preventing problems in the first place. These maintenance habits keep your humidifier running like new and avoid the frustration of ultrasonic humidifier not working scenarios.
Establish Daily and Weekly Routines
Empty the tank completely every day—never let water sit for more than 24 hours. Weekly, wipe down the base and tank with a damp cloth to prevent biofilm buildup. Check the transducer weekly for early mineral deposits and clean immediately when you see any white buildup. This simple routine prevents 90% of humidifier failures.
Optimize Water Quality Management
Install a small reverse osmosis unit under your sink or use distilled water exclusively. The $0.50 per gallon cost saves hundreds in replacement parts over the humidifier’s lifetime. If you must use tap water, add a teaspoon of vinegar to each tank to reduce mineral deposition. Test your local water hardness annually and adjust maintenance schedule accordingly.
Implement Proper Placement Strategies
Position your humidifier at least 12 inches from walls and furniture for proper air circulation. Avoid direct sunlight, which accelerates algae growth and warps plastic components. Keep away from heating and cooling vents that force dust into the unit and onto the transducer. Place on a stable, level surface to prevent accidental tipping and leaks.
Your ultrasonic humidifier probably isn’t broken—it’s just dirty or needs a simple component replacement. Start with the basic checks: power, water level, and visible mineral buildup. These three steps solve 80% of “ultrasonic humidifier not working” issues within 15 minutes. For persistent problems, systematic cleaning and component testing usually restore full function for under $20 in parts.
Remember: consistent maintenance prevents 90% of humidifier failures. Make daily water changes and weekly cleaning part of your routine, and your ultrasonic humidifier will provide years of reliable service. When properly maintained, these units typically last 3-5 years before needing replacement—far longer than neglected models that fail within months.


