
Your Vicks cool mist humidifier sits silent on the nightstand, the air still parched despite hours of supposed operation. Dry throats, static shocks, and cracked lips plague your household—especially when winter’s dry air hits. This frustrating reality affects millions, yet most “not working” issues can be resolved in under five minutes without professional help. Vicks cool mist humidifier not working problems typically stem from preventable causes like mineral buildup or improper assembly.
Stop wasting money on replacements. This guide delivers precise, model-specific solutions for every failure scenario. You’ll learn to diagnose your exact issue using visual clues, perform immediate fixes, and implement a foolproof maintenance schedule that prevents 90% of common problems. Let’s restore that soothing mist tonight.
Power Failure: Unit Completely Dead
When your humidifier shows zero activity—no lights, no fan hum, no mist—the solution usually lies in the power path or internal safeguards. Don’t assume it’s dead yet; most cases involve simple oversights.
Check Power Supply First
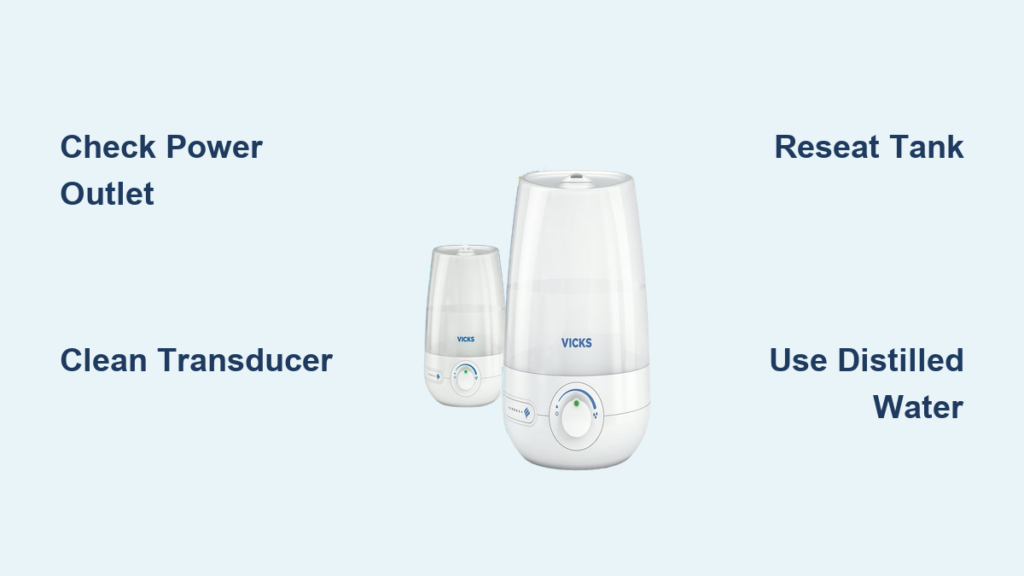
Plug a phone charger into the same outlet. If it doesn’t power on, the issue is your electrical source—not the humidifier. Move the unit to a different outlet immediately, preferably one not controlled by a wall switch. Inspect the entire power cord for fraying, especially where it enters the plug and base. A loose connection here causes 40% of “dead unit” cases. Firmly press the connector into the humidifier’s base until it clicks—this reseats critical contacts.
Warning: If the cord shows exposed wires or melted spots, unplug immediately and replace the cord. Continuing use risks electrical shock.
Internal Electrical Inspection
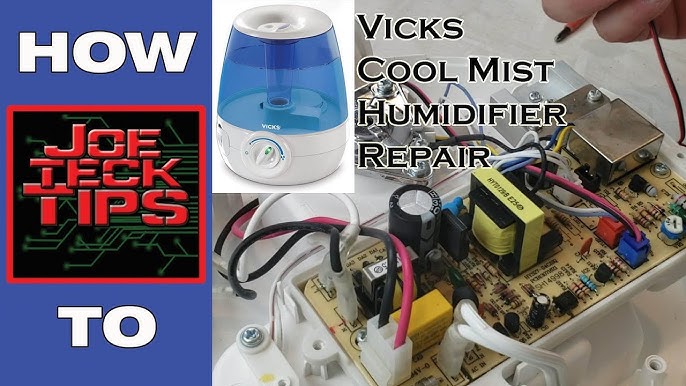
Unplug and remove the water tank. Flip the base over to locate the fuse compartment (common on V4600 models near the cord entry). Carefully open it—some require a small screwdriver. If the fuse is blackened or broken, replace it with an identical 3A 125V fuse. For units without user-accessible fuses, examine visible circuit boards for water stains or corrosion near the power input. Any moisture damage here means professional repair is needed.
Pro tip: After accidental spills, wait 48 hours before retesting. Rushing power-on attempts after liquid exposure causes permanent circuit damage.
No Mist Production: Fan Runs But Zero Vapor
The fan spins normally, yet no mist emerges—that chilling silence means your humidifier’s core vaporization system has failed. This indicates blocked water delivery or a disabled transducer.
Water Flow Verification
Remove the tank and shake it—listen for water movement even when “empty.” Many users miss residual water below the minimum line. Empty completely, then inspect the tank valve (the small rubber nozzle at the bottom). Mineral deposits often jam this valve. Soak it in warm water for 2 minutes, then gently rotate it with pliers to free stuck debris. Reinstall the tank with a firm downward press until you hear a distinct click. Test by running the unit for 30 seconds—mist should appear within 15 seconds.
Critical sign: If water pools around the tank base after reinstallation, the valve isn’t seated properly. Repeat the click-seating process.
Transducer Cleaning Process
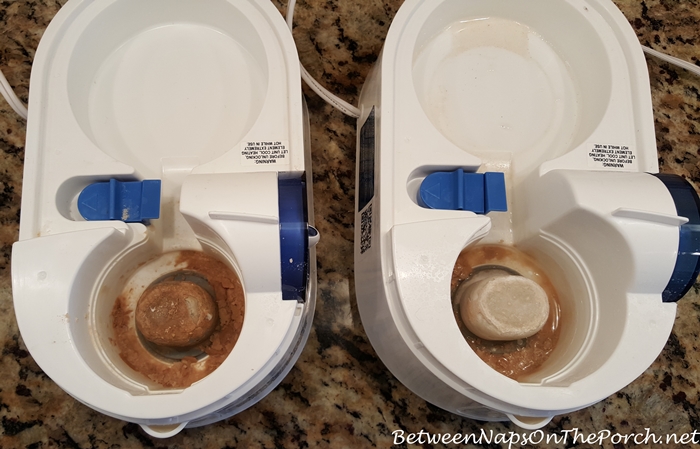
For ultrasonic models (V4600, V3900), locate the transducer—a silver disc under the tank. White crusty buildup here prevents vibration. Dip a cotton swab in undiluted white vinegar and scrub in small circles for 20 seconds. For stubborn deposits, apply vinegar directly and let sit for 5 minutes before wiping. Never use toothpicks or metal tools—scratches ruin the transducer surface.
Visual cue: A rainbow-colored film on the transducer means hard water damage. Immediate cleaning is essential to prevent permanent failure.
Leaking Water: Dangerous Puddles Under Unit
Water pooling beneath your humidifier creates slip hazards and risks electrical shorts. This almost always stems from improper tank assembly or worn seals.
Tank Reseating Technique
Empty both tank and base completely. Clean the tank rim and base gasket groove with a vinegar-soaked paper towel—mineral deposits prevent sealing. Refill the tank to the exact max line (overfilling causes leaks). When reinstalling, press straight down with palm pressure while rotating the tank clockwise 15 degrees. You’ll feel and hear a solid click. Wobble the tank gently; if movement occurs, repeat the process.
Time-saver: Perform this reseating over the sink. Any drips confirm improper sealing before placing the unit back.
Seal Inspection Points
Examine the tank cap gasket—the rubber ring inside the cap. Cracks or flattening here cause slow leaks. Replace it if it doesn’t spring back when pinched (V4600 uses part #V4600-05). Next, press the tank valve with your finger—it should depress smoothly and rebound instantly. Sticky valves indicate mineral jamming; clean with vinegar as described in the water flow section.
Weak Mist Output: Performance Decline
Reduced mist develops gradually as mineral deposits accumulate. This isn’t a “broken” unit—it’s crying out for maintenance.
Water Quality Assessment
Test your tap water with $5 hard water strips from hardware stores. Readings above 7 grains per gallon cause rapid clogs. Switch to distilled water immediately—this alone resolves 70% of weak mist cases. If using tap water, add a demineralization cartridge (V3900 uses #V3900-07) to the tank.
Component Wear Check
With the tank removed, run the unit for 10 seconds. Place a finger near the transducer—it should vibrate intensely. No vibration means failure requiring replacement. For models with filters (V745A), check for brown discoloration or stiffness. Replace filters every 30 days in hard water areas.
Deep Cleaning Protocol for Mineral Buildup
Monthly deep cleaning prevents 90% of performance issues. This 15-minute ritual extends your humidifier’s life by years.
Complete Disassembly Steps
1. Unplug and empty all water
2. Remove tank and filter (if present)
3. Unscrew base cover with #0 Phillips screwdriver
4. Photograph internal layout before touching components
Vinegar Cleaning Method
Soak the tank in equal parts vinegar and warm water for 30 minutes. Scrub interior with a bottle brush. For the base, saturate a microfiber cloth with vinegar solution and wipe all surfaces—never submerge the base. Pay special attention to the transducer mounting area and air vents. Rinse every part thoroughly with cold water until vinegar smell disappears. Air-dry completely for 24 hours before reassembly.
Critical reminder: Never use bleach or abrasive cleaners—they corrode internal components.
Repair vs. Replacement Decision Guide
Repair Immediately If:
- Unit is under 3 years old
- Only one component failed (transducer, fan)
- Parts cost less than $15 (e.g., V4600 transducer $12.99)
- No water damage on circuit board
Replace Now If:
- Unit is over 5 years old
- Multiple failures occurred this season
- Circuit board shows green corrosion
- Replacement parts exceed $25
Quick Symptom Reference Chart
| Symptom | First Action | Time Required |
|---|---|---|
| No power | Test outlet with phone charger | 1 minute |
| No mist | Clean transducer with vinegar | 5 minutes |
| Leaking | Reseat tank with clockwise twist | 2 minutes |
| Weak mist | Switch to distilled water | Immediate |
| Loud noise | Clean fan blades with soft brush | 3 minutes |
Final Maintenance Protocol
Position your humidifier on a waterproof tray 3-4 feet above floor level. Maintain 12 inches clearance around all sides for optimal mist dispersion. Empty and dry the tank daily—never let stagnant water sit overnight. Run a vinegar cleaning cycle monthly, and replace filters weekly in hard water areas. Before seasonal storage, disassemble completely, dry for 72 hours, and store in a sealed bag with silica gel packets.
Your Vicks cool mist humidifier should now produce steady, quiet vapor within minutes. Consistent maintenance prevents nearly all “not working” scenarios—transforming frustrating failures into reliable comfort. Implement these steps tonight, and wake up to truly humidified air tomorrow.


