That intermittent chirp from your ceiling at 2 AM is more than annoying—it’s your smoke detector telling you the battery is dying. Ignoring it puts your family at risk because working alarms cut the risk of dying in a home fire in half. Whether you rent an apartment or own a multi-story house, knowing how to replace smoke detector battery the right way keeps everyone protected.
This guide covers every detector type—battery-powered, hardwired, and plug-in CO models. You’ll learn how to identify your unit, pick the correct battery, complete the swap safely, and test the alarm. Plus, you’ll get troubleshooting tips and a maintenance schedule to keep your home safe for the next decade.
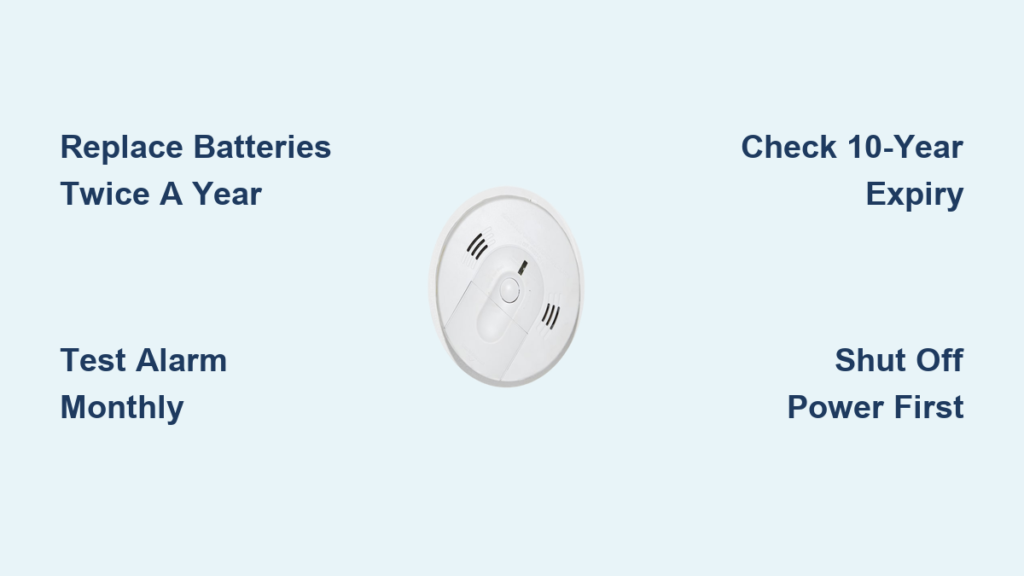
Replace Batteries Twice a Year for Reliable Protection
Sync with Daylight Saving Time Changes
The simplest way to remember how to replace smoke detector battery is to tie it to clock changes. When you spring forward and fall back, swap your detector batteries at the same time. This biannual habit ensures fresh power before the low-battery chirp ever starts.
Fire departments and manufacturers like Kidde strongly support this schedule. Pair it with other seasonal chores like swapping HVAC filters or inspecting fire extinguishers to build a complete safety routine.
Why Annual Replacement Falls Short
Some manuals suggest yearly battery swaps, but real-world conditions demand more attention. Temperature swings, humidity, and natural battery drain reduce performance over time. Replacing every six months prevents unexpected failures—especially in hard-to-reach units that chirp long after the problem begins.
Pro Tip: Use a marker to write the install date on each new battery so you always know when it was placed.
Test Your Alarm Monthly to Confirm It Works
Press and Hold the Test Button
Testing takes less than ten seconds but could save your life. Press and hold the test button for 5–10 seconds. You should hear a loud, clear alarm. Silence means a battery issue or an expired detector.
Run this test on every unit in your home once a month. Make it part of your routine—test alarms while folding laundry or during your morning coffee prep.
Always Test After a Battery Swap
Before reattaching the unit to the ceiling, press the test button again. This confirms the alarm works on battery power alone. If nothing sounds, reopen the compartment and verify the battery is fully seated, polarity is correct, and any red reminder pin is pressed down.
This quick check ensures you never reinstall a faulty unit.
Identify Your Detector Type Before Starting
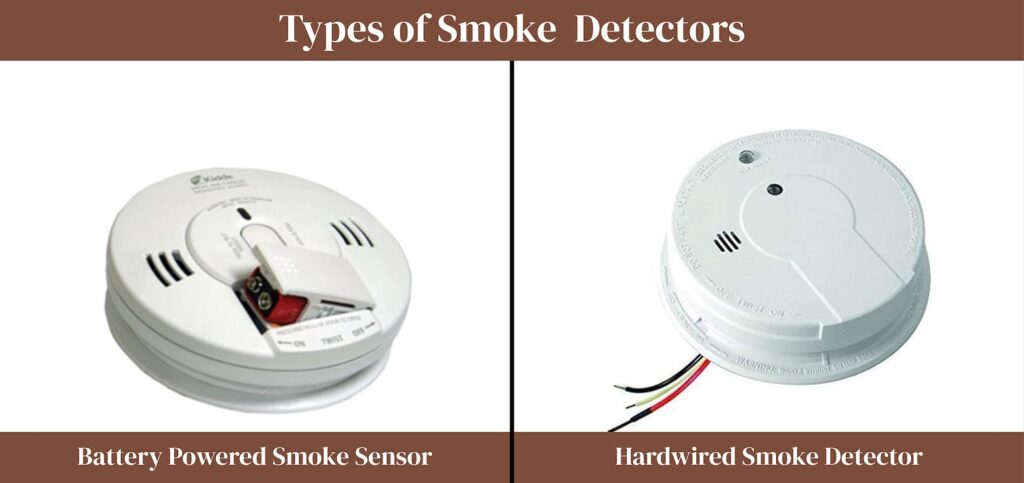
Battery-Powered Smoke Detectors
These run entirely on batteries—usually 9V or AA—and are common in older homes or rentals. To replace the battery:
1. Twist the unit counterclockwise off its mounting bracket
2. Open the compartment (slide or pop open)
3. Insert the new battery with correct polarity
4. Snap the cover back and test
No wiring required, making this the simplest and safest option.
Hardwired Detectors with Battery Backup
Found in newer construction, these connect to household electricity but include a battery backup for outages. Always shut off power at the circuit breaker first.
Steps:
1. Turn off electricity to the detector
2. Twist the unit off the mount
3. Disconnect the Quick Connect wire harness by squeezing the prongs and pulling
4. Swap the battery
5. Reconnect wires, restore power, and test
Skipping the breaker creates a real shock risk.
Plug-In Carbon Monoxide Detectors
These plug directly into a wall outlet and often have battery backup. To replace:
1. Unplug from the outlet
2. Open the battery compartment
3. Install the new battery
4. Replug and test
Some models flash “Low” on the display when batteries weaken—this signals a weak battery, not actual carbon monoxide danger.
Follow Kidde’s Instructions for Rear-Loading Models
Complete the Rear-Loading Battery Swap
Many Kidde alarms load batteries from the back and include tamper-resist features.
Steps:
1. Remove the tamper-resist pin or tab: If a locking tab exists, push it in with a screwdriver before twisting
2. Twist off the bracket: Turn in the direction of the “Off” arrow
3. Disconnect the wire harness (if hardwired): Squeeze the plastic prongs and pull out
4. Open the battery door: Now accessible after removal
5. Insert the new battery:
– Press the red reminder finger down first
– Align the + and – ends with the metal plates inside
6. Test before reinstalling: Confirm the alarm sounds on battery only
7. Reconnect wiring (if applicable): Line up pins and holes, squeeze prongs, and snap into place
8. Twist back on: Align with the “On” arrow and secure
Visual Cue: The red reminder pin should stay depressed after the battery clicks into place.
Follow Kidde’s Instructions for Front-Loading Models
Complete the Front-Loading Battery Swap
Front-loading designs offer easier access—you usually don’t need to remove the entire unit.
Steps:
1. Open the compartment: Press down on the door until it pops open
2. Remove the old battery: Pull straight out
3. Insert the new battery:
– Ensure + and – face outward
– Match connectors to the yellow label inside
– For AA models: Contacts must face opposite directions
4. Close the door firmly: Press until it snaps shut
5. Test immediately
Warning: If the door won’t close, a battery is missing or misaligned.
Recognize the Low-Battery Warning Signals
Understand the Chirping Pattern
When the battery runs low, your smoke detector emits a short beep every 30–60 seconds. This is a warning, not an emergency. The chirping continues until you install a fresh battery.
Don’t disable the unit or remove the battery temporarily. Replace it right away to restore full protection.
What a “Low” Display Means on CO Detectors
If your carbon monoxide detector shows “Low,” the battery is weak—not that CO gas is present. Swap the battery immediately. A dead battery leaves you blind to odorless, invisible carbon monoxide, which can be fatal while you sleep.
Remember: No alarm is better than a dead one.
Choose the Right Replacement Battery
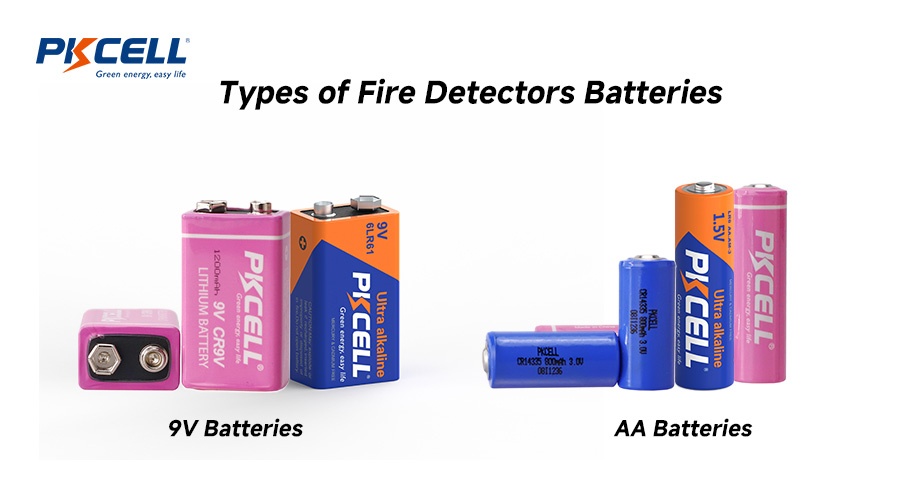
Common Battery Types
- 9V batteries: Most common in smoke detectors
- AA batteries: Used in many CO and combo units
- Lithium vs. Alkaline: Lithium lasts longer and performs better in temperature extremes
Check your model’s label or manual for exact specifications.
OEM vs. Generic Brands
Generic batteries work, but OEM or long-life lithium batteries (like Energizer Ultimate Lithium) offer stronger reliability. Avoid expired or old-stock batteries—always check the date code on the package.
Pro Tip: Buy a multi-pack and label each battery with the install date so you track replacements easily.
Solve Common Post-Replacement Problems
Alarm Stays Silent After Battery Swap
If the unit doesn’t sound after replacement:
– Rear-loading models: Reopen the compartment and confirm the red reminder pin is fully pressed down
– Front-loading models: Check that batteries align with the yellow polarity label
– Verify + and – match the internal contacts
– Try a different battery to rule out a defective cell
Never assume the detector works without testing it.
Battery Compartment Won’t Close
This usually means:
– A battery is missing
– One battery is inserted backward
– Contacts are bent or blocked
Remove all batteries and reinsert them one at a time, ensuring proper alignment each step.
Fix Polarity Mistakes
Wrong polarity blocks power flow. Always:
– Match + to + and – to –
– For AA models, confirm one battery faces positive-up and the other negative-up
– Refer to the yellow label inside the compartment
Misaligned contacts are a top cause of post-replacement failure.
Replace Entire Detectors Every 10 Years
Sensors Wear Out Over Time
Even with fresh batteries, smoke detectors lose sensitivity after a decade. Dust, humidity, and chemical exposure break down internal sensors.
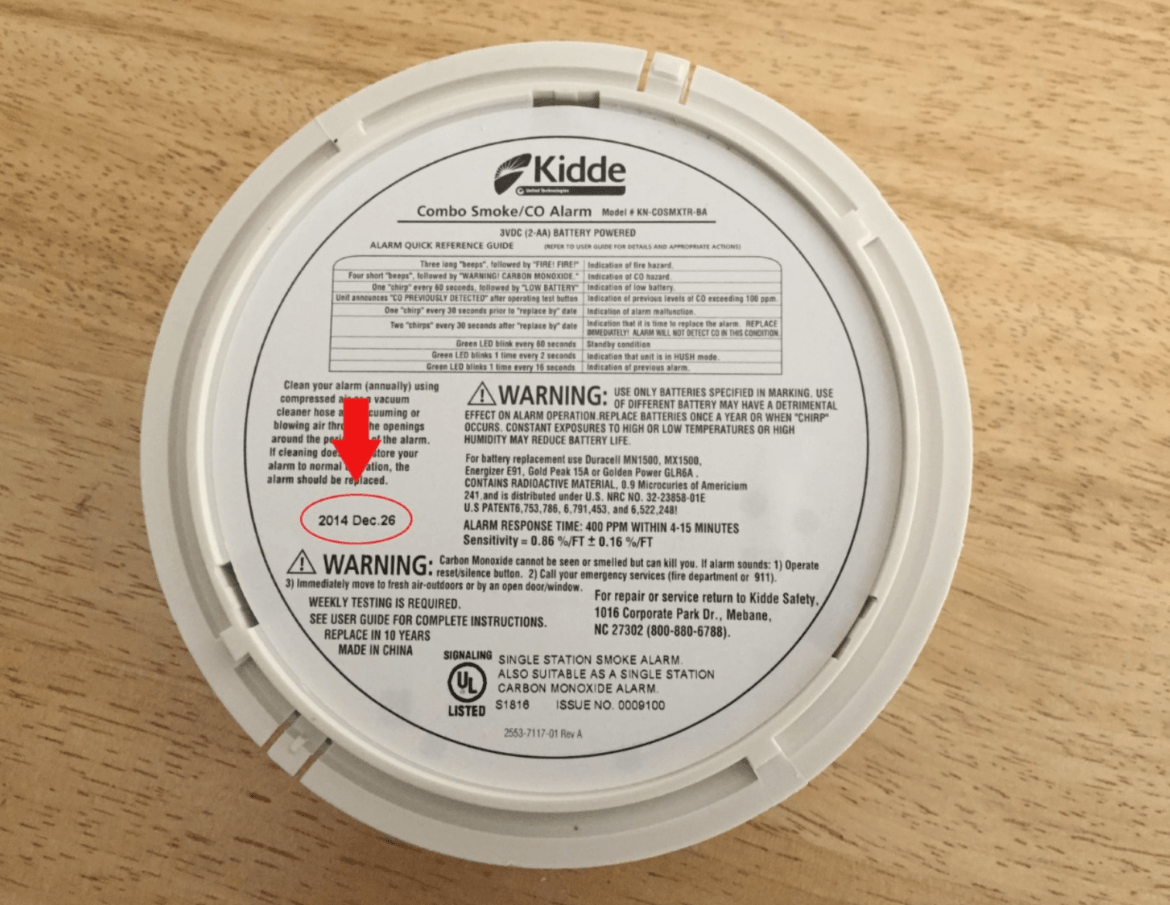
Check the manufacture date on the back of the unit. If it’s older than 10 years, replace the entire detector, even if it still beeps during tests.
Hardwired Units Also Expire
Hardwired alarms contain sensors that wear out too. Swapping the battery alone won’t restore full protection. Upgrade to newer models with sealed lithium batteries and 10-year warranties for hassle-free operation.
Look for models with:
– Sealed, non-removable batteries
– Smart interconnectivity
– Hush buttons for nuisance alarms
Install Detectors in the Right Locations
Place CO Detectors on Every Level
One CO detector per floor is essential. Install them:
– Near bedrooms
– On every level (basement, main floor, upstairs)
– Away from windows, vents, and bathrooms where humidity interferes
CO spreads quickly and can be fatal while you sleep—early detection saves lives.
Optimize Smoke Detector Placement
- Inside and outside sleeping areas
- On every level, including basements
- Avoid kitchens (steam causes false alarms) and garages (temperature extremes)
Interconnected alarms deliver the best protection—when one sounds, they all do.
Dispose of Old Alarms Safely
Check for Hazardous Materials First
Some detectors contain small amounts of radioactive material (americium-241) in ionization sensors. Do not toss them in regular trash.
Instead:
– Contact the manufacturer (like Kidde) for disposal programs
– Visit Earth911.org to find local e-waste or hazardous waste drop-off sites
– Follow local regulations for electronic waste recycling
Recycle old batteries at designated battery collection bins.
Troubleshoot Persistent Chirping Like a Pro
Why the Chirping Won’t Stop
Persistent chirping after a fresh battery usually means:
– The battery isn’t fully seated
– Dirty battery contacts (clean gently with a cotton swab)
– Red reminder pin not pressed down (rear-loading models)
– The detector is over 10 years old
Replace the entire unit if troubleshooting fails.
False Alarms Right After Installation
If the alarm sounds immediately after swapping batteries:
– A brief alarm confirms power restoration—this is normal
– If it continues, check for dust, steam, or insects inside the sensing chamber
– Clean gently with compressed air
Never disable an alarm because of false triggers—address the root cause instead.
Build a Year-Round Maintenance Routine
Monthly, Semi-Annual, and Decade Tasks
| Task | Frequency | Action |
|---|---|---|
| Test alarms | Monthly | Press test button for 5–10 seconds |
| Replace batteries | Twice yearly | During Daylight Saving Time changes |
| Replace detectors | Every 10 years | Check the manufacture date on the back |
Hang a checklist in your utility room or set phone reminders so nothing slips through the cracks.
Make Safety a Family Habit
Teach everyone in the home what the low-battery chirp sounds like and how to respond. Kids can help test alarms. Make safety a natural part of daily life, not an afterthought.
Get Help When You Need It
Contact Manufacturer Support
If you’re unsure about your model or the replacement process:
– Visit the Kidde website or call customer care
– Provide your model number (printed on the back)
– Ask for step-by-step guidance or video tutorials
Many brands offer live chat or downloadable manuals online.
Consult Your User Manual
Every detector includes a manual with model-specific instructions. Keep it in a fire safety folder or save a digital copy. It contains:
– Battery type required
– Wiring diagrams
– Reset procedures
– Warranty details
Frequently Asked Questions About Smoke Detector Batteries
How Often Should I Replace Smoke Detector Batteries?
Replace batteries twice a year, ideally when clocks change for Daylight Saving Time. Some manufacturers suggest annual replacement, but every six months is safer and prevents unexpected low-battery chirps.
Why Does My Smoke Detector Chirp Even After I Replace the Battery?
Common causes include a battery that isn’t fully seated, dirty contacts, a red reminder pin that isn’t pressed down (rear-loading models), or a detector older than 10 years. Clean the contacts and reseat the battery, or replace the entire unit if it’s expired.
What Kind of Battery Does My Smoke Detector Take?
Most use 9V or AA batteries, but check your model’s label or manual. Lithium batteries last longer and perform better in extreme temperatures compared to alkaline options.
Do I Need to Turn Off Power for Hardwired Smoke Detectors?
Yes. Always shut off power at the circuit breaker before working on a hardwired detector. Failure to do so creates a real risk of electric shock.
What Does “Low” Mean on My CO Detector Display?
“Low” signals a weak battery, not actual carbon monoxide danger. Replace the battery immediately to keep the CO sensor active.
How Do I Know When to Replace the Entire Detector?
Replace the whole unit every 10 years, regardless of function. Check the manufacture date stamped on the back. Sensors degrade over time, and fresh batteries won’t restore lost sensitivity.
Final Thoughts on Replacing Your Smoke Detector Battery
Learning how to replace smoke detector battery correctly is one of the simplest ways to protect your family. Match the steps to your detector type, test after every swap, and replace the entire unit every 10 years to keep sensors sharp.
Build the habit now: tie battery swaps to Daylight Saving Time changes, test monthly, and teach your household to recognize the low-battery chirp. A working alarm is your earliest warning in a fire or carbon monoxide emergency—don’t let a dead battery silence it.