A persistent chirp from your ceiling is more than just an annoyance. It is a warning that your First Alert smoke detector needs attention right now. That single beep every minute is the single most common reason homeowners search for help with their alarm, and the fix usually takes less than five minutes.
This guide walks you through the exact steps to change the battery in your First Alert smoke detector, whether it uses a 9-volt or AA batteries. You will also learn how to test the unit, troubleshoot stubborn chirps, and know when to replace the entire alarm for good.
Safely Remove the Detector From Its Bracket
Detach the Unit From the Ceiling or Wall
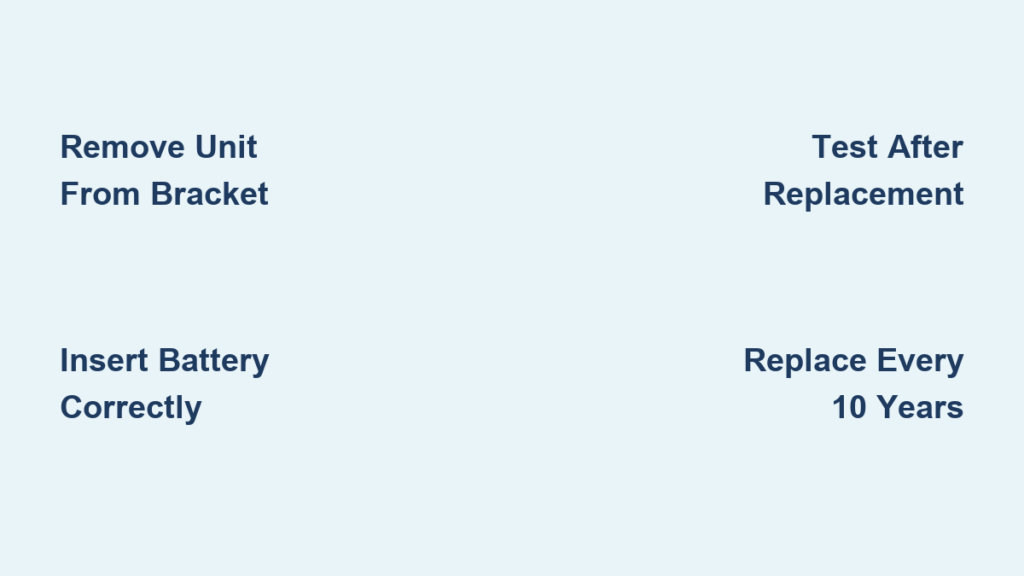
Grip the detector body and twist it counterclockwise, or press the small release tab on the side of the mounting bracket. Most First Alert models pop off with a gentle pull once the tab is pressed. This step gives you safe access to the battery compartment on the back or side of the unit.
Handle the alarm carefully if it is a hardwired model with a battery backup. Pulling too hard can damage the connector plug or wiring harness.
Pro Tip: Stand on a sturdy step stool rather than a chair. Have someone nearby to hold the ladder if you are working over your head.
Replace a 9-Volt Battery the Right Way

Open the Battery Compartment
Locate the small plastic tab on the side of the detector. Press it down firmly to release the compartment door. The cover will swing open, exposing the old battery and the polarity markings inside.
Match the Terminals Before Inserting
Before you pull out the old battery, look at the terminals. The positive terminal is the smaller, raised metal circle. The negative terminal is the larger, flat ring on the bottom.
Insert your new 9-volt battery with these positions:
– Positive terminal facing the center of the detector
– Negative terminal facing the outer edge
The compartment is designed to prevent backward insertion. If the battery does not slide in smoothly, stop. You likely have it reversed.
Close the Cover and Reattach the Unit
Snap the compartment door shut until you hear a click. Then align the detector with the mounting bracket, push up, and twist clockwise to lock it in place. The unit should sit flush against the ceiling or wall.
Warning: A detector that fails to power on after a new battery is installed usually has a reversed battery. Always recheck polarity before assuming the battery is dead.
Replace AA Batteries in Side or Rear Tray Models

Pull Out the Battery Tray
Some First Alert models use AA batteries stored in a sliding tray on the side or back. Grip the tray edge with your fingers and pull it straight out. A slight downward press may be needed on some models before it will slide free.
Insert Batteries With Correct Polarity
Remove all old batteries and check the plus and minus symbols printed inside the tray. Insert each new AA battery with the positive end against the spring or contact marked plus. The negative end should sit against the flat contact marked minus.
Each battery should snap into place with a light click. Loose batteries can interrupt the connection and cause false chirps.
Slide the Tray Back Into the Unit
Push the tray straight back into the detector until it locks with a click. A misaligned tray is one of the top reasons a detector will not turn on after a fresh set of batteries.
Pro Tip: Stick with name-brand AA batteries like Duracell or Energizer. Off-brand or recycled cells often die early, leaving your home unprotected between replacement cycles.
Test the Detector After Every Battery Change
Press and Hold the Test Button
Once the unit is back on the bracket, press and hold the Test or Silence button on the front for 3 to 5 seconds. You should hear a loud, clear alarm. This confirms the detector has power and the sensor is functional.
If no sound comes out, run through this quick checklist:
– Confirm the battery is installed with the correct polarity
– Make sure the compartment door is fully closed
– Verify the unit is seated firmly on the bracket
Make Monthly Testing a Habit
Press the test button once a month from now on. For a deeper check, you can also use a can of smoke detector test spray from any hardware store. It puffs a safe aerosol into the sensor to confirm it reacts to actual smoke particles.
Expert Note: The test button does more than check the battery. It also verifies the internal circuitry, horn, and sensor are all working together.
Troubleshoot Chirping and Power Problems

Stop Persistent Chirping
A single chirp every 30 to 60 seconds means the battery is low. Swap it out right away. If the chirp continues after a fresh battery, try these steps:
– Reset the detector by holding the Test button for 10 seconds
– Clean the contacts with a dry cloth to remove any leaked battery acid
– Replace the entire unit if it is more than 10 years old or still chirps after a reset
Fix a Detector That Will Not Power On
If the alarm stays silent after a battery swap, work through these checks:
– Confirm you used the correct battery type for your model
– Look for dust or insect debris clogging the sensor openings
– For hardwired models, restore power at the circuit breaker and confirm the connector is fully seated
Common Mistake: Many people forget to remove the small plastic tab on a new battery. Always inspect the cell before you slide it into the compartment.
Know When to Replace the Whole Detector
Follow the 10-Year Replacement Rule
Every smoke detector, including First Alert models, should be replaced every 10 years. The sensor chamber degrades over time, and older units may not respond fast enough to save lives.
To find the age of your unit, look on the back label for a manufacture date code. If the date is more than 10 years ago, replace the detector right away.
Watch for These Warning Signs
Your detector is ready for retirement if any of these apply:
– It fails the test button check after a fresh battery
– The plastic casing is cracked, yellowed, or warped
– It triggers false alarms even after you have cleaned it
– The manufacturer has discontinued the model and no longer supports it
Safety Fact: A smoke detector older than 10 years has only a 50% chance of working during a real fire. That is a risk no family should take.
Position Your Detectors for the Best Protection
Follow Recommended Placement Guidelines
Correct placement gives smoke detectors the best chance to catch a fire early. Keep these rules in mind:
– Mount on the ceiling at least 4 inches away from any wall
– On walls, place the unit 12 to 24 inches down from the ceiling
– Install one detector in every bedroom, outside each sleeping area, and on every floor of the home
Avoid placing detectors in these spots:
– Inside the kitchen, where cooking smoke triggers false alarms
– Inside bathrooms, where steam confuses the sensor
– Near windows, vents, or ceiling fans, where airflow can block smoke
Handle Hardwired Detectors Safely
If your model is wired into the home electrical system, take extra steps before opening anything:
– Switch off the breaker that powers the detector circuit
– Use a voltage tester to confirm the wires are dead
– Match the red interconnect wire to the matching wire from other alarms
– Cap every connection with a wire nut and tuck the wires neatly into the electrical box
Warning: Never touch electrical wiring without confirming the power is off. A shock from household current can cause serious injury.
Keep Your Detector Working With Simple Maintenance
Clean the Vents Every Month
Dust, pet hair, and small insects can sneak into the detector and block the sensor. Once a month, run a vacuum with a soft brush attachment across the vents and outer shell. Skip water, spray cleaners, and compressed air, since all three can damage the sensor chamber.
Tie Battery Replacement to a Date You Will Remember
Pick an annual trigger for changing batteries so you never forget:
– The spring and fall daylight saving time changes
– Your birthday or a family member’s birthday
– New Year’s Day
Set a phone reminder on the same day each year. Even better, buy a multi-pack of batteries and replace every detector in the house at the same time, even if only one is chirping.
Consider Upgrading to a Smart Smoke Detector

What Smart Detectors Add to Your Safety
A First Alert smart smoke detector sends alerts straight to your phone the moment something is wrong, even when you are not home. Many models also connect with Alexa, Google Assistant, or Apple Home for voice control and automation routines.
Other useful features include:
– Remote testing and silencing from your phone
– Battery status notifications before the chirp starts
– Voice alerts that tell you which room triggered the alarm
What You Need for a Smart Upgrade
Smart detectors connect over a 2.4 GHz Wi-Fi network, so you will need a strong signal at the mounting location. You will also need to install the First Alert app or a compatible partner app, and keep the firmware updated. Keep in mind that smart detectors still need fresh batteries once a year unless they are hardwired with a continuous power supply.
Quick Battery Change Checklist
Here is a short recap to keep on your phone:
– Twist the detector off the mounting bracket
– Open the battery compartment
– Remove the old battery and check the polarity markings
– Insert the new battery with correct orientation
– Close the compartment until it clicks
– Reattach the unit to the bracket
– Press and hold the Test button for 3 to 5 seconds
Frequently Asked Questions About Changing a First Alert Smoke Detector Battery
How often should I change the battery in my First Alert smoke detector?
Replace the battery once a year, or right away when you hear the low battery chirp. Many homeowners tie the swap to a daylight saving time change so they never forget.
Which battery does a First Alert smoke detector use?
Most First Alert models use either a 9-volt battery or AA batteries. Check the label inside the battery compartment to confirm the exact type for your unit. Use name-brand batteries like Duracell or Energizer for the best results.
Why does my First Alert smoke detector keep chirping after I changed the battery?
A chirp that continues after a fresh battery usually means the unit needs a reset. Hold the Test button for 10 seconds to clear the error. If chirping continues, clean the battery contacts with a dry cloth. If the detector is more than 10 years old, replace the entire unit.
How do I tell which way a 9-volt battery goes in?
The positive terminal is the smaller, raised circle and should face the center of the detector. The negative terminal is the larger, flat ring and should face the outer edge. The compartment will resist closing if the battery is inserted backward.
How long does a First Alert smoke detector last?
Every First Alert smoke detector should be replaced after 10 years, even if it still seems to work. Check the back label for the manufacture date. A detector older than 10 years has a much lower chance of responding to a real fire.
Can I use rechargeable batteries in my First Alert smoke detector?
It is best to stick with fresh, name-brand alkaline batteries. Rechargeable cells often have a lower voltage or a faster self-discharge rate, which can trigger false low battery chirps.
Final Takeaways for Changing a First Alert Smoke Detector Battery
Changing the battery in a First Alert smoke detector is a quick task that protects your entire household. The key steps are removing the unit, swapping the battery with the correct polarity, reattaching the detector, and pressing the Test button to confirm everything works. Test your alarm monthly and replace the battery once a year to stay ahead of low battery warnings. If your detector is more than 10 years old, will not stop chirping, or fails any test, replace the whole unit right away. Your next step is simple: grab a fresh battery, clear a step stool, and take care of every smoke alarm in your home today.