
Your new Aircare humidifier can transform dry, uncomfortable air—but improper setup causes 80% of early failures. Leaks, electrical hazards, and voided warranties often stem from skipping model-specific protocols during installation. This guide delivers a precise roadmap for safely setting up your Aircare humidifier while activating warranty coverage and ensuring optimal performance from day one. You’ll learn why steam models require 4-foot bedside clearance, why ultrasonic units reject essential oils in water tanks, and how to verify wick saturation before powering on. Follow these manufacturer-mandated steps to prevent common pitfalls that damage components and shorten your unit’s lifespan.
Unlike generic manuals, we spotlight critical safety protocols most users ignore: polarized plug requirements, heat-resistant surface rules, and the dangerous misconception about adding medications directly to water reservoirs. Proper setup prevents 90% of issues reported in the first 30 days of ownership. In the next sections, you’ll get model-specific assembly instructions, post-installation verification checks, and troubleshooting for immediate problems. Let’s transform your new humidifier from a potential hazard into a reliable comfort solution.
Essential Safety Steps Before Connecting Power

Electrical Safety Protocol That Prevents Fires
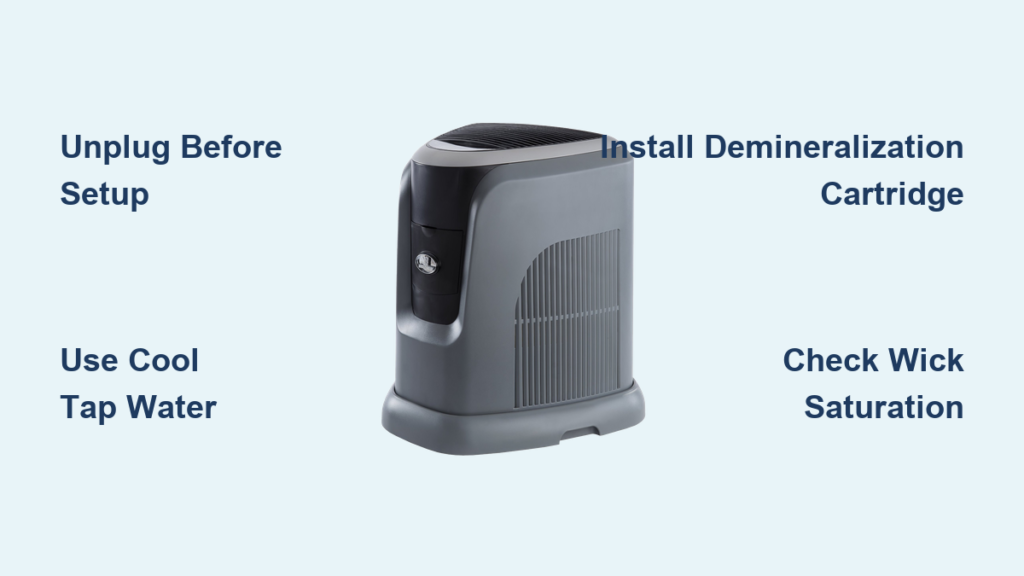
Immediately unplug your Aircare humidifier before moving, filling, or cleaning—it’s non-negotiable for safety. All models feature a polarized plug (one blade wider than the other) that must never be forced into an outlet. If it doesn’t fit, reverse the plug. Still no connection? Contact an electrician—never modify the plug or use extension cords, which void warranties and create fire hazards. Keep cords clear of traffic areas, radiators, and heat registers to prevent damage.
Critical placement requirements:
– Position steam models at least 4 feet from beds to avoid burns
– Maintain 6 inches clearance from walls for all units
– Place only on heat-resistant surfaces (tile, sealed wood) for steam models
– Never operate near open flames or in freezing temperatures
Water Quality Rules That Protect Your Warranty
Use only clean, cool tap water in your water tank—nothing else. Adding essential oils, medications, or water softeners directly to the reservoir voids your warranty immediately. Steam models include a designated medicine cup for additives; this is the only approved location. Never pour water onto controls or motor areas. If these get wet, dry completely and get professional inspection before reuse.
Unpack and Verify Components Before Assembly
Damage Inspection Checklist That Saves Your Warranty
Remove all packaging carefully and inspect for:
– Cracks in water tanks or bases
– Missing wick filters (evaporative models)
– Damaged electrical cords or plugs
– Incomplete accessory kits
Contact Aircare immediately at 800-547-3888 if you find damage—operating with faulty parts creates safety risks and invalidates warranty coverage. Never attempt repairs with non-AIRCARE parts, which automatically void protection.
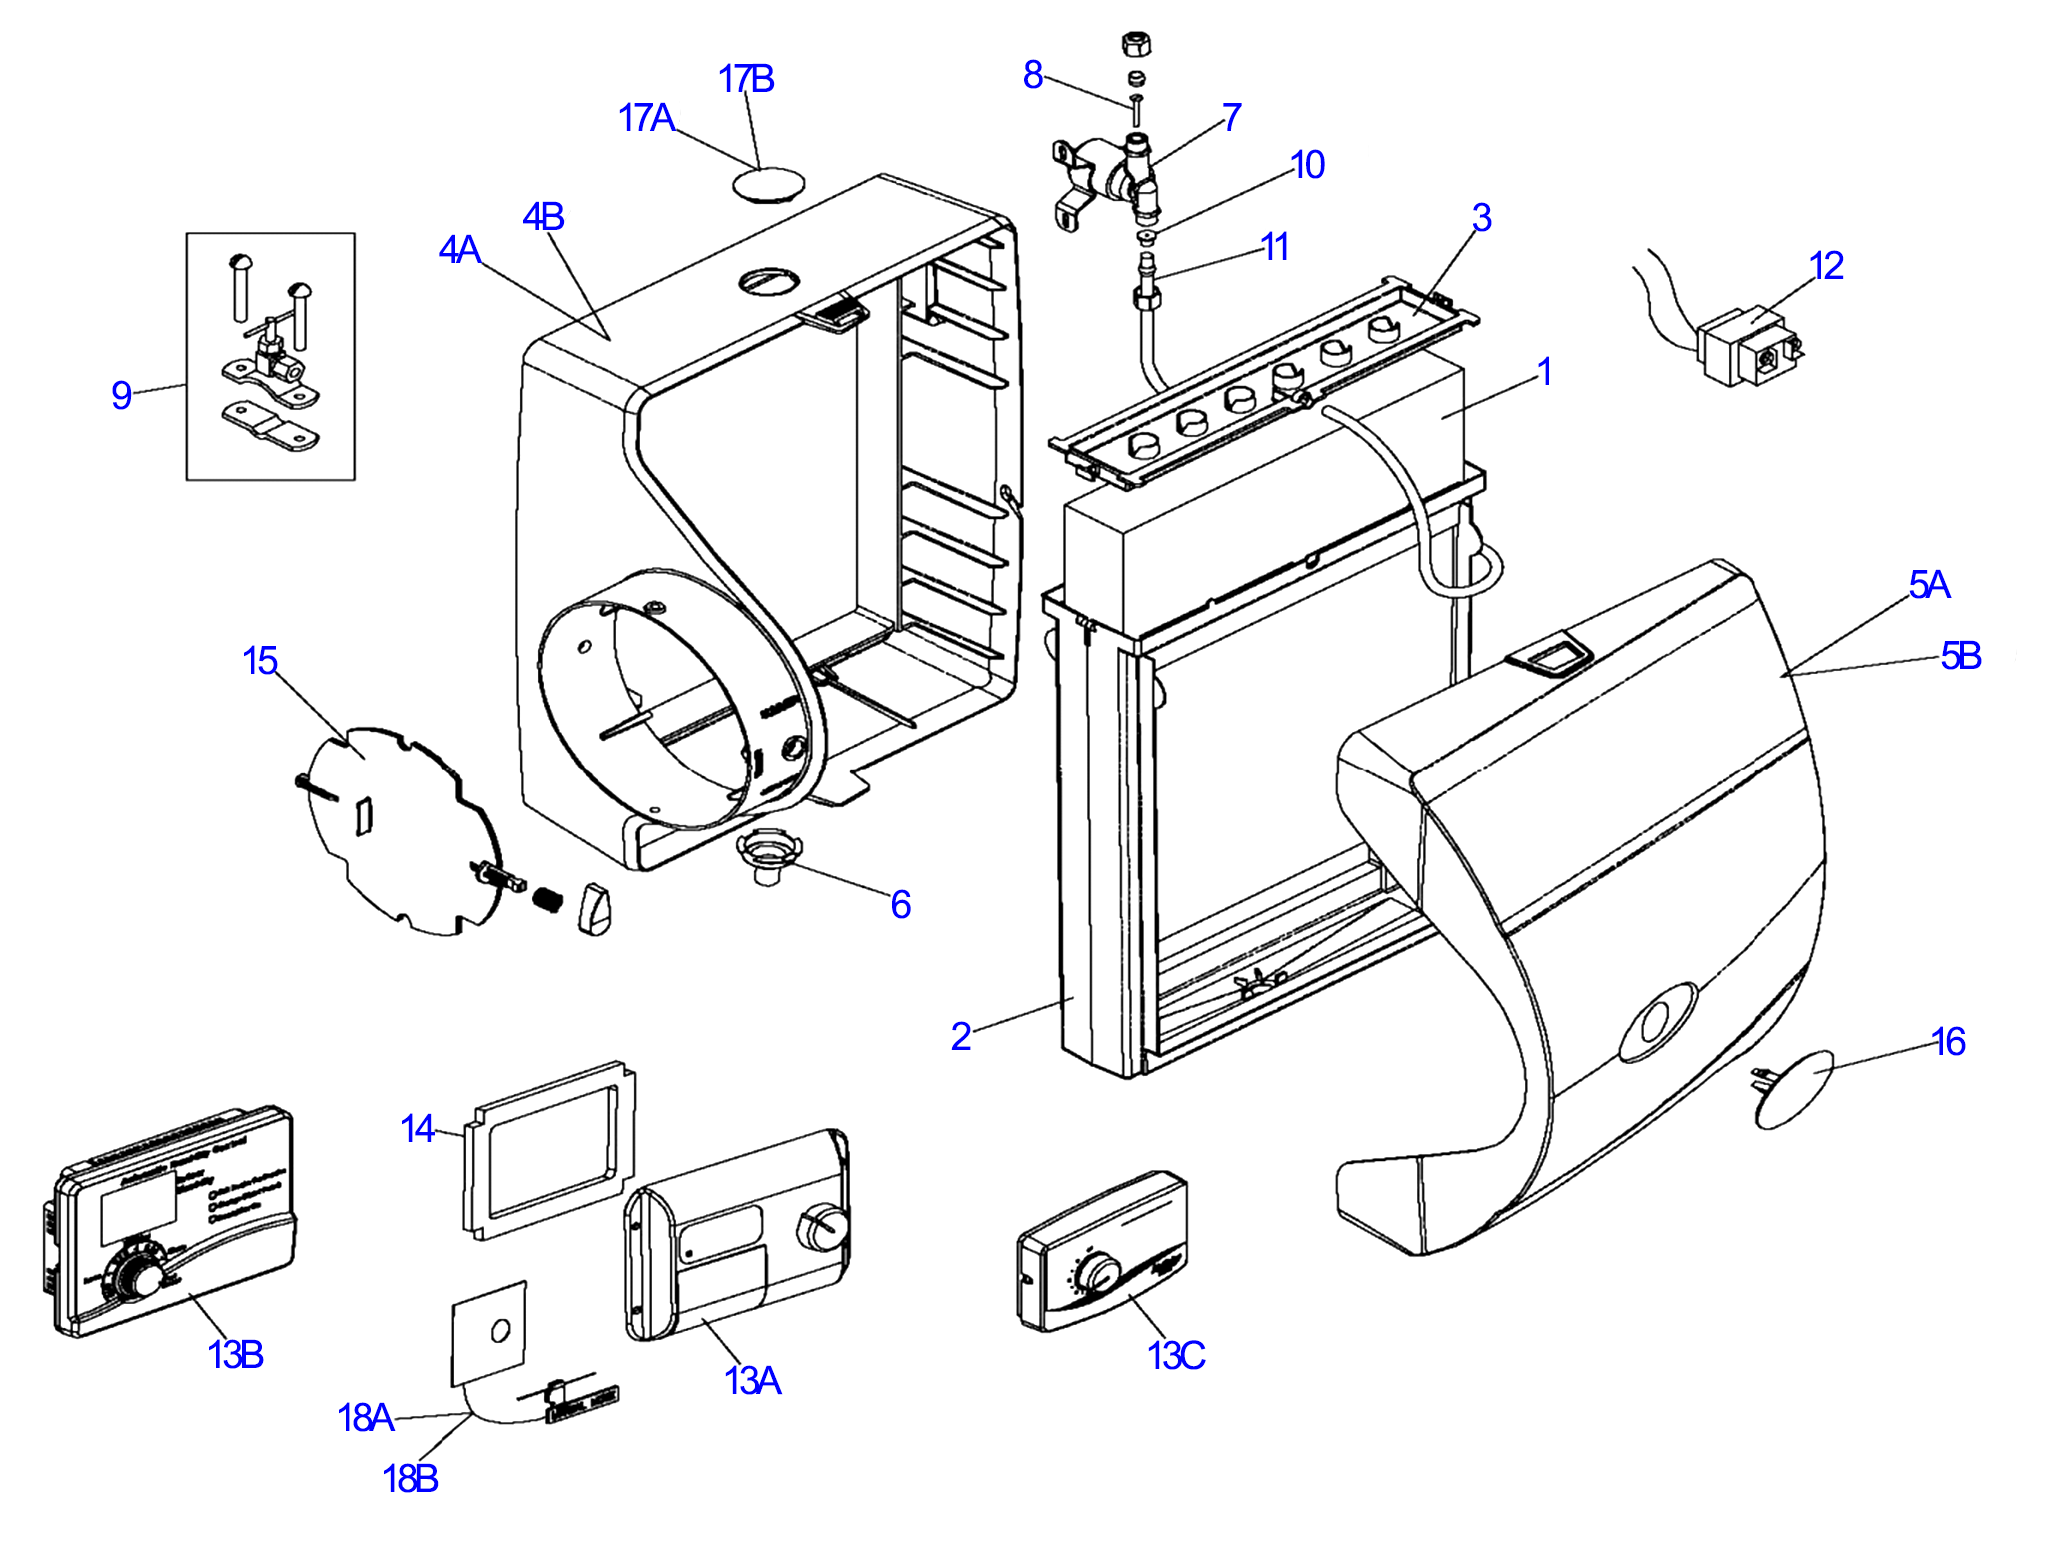
Identify Model-Specific Parts for Correct Setup
Locate these critical components before proceeding:
– Water tank with cap (check for hairline cracks)
– Base unit with control panel
– Wick/filter system (evaporative models)
– Demineralization cartridge (ultrasonic models)
– Medicine cup (steam models only)
Pro Tip: Match wick filters to your model using these codes: Super Wick® 1045 for H12 series, 1040 for CM330, or SGL1040 for CM330ABLK/CM330AWHT models. Installing the wrong wick causes poor performance and premature failure.
Ultrasonic Models Setup: Critical First Steps
Mist-Free Installation Process That Works
- Place on level surface with 6-inch wall clearance
- Install demineralization cartridge by twisting into tank base
- Fill tank with cool water to MAX line—never add oils/softeners
- Secure cap tightly to prevent leaks
- Plug directly into 120V outlet—no extensions allowed
- Power on and test mist output at highest setting
Critical Warning: Running without the demineralization cartridge causes white dust buildup and voids warranty. If no mist appears after 10 minutes, check tank cap seal and water level before contacting support.
Evaporative Models Assembly: Wick Filter Secrets

Super Wick® Installation That Prevents Dry-Out
- Remove all packaging from wick filter
- Soak wick in clean water for 10 minutes before insertion
- Slide wick into housing until it contacts reservoir bottom
- Verify flush positioning—gaps cause uneven saturation
- Fill reservoir to indicated water level mark
- Confirm wick saturation by checking for dampness at top
EasyWick® System Setup That Simplifies Maintenance
For EasyWick® models (MA1201, 7D6100, E35000 series):
– Pull old wick straight up to remove
– Slide new wick down until it clicks
– Ensure black orientation strip faces front
– Fill reservoir and test wick movement
Pro Tip: Replace wicks every 30-90 days based on water hardness. Hard water users should change filters monthly to prevent mineral clogs.
Steam Models Setup: Heat Management Essentials

Heat-Resistant Surface Requirements That Prevent Damage
Place steam humidifiers ONLY on tile, stone, or sealed wood surfaces. Avoid plastic tables or carpets—heat output can melt surfaces within 20 minutes. Position 4 feet from beds and 6 inches from walls to ensure proper airflow and prevent scalding risks.
Water Loading Process That Avoids Electrical Damage
Critical: Fill only the water tank—never add water directly to the base basin. This mistake causes electrical shorts and voids warranty coverage. Fill tank completely, then invert into base unit. You’ll hear water flow into the heating chamber—this confirms proper connection.
Essential Oil Usage That Won’t Damage Your Unit
Use ONLY the designated medicine cup for essential oils or vapor medications. Adding oils directly to the water tank creates mineral buildup on heating elements, reducing steam output by 70% within weeks. Never use water softeners—they corrode internal components.
Post-Setup Verification: 30-Minute Success Check
Leak and Output Test That Catches 95% of Errors
Run your humidifier for 30 minutes while checking:
– Leak points: Inspect tank seams, cap, and base connections
– Sound profile: Listen for grinding (indicates wick misalignment)
– Output confirmation: Visible mist (ultrasonic/steam) or humidity rise (evaporative)
– Auto-shutoff function: Verify unit powers down when tank empties
First 24-Hour Monitoring That Prevents Long-Term Damage
Track these indicators:
– Normal water consumption (1-2 gallons daily for medium rooms)
– Room humidity reaching target levels within 4-6 hours
– Zero unusual odors (indicates mineral buildup)
– Consistent auto-shutoff engagement
Urgent Action Required: If you detect clicking sounds, steam model leaks, or evaporative units running dry, unplug immediately and call 800-547-3888. Delaying fixes risks permanent damage.
Troubleshooting Setup Failures Within First Hour
Unit Won’t Power On: Step-by-Step Fixes
- Test outlet with another device
- Reverse polarized plug—don’t force insertion
- Check circuit breaker for tripped switches
- Confirm tank seating—safety switches block power if misaligned
No Mist Output: Model-Specific Solutions
Ultrasonic: Clean demineralization cartridge, check cap seal, increase humidity setting above room level
Evaporative: Ensure wick saturation, verify positioning, replace wick if >90 days old
Steam: Allow 10-minute heat-up period, confirm tank has water, check steam output setting
Water Leak Emergency Protocol
Tank leaks: Empty unit, inspect cap seal for debris, check for cracks
Base leaks: Verify unit sits level, test float valve operation, ensure no overfilling
Critical: If leaks persist after repositioning, unplug and contact support—do not continue use.
Warranty Registration That Protects Your Investment
Online Process That Must Be Completed in 30 Days
Visit AIRCARE.com (ultrasonic/steam) or AIRCAREproducts.com (evaporative) with:
– Model/serial numbers (bottom label)
– Purchase date and retailer name
– Sales receipt (required for claims)
Consequence of Skipping: While registration doesn’t affect warranty rights, it delays service by 72+ hours during claims processing. Keep your receipt—it’s your proof of purchase.
Coverage Exclusions That Void Protection Instantly
Warranty does not cover:
– Damage from water softeners or essential oils in tanks
– Use of non-AIRCARE wicks or demineralization cartridges
– Repairs by unauthorized technicians
– Leaks from improper tank seating or overfilling
– Units operated below freezing temperatures
Maintenance Prep: Extend Your Humidifier’s Lifespan
Filter Replacement Schedule That Prevents Breakdowns
- Wick filters: Every 30-90 days (hard water = monthly)
- Demineralization cartridges: Replace when white crust appears
- Steam models: Monthly descaling with vinegar solution
Save Critical Support Contacts Now
- Phone: 1-800-547-3888 (Mon-Fri 8AM-5PM CST)
- Email: info@essickair.com
- Online: Product manuals, FAQs, and registration portal
Your Aircare humidifier delivers years of reliable service when set up correctly. Monitor the first week closely—addressing unusual sounds or leaks immediately prevents 90% of long-term failures. Remember: proper setup isn’t optional; it’s your warranty’s first requirement. By following these precise steps, you’ve transformed a potential hazard into a trusted comfort solution that maintains optimal indoor humidity safely. Now enjoy cleaner, healthier air without the common frustrations new users face.


