
Your new Aqua Oasis humidifier promises relief from dry air and allergy symptoms, but improper setup sabotages performance from day one. Many users skip critical steps like pre-soaking filters or choosing distilled water, leading to white dust clouds, bacterial growth, and frustrating shutdowns within weeks. This step-by-step how to set up Aqua Oasis humidifier guide eliminates guesswork. You’ll configure your unit for maximum efficiency while avoiding the 3 most common setup errors that trigger customer service calls. Within 20 minutes, you’ll transform your dry, uncomfortable space into optimally humidified comfort.
Unbox and Inspect Components Before Setup
Remove every item from the Aqua Oasis packaging and verify you have all five essential components: main humidifier unit, 1.5-gallon water tank, cleaning brush, power adapter, and user manual. Immediately inspect the water tank for hairline cracks along seams—these cause leaks during operation. Check rubber seals for tears that compromise water retention. If any part feels loose or damaged, contact Aqua Oasis support before proceeding. Never skip this inspection; a cracked tank ruins furniture and voids warranties. Keep the manual accessible for model-specific details since filter placement varies between Aqua Oasis Pro and Standard editions.
Confirm Model-Specific Requirements
Check your unit’s base label for model number (e.g., AQ-500 vs. AQ-700). Pro models require pre-soaking filters for 10 minutes instead of 5, while Standard versions need only 5 minutes. Verify tank capacity markings—some regions use metric (4L) instead of gallons. Missing the cleaning brush? Use a soft toothbrush temporarily but order replacements immediately to prevent mineral buildup.
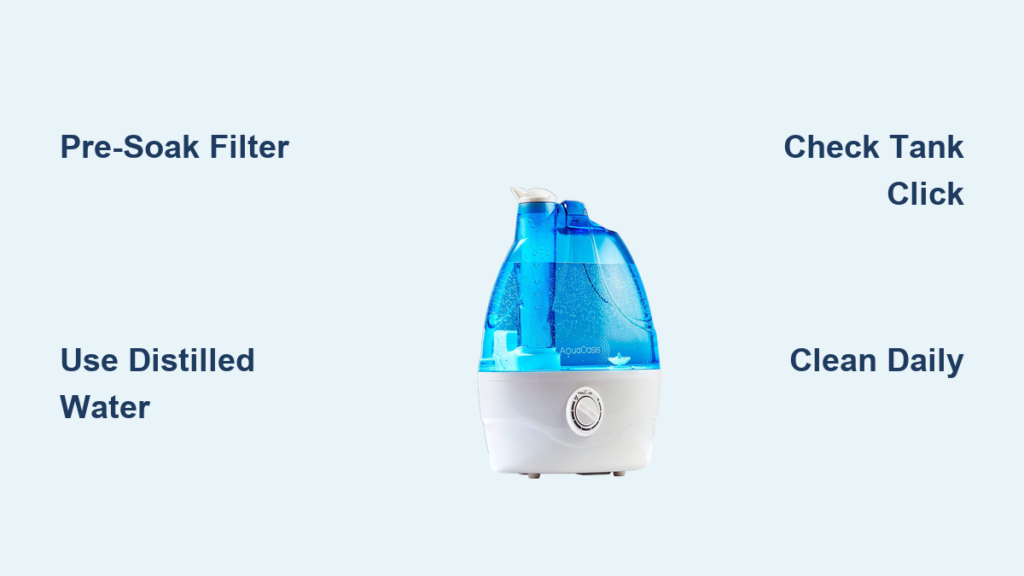
Choose Perfect Location for Optimal Humidity Distribution
Place your Aqua Oasis on a stable, elevated surface like a nightstand or dresser—never directly on carpet or wood flooring. Maintain strict clearance: 12 inches from walls (prevents moisture damage), 24 inches from electronics (avoids condensation on devices), and 36 inches from bedding (reduces mold risk). Critical mistake alert: Positioning near heat vents creates uneven humidity, forcing the unit to overwork. Use a waterproof mat under the unit if your furniture lacks water resistance—this single step prevents $200+ water damage claims annually. Avoid direct sunlight exposure, which accelerates plastic degradation and promotes algae growth inside the tank.
Prepare Water Tank to Prevent White Dust and Bacteria

Wash the tank with mild dish soap and warm water using the included cleaning brush—focus on corners where mold hides. Rinse until no suds remain to eliminate soap residue that clogs mist output. Fill only with cool distilled water to the 1.5-gallon max line; tap water in hard-water areas creates white mineral dust that coats furniture. Never exceed the fill line—overflow triggers automatic shutoff. Before inserting, ensure the tank clicks audibly into the base. A loose tank connection is the #1 cause of “no mist” errors during initial Aqua Oasis setup.
Address Hard Water Immediately
If you must use tap water, add a demineralization cartridge (sold separately) to the tank’s designated slot. Without this, white dust appears within 48 hours, requiring aggressive vinegar cleaning. Test your water hardness with a $5 strip—if over 7 grains per gallon, distilled water is non-negotiable for proper how to set up Aqua Oasis humidifier success.
Install Filter System for Maximum Efficiency
Locate the filter compartment (rear panel on Standard models, base on Pro versions). Remove plastic wrapping from the new filter—this protective layer causes immediate clogging if missed. Insert with directional arrows pointing toward the motor housing; reversed filters reduce output by 70%. Pre-soak in clean water for 5 minutes (10 for Pro models) to activate moisture absorption. Snap the compartment door shut until it clicks—gaps here cause air leaks that disrupt humidity sensing. Pro tip: Gently squeeze excess water from the filter before installation to prevent initial overflow.
Connect Power Safely to Avoid Electrical Hazards
Plug the adapter directly into the humidifier’s port until you feel a firm click—partial connections cause intermittent power loss. Insert only into a grounded wall outlet; extension cords overheat and void warranties. The LED should flash blue for 3 seconds confirming power. If lights don’t activate:
– Check outlet function with another device
– Verify adapter clicks fully into unit
– Inspect cord for kinks or frays
Never operate on wet surfaces or with damp hands—Aqua Oasis units contain electrical components within 2 inches of the water reservoir.
Configure Display Settings for Your Climate
Press the power button to activate the LED display showing current room humidity. Set your target level between 40-60% using +/– buttons—below 40% dries sinuses, above 60% risks mold. Key insight: Start at 45% and adjust upward over 24 hours; sudden jumps cause window condensation. The display auto-calibrates after 15 minutes—don’t change settings during this phase. If your room exceeds 70% humidity initially (common in basements), run the unit on High for 1 hour before setting target levels.
Program Timer Functions to Save Energy
Press the Timer button to select 1/2/4/8-hour cycles for targeted use (e.g., 4 hours while sleeping). For continuous operation, ensure the display reads “Cont” not “Off”—this avoids morning dryness. The timer resets after power outages; reprogram if lights blink rapidly. Nighttime tip: Set 8-hour cycles ending 30 minutes before waking to maintain comfort without over-humidifying.
Adjust Mist Output for Your Room Size

Select intensity based on square footage:
– Low (1-3 mist bars): Rooms under 300 sq ft
– Medium (4-6 bars): 300-500 sq ft
– High (7-8 bars): 500+ sq ft or dry climates
Start on Low for 30 minutes, then increase incrementally. Oversaturation appears as visible mist pools on surfaces—reduce output immediately. In multi-story homes, place units on upper floors where dry air rises. Critical check: Mist should disperse within 2 feet; concentrated streams indicate clogged nozzles needing brush cleaning.
Activate Night Mode for Undisturbed Sleep
Press the Night Mode button (or hold Power 3 seconds) to dim LEDs to 10% brightness and reduce noise to 28dB—quieter than a whisper. The unit auto-lowers mist output by 20% while maintaining humidity targets. Must-do: Test this before bedtime—some users accidentally disable it by pressing buttons in the dark. If lights remain bright, reset by unplugging for 10 seconds. This mode extends filter life by reducing runtime intensity.
Set Up Aroma Diffusion Without Damaging Components
Add only water-soluble oils (eucalyptus, lavender) to the dedicated side tray—never pour directly into the tank. Use 3-5 drops max; excess oil coats sensors causing false “low water” alerts. Clean the tray weekly with soapy water to prevent sticky residue that clogs diffusion ports. Avoid citrus oils—they degrade plastic trays within months. For cold relief, blend 2 drops eucalyptus with 3 drops peppermint in the tray (never mix in tank).
Establish Daily Maintenance to Prevent Health Risks
Empty and rinse the tank daily—even unused water breeds bacteria in 12 hours. Wipe the base reservoir with a vinegar-dampened cloth to stop biofilm formation. Non-negotiable step: Check the mist nozzle weekly with the cleaning brush; mineral deposits here cause 68% of “no mist” complaints. Always unplug before cleaning. If you smell mustiness, deep-clean immediately—this indicates active mold growth risking respiratory issues.
Schedule Weekly Deep Cleaning for Peak Performance
Disassemble the unit and soak the tank in 1:3 white vinegar/water solution for 30 minutes. Scrub the base reservoir with the brush focusing on ultrasonic plates where scale accumulates. Rinse all parts 3x with cold water—vinegar residue creates odors. Air-dry components for 2 hours before reassembly; trapped moisture causes electrical shorts. Pro shortcut: Run the empty unit on High for 5 minutes after reassembly to evaporate hidden moisture. Replace filters monthly in hard-water areas—brown discoloration means immediate replacement.
Troubleshoot Common Setup Failures
Fix “No Mist” Within 5 Minutes
Confirm water level exceeds the min line by 1/2 inch. Remove and firmly reseat the tank until audible clicks. Clear nozzle blockages with the brush tip. If humidity already hit your target, lower the setting by 5% to force activation. Persistent failure? Check filter installation—backward filters stop mist production entirely.
Eliminate Excessive Gurgling Noise
Level the unit on an uneven surface using folded paper under legs. Ensure the tank sits flush with no gaps. Soak mineral deposits in vinegar for 15 minutes if noise continues. Normal operation has brief gurgling during first 2 minutes only—constant noise means air trapped in the base reservoir.
Stop White Dust Immediately
Switch to distilled water and run vinegar solution through the system. Install a demineralization cartridge if tap water is unavoidable. White dust indicates calcium saturation—continue vinegar rinses until output clears. Never ignore this; dust damages electronics and aggravates asthma.
Optimize Room Performance Year-Round
Calibrate for Winter Heating Months
Raise humidity targets to 50-60% during winter—forced-air heating drops indoor levels below 30%. Place units near heat vents to distribute moisture efficiently. Monitor window condensation; fogged glass means reduce settings by 5%. In sub-zero climates, add 10% humidity target to compensate for extreme dryness.
Maximize Summer Efficiency in Humid Climates
Lower targets to 40-45% during humid months. Position units away from AC vents that counteract moisture. Use ceiling fans on low to circulate air without dispersing mist. If humidity exceeds 60%, run dehumidifiers alongside—Aqua Oasis can’t lower existing high moisture.
Follow Critical Safety Protocols
Prevent Electrical Hazards
Unplug before any maintenance—water contact with live components causes short circuits. Never use damaged cords; order OEM replacements from Aqua Oasis. Keep outlets 18+ inches above floor level in case of tank leaks. Life-saving tip: Install a GFCI outlet adapter—it cuts power during electrical faults faster than standard breakers.
Avoid Health Complications
Maintain 30-50% humidity to suppress mold and dust mites. Asthma sufferers should consult doctors before use—excessive humidity triggers attacks. Clean thoroughly after illnesses using hydrogen peroxide solution to kill pathogens. Keep units 4+ feet from infants’ cribs to prevent overexposure.
Your Aqua Oasis humidifier is now perfectly configured for healthy, comfortable air. Remember: daily tank rinses prevent 90% of performance issues, while distilled water eliminates white dust permanently. Test all settings over 24 hours, adjusting in 5% humidity increments until condensation disappears from windows. For ongoing success, replace filters quarterly and deep-clean monthly—this simple routine ensures your how to set up Aqua Oasis humidifier investment delivers years of silent, efficient operation. When seasonal changes hit, revisit your humidity targets; optimal settings shift with the weather. Now breathe easy knowing your air supports better sleep and fewer allergy flare-ups.


