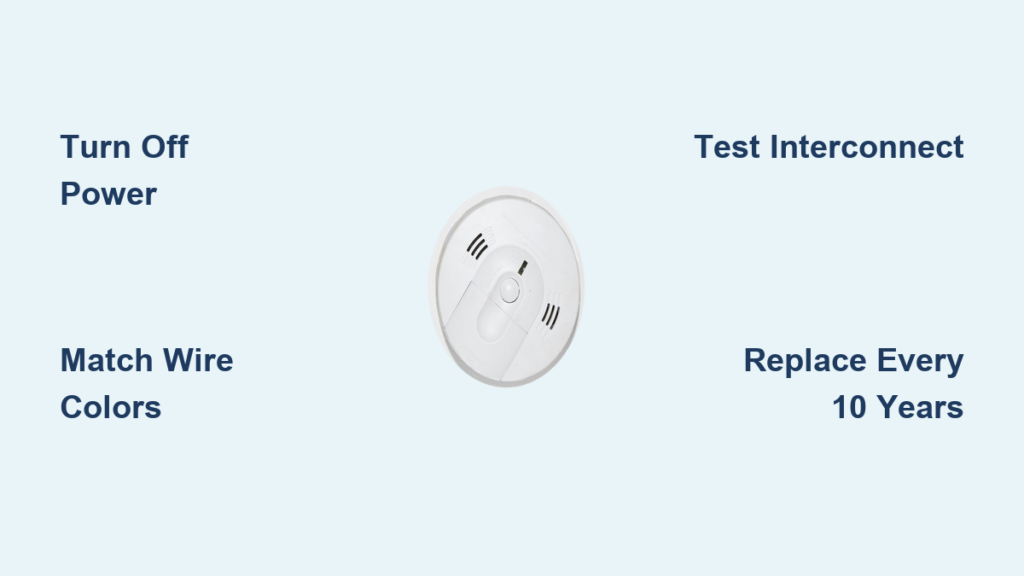
A hardwired smoke detector is one of the most important safety upgrades you can make in your home. Unlike battery-only models, hardwired units draw continuous power from your electrical system and include battery backup for outages. Better yet, interconnected models all sound at once when one detects smoke, giving your family critical extra seconds to escape. If you’re replacing an aging unit or installing a new system, learning how to hardwire a smoke detector the right way ensures reliable protection and code compliance.
This guide covers everything you need: choosing the best detector, understanding your home’s wiring, making safe electrical connections, and testing the finished system. You’ll also learn how to troubleshoot common issues and keep your alarms working properly for years.
Pick the Best Hardwired Smoke Detector for Your Home
Choose a Photoelectric Model
Go with a photoelectric smoke detector for the fastest response to smoldering fires. These slow-burning fires often start in upholstery, bedding, or behind walls and produce heavy smoke before flames appear. Photoelectric sensors detect this smoke earlier than ionization models, which are more prone to nuisance alarms from cooking.
Look for a 10-Year Sealed Battery
A 10-year sealed lithium battery eliminates annual battery swaps and the dreaded midnight chirp. Models like the Supercell run for the entire life of the unit without maintenance. Many also include an end-of-life signal that chirps when it’s time to replace the detector after a decade.
Confirm Wiring Compatibility
Most hardwired detectors ship with a wiring harness featuring black, white, and orange conductors. The orange wire connects to the red interconnect wire in modern 12-3 cable. If your home has older 12-2 wiring, you’ll simply cap the orange wire and lose interconnectivity unless you upgrade.
Identify Your Home’s Wiring Type
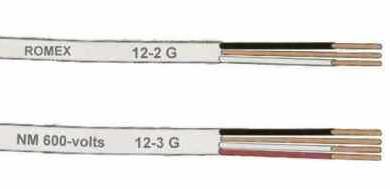
Modern 12-3 Cable (Post-1985 Homes)
Modern cable contains four conductors:
• Black – Hot (120V power)
• White – Neutral
• Red – Interconnect signal
• Bare copper – Ground
The red wire allows all linked detectors to sound together when one triggers an alarm.
Older 12-2 Cable (Pre-1985 Homes)
Older cable has only two conductors (black and white) with no interconnect wire. In this case, detectors operate independently. You can still install a hardwired unit, but you’ll need wireless interconnect models to get whole-home alarming.
Cap Unused Wires Safely
If you have 12-2 wiring, cap the orange wire on the harness with a wire nut and tuck it into the box. Never connect it to another wire. For future reference, label and tape any capped conductors.
Turn Off Power and Verify It’s Safe
Shut Off the Correct Breaker
Find the breaker controlling the smoke detector circuit—often labeled “hall,” “bedroom,” or “smoke alarms.” Flip it off, then confirm the detector’s indicator light goes out or chirping stops.
Test for Live Voltage
Before touching any wires, hold a non-contact voltage tester near the conductors inside the box. If it lights up or beeps, power is still on. For extra confidence, use a multimeter to check for 120V between the black and white wires. Never proceed if voltage is detected.
Light Your Workspace
Electrical boxes in ceilings are often dark. Use a flashlight or headlamp so you can clearly see wire colors and avoid dangerous mistakes.
Remove the Old Detector and Prep the Site
Take Down the Existing Unit
Twist the old detector counterclockwise to release it from the mounting bracket. Pull it down gently and disconnect each wire by unscrewing the wire nuts. Check the manufacture date on the back—replace any unit over 10 years old.
Inspect the Electrical Box
Look for a loose, cracked, or poorly positioned drywall box. Code requires mounting 4 to 12 inches from the ceiling. If the existing box is too low or damaged, install a new plastic or metal box secured to a stud or brace.
Clean the Work Area
Wipe dust and debris from inside the box and around the ceiling. A clean surface helps connections seat properly and prevents contamination.
Connect the Wires Using the Right Method

Match Colors and Functions
Follow this standard wiring chart:
| Ceiling Wire | Harness Wire |
|---|---|
| Black (hot) | Black |
| White (neutral) | White |
| Red (interconnect) | Orange |
| Bare copper (ground) | All grounds joined |
Twist each pair together with a wire nut, turning clockwise until snug. Give each connection a gentle tug to confirm it’s secure. Never use tape alone—wire nuts are required by code.
Use Pigtails for Intermediate Detectors
If your detector sits mid-circuit, two cables enter the box. Use pigtails (short jumper wires) to connect both incoming and outgoing conductors to the harness. For example, join the two black ceiling wires with a pigtail, then attach the pigtail to the harness’s black wire. Repeat for white and red. This keeps the detector’s terminals from being overloaded.
Join All Ground Wires
Twist every bare copper ground wire together with a wire nut. If only one ground is present, connect it directly to the harness ground. While most plastic detectors don’t require grounding for operation, joining grounds improves overall system safety.
Mount the Detector and Lock It In
Install the Mounting Bracket
Feed the wiring harness through the center of the mounting bracket. Align the bracket with the screw holes on the electrical box. Start the screws by hand, then tighten just until the bracket feels firm. Avoid over-tightening—plastic can crack.
Tuck the Wiring Neatly
Carefully push all connected wires back into the box. Keep them high and away from sharp edges. If space is tight, consider swapping in a deeper electrical box for better clearance.
Attach the Detector
Align the prongs on the back of the detector with the slots on the bracket. Push up and twist clockwise until you hear a click. The unit should sit flush and feel secure.
Restore Power and Test Every Alarm
Turn the Breaker Back On
Flip the circuit breaker to restore power. Wait a few seconds for the detector to initialize. A brief blinking light is normal.
Press the Test Button
Press and hold the test button for 5 to 10 seconds. The alarm should sound loudly. Release, and the unit will reset. If nothing happens, recheck your wire connections and battery.
Confirm Interconnection
Walk to each detector in the home and press the test button. Every unit should sound simultaneously. If only one beeps, inspect the red-to-orange connection or check for a break in the interconnect wire.
Verify Status Lights and Final Setup
Check the Indicator Lights
A solid green light confirms AC power is active. A blinking red light means the unit is running on battery backup only—recheck your wiring if this persists. No light at all signals a power or connection problem.
Remove the Safety Tab
Many detectors ship with a plastic safety tab near the battery compartment. Pull it out to fully activate the unit and prevent accidental alarms during shipping.
Make Sure It’s Level
Step back and confirm the detector sits flush against the ceiling. A crooked unit often points to a loose bracket or pinched wires. Adjust as needed.
Troubleshoot Common Smoke Detector Problems
Chirping Every 30–60 Seconds
This usually signals a low backup battery. Replace the 9V battery immediately, even in hardwired units. If chirping continues, reset the detector by holding the test button for 15 seconds with power off.
False Alarms From Cooking or Steam
Avoid mounting detectors within 10 feet of kitchens or bathrooms. Steam and cooking fumes easily trigger false alarms. If relocation isn’t possible, use a unit with a hush button to silence nuisance alerts temporarily.
Detector Won’t Respond
Run through this checklist:
• Circuit breaker is on
• Wire nuts are tight
• Black and white wires are correctly matched
• Battery is installed and charged
If the unit still doesn’t work, it may be defective and need replacement.
Intermittent Beeping
Beeping that returns after a battery swap often means the detector has reached its 10-year end-of-life. Replace the entire unit right away.
Maintain Your Detectors for Long-Term Reliability
Test Monthly
Press the test button once a month. It takes less than 10 seconds and confirms the alarm will sound when you need it.
Clean Twice a Year
Use a soft brush or vacuum attachment to clear dust from the vents. Built-up debris blocks smoke entry and reduces sensitivity.
Replace Batteries Annually
For models with replaceable 9V batteries, swap them every year—even if the unit isn’t chirping. Always use alkaline batteries and never mix old with new.
Replace the Unit Every 10 Years
Sensors and electronics degrade over time. Check the manufacture date on the back and replace the entire detector when it hits the 10-year mark.
Know When to Hire a Licensed Electrician
Rewiring Older Homes
If your home has 12-2 wiring and you want full interconnectivity, you’ll need new 12-3 cable run through walls and ceilings. This level of work is best handled by a licensed electrician.
Uncertain Wiring or No Power
If you’re unsure which wire is which, can’t identify the breaker, or have no power reaching the box, stop and call a professional. Electrical mistakes can cause shocks or fires.
Failed Interconnection After Installation
If all detectors still won’t sync after correct wiring, there may be a hidden break in the red interconnect wire. An electrician can trace the circuit and repair the fault safely.
Frequently Asked Questions About Hardwiring a Smoke Detector
Can I Install a Hardwired Smoke Detector Without Existing Wiring?
You’ll need to run new electrical cable from your panel to each detector location. This usually requires a licensed electrician, especially to meet code and pass inspection.
Why Is the Orange Wire Capped on My New Detector?
The orange wire handles interconnection. In homes with older 12-2 wiring (no red interconnect wire), you cap the orange wire and tuck it into the box. The detector still works, but you’ll lose the system-wide alarm feature.
How Do I Know if My Detectors Are Interconnected?
Press and hold the test button on one unit. If every alarm in the home sounds at the same time, the system is properly interconnected. If only the tested unit sounds, the red interconnect wire may be missing or loose.
What Does a Chirping Sound Mean?
A chirp every 30 to 60 seconds usually points to a low backup battery. Replace it with a fresh 9V alkaline battery. If chirping continues, reset the unit by holding the test button for 15 seconds with the breaker off.
How Often Should I Replace the Entire Smoke Detector?
Replace every hardwired smoke detector every 10 years. Sensors lose sensitivity over time, and most units include an end-of-life chirp to alert you when replacement is due.
Is It Safe to Install a Smoke Detector Myself?
Yes, if you’re comfortable working with household electrical circuits, follow the steps above, and verify power is off with a voltage tester. If you’re ever unsure, hire a licensed electrician to avoid shock or fire hazards.
Key Takeaways for Hardwiring Your Smoke Detector
Hardwiring a smoke detector is a straightforward project that delivers major safety benefits. Choose a photoelectric model with a 10-year sealed battery, confirm your home’s wiring type, and always turn off the breaker before touching any wires. Use wire nuts for every connection, follow the color-matching chart, and test the entire interconnected system before you finish. Remember to test monthly, clean twice a year, and replace the unit at the 10-year mark. With the right tools and a careful approach, you can complete the job in under an hour and give your family reliable, whole-home fire protection for years to come.