A hardwired smoke detector is a critical part of your home’s fire safety system. It runs on your home’s electrical power and includes a backup battery for outages. But even the most reliable alarms degrade over time. Most manufacturers and fire safety experts recommend replacing hardwired smoke detectors every 10 years. If your alarm is chirping, slow to respond, or nearing a decade old, it is time for a replacement.
The good news? Replacing a hardwired unit is a quick, DIY-friendly task that takes under 15 minutes with basic tools. This guide walks you through every step, from turning off power to testing the new alarm, so you can restore full protection safely and confidently.
Identify When Replacement Is Needed
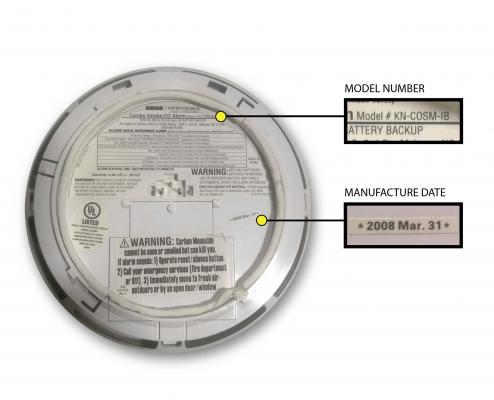
Check the Manufacture Date
Every smoke detector has a manufacture date stamped on the back. Remove the unit from its mounting bracket and look for the label. If it is within 10 years of today, replacement is recommended, even if the test still passes. Sensors degrade over time, and reliability drops significantly after a decade.
Recognize End-of-Life Warning Signs
Watch for these red flags:
– Five beeps per minute signals end-of-life and requires immediate replacement
– Delayed response when pressing the test button
– Frequent chirping after battery replacement
– False alarms triggered by cooking or steam
– Discoloration or dust buildup inside the unit
If troubleshooting does not stop the chirping, the unit has likely reached its service limit.
Troubleshoot Before Buying a New Detector
Before purchasing a replacement:
1. Replace the backup battery
2. Press and hold the test button for 30 seconds to drain residual capacitor charge
3. Use compressed air to clean dust from vents
4. Test again
If chirping persists, proceed with replacement.
Power Off and Stay Safe
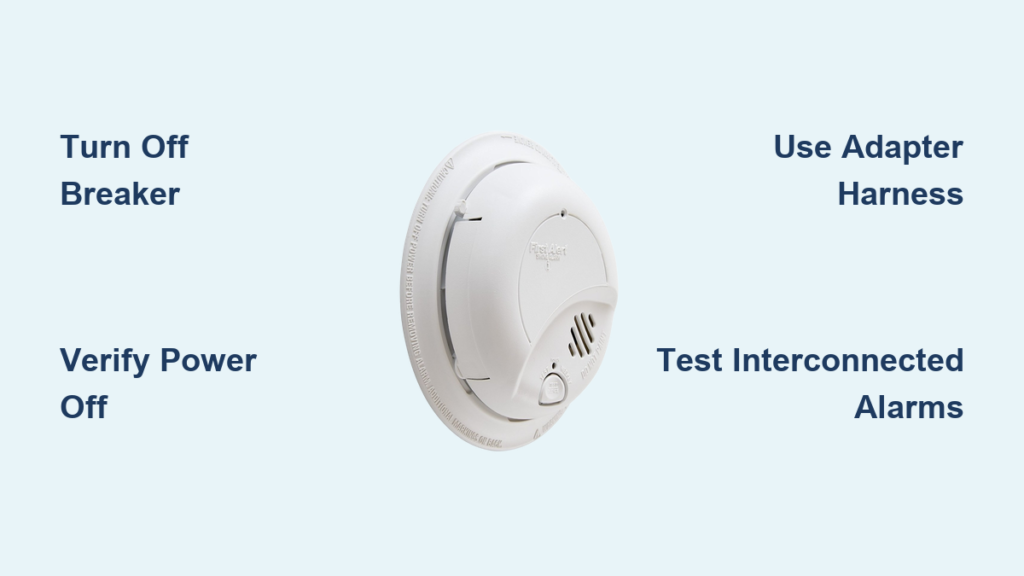
Shut Off the Circuit Breaker
Locate the breaker that powers your smoke detectors. It is often labeled “smoke alarms” or “hallway.” Turn it off completely. Never work on live wiring. This step eliminates the risk of electrical shock when handling wires.
Verify Power Is Off
Use a non-contact voltage tester to confirm the circuit is dead. Hold it near the wires or the detector’s base. If it beeps or lights up, power is still active. Double-check the breaker. Only proceed when the tester shows no voltage.
Gather Your Safety Gear
- A sturdy ladder for ceiling access
- Safety glasses if working above head height
- Adequate lighting in the work area
- Tools within reach to avoid overreaching
If wiring appears damaged or missing, consider hiring a licensed electrician.
Tools and Supplies You’ll Need
Essential Tools
- Sturdy ladder for safe ceiling access
- Phillips screwdriver for mounting screws
- Non-contact voltage tester to confirm power is off
- Pen or marker for labeling the replacement date
Wiring Supplies
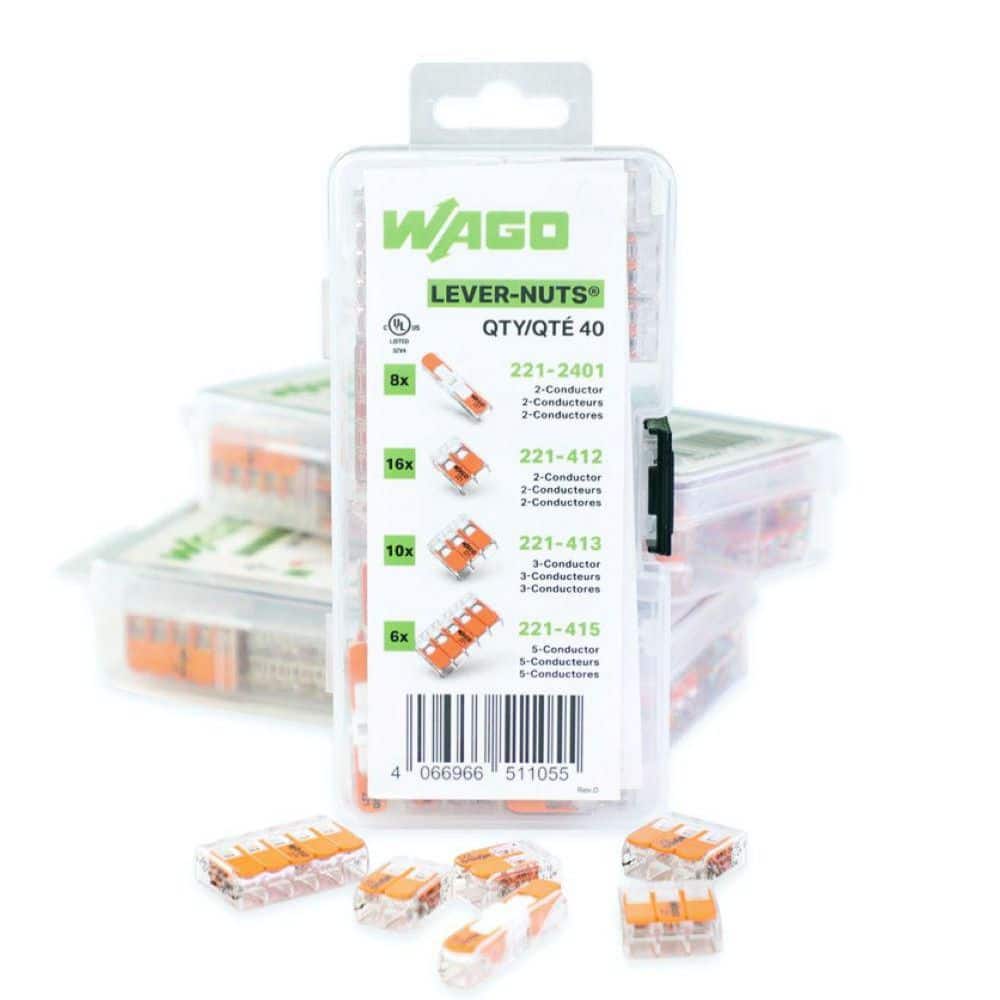
- Wire nuts or Wago 221 lever nuts to secure connections
- Wire strippers, only if re-terminating wires
- Electrical tape for securing connections or disposal prep
Replacement Materials
- A new hardwired smoke detector that matches your power type and interconnect capability
- An adapter harness (about $5) if the pigtail does not match existing wiring
- A fresh 9V or AA battery for backup (if not sealed)
Pro Tip: Take the old unit to Home Depot (Kidde) or Lowe’s (First Alert) to ensure compatibility with your existing system.
Identify Your Wiring Type
Confirm a Hardwired Setup
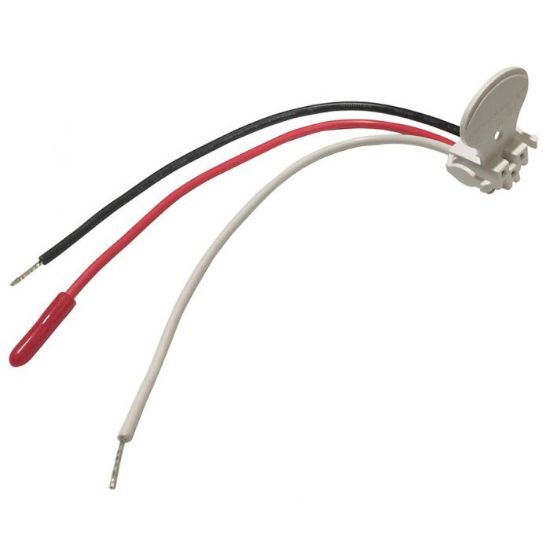
Hardwired detectors connect to your home’s electrical system through a plug-in pigtail. Look for:
– Three wires: black (hot), white (neutral), red (interconnect)
– A plastic wiring harness plugged into the back
– Mounting to an electrical box in the ceiling or wall
Battery-only models twist off without any wires.
Understand the Interconnect Wire
The red wire links all alarms in your home. When one detects smoke, all of them sound. This feature is critical for whole-home safety, especially at night. Make sure the red wire stays connected during replacement.
Check Pigtail Compatibility
New detectors come with a pigtail. If it does not match your existing connector, you may need an adapter. Three-pin triangle and three-pin straight-line layouts differ by brand. An adapter harness bridges the gap without rewiring.
Remove the Old Smoke Detector
Detach the Unit from the Bracket
Twist the detector counterclockwise about a quarter turn. Gently pull it down to expose the wiring harness. Some models have a locking tab that you need to press to release. Avoid yanking the wires from the ceiling.
Unplug the Wiring Harness
Locate the pigtail connector on the back of the unit. Press the two side tabs to release it. Carefully unplug the harness and let it hang safely while you work. Do not cut or disconnect wires from the ceiling box unless you are also replacing the mounting plate.
Remove the Mounting Plate
Unscrew the two Phillips screws holding the old plate in place. If the plate is painted over, gently twist it to break the seal. Remove the plate and set it aside. Inspect the electrical box for damage or loose wires.
Prepare for the New Installation
Inspect the Existing Wiring
Check the three wires in the ceiling box:
– Black (hot) delivers power
– White (neutral) completes the circuit
– Red (interconnect) links to other alarms
Make sure wires are intact, not frayed, and long enough to reach the new connector.
Install the New Mounting Plate
Align the new plate with the screw holes. Secure it with the provided screws. Confirm it matches your new detector’s mounting style. Some models require specific brackets, so use the one included.
Handle Compatibility Issues
If the new pigtail does not fit, you have two options:
– Use an adapter harness for a plug-and-play solution
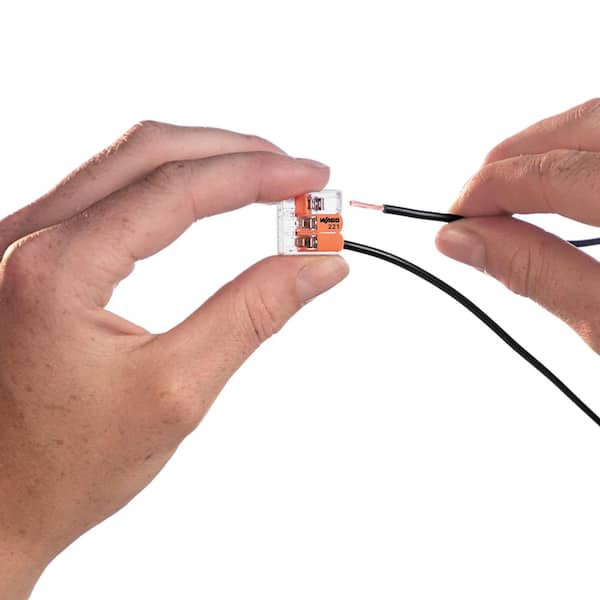
– Rewire using Wago 221 lever nuts by stripping wire ends if needed, inserting red to red, black to black, and white to white, then closing each lever to secure
Wago lever nuts are safer and more reliable than traditional wire nuts.
Install the New Smoke Detector
Connect the Wiring Harness
Plug the pigtail into the ceiling wires using wire nuts or Wago connectors. Match the colors: black to black, white to white, red to red. Tuck the wires neatly into the electrical box and avoid pinching or straining them.
Attach the Detector to the Bracket
Plug the new detector into the pigtail. Twist clockwise until it clicks into place. Ensure it is fully seated with no gaps or wobble.
Install the Backup Battery
Remove the plastic battery saver tab. Insert a fresh 9V or AA battery if your model uses one. Some detectors will chirp until the battery is installed.
Restore Power and Test the Alarm
Turn On the Circuit Breaker
Return to the electrical panel and flip the smoke alarm breaker back on. Look for a green LED on the new detector, which confirms power is flowing.
Test the Alarm
Press and hold the test button for 5 to 10 seconds. The alarm should sound loudly. If your system is interconnected, all alarms in the home should activate. Test from a second alarm to confirm full system response.
Silence Test Noise Safely
Cover the speaker with your hand during testing because these alarms are extremely loud. Warn household members before pressing the test button.
Label and Maintain Your New Detector
Mark the Replacement Date
Use a pen to write the 10-year replacement date on the side of the unit. For example: Replace by 2034. This prevents future guesswork and keeps your maintenance on track.
Set a Maintenance Schedule
- Test monthly by pressing the test button
- Replace the backup battery annually, even in hardwired units
- Vacuum every 6 months with a soft brush attachment
- Replace the entire unit in 10 years
Keep a home maintenance log for all detectors in your house.
Troubleshoot Common Issues
Alarm Won’t Sound
- Check that the battery is installed and charged
- Verify power is on at the breaker
- Ensure the unit is fully twisted into the bracket
- Confirm all wiring connections are secure
Chirping After Replacement
Chirping may come from:
– A different alarm in the home
– A low battery in another hardwired unit
– A detector not fully seated on the bracket
– An end-of-life signal from a second unit
Test each alarm individually to locate the source.
False Alarms
Common causes include cooking fumes, steam, dust buildup, and high humidity. Avoid installing detectors near kitchens or bathrooms. Clean regularly with a vacuum or compressed air.
Dispose of the Old Unit Safely
Prepare for Disposal
Remove the backup battery. Cover the terminals with electrical tape or duct tape to prevent accidental short circuits in the trash.
Follow Local Guidelines
Check with your municipality for e-waste or battery disposal rules. Some retailers offer recycling programs. Never burn or dismantle smoke detectors. They contain electronic components and small amounts of radioactive material in ionization models.
When to Call a Professional
Hire an Electrician If
- Wires are missing, damaged, or too short
- The electrical box is loose or unstable
- You are installing a new alarm rather than replacing an existing one
- You are unsure about wiring or breaker location
DIY Is Safe for Replacements
If you are replacing an existing unit with the same power setup and intact wiring, DIY is safe and straightforward. Just follow the steps: power off, unplug, swap, test.
Frequently Asked Questions About Replacing a Hardwired Smoke Detector
How do I know if my smoke alarm is expired?
Remove the alarm from the bracket and check the manufacture date on the back. If it is close to 10 years old, replacement is recommended even if it still passes a test.
Can I replace a hardwired smoke alarm myself?
Yes. If you are replacing an existing hardwired alarm with the same power setup and a working wiring harness, many homeowners can do it safely by turning off the breaker first. If wiring is missing, damaged, or you are unsure, use a qualified electrician.
Why is my alarm still chirping after replacement?
Chirping can come from a different alarm in the home, a low backup battery in a hardwired unit, a unit not fully seated on the bracket, or an end-of-life signal. Confirm which alarm is chirping and test each unit individually.
What does five beeps per minute mean?
Five beeps per minute is a universal end-of-life signal. Replace the unit immediately.
How long does the replacement process take?
Replacing a hardwired smoke detector takes less than 15 minutes when you are swapping an existing unit with compatible wiring.
What should I do if the new detector’s pigtail does not match my wiring?
Use a universal adapter harness (about $5) or rewire using Wago 221 lever nuts. Both solutions eliminate the need for extensive rewiring.
Key Takeaways for a Safe Smoke Detector Replacement
Replacing a hardwired smoke detector is one of the simplest ways to protect your home. Start by confirming the unit is truly due for replacement using the manufacture date and end-of-life signals. Always shut off power at the breaker and verify with a voltage tester before touching any wires. Use an adapter harness or Wago lever nuts to handle compatibility issues without rewiring. Test the new alarm thoroughly, including interconnected units, and label the replacement date for future reference.
Your next step: Check the manufacture dates on every smoke detector in your home today. If any are approaching 10 years or showing warning signs, pick up a replacement and set aside 15 minutes to swap it out. Your safety, and your family’s safety, depends on it.