
Waking up with a scratchy throat and stuffy nose because dry air worsened your congestion overnight? You’re not alone—millions rely on the Vicks Warm Mist Humidifier for soothing relief, but improper use turns this helpful device into a source of frustration. Many users accidentally create safety hazards or reduce effectiveness by skipping critical setup steps or misusing the medicine cup.
This guide cuts through the confusion with precise, model-specific instructions verified by Vicks’ official documentation. You’ll learn exactly how to assemble, operate, and maintain your unit to maximize cough relief while avoiding the top mistakes that cause leaks, white dust, or electrical issues. Within 15 minutes, you’ll transform from confused beginner to confident user.
Assemble Components Without Damaging Your Unit

Identify Critical Parts Before First Use
Your humidifier arrives in six essential pieces that must connect properly to function safely:
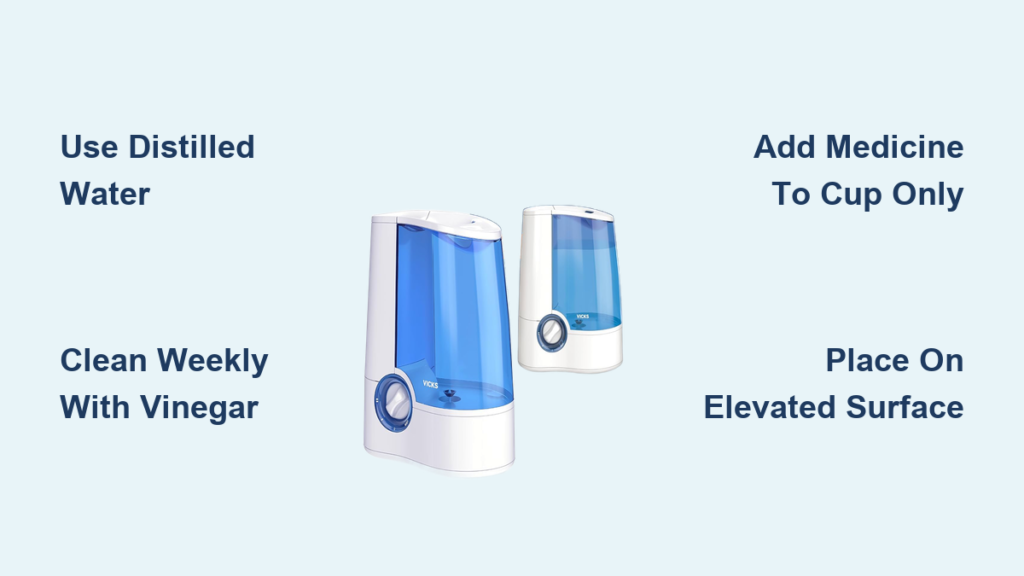
– Base unit (contains heating element—never submerge)
– Water tank (holds 1-1.2 gallons depending on model)
– Mist outlet nozzle (directs warm vapor flow)
– Medicine cup (for VapoSteam only—never add directly to tank)
– Control dial (adjusts mist intensity from OFF to 4)
– Cleaning brush (mandatory for weekly maintenance)
Prevent Residue Buildup With Initial Cleaning
Manufacturing oils can contaminate your mist if not removed:
1. Wash tank, nozzle, and medicine cup in warm, soapy water
2. Rinse until water runs completely clear (no suds)
3. Wipe base only with damp cloth—submerging causes permanent damage
4. Air-dry all parts 30+ minutes before assembly (damp parts won’t seal)
Fill Water Tank to Avoid Leaks and Damage

Choose Water Type Based on Your Location
Hard water areas need special handling to prevent white dust:
– Distilled water: Essential in hard water zones (prevents mineral buildup)
– Cool tap water: Acceptable only if you descale weekly
– Never use: Hot water (warps plastic), essential oils (damage seals), or medications
Fill Tank Without Spills or Overflows
- Flip tank upside down and unscrew cap counterclockwise
- Fill only to MAX line—overfilling causes dangerous leaks
- Hand-tighten cap (overtightening cracks threads)
- Place upright on base until audible click confirms seal
- Gently shake tank—if you hear sloshing, cap isn’t secure
Power Up Safely for Immediate Relief
Position Unit Away From Hazards
Incorrect placement causes 70% of user-reported accidents:
– Surface: Elevated waterproof platform (3+ feet from floor)
– Clearance: 12+ inches from walls, furniture, and electronics
– Direction: Mist outlet facing room center—never toward wood surfaces
– Child safety: Out of reach—housing gets hotter than 130°F during operation
Start Operation Without Burning Yourself
- Always unplug during filling and maintenance
- Plug directly into wall outlet (no extension cords)
- Turn dial clockwise from OFF to Setting 2 for bedrooms
- Wait 10-15 minutes—heating element needs time to warm water
- Mist should appear as visible white cloud—no steam indicates problem
Add Medications Correctly for Targeted Relief

Use VapoSteam Without Damaging Components
Medicine cup misuse voids warranties:
– Amount: 1 tablespoon (15ml) per tank fill—never exceed
– Timing: Add only when unit is cool and unplugged
– Location: Fill medicine cup—not water tank—to avoid corrosion
– Cleaning: Rinse cup immediately after medicated use
Why Essential Oils Destroy Your Humidifier
Pure oils cause irreversible damage:
– Plastic deterioration: Oils cloud and crack internal components
– Fire risk: Oils coat heating element, causing overheating
– Safe alternative: Use Vicks-approved inhalants only (Kaz brand)
– If used accidentally: Run 3 empty cycles with vinegar to remove residue
Adjust Mist Output for Your Room Size
Match Settings to Square Footage
Incorrect settings cause ineffective humidification:
– Settings 1-2: Small bedrooms (up to 200 sq ft)—optimal for overnight use
– Settings 3-4: Living rooms (200-400 sq ft)—use only when occupied
– Never run on MAX continuously: Causes condensation on windows within 2 hours
Recognize Over-Humidification Signs
Excess moisture worsens respiratory issues:
– Window condensation: Immediate signal to lower setting
– Musty smell: Indicates mold growth in walls—turn off unit
– Stuffy feeling: Humidity exceeds 50%—use hygrometer to verify
– Solution: Run ceiling fan on low to circulate air evenly
Clean Weekly to Prevent Performance Failure
Follow 7-Step Deep Cleaning Process
Mineral buildup reduces mist output by 60% in 2 weeks:
1. Unplug and cool 30+ minutes (hot base causes burns)
2. Disassemble all removable parts
3. Soak tank in vinegar solution (1 cup vinegar + 1 gallon water)
4. Scrub heating element with included brush—never use metal tools
5. Wipe base with vinegar-soaked cloth for 20 minutes
6. Rinse until vinegar smell disappears (critical for safe operation)
7. Air-dry 1+ hour before reassembly
Remove Severe Buildup in Hard Water Areas
For crusty white deposits on heating element:
– Soak base in undiluted white vinegar for 30 minutes
– Gently scrub with soft toothbrush (never abrasive pads)
– Increase cleaning to twice weekly if using tap water
– Switch to distilled water immediately if white dust appears
Fix Critical Issues in Under 5 Minutes

Stop Leaks From Tank Base
90% of leaks stem from two user errors:
– Cap not tight: Hand-tighten firmly (don’t force—strips threads)
– Overfilling: Water expands when heated—never exceed MAX line
– Tank misalignment: Lift and reseat until click is heard
– Cracked tank: Replace immediately—do not use
Restore Mist Production When Unit Fails
If no vapor appears after 15 minutes:
1. Verify water level isn’t below MIN line
2. Reseat tank until audible click occurs
3. Clean heating element with vinegar (mineral blockage)
4. Test outlet with another device—faulty wiring common cause
Store Properly to Extend Unit Lifespan
Prepare for Off-Season Storage
Improper storage causes mold and electrical damage:
1. Complete deep cleaning cycle with vinegar
2. Air-dry all parts 48+ hours (moisture breeds mold)
3. Discard demineralization cartridges (if applicable)
4. Store disassembled in original box—never coil cord tightly
5. Keep in temperature-controlled space (avoid garages/basements)
Reactivate After Storage Without Failures
Skipping these steps causes first-use breakdowns:
– Inspect tank for hairline cracks (hold against light)
– Repeat full cleaning cycle even if unit looks clean
– Run empty for 30 minutes before adding water
– Check medicine cup seal for hardening—replace if brittle
Optimize for Maximum Cough Relief
Position for Natural Air Circulation
Strategic placement doubles effectiveness:
– Place in room corner for even mist distribution
– Close doors/windows to contain moisture
– Use ceiling fan on lowest setting to circulate vapor
– Direct mist toward your bed—not at walls or furniture
Reduce Energy Costs While Running
Operate efficiently without sacrificing relief:
– Use Setting 1 overnight (uses 260W vs. 400W on MAX)
– Refill at 50% tank level—never top off old water (mineral concentration)
– Unplug when leaving room >2 hours
– Run only in occupied rooms—humidify bedrooms primarily
Final Note: Your Vicks warm mist humidifier delivers instant cough relief when used correctly—but mineral buildup and improper medication use cause 80% of failures. Always fill with distilled water, clean weekly with vinegar, and never add essential oils directly. For persistent congestion, run the unit on Setting 2 in your bedroom with doors closed and a ceiling fan on low. Remember: safety starts with proper placement away from children and water sources, while peak performance requires consistent maintenance. Within days of following these steps, you’ll wake up breathing easier with noticeably less throat irritation.


