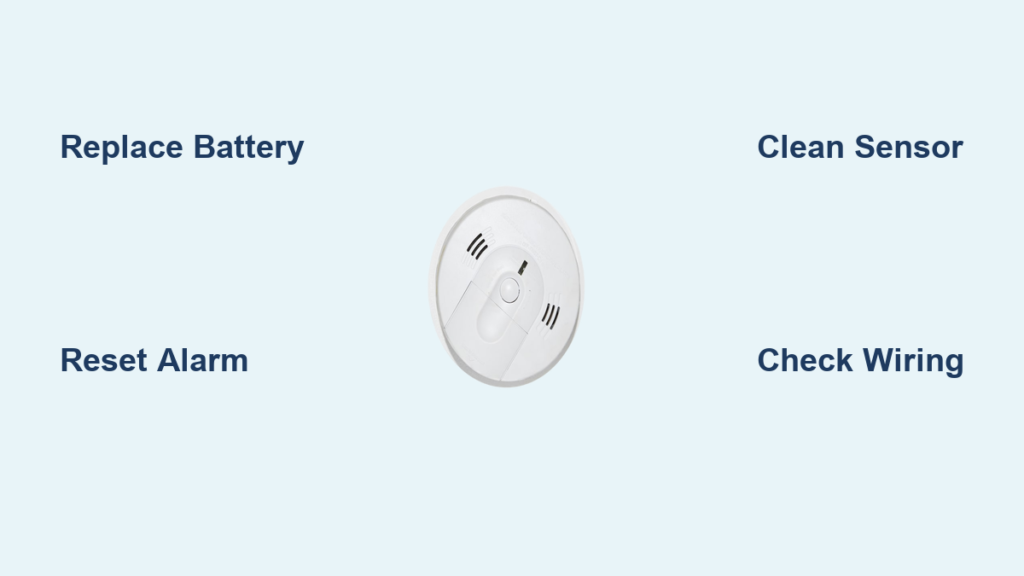
That sudden, high-pitched chirp in the middle of the night, every 30 to 60 seconds, is one of the most maddening sounds in any home. If your smoke detector is beeping intermittently, you are not alone. The most common cause is a low battery, but other issues like dust buildup, electrical interference, or an aging unit can also trigger the alert. Ignoring the chirp is not just annoying, it is a safety risk. A beeping smoke alarm often means it is not operating at full capacity, leaving your home vulnerable.
The good news? In most cases, you can fix the beeping in under 10 minutes with basic tools and a few simple steps. Whether your detector runs on battery power alone or connects to your home wiring, this guide walks you through proven solutions. You will learn how to replace the battery, reset the unit, diagnose wiring issues, and recognize when it is time for a full replacement. The goal is to help you silence the chirp safely and permanently, without compromising your home’s protection.
Replace the Battery to Stop the Chirp
Identify a Low Battery Chirp Pattern
If your smoke detector emits one chirp every 30 to 60 seconds, the power source is likely dying. This pattern is standard across most brands and serves as an early warning before the alarm fails completely. Many models also flash a green or yellow LED alongside the chirp. Replace the battery as soon as possible, since even a temporarily quiet alarm with a weak battery may not activate during a real emergency.
Follow Step-by-Step Battery Replacement
- Turn off power at the circuit breaker if your unit is hardwired, to avoid electrical shock
- Twist the alarm counterclockwise to detach it from the mounting bracket
- Slide open the battery compartment or remove the cover
- Remove the old battery and inspect it for corrosion or leakage
- Insert a fresh battery, making sure the positive and negative ends align correctly
- Reattach the alarm to the bracket and restore power
Once reinstalled, the green LED should glow steadily. If the chirping continues, the battery alone may not be the issue, and you should move on to resetting the unit.
Choose the Right Battery and Maintain It Properly
Use only the battery type specified in your manual, typically a 9V or AA alkaline battery. Avoid rechargeable batteries because their lower voltage can trigger false low-battery signals. Replace batteries annually, ideally when daylight saving time changes. Mark your calendar to prevent midnight chirps. Even hardwired alarms need working backup batteries, which safety codes require to keep the unit functioning during power outages.
Reset the Smoke Detector After Battery Replacement

Perform a Hard Reset on Hardwired Units
A weak battery can leave an error stored in the alarm’s processor, causing it to chirp even after you install a fresh one. A full reset clears this memory:
- Turn off power at the breaker
- Remove the alarm from the bracket and disconnect the power cable
- Take out the battery
- Press and hold the test button for 15 to 20 seconds
- Reconnect power, reinstall the battery, and twist the unit back into place
You may hear one chirp when power returns. That sound is normal, and the alarm should stabilize within a minute.
Reset Battery-Only Models
For standalone units, follow these steps:
- Remove the battery
- Press and hold the test button for 15 seconds
- Reinsert the battery
The alarm may chirp once but should stop. If it continues, clean the contacts or consider replacing the unit.
Clean Battery Contacts and the Internal Sensor

Inspect and Clean the Battery Terminals
Corroded or dirty battery contacts prevent proper power flow and can mimic a low-battery condition. After removing the battery, take the following actions:
- Wipe the terminals with a dry cloth or cotton swab
- For light corrosion, gently scrub with a pencil eraser
- Avoid using liquids or metal tools that could damage the contacts
Make sure the battery sits snugly in its compartment. A loose fit causes intermittent power and unwanted chirping.
Remove Dust and Debris from the Sensor Chamber
Dust, insects, or steam can interfere with the internal sensor and trigger false alerts. Clean the unit safely with these steps:
- Remove the alarm from its mount
- Use a vacuum with a brush attachment to gently suction dust from the vents
- Wipe the exterior with a dry microfiber cloth
- Avoid spraying cleaners directly, since moisture can damage the electronics
Perform this cleaning every 6 months to maintain sensor sensitivity and prevent nuisance chirping.
Use the Silence or Hush Button for Quick Relief
Activate Temporary Silence Mode
Many modern alarms include a “Test/Silence” or “Hush” button. Press and hold it for 5 to 10 seconds to stop chirping for 5 to 15 minutes. This feature works well in these situations:
- Cooking smoke that causes false alarms
- Steam drifting in from a shower
- Brief relief while you troubleshoot the underlying issue
Important note: This button does not fix the root cause. Use it only as a short-term solution while you replace the battery or reset the unit.
Recognize the Limitations of Silence Mode
The silence function will not stop low-battery chirps permanently. If the alarm resumes beeping after the timeout, the battery still needs replacement or the unit may be failing. Do not rely on this button as a long-term fix.
Check Wiring and Electrical Issues in Hardwired Units

Inspect the Hardwired Connections
If your alarm connects to home wiring, loose or damaged wires can cause intermittent chirping. Check the connections using these steps:
- Turn off power at the breaker
- Remove the alarm from the mount
- Pull down the wiring harness and inspect each connection
- Ensure all wires are securely fastened in the connector
A loose neutral or hot wire causes power fluctuations, which triggers the backup battery to engage and chirp.
Diagnose Power Surges and Electrical Interference
Chirping that occurs at the same time each day may result from power grid switching by your utility company. Similarly, if the alarm chirps when you turn on an exhaust fan or heater, electrical interference is likely the cause.
Try these solutions:
– Plug interfering devices into a different circuit
– Install a surge protector for sensitive electronics
– Consult an electrician if the issue continues
These steps protect not only your alarm but other connected devices in your home.
Address Environmental Triggers That Cause False Chirps
Avoid Placement Near Kitchens and Bathrooms
Smoke detectors placed too close to kitchens, bathrooms, or laundry rooms often produce false alarms from steam and humidity. The chirping may not be a malfunction. It may simply be the alarm reacting to environmental conditions.
Ideal placement guidelines:
– At least 10 feet from cooking appliances
– Away from shower vents or humidifiers
– Mounted on the ceiling, away from corners and direct airflow
Relocating the unit can eliminate unnecessary chirping.
Control Humidity and Airflow Around the Detector
High humidity can condense inside the sensor chamber and cause erratic behavior. Use exhaust fans or dehumidifiers in moisture-prone areas. Also, make sure HVAC vents are not blowing directly on the detector, since disrupted airflow can trigger alerts.
Know When to Replace the Smoke Alarm Entirely
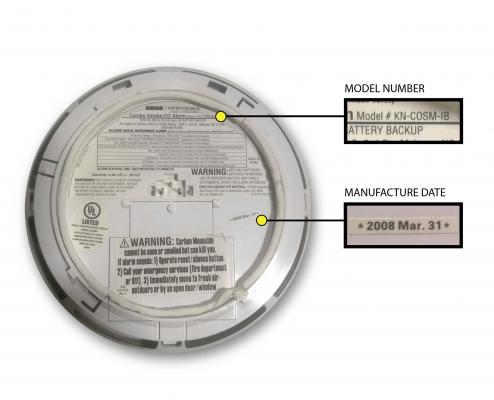
Check the Expiration Date on the Unit
Smoke alarms do not last forever. Replace smoke and heat alarms every 10 years, and carbon monoxide or combination units every 7 years. To find the age:
- Remove the alarm from the mount
- Check the label on the back for a manufacture date or expiration code
If the unit is older than 10 years, replace it immediately. Even with a fresh battery, an aging alarm may not respond reliably during an emergency.
Recognize the Warning Signs of a Failing Unit
Replace your smoke detector if any of these conditions apply:
- It chirps after battery replacement and reset
- The test button fails to trigger an alarm
- The unit shows signs of dust damage, moisture exposure, or physical impact
- The warranty has expired and the alarm keeps malfunctioning
A faulty alarm is worse than no alarm at all. Do not delay the replacement.
Prevent Future Beeping with Simple Habits
Set Annual Maintenance Reminders
Prevention beats emergency fixes every time. Schedule battery checks every 6 months and full replacements once a year. Use calendar alerts or tie the task to seasonal events like holidays or time changes.
Test Every Alarm Monthly
Press the test button once a month to confirm the alarm, battery, and circuitry all work properly. If the sound is not loud and clear, troubleshoot immediately or replace the unit.
Consider Upgrading to Smart Detectors
Smart smoke detectors send alerts directly to your phone, run automatic self-tests, and distinguish between real threats and false alarms. They remove guesswork from maintenance and reduce nuisance chirping in busy households.
Frequently Asked Questions About Smoke Detector Beeping
Why does my smoke detector beep at night?
Nighttime temperature drops can cause a weak battery to voltage-dip below the alarm’s threshold, triggering the chirp. Humidity also rises at night, which can affect sensor readings. Replace the battery immediately and consider whether the unit is near a humidity source.
How do I stop a hardwired smoke detector from beeping?
Turn off power at the circuit breaker, remove the alarm from the mounting bracket, and disconnect the power cable. Replace the backup battery, press and hold the test button for 15 to 20 seconds to reset the processor, then reconnect power and remount the unit.
Will taking the battery out stop the chirping?
Removing the battery silences a battery-only unit, but hardwired alarms will continue to chirp from the home’s electrical supply. Disconnecting the backup battery on a hardwired unit also removes protection during outages, so reinstall it as soon as possible.
How long do smoke detector batteries last?
Most 9V and AA alkaline batteries last about 12 months under normal conditions. Replace them annually, even if the alarm has not started chirping, to maintain reliable protection.
How do I know if my smoke detector is expired?
Check the back of the unit for a manufacture date or expiration code. Smoke and heat alarms expire after 10 years, while carbon monoxide and combination units expire after 7 years.
Can dust really make a smoke detector beep?
Yes. Dust and small insects can enter the sensor chamber and disrupt the internal photoelectric or ionization sensor. Vacuum the unit with a brush attachment every 6 months to keep the sensor clear.
Key Takeaways for Silencing a Beeping Smoke Detector
A chirping smoke detector is a warning signal, not just a nuisance. Low battery remains the most common cause, but persistent chirping after a battery swap often points to deeper issues like dust buildup, wiring problems, sensor failure, or an aging unit. Follow this guide to address the chirp quickly and safely, and remember to test every alarm monthly. Never disable a smoke alarm permanently, since your life and your family’s safety depend on it. When troubleshooting fails or the unit is past its lifespan, replace the alarm without delay. Reliable fire protection is always worth the investment.