That relentless chirping every minute is more than annoying. It is your hardwired smoke detector telling you the backup battery is dying. Even though these units pull power from your home’s electrical system, the battery backup kicks in during outages. Without it, your family has zero fire protection when the power goes out. Swapping that battery takes only minutes, but doing it wrong can leave you vulnerable or damage the unit. In this guide, you will learn how to identify your model, remove the detector safely, install a fresh battery correctly, and test everything before you walk away.
Identify Your Smoke Detector Model
Before you climb the ladder, check the brand and model number. Look at the back or side of the unit for a label. Common manufacturers include Kidde, First Alert, and BRK. Knowing your exact model determines the battery type and how the compartment opens. Some units twist off the mounting plate. Others require a screwdriver to release a locking tab. This single step prevents accidental damage and saves you time mid-project.
Check the Battery Type and Access Style
Hardwired detectors use different battery types depending on the design. Most use a 9-volt battery, especially front-loading models. Some compact or rear-loading units use AA or AAA batteries instead. If you want fewer replacements, look for long-life lithium options rated for 10 years.
Battery compartments also vary. Front-loading doors pop open with a simple press. Side-door compartments use a push tab. Rear-loading designs require you to remove the entire unit before flipping it over to access the back.
Recognize the Low Battery Signal
A dying backup battery triggers a single chirp every minute. Many models also flash an amber or red LED with each beep. Never ignore this warning. A weak battery means the alarm will not function during a power outage, which is exactly when you need it most.
Prepare for Safe Battery Replacement
Hardwired detectors connect to your home’s 120V electrical system. Even though the battery is the only thing you are touching, careless handling can lead to shocks or unit damage. Take a few minutes to set up properly.
Turn Off Power at the Breaker
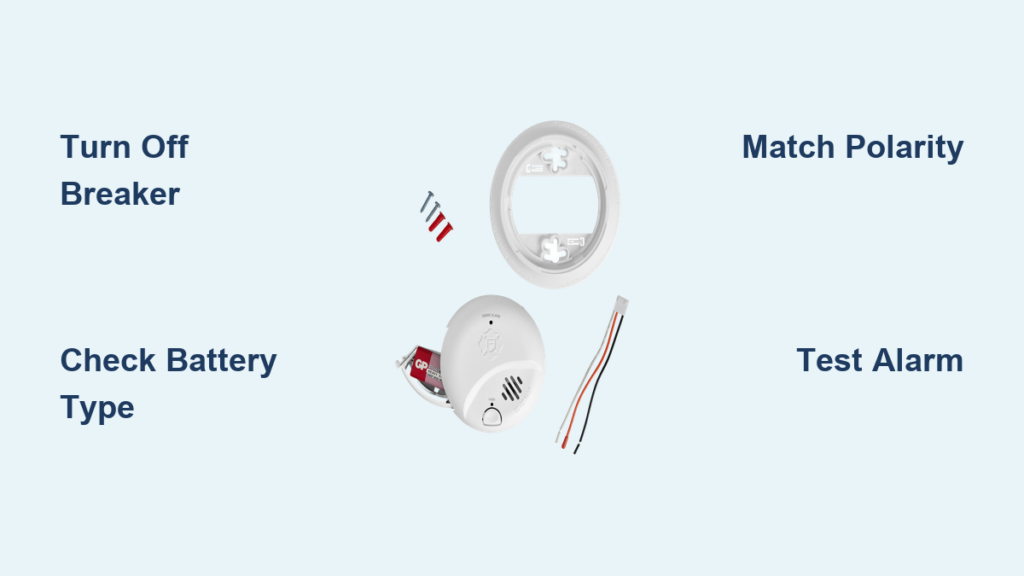
Flip the circuit breaker that controls your smoke detectors. Look for a label like “smoke alarms” or the room where the unit is installed. Switch it fully to the off position. This step is critical if your model requires disconnecting the wiring harness.
⚠️ Never touch the wires inside the wall plate. Only disconnect the plug attached to the back of the detector. The mounting base remains live even with the breaker off.
Gather Your Tools
You will need a few basic items before you start:
– Stable step ladder tall enough to reach the ceiling safely
– New battery of the correct type (Energizer or Duracell recommended)
– Flathead screwdriver for tamper-resist tabs or release slots
Skip the dollar-store batteries. Cheap cells degrade faster and often fail right when you need them.
Remove the Smoke Detector from the Ceiling
Most hardwired units mount to a base with a twist-lock mechanism. How you remove yours depends on the model.
Twist-Off Removal Method
For standard twist-off models, stand on your ladder and grip the unit firmly. Turn it counterclockwise, usually about a quarter to half turn. Look for the “Off” arrow on the mounting plate as a guide. Once loose, gently pull the detector down. Do not yank it; the wiring harness is still attached.
Screwdriver-Assisted Release
Some models include a tamper-resist tab or a small slot on the side. Insert a flathead screwdriver into the slot and gently push while turning the unit anticlockwise. This releases the locking mechanism. If a tamper-resist pin is engaged, remove it first before attempting to twist the unit.
Disconnect the Wiring Harness

Once the detector hangs loose, you will see a plastic connector plugged into the back.
Unplug the Quick Connect Harness
Squeeze the plastic prongs on the connector and pull it straight out from the detector. The wall-mounted base stays live, so keep your hands on the plug only. Newer models may have a wiring arm that you must depress before the harness releases.
✅ Disconnect only the plug. Never touch the wires coming out of the ceiling.
Setting the detector on a flat surface now gives you safe access to the battery compartment.
Open the Battery Compartment
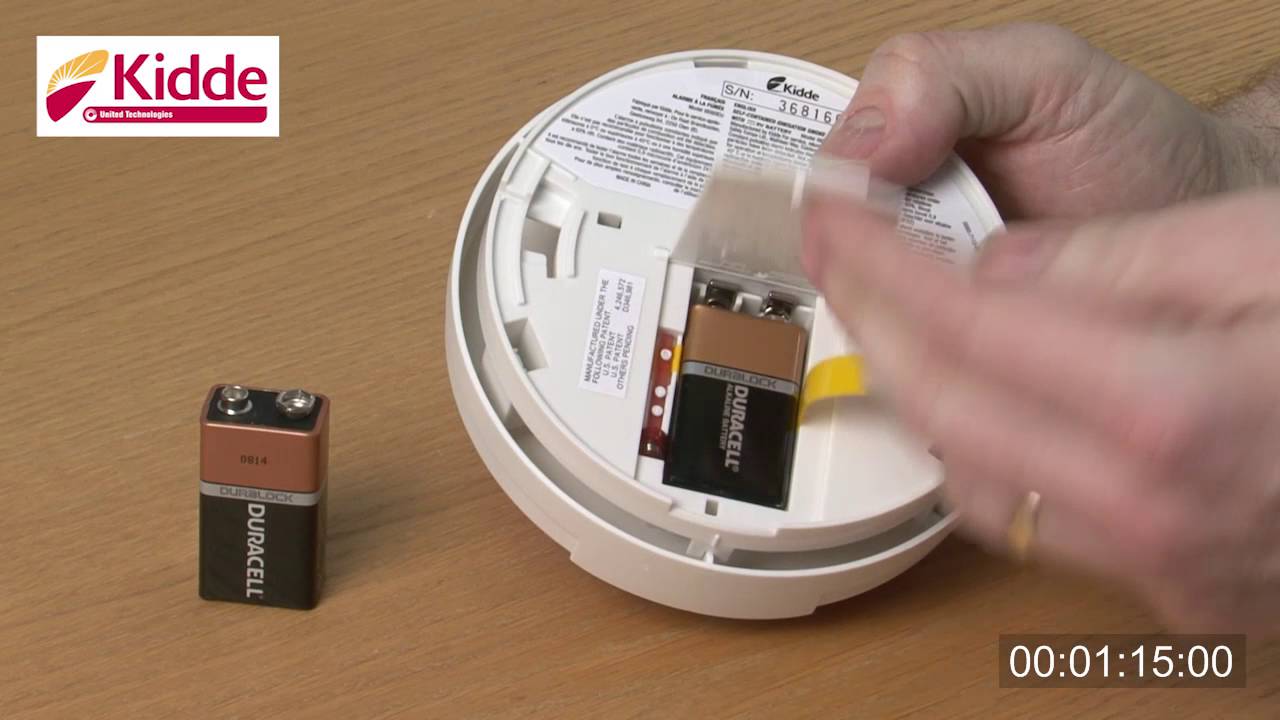
The opening method depends on whether your model is front-loading, side-door, or rear-loading.
Front and Side-Door Models
For front-loading Kidde models, press down on the battery door and release. The door pops open. Pull the old battery straight out. For side-door designs, push the release tab and slide the compartment out.
Rear-Loading Models
Flip the unit over after removal. Locate the battery cover on the back and open it according to the manufacturer’s instructions.
Install the New Battery Correctly
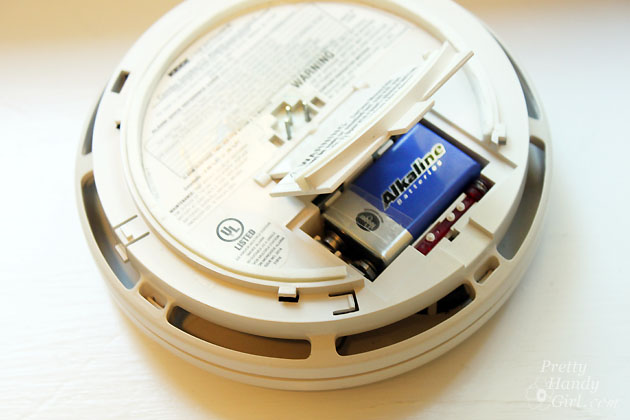
Sliding in a fresh battery is simple, but polarity mistakes cause real headaches. A reversed battery can trigger a continuous alarm or prevent the unit from working at all.
Check Polarity Markings First
Look inside the compartment for plus (+) and minus (–) symbols or a yellow polarity label. This shows the correct orientation before you insert anything.
Match the Battery to the Contacts
For 9-volt batteries, align the terminals with the metal clips. For AA or AAA batteries, match the flat end to the spring contact and the nub end to the flat contact.
❌ Reverse polarity will cause a continuous alarm or stop the unit from powering on.
Insert the Battery and Close the Door
For Kidde rear-loading models, press the red battery reminder finger down first, then slide the battery into place. Make sure the connectors line up with the metal plates. The battery should snap securely into position. If the door will not close, the battery is likely missing or installed backward.
Reconnect and Reinstall the Detector
With the new battery in place, it is time to put everything back together.
Reconnect the Wiring Harness
Align the three pins on the connector with the slots on the back of the detector. Squeeze the plastic prongs and push firmly until the harness clicks into place. A loose connection can cause malfunctions or false alarms.
Mount the Unit Back on the Plate
Align the detector with the mounting bracket. Turn it clockwise until it locks into position. Follow the “On” arrow on the plate for proper alignment. The unit should feel snug with no wobbling.
Test the Smoke Detector Immediately
Skipping this step is a mistake. Testing confirms the battery works, the wiring is correct, and the hardwired power is restored.
Press and Hold the Test Button
Hold the test button for 5 to 10 seconds. A loud alarm confirms everything is functioning. For Kidde models, test before reinstalling to verify the unit runs on battery only.
Troubleshoot a Silent Test
If no sound occurs, reopen the battery compartment. Check that the red reminder finger is pressed down, verify battery polarity, and confirm the wiring harness is fully seated. Repeat the test after making corrections.
Maintain Your Smoke Detector System
Replacing one battery is not enough. A well-maintained system keeps your entire home protected.
Replace All Batteries at Once
Hardwired detectors are interconnected. If one battery is dying, the others will follow soon. Replace every backup battery in the system at the same time to prevent repeat chirping and ensure consistent protection.
Follow a Consistent Schedule
| Frequency | Action |
|---|---|
| Every 6 months | Replace all batteries (spring and fall) |
| Annually | Minimum replacement per Kidde |
| Daylight saving changes | Easy reminder: “change the battery when you change the clock” |
Label each detector with the replacement date using tape or a marker for easy tracking.
Troubleshoot Common Problems
Even careful homeowners run into issues. Here is how to solve the most frequent ones.
Chirping Continues After Battery Change
A persistent chirp usually means a loose connection, an incorrect battery type, or leftover dust in the compartment. Recheck the wiring harness, confirm the battery matches manufacturer recommendations, and clean the compartment with compressed air.
Battery Compartment Will Not Close
The battery may be inserted backward, or the red reminder tab may not be pressed down. On Kidde models, the door will not latch without a battery properly seated.
Continuous Alarm After Installation
Reverse polarity is the most common cause. Turn off the breaker, remove the battery, and reinstall it with the correct orientation. Test again before walking away.
Frequently Asked Questions About Hardwired Smoke Detector Batteries
How often should I change the battery in a hardwired smoke detector?
Replace the battery every 6 to 12 months, or immediately when the low-battery chirp starts. Kidde recommends replacing batteries at least once a year. Many homeowners tie the task to daylight saving time changes for easy remembering.
Do hardwired smoke detectors need batteries?
Yes. Even though hardwired units draw power from your home’s electrical system, they require a backup battery to function during power outages. Without a working battery, the alarm cannot protect your home when the power fails.
Why is my hardwired smoke detector chirping even after I changed the battery?
Common causes include a loose wiring harness, incorrect battery polarity, dust in the compartment, or a defective new battery. Recheck the connection, confirm the battery orientation, and try a different battery if the chirping continues.
What type of battery does a hardwired smoke detector use?
Most use a 9-volt battery, though some models use AA or AAA batteries. Check the label on your specific unit before purchasing a replacement. Long-life lithium batteries are a good option for extended maintenance intervals.
Can I replace the battery without turning off the breaker?
You can replace the battery without flipping the breaker if you do not disconnect the wiring harness. However, turning off the breaker adds a layer of safety and is recommended for full removal and reinstallation.
Key Takeaways for Changing a Hardwired Smoke Detector Battery
Swapping a backup battery takes only minutes, but every step matters. Identify your model first to avoid damage during removal. Turn off the breaker for safety and never touch the wires inside the wall plate. Check polarity carefully before inserting the new battery, and always test the unit before walking away. Replace every battery in your interconnected system at once to prevent repeat alerts.
Your next step is simple. Grab a fresh 9-volt or AA battery, set up your ladder, and spend five minutes protecting your home. A working smoke detector is one of the easiest safety upgrades you can make today.