A working smoke detector can mean the difference between life and death during a home fire. Yet many people assume their alarm is functional until a real emergency proves otherwise. Knowing how to check smoke detector performance properly is a simple, life-saving habit every homeowner should build. Whether your unit runs on batteries or is hardwired into your electrical system, it needs regular testing, cleaning, and eventual replacement. In just 30 seconds per alarm, you can verify your family’s protection. This guide walks you through the correct way to test your device, interpret warning signals, swap batteries, clean sensors, reset faulty units, and recognize when replacement is overdue.
Test Your Smoke Detector Monthly
Press and Hold the Test Button
The fastest way to check smoke detector function is by pressing and holding the test button for about 5 seconds. If the battery, circuitry, and horn are all working, you will hear three loud beeps followed by a pause. A weak or absent sound means the unit likely needs a new battery or full replacement.
Before you start, take a few quick precautions:
– Alert everyone in the home so the loud alarm does not cause alarm
– Place any monitored security system into test mode if applicable
– Confirm that all interconnected alarms sound together
Verify Interconnected Alarms Respond
Homes with multiple linked detectors should respond as a system. Pressing the test button on one unit should trigger every alarm in the network. This confirms the interconnect wiring or wireless link is intact. If only one unit sounds, check power sources, inspect wiring on hardwired models, and confirm all alarms are compatible. Retest after any adjustment.
Failure of linked units to respond often points to a wiring fault, a failing device, or a mix of incompatible models.
Confirm Visual and Audio Signals
During the test, listen for a loud, consistent alarm and watch for a flashing strobe light, which is critical for household members with hearing impairments. On smoke-only models, the sound should stop as soon as you release the button. Both signals confirm the unit is fully operational beyond just the basic horn.
Recognize Power and Status Lights
Green Light = Normal Operation
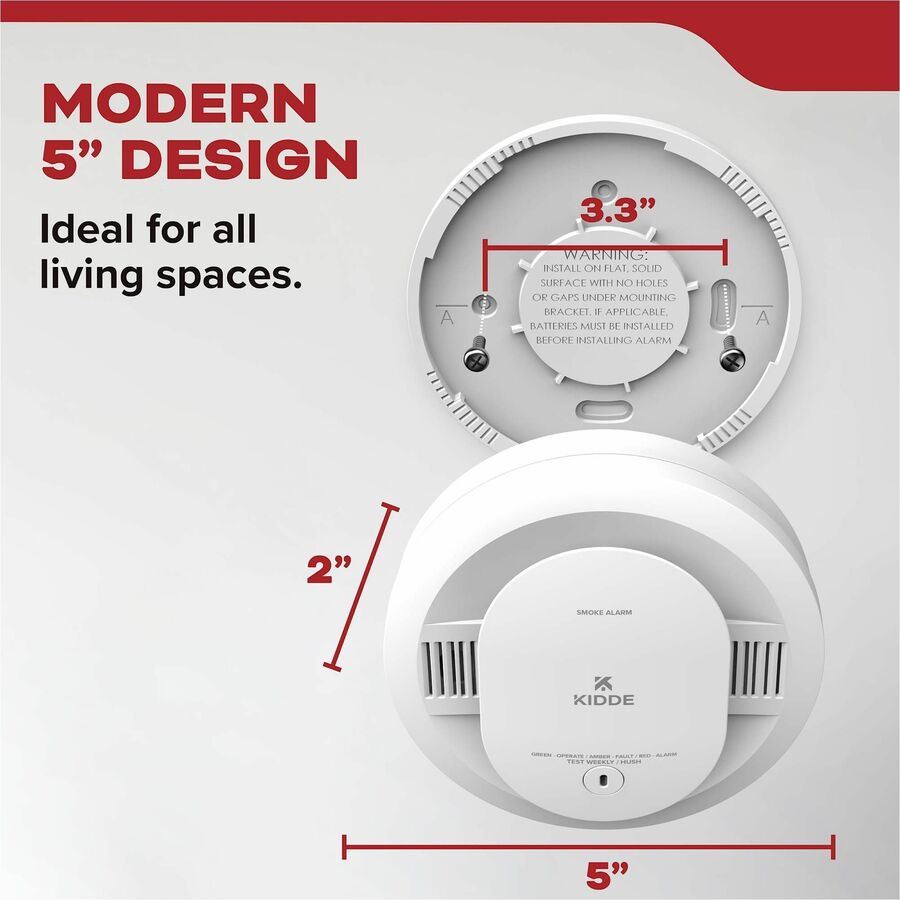
A steady green LED on a hardwired alarm means it is receiving AC power from your home’s electrical system. On battery-operated models, a quick flash every 30 to 45 seconds indicates the battery is active. Remember, however, that blinking or solid lights do not guarantee functionality. Only pressing the test button can confirm that the alarm will actually sound in an emergency.
Amber or Red Light = Warning
Different colors signal different conditions:
– Amber light signals a low battery or system error. Replace the battery or the entire unit.
– Red light indicates active danger. Evacuate immediately and investigate the source of smoke.
These color codes help you react quickly to potential threats without confusion.
Decode Chirping Patterns
Chirps communicate specific problems:
– Single chirp every 30 to 60 seconds means low battery
– Three chirps every 60 seconds means the unit needs cleaning
– Chirping after a battery swap may mean the unit needs a manual reset or has reached end-of-life
Never ignore chirps. They are early warnings designed to prevent failures.
Replace Batteries Twice a Year
Don’t Wait for the Chirp
Proactive battery replacement prevents those middle-of-the-night beeping sessions. Replace batteries twice a year, ideally when clocks change for daylight saving time. This habit ensures continuous protection.
Guidelines by alarm type:
– Battery-powered alarms: Replace batteries every 6 months
– Hardwired alarms: Replace the backup battery annually
Use high-quality alkaline or lithium batteries. SimpliSafe® smoke detectors, for example, use a CR-123A lithium battery.
Stop Post-Replacement Chirping
If your alarm keeps chirping after a fresh battery installation, follow these steps:
1. Remove the batteries completely
2. Press and hold the test button for 15 seconds to drain residual power
3. Insert fresh batteries
4. Reattach and test again
This reset clears false low-battery signals caused by leftover charge in the circuitry.
Secure the Battery Compartment
After swapping batteries, confirm the battery drawer closes fully, the alarm locks onto its mounting bracket, and the test button produces a proper alarm. Loose connections are a common cause of persistent chirping.
Reset a Non-Working Smoke Detector

Reset Battery-Powered Units
If your detector fails to respond to testing, try a full reset:
1. Remove the unit from its mounting bracket
2. Take out the battery
3. Press and hold the test button for 15 to 20 seconds
4. Reinstall a fresh battery
5. Reattach to the mount and test
This clears memory errors and resets the internal circuitry.
Reset Hardwired or Plug-In Models
Hardwired alarms need a power cycle reset:
1. Turn off power at the circuit breaker
2. Remove the backup battery if present
3. Press and hold the test button for 15 to 20 seconds
4. Restore power at the breaker
5. Reinstall the backup battery and test
This full power cycle often resolves stubborn electronic glitches.
Clean Detectors Monthly and Annually
Vacuum Vents with a Soft Brush
Dust and debris can block sensors and trigger false alarms. Once a month, use a vacuum cleaner with a soft brush attachment to gently clean around the vents and exterior. Avoid harsh chemicals or water, which can damage internal components.
Deep Clean Once a Year
At least once a year, or more often in dusty environments, perform a deeper clean:
1. Remove the alarm from its mount
2. Use compressed air to blow out internal vents
3. Gently vacuum with a soft brush
4. Wipe the exterior with a dry cloth
Critical warning: Never paint over smoke detectors. Paint can seal sensors and permanently disable the unit.
Respond to Cleaning Alerts
If your alarm chirps three times every 60 seconds, it is signaling that it needs cleaning. After cleaning, always retest to confirm the unit works properly.
Replace Alarms Every 10 Years
Check the Manufacture Date
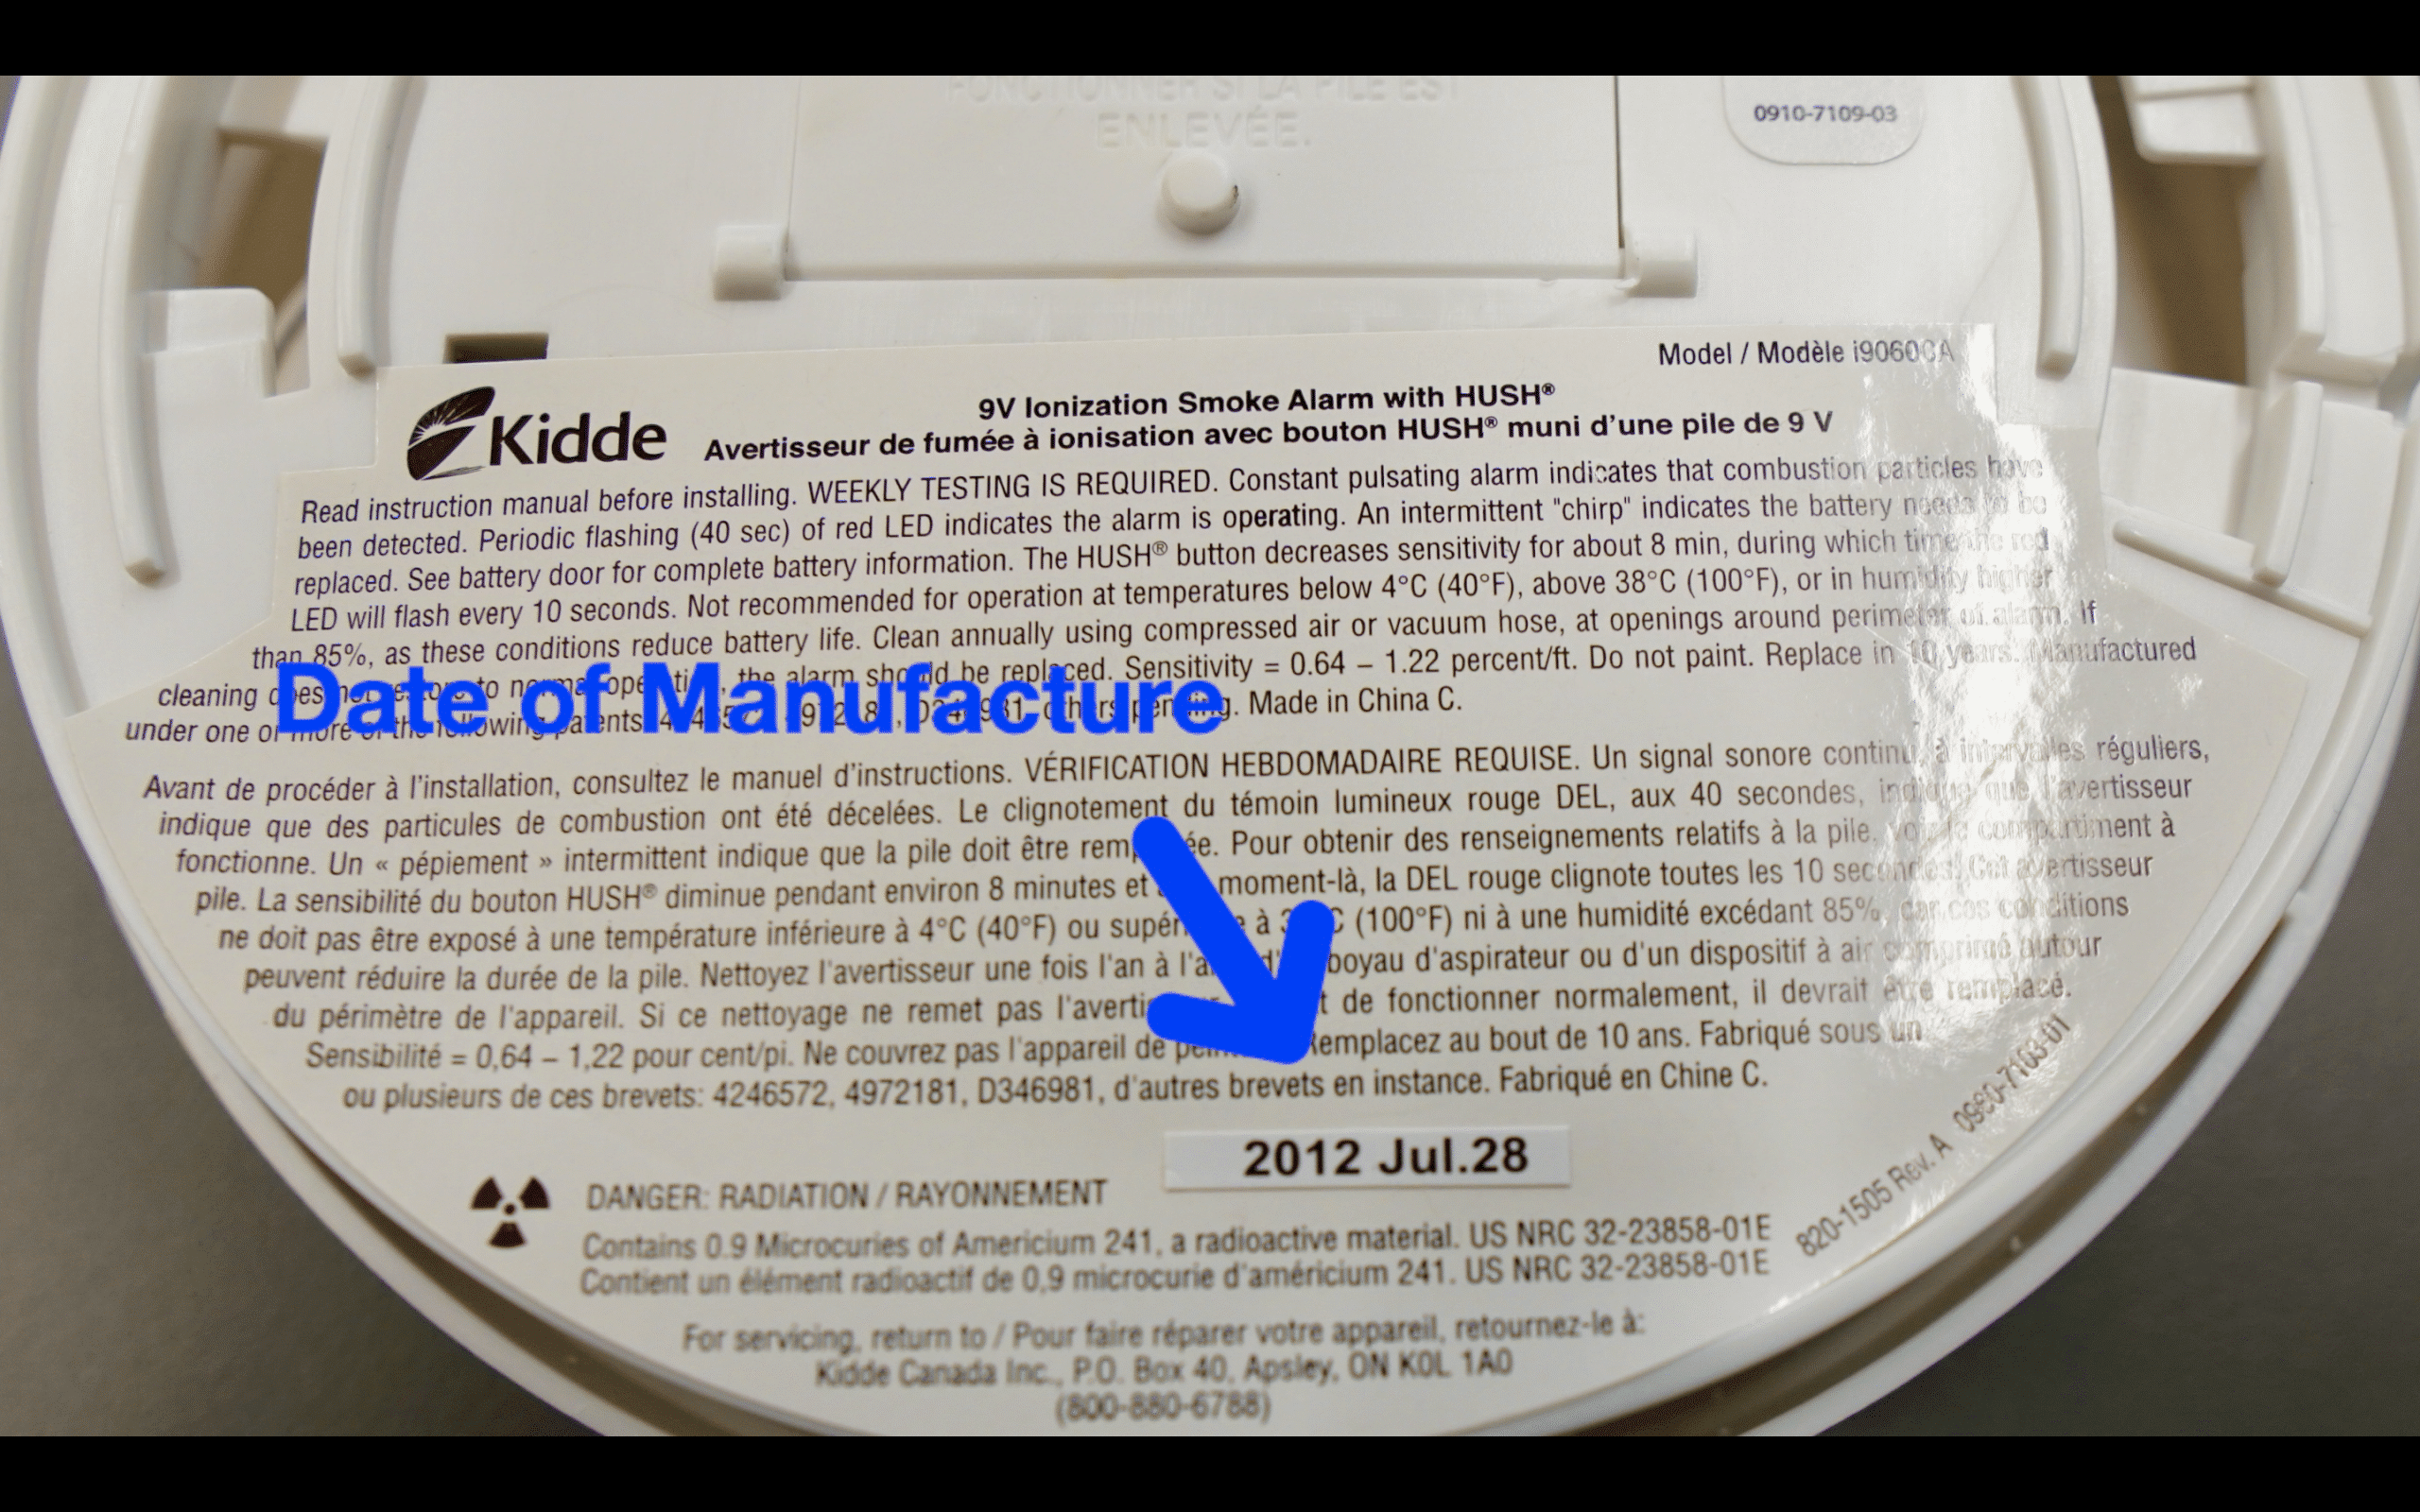
Every smoke detector has a limited service life. Flip the unit and locate the manufacture date on the back. Replace it 10 years from that date, regardless of whether it still seems to work. Some models last only 5 to 7 years, so always check manufacturer specifications.
Replace Immediately If Any of These Apply
- The test button produces no sound at all
- The unit chirps every 30 to 60 seconds (an end-of-life signal, not low battery)
- The alarm was exposed to fire or heavy smoke
- The unit makes erratic or unusually weak sounds
An expired alarm is unreliable even if it appears functional during a test.
Never Downgrade Hardwired Units
If you are replacing a hardwired alarm, install another hardwired model. Switching to a battery-only unit reduces safety and may violate local fire codes.
Avoid Dangerous Testing Methods
Never Use an Open Flame
Do not use matches, lighters, or candles to test your smoke detector. This risks igniting nearby flammable materials and can damage the sensor permanently. The test button is the only safe and recommended method.
Don’t Disable the Alarm for Cooking Smoke
Steam or cooking fumes often trigger false alarms. Never remove the battery or disable the unit. Instead, use the Hush button to temporarily silence it while you ventilate the area.
Use the Hush Feature for False Alarms
Silence Without Compromising Safety
Press the Hush or Test/Silence button when light smoke triggers the alarm. The unit will silence for 8 to 10 minutes and then automatically reset and resume monitoring. This gives you time to clear the air without removing your protection.
Handle Persistent Nuisance Alarms
If false alarms keep happening, follow this sequence:
1. Press Hush to silence
2. Clean the detector thoroughly
3. Retest to confirm proper function
4. Contact manufacturer support such as Kidde or First Alert if problems continue
Frequent false alarms may also indicate poor placement. Avoid installing detectors directly next to kitchens or bathrooms.
Follow SimpliSafe® Specific Steps
Test Within the System’s Test Mode
SimpliSafe® users should follow a specific protocol to check smoke detector function through the system:
1. Disarm the system and enter Test Mode via the Keypad menu
2. Press the smoke detector’s test button for exactly 1 second
3. Listen for 3 to 4 loud chirps
4. Confirm the Base Station announces “Smoke Detector”
5. Exit Test Mode using the left arrow key
Warning: If real smoke is detected during Test Mode, the monitoring center will treat it as an emergency and respond accordingly.
Optimize Signal Strength
Reliable communication depends on proper Base Station placement:
– Place the Base Station at least 3 feet off the ground
– Use glass or wood surfaces, not dense materials
– Keep the Base Station away from other wireless devices
– Avoid cabinets or enclosed spaces
The SimpliSafe® smoke detector uses a CR-123A lithium battery with a life expectancy of 3 to 5 years.
Follow Legal Safety Requirements
Ontario, Canada Rules
Ontario law requires working smoke alarms:
– On every level of the home
– Outside all sleeping areas
– In each bedroom for maximum protection
Failure to comply can result in fines and, more importantly, increased risk to your household.
Build a Yearly Fire Safety Routine
Monthly: Test All Alarms
Spend 30 seconds per unit. Test on the first of each month, or rotate weekly to spread out the noise across the household.
Biannual: Change Batteries
Twice a year, replace batteries, vacuum detectors, and confirm mounting security. The clock-change weekends are a perfect anchor.
Annual: Deep Clean and Inspect
Once a year, use compressed air, wipe down exteriors, and confirm all lights and sounds work as expected.
Every 10 Years: Replace Units
Mark replacement dates on your calendar. Old detectors often fail silently, giving you no warning.
Troubleshoot Non-Responsive Alarms
Confirm the Power Source
For hardwired units, check the circuit breaker, inspect wiring connections, and contact a licensed electrician if issues persist. For battery models, replace the battery immediately and try a different brand if needed.
Reset and Clean
If power is confirmed, perform a proper reset, clean the vents thoroughly, and test again. If the alarm still does not respond, replace the entire unit.
When to Call Support
Contact manufacturer support if:
– The unit chirps after battery replacement and a full reset
– False alarms persist after thorough cleaning
– The interconnect system fails repeatedly
Your warranty may cover a free replacement.
Frequently Asked Questions About Smoke Detector Checks
How often should I check my smoke detector?
You should test your smoke detector once per month and replace the batteries twice a year. Deep clean the unit annually and replace the entire alarm every 10 years.
What does it mean when my smoke detector chirps every 30 to 60 seconds?
A single chirp every 30 to 60 seconds typically signals a low battery. Replace the battery immediately. If the chirping continues after a fresh battery and a full reset, the unit may have reached end-of-life and needs replacement.
Can I test a smoke detector with a candle or match?
No. Never use an open flame to test a smoke detector. This can damage the sensor or ignite nearby materials. The test button is the only safe method recommended by manufacturers.
How do I stop my smoke detector from chirping after I changed the battery?
Remove the battery, press and hold the test button for 15 seconds to drain residual power, then install a fresh battery. Make sure the battery drawer is fully closed and the alarm is securely attached to its mounting bracket.
How do I know if my smoke detector is hardwired or battery-powered?
Hardwired alarms are connected to your home’s electrical system and usually have a steady green LED light when receiving power. Battery-powered models lack the green light and instead flash briefly every 30 to 45 seconds. You can also check whether the unit has a backup battery compartment.
When should I replace my smoke detector entirely?
Replace your smoke detector 10 years after the manufacture date printed on the back of the unit. Replace it sooner if the test button produces no sound, if it chirps constantly after a battery change, or if it was exposed to fire or heavy smoke.
Key Takeaways for Checking Smoke Detectors
Test. Verify. Protect.
A few seconds of attention each month can save lives. Test monthly, replace batteries twice a year, clean monthly with a deep clean annually, and replace every 10 years. Use the Hush feature for false alarms rather than disabling the unit.
Make It a Family Habit
Set calendar reminders, involve everyone in the household, and post a checklist near your breaker box or in a common area. A working alarm is your first line of defense, but only if you maintain it.
Don’t Wait for an Emergency
The worst time to discover your smoke detector is not working is during an actual fire. Check your smoke detectors today, replace any expired units, and make this simple task a non-negotiable part of your home safety routine.