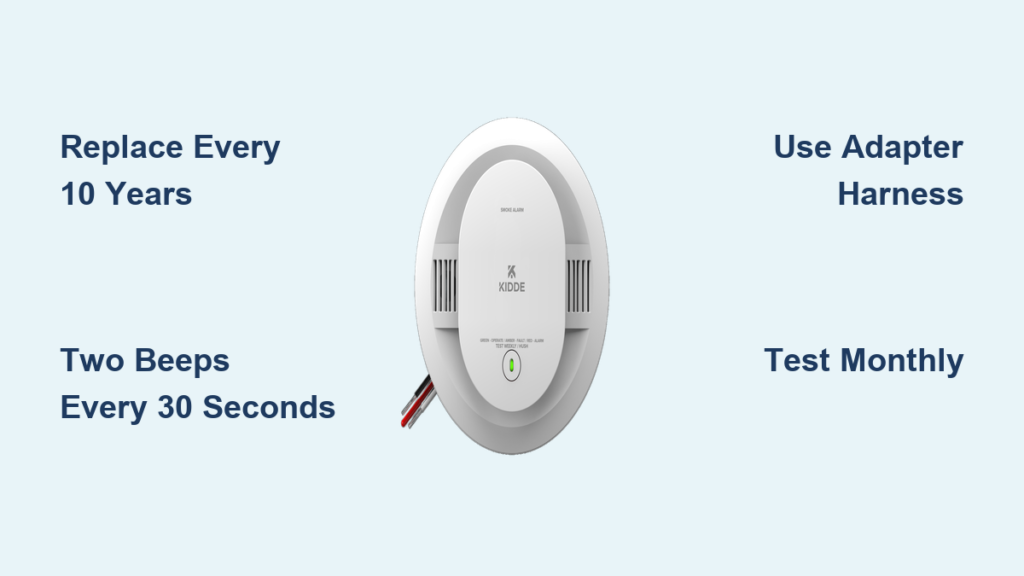
Hearing two beeps every 30 seconds from your Kidde alarm? That’s not a low battery—it’s an end-of-life warning. After 10 years, even working detectors lose sensor sensitivity, leaving your home vulnerable. The good news: replacing a Kidde smoke detector is a beginner-friendly project that takes under 30 minutes. This guide covers how to identify replacement time, remove the old unit safely, install the new alarm, and keep it working reliably for the next decade.
Identify When Your Kidde Detector Needs Replacement
Follow the 10-Year Replacement Rule
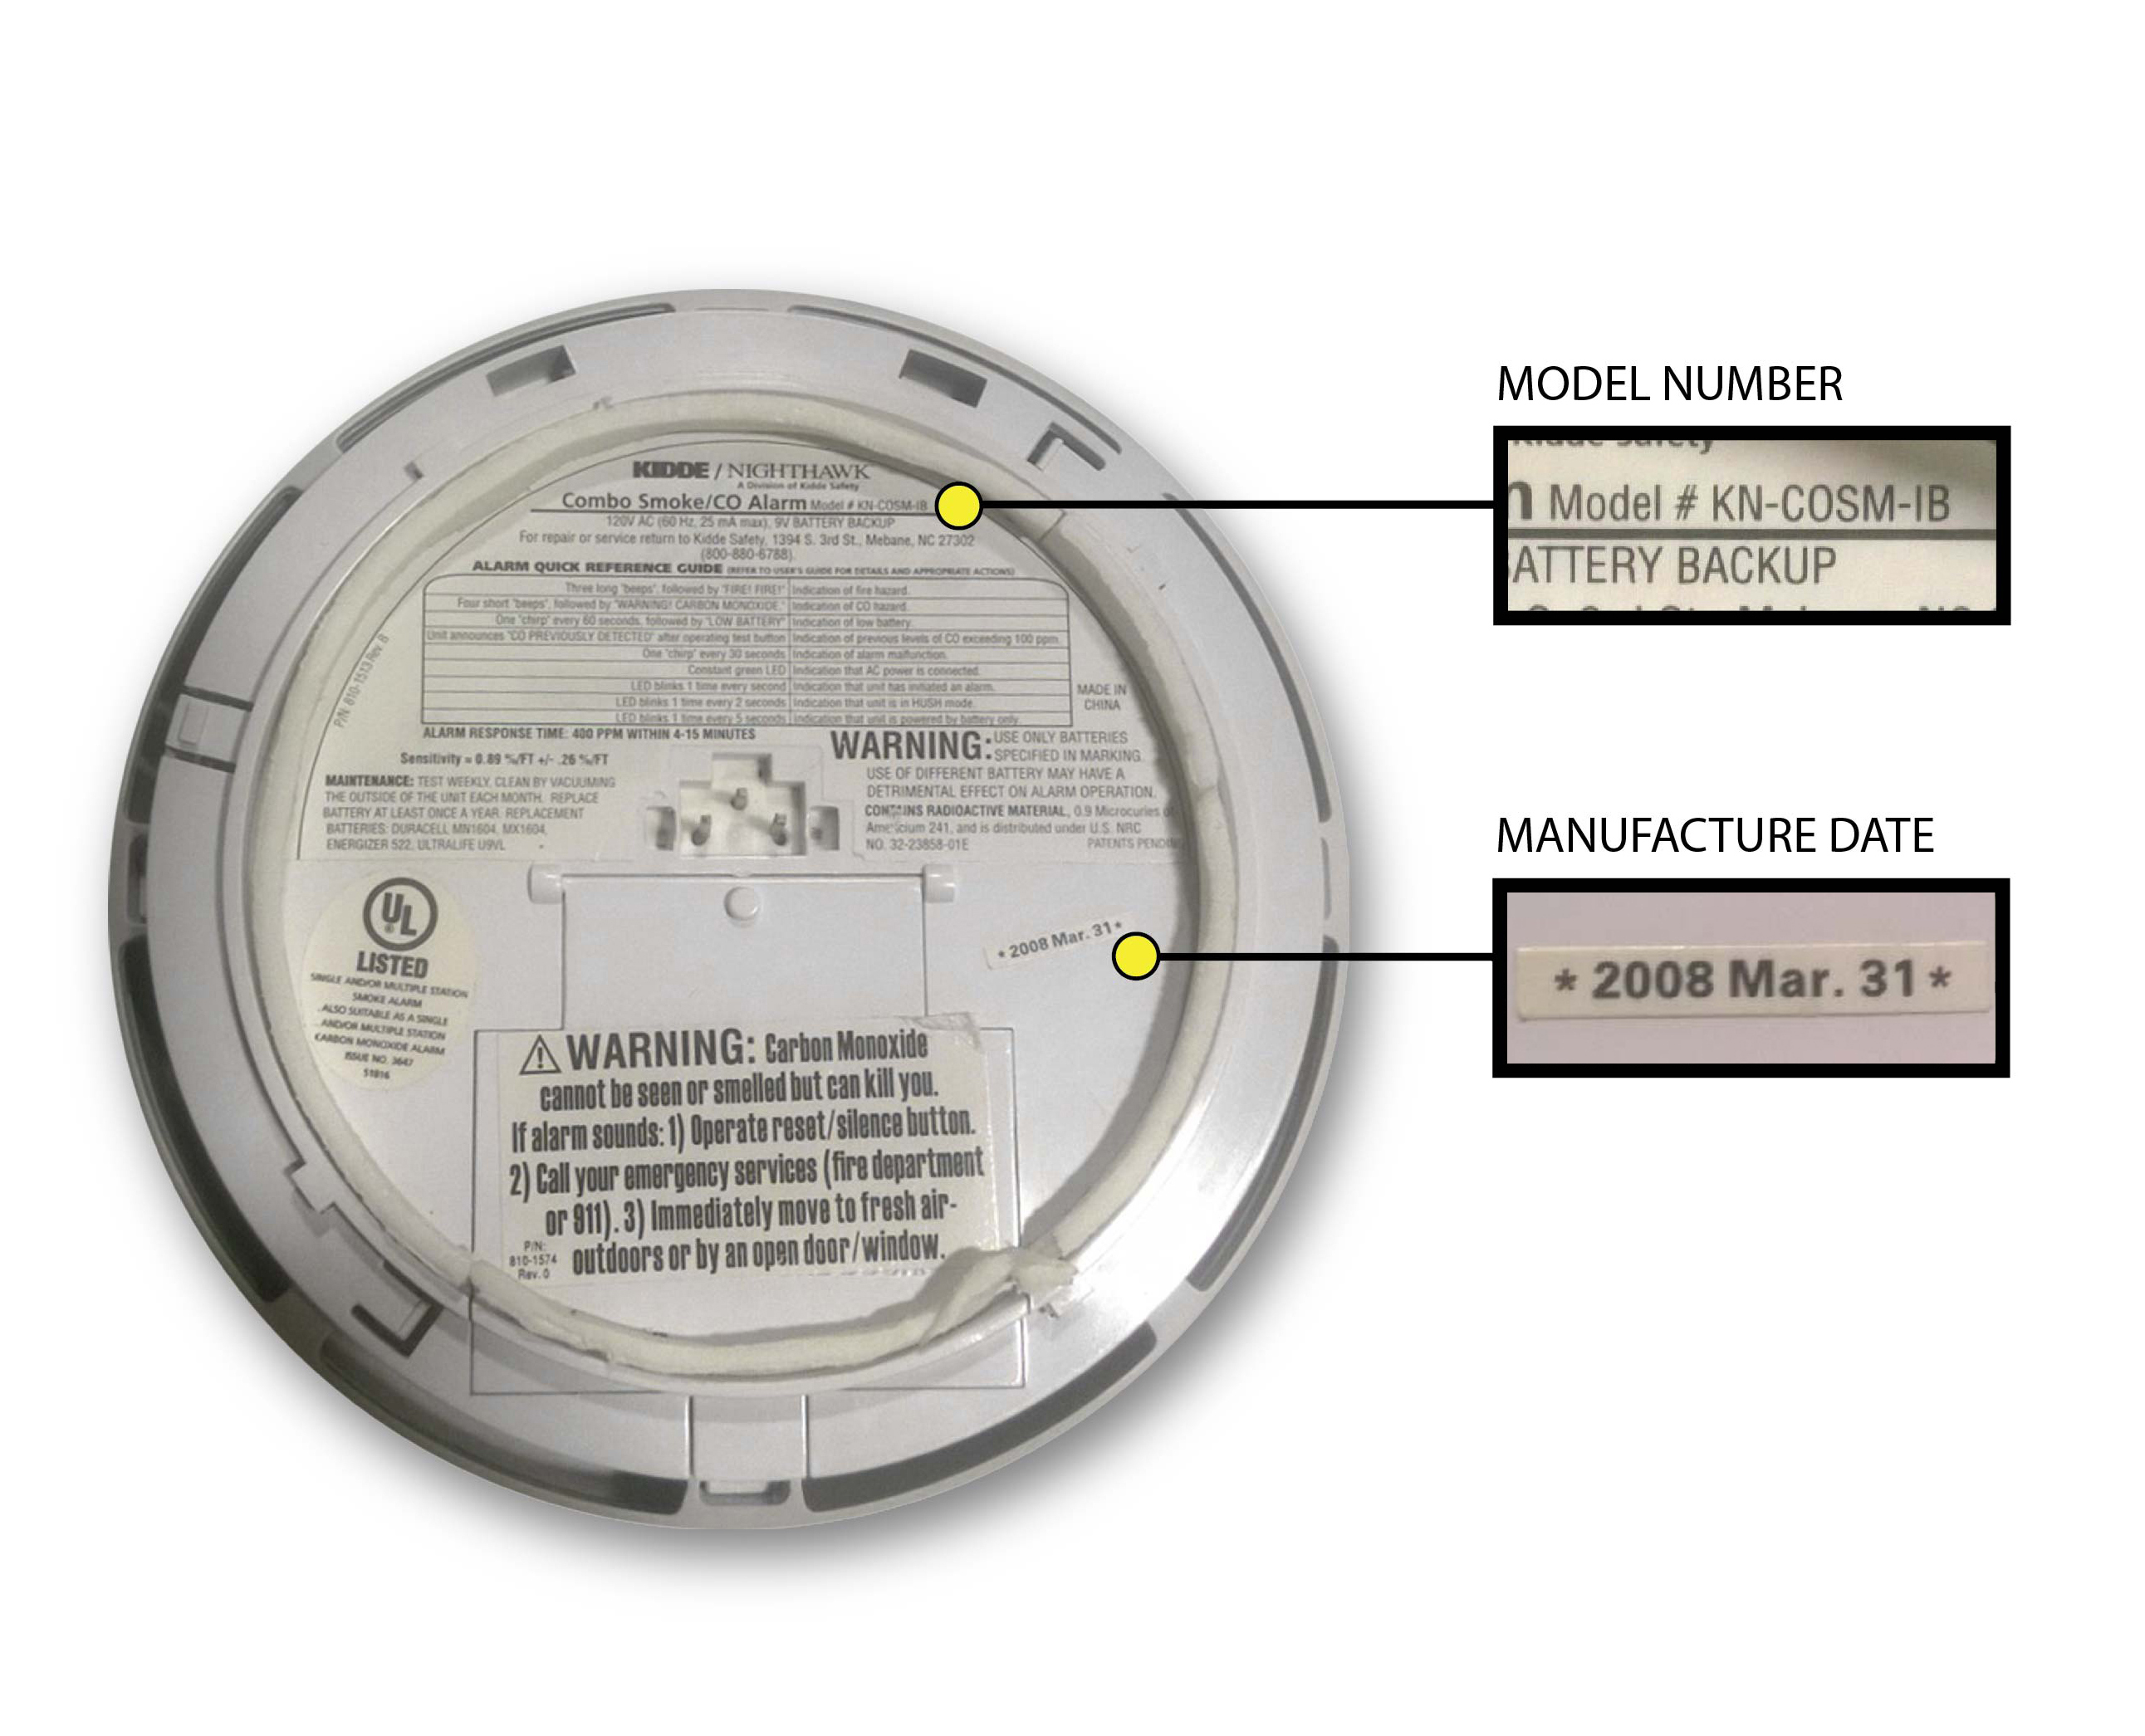
Every Kidde smoke detector has a maximum lifespan of 10 years from the manufacture date. Check the back of the unit for this date. Once expired, replace it immediately—even if it seems fine. Sensors degrade silently, and dust buildup further reduces detection accuracy.
Recognize End-of-Life Warning Signals
- Two beeps every 30 seconds: This signals end-of-life. Replace the detector now.
- Intermittent chirping: Usually points to a low battery. Swap batteries before assuming the unit is faulty.
- No response to test button: If the alarm stays silent during testing, replacement is likely needed.
Understand Why Timely Replacement Matters
Expired detectors can fail without warning during real emergencies. Newer models feature improved sensing technology, fewer false alarms, and better interconnectivity. Upgrading keeps your home aligned with current fire safety standards.
Prepare Before Removing the Old Detector
Locate the Model Number and Date
Remove the detector from its base and check the back for the model number (such as i12040) and manufacture date. Enter the model number on Kidde’s website to confirm compatible replacements and adapter harness availability.
Disengage the Tamper-Resist Feature
Some Kidde models include a tamper-resist pin or tab that blocks removal.
- Pin type: Pull the pin straight out using long-nose pliers.
- Tab type: Press down on the tab while rotating the alarm toward the OFF arrow.
Skip this step and the unit won’t budge.
Gather the Essential Tools
You will need:
- Non-contact voltage tester
- Screwdriver
- Long-nose pliers
- Compressed air
- Vacuum with soft brush attachment
- Wire nuts or Wago 221 lever nuts (if rewiring)
- Replacement alarm or adapter harness
Cut Power for Hardwired Units
Flip the circuit breaker supplying the alarm. Confirm zero voltage with a non-contact tester at the wiring harness before touching any wires.
Remove the Old Smoke Detector
Take Down Battery-Operated Models
- Rotate the unit counterclockwise toward the OFF arrow.
- Pull it gently down from the mounting base.
- No power shutdown needed—safe to handle right away.
Remove Hardwired or Interconnected Units
- Rotate the alarm counterclockwise off the base plate.
- Squeeze the locking arms on the quick connector and pull to disconnect the AC harness.
- Double-check with a voltage tester that no current is present.
- Set the old unit aside for disposal.
Avoid Damaging the Wiring
Never yank the wires. If an adapter harness will be used, leave the existing base and wiring untouched. Only disconnect wires if replacing the base or switching connector types.
Troubleshoot Before Buying a Replacement
Fix Chirping Without Replacing the Unit
Try these steps before purchasing a new alarm:
- Replace the battery with a fresh 9V or AA.
- Discharge residual power: remove the battery, hold the test button for 30 seconds, then reinstall.
- Clean the sensor with compressed air or a vacuum brush.
Check AC Power for Hardwired Units
If a fresh battery dies within a month on a hardwired model, AC power may not be reaching the unit. Verify the breaker is on and the wiring harness sits firmly in place.
Know When Replacement Is the Only Option
If the unit is past 10 years old, beeps twice every 30 seconds, or fails testing after troubleshooting, replace it now. Don’t depend on expired alarms.
Choose the Right Replacement Detector

Match Power Source and Function Type
- Battery-only: Best for locations without wiring.
- Hardwired with battery backup: Standard in modern homes.
- Interconnected: All alarms sound together across the home.
- Combination smoke/CO: Single unit for two threats (purple housing on Kidde FireX models).
Use an Adapter Harness for Easy Installation
A $5 adapter harness lets you plug a new Kidde alarm into the old base without rewiring. Confirm compatibility by entering your old model number on Kidde’s website.
Keep the Same Brand When Possible
Kidde-to-Kidde replacements guarantee connector compatibility and faster installation. Switching brands typically requires manual rewiring.
Where to Purchase Replacements
- Home Depot: Stocks Kidde models.
- Lowe’s: Carries First Alert in-store, Kidde available online.
- Amazon: Wide selection with fast delivery.
Install the New Detector Using Three Methods
Method 1: Adapter Harness (Fastest)
- Plug the adapter into the old base plate.
- Connect the new alarm’s pigtail to the adapter.
- Rotate the unit clockwise until it clicks.
- Restore power and test.
This method eliminates wiring entirely.
Method 2: Manual Wiring (No Adapter)
Use this approach when no adapter is available.
- Disconnect old wires using wire nuts or Wago 221 lever nuts.
- Strip wire ends if necessary.
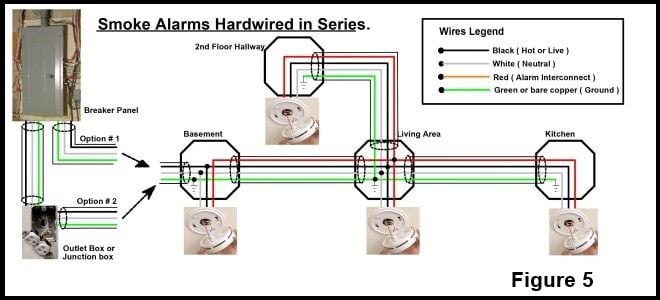
- Match colors: black to hot, white to neutral, green or bare to ground, red to interconnect (if present).
- Tuck wires neatly into the electrical box.
- Snap the new pigtail into the detector and mount.
Lever nuts offer safer and more reliable connections than traditional wire nuts.
Method 3: New Installation (No Existing Base)
- Mark drill points using the mounting bracket.
- Drill holes and insert wall anchors.
- Secure the bracket with screws—do not overtighten.
- Feed wires through the center.
- Complete wiring as outlined above.
- Install batteries and mount the alarm.
Wire Your New Detector Correctly
Standard Hardwired Connections
- Black wire connects to the home’s hot (black) wire.
- White wire connects to the neutral (white) wire.
- Green or bare wire attaches to ground.
- Red wire is the interconnect line—connect only when linking multiple alarms.
Secure All Connections
Straighten solid-core wires before inserting. Close lever nuts fully or twist wire nuts until snug. Tuck all connections into the electrical box to prevent pinching.
Set Up Battery Backup (AA Models)
Insert the batteries, then pull the activation tab on the back before restoring power. Never pull the tab after power is on—this triggers a false low-battery chirp every 60 seconds.
Handle 10-Year Sealed Battery Models
No battery replacement is needed. The internal battery activates automatically when mounted, confirmed by a beep.
Test the New Detector After Installation
Restore Power and Check Indicators
Turn the breaker back on. Look for a solid green LED, which confirms AC power is active.
Run the Full Test Sequence
- Press and hold the test button for 5 seconds.
- Expect two smoke and two CO detection cycles.
- Interconnected alarms should all sound.
- The initiating unit shows a blinking red LED.
Stand 2.5 feet away or use ear protection—alarms exceed 85 dB.
Schedule Ongoing Testing
- Press the test button weekly for a quick check.
- Run a full 5-second test monthly.
- For hardwired units, cut power monthly to verify battery backup.
Place Detectors in Optimal Locations
Install in All Required Areas
- Every level of the home, including the basement.
- Inside every bedroom.
- Outside each sleeping area.
- Hallways and common living spaces.
Choose Ceiling or Wall Placement
Ceiling mounting works best since smoke rises. If wall mounting is necessary, place the unit 4 to 12 inches from the ceiling. Avoid corners where dead air space slows detection.
Steer Clear of Problem Areas
Keep detectors at least 3 feet away from HVAC vents, ceiling fans, bathrooms, kitchens, and fluorescent lights. Steam, cooking fumes, and strong airflow all trigger false alarms.
Maintain Your Detector for Long-Term Reliability
Test Monthly
Press the test button every month. A loud alarm confirms proper operation. Silence signals a power, battery, or connection issue.
Replace Batteries on Schedule
Swap batteries every 6 months for optimal performance, or at minimum annually. Use high-quality alkaline batteries. After replacement, hold the test button for 10 seconds to reset the unit.
Clean the Sensors Regularly
Use compressed air or a vacuum with a soft brush monthly. Wipe the exterior with a dry cloth only. Never apply water or cleaning sprays.
Manage Dust Covers Carefully
Leave the dust cover on during construction or renovation. Remove it only after 24 hours of final cleanup. Premature removal leads to dust buildup, the top cause of false alarms.
Mark the Installation Date
Write the install date and the replace-by date (10 years later) on the back. This makes future replacement effortless.
Troubleshoot Common Detector Problems
Alarm Not Responding
- Confirm the battery sits correctly.
- Verify power is on (solid green LED).
- Press the test button for 10 seconds.
- Clean the sensor with compressed air.
False Alarms
Dust, steam, and cooking fumes are common triggers. Relocate the unit away from kitchens and bathrooms, and clean it monthly.
Low Battery Chirping
One chirp per minute means low battery. Replace it immediately using the specified 9V or AA battery. Reset by holding the test button for 10 seconds after replacement.
Nuisance Alarm Reference
| Symptom | Likely Cause | Solution |
|---|---|---|
| Three short chirps every 60 seconds | Dust in sensor | Clean with air or vacuum; press hush |
| Amber light flashes every 6 seconds | AC power not engaged | Reinstall, restore power, press hush |
| Continuous alarm | Smoke, steam, or airflow | Ventilate, clean, or relocate |
Interpret Alarm Sounds and Indicator Lights
Recognize Critical Beep Patterns
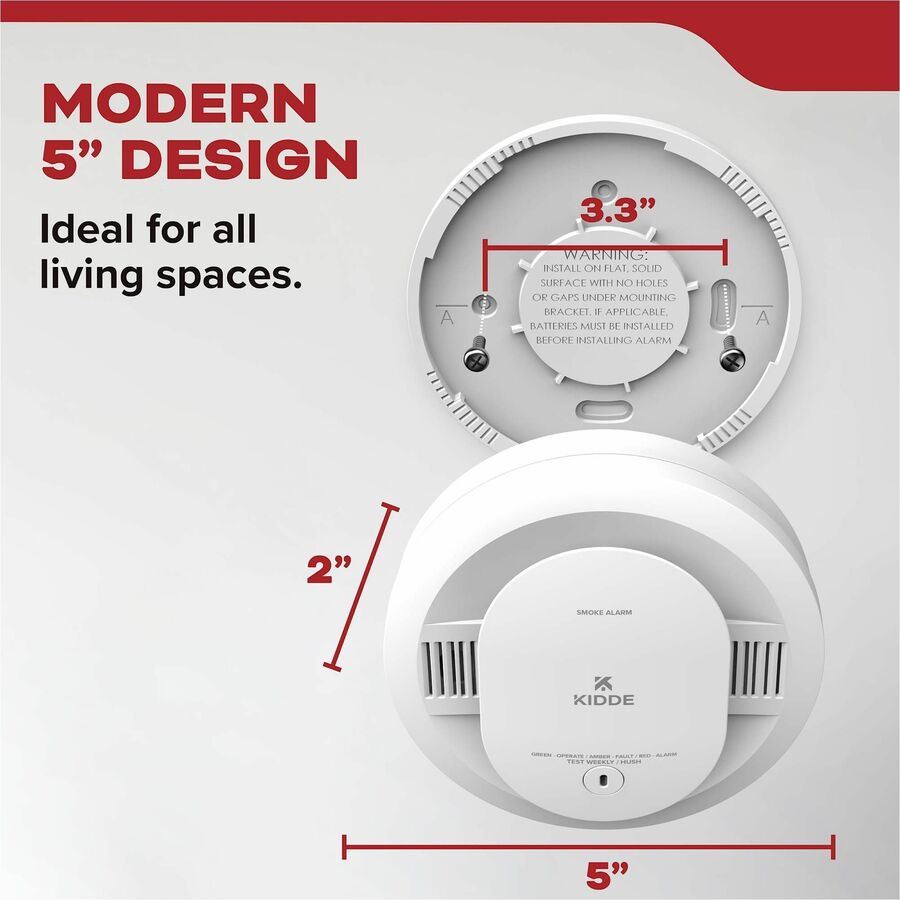
- Two beeps every 30 seconds: End-of-life—replace now.
- One chirp per minute: Low battery—swap battery.
- Three chirps every 60 seconds: Malfunction or dust—clean or reset.
- Continuous loud alarm: Fire or CO—evacuate and call 911.
Respond to Digital CO Display Warnings
If a digital unit shows any number, assume carbon monoxide is present. Leave the home immediately and call 911.
Understand LED Indicators
- Solid green: Normal operation.
- Blinking red: Initiating alarm in the network.
- Flashing amber: Power issue—check the AC connection.
Find Your Model Number and Date Quickly
Locate the Model Number
Remove the unit and inspect the back or side for a label showing the model number. Use it to search Kidde’s website for compatible replacements.
Check the Manufacture Date
This date appears on the back of the unit. Replace the detector once the unit is 10 years past this date.
Get Replacement Details Online
Enter the model number at kidde.com. Product pages list compatible replacements and adapter harnesses. Contact support if the model is discontinued.
Follow These Critical Safety Warnings
Never Pull the Activation Tab After Power On
Pulling the tab after restoring power causes a false low-battery chirp every 60 seconds. Always pull it before mounting.
Observe Electrical Safety Rules
Turn off the breaker, confirm zero voltage with a tester, and never touch live wires.
Avoid Overtightening Screws
Snug is enough. Overtightening cracks plastic or strips threads.
Never Use Water or Chemicals
Cleaning agents damage sensors. Use only a dry cloth, compressed air, or a vacuum.
Treat Any Digital CO Reading as an Emergency
Any number on a digital display means leave the home and call 911 immediately.
Frequently Asked Questions About Replacing a Kidde Smoke Detector
How do I know when my Kidde smoke detector needs to be replaced?
Kidde detectors must be replaced every 10 years from the manufacture date. The most common end-of-life signal is two beeps every 30 seconds, which is different from the single chirp that signals low battery.
Can I replace a Kidde detector without rewiring?
Yes. An adapter harness (around $5) plugs into your existing base plate and connects directly to the new alarm’s pigtail. This avoids touching any wires and makes the swap take just a few minutes.
Do I need to turn off the power to replace a hardwired smoke detector?
Always turn off the circuit breaker before working on a hardwired unit. Use a non-contact voltage tester at the wiring harness to confirm no current is flowing before you touch any wires.
What is the difference between chirping every 30 seconds and every 60 seconds?
Two beeps every 30 seconds signals end-of-life—replace the whole unit. One chirp every minute indicates a low battery—swap the battery first and see if the chirping stops.
Where should I install a new Kidde smoke detector?
Install on every level of the home, inside each bedroom, and outside sleeping areas. Ceiling placement is best since smoke rises. Keep detectors at least 3 feet from vents, fans, kitchens, and bathrooms.
How often should I test and maintain my new Kidde detector?
Press the test button weekly for a quick check and run a full 5-second test monthly. Replace the backup battery every 6 months for best performance. Clean the sensor with compressed air monthly to prevent dust buildup.
Key Takeaways for Replacing Your Kidde Smoke Detector
Following the 10-year replacement rule keeps your home protected against silent sensor degradation. Use an adapter harness whenever possible to skip rewiring, and always cut power at the breaker before touching hardwired units. Test monthly, swap batteries every 6 months, and clean sensors regularly to prevent false alarms.
Next step: Grab your existing detector, note the model number and manufacture date, and pick up a Kidde replacement plus a $5 adapter harness from your local hardware store. You’ll have the new unit installed and tested within 30 minutes—and peace of mind for the next decade.